Transcription
IBM WebSphere DataPower Integration Blade XI50BType 4195Installation and User's Guide
IBM WebSphere DataPower Integration Blade XI50BType 4195Installation and User's Guide
NoteBefore using this information and the product it supports, read the general information in“Notices” on page 39, the Warranty Information document, and the IBM Safety Information and theEnvironmental Notices and User Guide documents on the IBM Documentation CD.Second Edition (October 2010) Copyright IBM Corporation 2010.US Government Users Restricted Rights – Use, duplication or disclosure restricted by GSA ADP Schedule Contractwith IBM Corp.
ContentsSafety. . . . . . . . . . . . . . . vSafety statements . viiChapter 1. Introduction . . . . . . . . 1Related documentation . . . . . . .The IBM Documentation CD . . . . .Hardware and software requirements .Using the Documentation Browser . .Notices and statements in this document .Features and specifications. . . . . .Major components of the blade appliance.Input/output connectors and devices . .34445677Chapter 2. Power, controls, andindicators . . . . . . . . . . . . . . 9Blade appliance controls and LEDs . .Control panel controls and LEDs .Storage drive controls and LEDs .Expansion unit controls and LEDs .Turning on the blade appliance . . .Turning off the blade appliance. . . 9. 9. 11. 11. 12. 12Chapter 3. Installing and removing theblade appliance . . . . . . . . . . . 13Installation guidelines . . . . . . . . . . .System reliability guidelines . . . . . . . .Handling static-sensitive devices . . . . . .Installing the blade appliance . . . . . . . .Installing the expansion unit. . . . . . . .Installing the blade appliance in a BladeCenterunit . . . . . . . . . . . . . . . .Updating the blade appliance configuration . .Removing the blade appliance from the BladeCenterunit . . . . . . . . . . . . . . . . .Removing the expansion unit . . . . . . . .131414151516181819Chapter 4. Setting up the initialfirmware configuration . . . . . . . . 21Configuration requirements . . . . . .Connection requirements . . . . . .Information requirements. . . . . .Password for administration account . .Considerations for operational modes . .Initializing the blade appliance . . . . .Verifying the configuration with the WebGUICompleting the configuration . . . . .Defining the base configuration manually .Downloading the firmware image . . . .21212122222324252525Solving operational problems . . . . . . . .IBM WebSphere DataPower Integration Blade XI50Bunique information . . . . . . . . . . . .Diagnostic tools overview . . . . . . . . .Error logs . . . . . . . . . . . . . . .Working with event logs during system startupViewing event logs without restarting the bladeappliance . . . . . . . . . . . . . .272828293030Chapter 6. Parts listing, Type 4195 . . . 31Appendix. Getting help and technicalassistance . . . . . . . . . . . . . 35Before you call . . . . .**** MISSING FILE **** . .**** MISSING FILE **** . .Software service and supportHardware service and supportIBM Taiwan product service .353636363637Notices . . . . . . . . . . . . . . 39Trademarks . . . . . . . . . . . . .Important notes . . . . . . . . . . . .Particulate contamination. . . . . . . . .Documentation format. . . . . . . . . .Telecommunication regulatory statement . . .Electronic emission notices . . . . . . . .Federal Communications Commission (FCC)statement . . . . . . . . . . . . .Industry Canada Class A emission compliancestatement . . . . . . . . . . . . .Avis de conformité à la réglementationd'Industrie Canada . . . . . . . . . .Australia and New Zealand Class A statementEuropean Union EMC Directive conformancestatement . . . . . . . . . . . . .Germany Class A statement . . . . . . .Japan VCCI Class A statement . . . . . .Korea Communications Commission (KCC)statement . . . . . . . . . . . . .Russia Electromagnetic Interference (EMI) ClassA statement . . . . . . . . . . . .People's Republic of China Class A electronicemission statement . . . . . . . . . .Taiwan Class A compliance statement . . .404041424243. 43. 43. 43. 43. 44. 44. 45. 46. 46. 46. 46Index . . . . . . . . . . . . . . . 47Chapter 5. Solving problems . . . . . 27Solving installation problems Copyright IBM Corp. 2010. 27iii
ivIBM WebSphere DataPower Integration Blade XI50B Type 4195: Installation and User's Guide
SafetyBefore installing this product, read the Safety Information.Antes de instalar este produto, leia as Informações de Segurança.Læs sikkerhedsforskrifterne, før du installerer dette produkt.Lees voordat u dit product installeert eerst de veiligheidsvoorschriften.Ennen kuin asennat tämän tuotteen, lue turvaohjeet kohdasta Safety Information.Avant d'installer ce produit, lisez les consignes de sécurité.Vor der Installation dieses Produkts die Sicherheitshinweise lesen.Prima di installare questo prodotto, leggere le Informazioni sulla Sicurezza. Copyright IBM Corp. 2010v
Les sikkerhetsinformasjonen (Safety Information) før du installerer dette produktet.Antes de instalar este produto, leia as Informações sobre Segurança.Antes de instalar este producto, lea la información de seguridad.Läs säkerhetsinformationen innan du installerar den här produkten.Bu ürünü kurmadan önce güvenlik bilgilerini okuyun.viIBM WebSphere DataPower Integration Blade XI50B Type 4195: Installation and User's Guide
Safety statementsReview all safety statements before installing this product.Important:Each caution and danger statement in this document is labeled with a number.This number is used to cross reference an English-language caution or dangerstatement with translated versions of the caution or danger statement in the SafetyInformation document.For example, if a caution statement is labeled "Statement 1", translations for thatcaution statement are in the Safety Information book under "Statement 1".Be sure to read all caution and danger statements in this document before youperform the procedures. Read any additional safety information that comes withthe server or optional device before you install the device.This device is intended for use with UL listed IBM BladeCenters.Statement 1Safetyvii
DANGERElectrical current from power, telephone, and communication cables ishazardous.To avoid a shock hazard:v Do not connect or disconnect any cables or perform installation,maintenance, or reconfiguration of this product during an electrical storm.v Connect all power cords to a properly wired and grounded electrical outlet.v Connect to properly wired outlets any equipment that will be attached tothis product.v When possible, use one hand only to connect or disconnect signal cables.v Never turn on any equipment when there is evidence of fire, water, orstructural damage.v Disconnect the attached power cords, telecommunications systems,networks, and modems before you open the device covers, unlessinstructed otherwise in the installation and configuration procedures.v Connect and disconnect cables as described in the following table wheninstalling, moving, or opening covers on this product or attached devices.To Connect:To Disconnect:1. Turn everything OFF.1. Turn everything OFF.2. First, attach all cables to devices.2. First, remove power cords from outlet.3. Attach signal cables to connectors.3. Remove signal cables from connectors.4. Attach power cords to outlet.4. Remove all cables from devices.5. Turn device ON.viiiIBM WebSphere DataPower Integration Blade XI50B Type 4195: Installation and User's Guide
Statement 2CAUTION:When replacing the lithium battery, use only IBM Part Number 33F8354 or anequivalent type battery recommended by the manufacturer. If your system has amodule containing a lithium battery, replace it only with the same module typemade by the same manufacturer. The battery contains lithium and can explode ifnot properly used, handled, or disposed of.Do not:v Throw or immerse into waterv Heat to more than 100 C (212 F)v Repair or disassembleDispose of the battery as required by local ordinances or regulations.Statement 21CAUTION:Hazardous energy is present when the blade is connected to the power source.Always replace the blade cover before installing the blade.Safetyix
xIBM WebSphere DataPower Integration Blade XI50B Type 4195: Installation and User's Guide
Chapter 1. IntroductionThe IBM WebSphere DataPower Integration Blade XI50B, Type 4195 iscompatible with IBM BladeCenter H and HT units and with IBM BladeCenter Eunits that have an advanced management module installed. The appliance is adouble-wide configuration that installs in two adjacent blade bays of theBladeCenter unit.Note: Unless otherwise stated, references to the BladeCenter unit apply to allsupported BladeCenter unit types.This Installation and User's Guide provides information about:v Setting up the blade appliancev Starting and configuring the blade appliancev Performing basic troubleshooting of the blade appliancev Replacement parts for the blade appliancePackaged with this document are resource CDs that help you to configurehardware and system software.The blade appliance comes with a limited warranty. For information about theterms of the warranty and getting service and assistance, see the WarrantyInformation document for your blade appliance on the IBM Documentation CD.The blade appliance might have features that are not described in thedocumentation that comes with the blade appliance, and the documentation mightbe updated occasionally to include information about those features, or technicalupdates might be available to provide additional information that is not includedin the blade appliance documentation.To download the latest blade appliance firmware, see “Downloading the firmwareimage” on page 25. Copyright IBM Corp. 20101
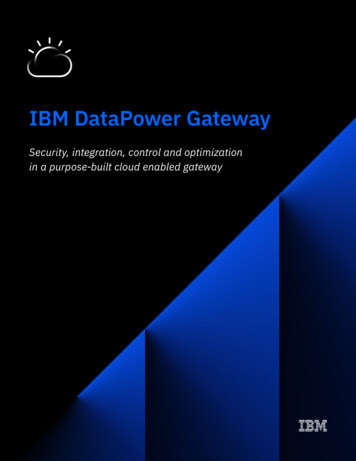
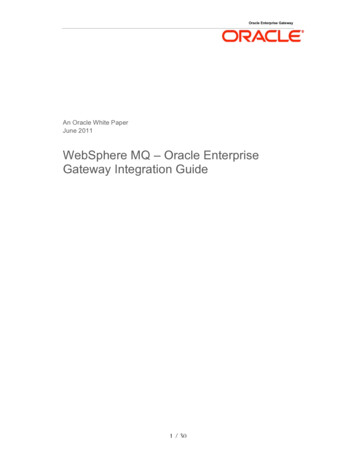
To check for updated documentation, go to library/documentation/. You can obtain other up-to-dateinformation about the blade appliance at http://www.ibm.com/systems/bladecenter/.You can subscribe to information updates specific to your blade appliance athttp://www.ibm.com/support/mynotifications.The model number and serial number are on the ID label on the side of the controlpanel on the front of the blade appliance, and on a label on the side of the bladeappliance that is visible when the blade appliance is not in the BladeCenter unit.Note: The illustrations in this document might differ slightly from the hardware.Expansion unitReleasehandleReleasebuttonsReleasehandleA set of blank labels comes with the BladeCenter unit. When you install the bladeappliance in the BladeCenter unit, write identifying information on a label andplace the label on the BladeCenter unit bezel. See the documentation for yourBladeCenter unit for recommended label placement.Important: Do not place the label on the blade appliance itself or in any way blockthe ventilation holes on the blade appliance.2IBM WebSphere DataPower Integration Blade XI50B Type 4195: Installation and User's Guide
Related documentationThis Installation and User's Guide contains general information about the bladeappliance. The following documentation is in PDF on an IBM Documentation CDthat comes with the blade appliance:v Problem Determination and Service GuideThis document is for the HS22 blade server that is the blade appliance systemboard assembly. It is referenced by this Installation and User's Guide and containsadditional information to help you solve problems yourself, and it containsinformation for service technicians. The HS22 blade server Problem Determinationand Service Guide should be used in addition to the blade appliance specificinformation contained in this Installation and User's Guide.v Safety InformationThis document contains translated caution and danger statements. Each cautionand danger statement that appears in the documentation has a number that youcan use to locate the corresponding statement in your language in the SafetyInformation document.v Warranty InformationThis document contains information about the terms of the warranty and gettingservice and assistance.v Environmental Notices and User GuideThis document contains translated environmental notices.The following documentation is available at library/documentation/:v IBM WebSphere DataPower SOA Appliances: Administrators GuideThis document describes the concepts and tasks to configure the bladeappliance.v IBM WebSphere DataPower: Command ReferenceThis document describes the commands used to configure the blade appliance.Depending on your BladeCenter product, additional documents might be includedon an IBM Documentation CD. In addition to the documentation in this library, besure to review the Planning and Installation Guide for your BladeCenter unit forinformation to help you prepare for system installation and configuration. To checkfor updated documentation and technical updates, go to library/documentation/.Chapter 1. Introduction3
The IBM Documentation CDUse the IBM Documentation CD to access the blade appliance documentation inPDF format.You can run the IBM Documentation CD on any personal computer that meets thehardware and software requirements.The IBM Documentation CD contains documentation for your blade appliance inPortable Document Format (PDF) and includes the IBM Documentation Browser tohelp you find information quickly.Hardware and software requirementsThe IBM Documentation CD requires the following minimum hardware andsoftware:v Microsoft Windows XP, Windows 2000, or Red Hat Enterprise Linux 5 Serverv 100 MHz microprocessorv 32 MB of RAMv Adobe Acrobat Reader 3.0 (or later) or xpdf, which comes with Linux operatingsystemsUsing the Documentation BrowserUse these instructions to start the Documentation Browser.Use the Documentation Browser to browse the contents of the CD, read briefdescriptions of the documents, and view documents, using Adobe Acrobat Readeror xpdf. The Documentation Browser automatically detects the regional settings inuse in your system and displays the documents in the language for that region (ifavailable). If a document is not available in the language for that region, theEnglish-language version is displayed.Use one of the following procedures to start the Documentation Browser:v If Autostart is enabled, insert the CD into the CD drive. The DocumentationBrowser starts automatically.v If Autostart is disabled or is not enabled for all users, use one of the followingprocedures:– If you are using a Windows operating system, insert the CD into the CD orDVD drive and click Start Run. In the Open field, typee:\win32.batwhere e is the drive letter of the CD or DVD drive, and click OK.– If you are using Red Hat Linux, insert the CD into the CD or DVD drive;then, run the following command from the /mnt/cdrom directory:sh runlinux.shSelect your blade appliance from the Product menu. The Available Topics listdisplays all the documents for your blade appliance. Some documents might be infolders. A plus sign ( ) indicates each folder or document that has additionaldocuments under it. Click the plus sign to display the additional documents.When you select a document, a description of the document is displayed underTopic Description. To select more than one document, press and hold the Ctrl keywhile you select the documents. Click View Book to view the selected document4IBM WebSphere DataPower Integration Blade XI50B Type 4195: Installation and User's Guide
or documents in Acrobat Reader or xpdf. If you selected more than one document,all the selected documents are opened in Acrobat Reader or xpdf.To search all the documents, type a word or word string in the Search field andclick Search. The documents in which the word or word string appears are listedin order of the most occurrences. Click a document to view it, and press Crtl F touse the Acrobat search function, or press Alt F to use the xpdf search functionwithin the document.Click Help for detailed information about using the Documentation Browser.Notices and statements in this documentUse this information to understand the most common documentation notices andstatements and how they are used.The caution and danger statements in this document are also in the multilingualSafety Information document, which is on the IBM Documentation CD. Eachstatement is numbered for reference to the corresponding statement in the SafetyInformation document.The following notices and statements are used in this document:v Note: These notices provide important tips, guidance, or advice.v Important: These notices provide information or advice that might help youavoid inconvenient or problem situations.v Attention: These notices indicate possible damage to programs, devices, or data.An attention notice is placed just before the instruction or situation in whichdamage might occur.v Caution: These statements indicate situations that can be potentially hazardousto you. A caution statement is placed just before the description of a potentiallyhazardous procedure step or situation.v Danger: These statements indicate situations that can be potentially lethal orextremely hazardous to you. A danger statement is placed just before thedescription of a potentially lethal or extremely hazardous procedure step orsituation.Chapter 1. Introduction5
Features and specificationsUse this table to view specific information about the blade appliance, such as bladeappliance hardware features and the dimensions of the blade appliance.Notes: Power, cooling, removable-media drives, external ports, and advancedsystem management are provided by the BladeCenter unit.The following table is a summary of the features and specifications of the bladeappliance.Table 1. Features and specificationsIntegrated functions: (continued)Microprocessor: Supports twomulti-core Intel Xeon microprocessors v Integrated keyboard/video/mouse (cKVM) controller throughMemory:IMMv 12 dual inline memory modulev Light path diagnostics(DIMM) connectorsv RS-485 interface forv Type: Very Low Profile (VLP)communication with thedouble-data rate (DDR3) DRAM.management moduleSupports six 2 GB DIMMs on thev Automatic server restart (ASR)system boardv USB 2.0 for communication withcKVM and removable mediaDrives: Two hot-swap, small formdrivesfactor (SFF) Serial Attached SCSIv Serial over LAN (SOL)(SAS) storage drivesv Redundant buses forcommunication with keyboard,Integrated functions:mouse, and removable mediav Local service processor: IntegrateddrivesManagement Module (IMM) withIntelligent Platform ManagementPredictive Failure Analysis (PFA)Interface (IPMI) firmwarealerts:v Integrated Matrox G200eV videov Microprocessorscontrollerv Memoryv LSI 1064E SAS controllerv Storage drivesv Broadcom BCM5709S dual-portGigabit Ethernet controllerElectrical input: 12 V dcv Broadcom BCM57711 dual-port 10Size:Gigabit Ethernet controllerv Height: 24.5 cm (9.7 inches) (6U)Note: The blade appliancev Depth: 44.6 cm (17.6 inches)high-speed Ethernet interfaces arev Width: 5.9 cm (2.32 inches)available only when the bladev Maximum weight: 7.4 kg (16.3 lb)appliance is installed inBladeCenter unit that ishigh-speed-switch capable. Ahigh-speed 10GbE I/O modulemust also be installed in theBladeCenter unit that is set up foroperation with the blade appliance.Environment:v Air temperature:– Blade server on: 10 C to 35 C(50 F to 95 F). Altitude: 0 m to914.4 m (0 ft to 3000 ft)– Blade server on: 10 C to 32 C(50 F to 89.6 F). Altitude: 914.4 mto 2133.6 m (3000 ft to 7000 ft)– Blade server off: 10 C to 43 C(50 F to 109.4 F). Altitude: 914.4m to 2133.6 m (3000 ft to 7000 ft)– Blade server shipping: -40 C to60 C (-40 F to 140 F)v Humidity:– Blade server on: 8% to 80%– Blade server off: 8% to 80%– Blade server storage: 5% to 80%– Blade server shipment: 5% to100%v Particulate contamination:Attention: Airborne particulatesand reactive gases acting alone or incombination with otherenvironmental factors such ashumidity or temperature might posea risk to the server. For informationabout the limits for particulates andgases, see “Particulatecontamination” on page 41.(continued)6IBM WebSphere DataPower Integration Blade XI50B Type 4195: Installation and User's Guide
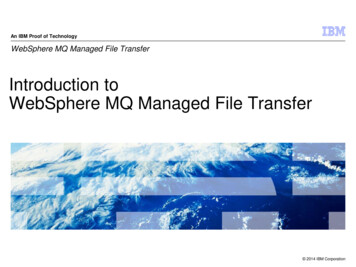
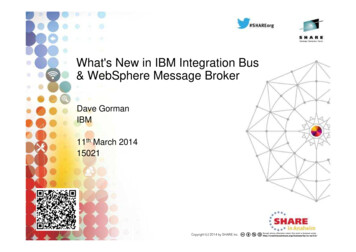
Major components of the blade applianceUse this information to locate the major components on the blade appliance.The following illustration shows the major components of the blade appliance.Expansion unitHot-swapstorage driveInput/output connectors and devicesThe input/output connectors that are available to the blade appliance are suppliedby the BladeCenter unit. See the documentation that comes with the BladeCenterunit for information about the input/output connectors.The blade appliance has two selection buttons on the control panel: the media trayselect button and the keyboard/video/mouse select button. See “Blade appliancecontrols and LEDs” on page 9 for information about these buttons and theirfunctions.The Ethernet controllers on the blade appliance communicate with the networkthrough the Ethernet-compatible I/O modules in the BladeCenter unit. Networksignals to and from the blade appliance or any expansion cards are automaticallyrouted to a same-network-interface I/O module through circuitry in theBladeCenter unit.Chapter 1. Introduction7
8IBM WebSphere DataPower Integration Blade XI50B Type 4195: Installation and User's Guide
Chapter 2. Power, controls, and indicatorsUse this information to view power features, turn on and turn off the bladeappliance, and view the functions of the controls and indicators.Blade appliance controls and LEDsUse this information for details about the controls and LEDs on the bladeappliance.Control panel controls and LEDsUse this information for details about the controls and LEDs on the bladeappliance control panel.The following illustration identifies the buttons and information LEDs on theblade-appliance control panel.Power-on LED: This green LED indicates the power status of the blade appliancein the following manner:v Flashing rapidly: The blade appliance IMM (service processor) is initializing andthe BladeCenter management module is discovering the blade appliance.v Flashing slowly: The blade appliance is discovered, initialized, and ready to beturned on.Note: If the BladeCenter unit does not have enough power to turn on the bladeappliance, the BladeCenter management module denies the blade appliancepermission to turn on, through the IMM, a short time after power is applied tothe blade appliance. The blade appliance will turn off immediately, the fault ledwill light, and an error entry will appear in the management module event log.v Lit continuously: The blade appliance has power and is turned on.Activity LED: When this green LED is lit, it indicates that there is activity on theexternal storage device or network.Location LED: The system administrator can remotely turn on this blue LED to aidin visually locating the blade appliance. When this LED is lit, the location LED onthe BladeCenter unit is also lit. The location LED can be turned off through the Copyright IBM Corp. 20109
advanced-management-module Web interface. For more information about theadvanced-management-module Web interface, see http://www.ibm.com/systems/management/.Information LED: When this amber LED is lit, it indicates that information about asystem event in the blade appliance has been placed in the advanced-managementmodule event log. The information LED can be turned off through theadvanced-management-module CLI, SNMP, or Web interface. For more informationabout the advanced-management-module Web interface, see http://www.ibm.com/systems/management/.Fault LED: When this amber LED is lit, it indicates that a system error hasoccurred in the blade appliance. The blade-error LED turns off only after the erroris corrected. If the error has occurred in the blade appliance expansion unit, thefault LED on the expansion unit is also lit.Power-control button: Press this button to turn on or turn off the blade appliance.Note: The power-control button has effect only if local power control is enabledfor the blade appliance. Local power control is enabled and disabled through theadvanced-management-module Web interface.Keyboard/video/mouse (KVM) select button: Press this button to associate theshared BladeCenter unit keyboard port, video port, and mouse port with the bladeappliance. The LED on this button flashes while the request is being processed andthen is lit when the ownership of the keyboard, video, and mouse has beentransferred to the blade appliance. It can take approximately 20 seconds to switchthe keyboard, video, and mouse control to the blade appliance.Using a keyboard that is directly attached to the advanced management module,you can press keyboard keys in the following sequence to switch KVM controlbetween blade servers and appliances instead of using the KVM select button:NumLock NumLock blade server number Enterblade server number is the two-digit number of the blade-server bay in whichthe blade appliance is installed. Since the blade appliance occupies more thanone blade-server bay, it is identified by the lowest bay number that it occupies.If there is no response when you press the KVM select button, you can use theadvanced-management-module Web interface to determine whether local controlhas been disabled on the blade appliance. See http://www.ibm.com/systems/management/ for more information.Media-tray select button: Press this button to associate the shared BladeCenterunit media tray (removable-media devices) with the blade appliance. The LED onthe button flashes while the request is being processed and then is lit when theownership of the media tray has been transferred to the blade appliance. It cantake approximately 20 seconds for the blade appliance to recognize the media tray.If there is no response when you press the media-tray select button, you can usethe advanced-management-module Web interface to determine whether localcontrol has been disabled on the blade appliance. See the IBM BladeCenter AdvancedManagement Module User's Guide for information and instructions.10IBM WebSphere DataPower Integration Blade XI50B Type 4195: Installation and User's Guide
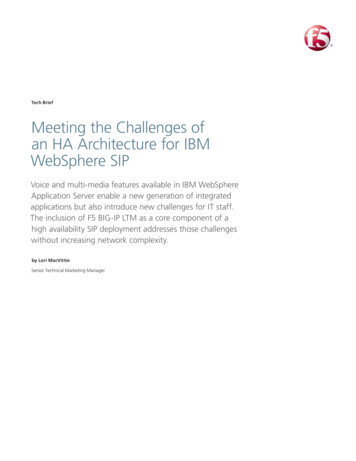
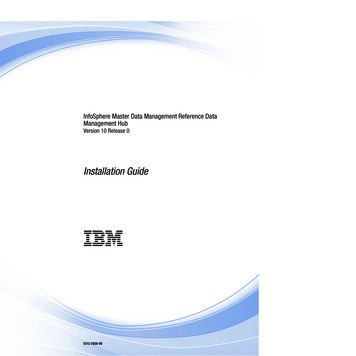
Storage drive controls and LEDsUse this information for details about the controls and LEDs on the bladeappliance storage drives.The following illustration identifies the information LEDs on the SAS hot-swaphard disk drive.Hard disk drive activity LED (green): When this green LED is lit, it indicates thatthere is activity on the storage drive.Hard disk drive status LED (amber): When this amber LED is lit, it indicates thatan error has occurred with the storage drive. The LED turns off only after the erroris corrected.Expansion unit controls and LEDsUse this information for details about the controls and LEDs on the bladeappliance expansion unit.The following illustration identifies the fault LED on the expansion unit.PCIe 2PCIe 1!Fault LEDFault LED: When this amber LED is lit, it indicates that an error has occurred inthe expansion unit. The expansion unit error LED turns off only after the error iscorrected. If an error occurs in the expansion unit, the fault LED on the bladeappliance control panel is also lit.Chapter 2. Power, controls, and indicators11
Turning on the blade applianceUse this information to turn on the blade appliance.After you connect the blade appliance to power through the BladeCenter unit, theblade appliance can start in any of the following ways:v You can press the power-control button on the front of the blade appliance (see“Blade appliance controls and LEDs” on page 9) to start the blade appliance.Notes:1. Wait until the power-on LED on the blade appliance flashes slowly beforeyou press the power-control button. While the blade appliance is initializingand synchronizing with the BladeCenter management module, the power-onLED flashes rapidly, and the power-control button on the blade appliancedoes not respond. This process can take approximately two minutes after theblade appliance has been installed.2. While the blade appliance is starting, the power-on LED on the front of theblade appliance is lit and does not flash. See “Blade appliance controls andLEDs” on page 9 for the power-on LED states.3. If the BladeCenter unit does not have enough power to turn on the bladeappliance, the BladeCenter management module denies the blade appliancepermission to turn on, through the IMM, a short time after power is appliedto the blade appliance. The blade appliance will turn off immediately, thefault led will light, and an error entry will appear in the managementmodule event log.v If a power failure occurs, the BladeCenter unit and the blade appliance can beconfigured to start automatically when power is restored through the advancedmanagement module.v You can turn on the blade appliance remotely by using the management module.Turning off the blade applianceUse this information to turn off the blade appliance.When you turn off the blade appliance, it is still connected to power through theBladeCenter unit. The blade appliance can respond to requests from theBladeCenter management module, such as a remote request to turn on the bladeappliance. To remove all power from the blade appliance, you must remove it fromthe BladeCenter unit.The blade appliance can be turned off in any of the following ways:v You can press the power-control button to perform a controlled shut down theblade appliance (see “Blade appliance controls and LEDs” on page 9).v If the blade appliance stops functioning, you can press and hold thepower-control button for more than 4 seconds to force the blade appliance toturn off.v The management module can turn off the blad
vi IBM WebSphere DataPower Integration Blade XI50B Type 4195: Installation and User's Guide. Safety statements Review all safety statements before installing this product. Important: Each caution and danger statement in this document is labeled with a number.