Transcription
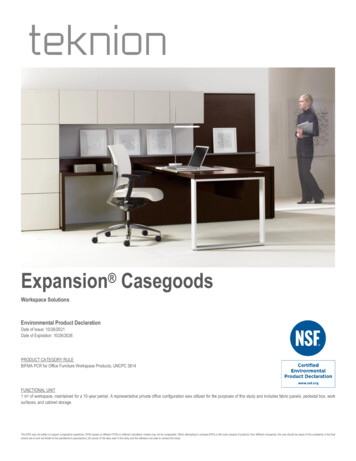
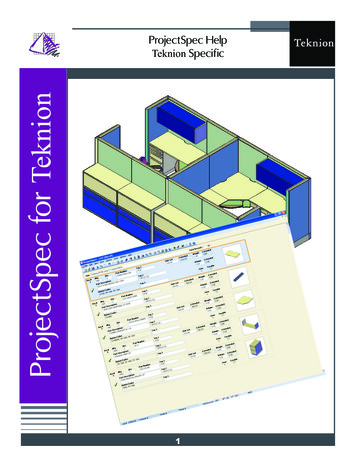
ProjectSpec for TeknionProjectSpec HelpTeknion Specific1
ProjectSpec for TeknionFunction KeysF1 Help GuideF2 Catalog ViewerF3 Field RepeatF4 Option ClipboardShift F4 Smart CopyF5 Edit OptionsF6 JoinF7 Price LineF8 Expand MergeF9 MergeF10 Option AllF11 DiscountF12 Toggle Classic/Spreadsheet View2
ProjectSpec for TeknionProjectSpec HelpTeknion SpecialsWhen making a special part for Teknion, the user needs to Right Click on a record. Thisworks in any view of ProjectSpec whether it be Classic View or Spreadsheet View. If the 3letter catalog code is associated to a Teknion product line, then it will open a Teknion specificSpecials dialog. Otherwise it will open a generic specials dialog box.Once the Specials dialog box isopened, the user can fill out orchange any field necessary. Theywill find fields for CR #, Sif Note andReport Notes.Once the information has been entered and the user selects the OKbutton, the record line will display ayellow flag and the line will be highlighted in yellow to designate thatrecord as a special.3
ProjectSpec for TeknionProjectSpec HelpTeknion SpecialsGuidelines for specifying a SPECIAL in Teknion: Always provide the CR # The CR# will override any data typed in manually when placed through TOPS(Teknion Order Processing System) You may type in Part Description, List Price and other items for printing quotesfor customers, but again, CR will take precedence over any other fields.The only time a SIF Note or Report Note field is required is when. A TJ# for a special paint for Teknion or Expansion (no CR's for paint) A Serial # for the approved COM Drawer Position for Ledger Build UP configuration Critical Height or Width for Blvd4
ProjectSpec for TeknionProjectSpec HelpTeknion Panel BuildersThe Teknion Panel BuildersThe panel builders can be launched from bothAutoCAD and ProjectSpec. The panel builderlaunched from within ProjectSpec will allow auser to create new projects and open existingprojects. The user can also access the designwindow to modify or create new panel types.Once panel types have been created, the usercan pick the type and size and insert it directlyinto ProjectSpec without going through theplacement in AutoCAD.NOTE:Teknion (TOPS) can only handle panelnames less than 10 characters.5
ProjectSpec for TeknionProjectSpec HelpTeknion Panel BuildersTeknion Panel BuildersImportant Things to Know About Working with Panel Builders1. What is a Panel Project?- When you start a Panel Builder like Leverageor T O S, you are asked to save the location. This creates a folder witha .prj extension. (ie. C:\MyDocuments\Projects\MyPanels.prj) That .prjfolder contains all of the panel type information. (DO NOT EDIT ANY INFORMATION INSIDE OF THIS FOLDER!) You will need to keep track ofwhere that folder is located.2. Location! Location! Location!- When a panel type is created it storesthe project path along with the type. If this path is changed by movingthe folder or sending the project to someone else this must be addressedto correctly price the panel types. This also can be a problem if the project folder has been renamed. (See Step 4 for resolving path issues.)3. Options & Finishes- When using a panel builder with Teknion product,all specifications, options, and finishes must be applied in the projectthrough the Panel Builder. This can be done at any point, but all finishesmust be changed in the Panel Builder or “Panel Matrix” and not throughmanually editing the finish codes in ProjectSpec.6
ProjectSpec for TeknionProjectSpec HelpTeknion Panel BuildersTeknion Panel BuildersImportant Things to Know About Working with Panel Builders4. What is a Panel Project?- When you start a Panel Builder like Leverageor T O S, you are asked to save the location. This creates a folder witha .prj extension. (ie. C:\MyDocuments\Projects\MyPanels.prj) That .prjfolder contains all of the panel type information. You will need to keeptrack of where that folder is located.In AutoCAD, you can see thepath in the attribute editor.In ProjectSpec there is acolumn in the spreadsheetview to show the path.7
ProjectSpec for TeknionProjectSpec HelpTeknion Panel BuildersTeknion Panel BuildersRe-setting Panel Builder Type Paths in AutoCAD1.2.If the project does get movedor renamed, follow thesesteps in the AutoCAD drawingto remap the path.1. Type “updatetypepaths” inthe command line, or go tothe Teknion Utilities menuin the toolpak pulldown.2. Click the browse button onthe toolbar8
ProjectSpec HelpTeknion Panel BuildersProjectSpec for TeknionTeknion Panel BuildersRe-setting Panel Builder Type Paths in ProjectSpecIf the project doesget moved or renamed, follow these steps in ProjectSpec to remap the path.1. Go to the Tools pull-down menu and select ProjectTools- Teknion- EditTypeFile Path(s).2. Click the Browse box.3. Search for the .prj folder and link to the SIFFILES folder.4. Press “OK”5. Re-Price the SIF file and check for any errors.9
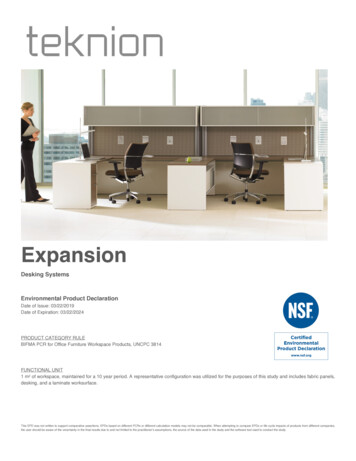
ProjectSpec for TeknionProjectSpec HelpTeknion ExportTeknion Export for Order Entry.1. Go to FILE- EXPORT and then choose Teknion (.sif)2. Select your file name and output path. If you choose not to change thisinformation, the location will be the same as your SIF you are working onand ProjectSpec will add an “(exported)” to the file name to keep track ofwhich is the completed Teknion Order Entry file.10
ProjectSpec for TeknionProjectSpec HelpTeknion ExportTeknion Export for Order Entry.3. The “Validate” command will check the SIF to make sure thatthere are no un-optioned records. If it does return some errors,then ProjectSpec will display a message box with the lines that aremissing.4. Once the record has been Validated and continues with the Export, you will receive the Teknion Order Entry box. The user can fillin the appropriate fields before finishing the Export.11
Teknion ProjectSpec Help Teknion Panel Builders Teknion Panel Builders Re-setting Panel Builder Type Paths in AutoCAD If the project does get moved or renamed, follow these steps in the AutoCAD drawing to remap the path. 1. Type "updatetypepaths" in the command line, or go to the Teknion Utilities menu in the toolpak pulldown. 2.