Transcription
User Manual V2.0
User Manual V2.0ContentsBefore Start .1How to place the finger. 2Understanding the Operator Panel LEDs . 4Menu tree .5Basic Concepts .7User Identification/Verification . 8Threshold . 8User ID Numbers. 10Privilege (status) Levels. 10Start-up window. 11Getting Start.12Enrolling Users. 12Fingerprint Enrollmente. 13Password Enrollment . 15Fingerprint & Password . 16Enroll ID . 18Enroll ID Card . 20Enroll Mifare Card . 21Testing an Enrollment . 23Enrolling a Auxiliary Fingerprint of User . 23Authentication type . 24Fingerprint authentication. 24-I-
ContentsPassword authentication . 28RF/ MIFARE card authentication . 29MIFARE card authentication . 29Hints for Successful Enrollments . 32Enroll Administrator. 33Delete enrolled Data . 35Option.37System Option . 38Set Current Date Time . 38Changing the Date Time Format. 39Changing the language . 40Lock . 41Unlock . 42Advance Option. 43Power Manager. 48Power Option. 48Time Alternate Condition . 51How to set time alternate condition . 52Communication Option. 56Log Options. 58Access Control Option . 59Brief Introduction to Access Options . 62- II -
User Manual V2.0Verification Flow of Access Options . 64Function Description . 65Dress Options. 81How to set the amount of failure to verify . 85Group Verification Type. 85Auto Test. 86How to Manage USB .88Download the attendance data. 88Download Staff Data. 90Upload Staff Data. 90Download SMS. 90Upload SMS. 90System Information.92Relieve Alarm .94View T&A Records.95Maintained .100Troubleshooting .102Appendix .106U flash disk management . 106Condition key . 107Time Ring . 108External Fingerprint Sensor . 109Modem Function. 110Query funtion . 112Print function . 112MP3 function introduction. 113Short message management (Optional) . 117- III -
ContentsMulti-combination Authentication Mode.119Card Support (HID, iCLASS, EM, Mifare Card). 125About Host and Client Fingerprint Machine. 126Remote server Solution . 131IClock Time & Attendance . 134Web Server Access Control. 136Collect IP Address Automatically. 137About Wiegand . 137Understanding SOAP . 142About POE(Power over Ethernet) . 143Reserve Battery(Mini-UPS). 145Digit Code. 148Automatically Synchronize Time . 148Daylight Saving Time . 149Assign time to play voice (by time period, group). 151Work code. 153DHCP. 154About the human rights privacy statement .156- IV -
The products warranty does not cover defects or damages arisingfrom the lock defects, improper installation, lack of or impropermaintenance, improper storage, shipping and handling, ordinary-1-USB ManageSystem Info.Relieve AlarmView Records Fingerprint identification machine is a precision electronicmachine, all safety and operation instruction should be read beforethe product is operated.Maintained Please do not place the product in the place with strong light,because the strong light may significantly affect the fingerprintscanning, and thus cause the fingerprint verification fail. Thisproduct is designed for indoor installation, if it has to be installed itoutdoor, please place the equipment in proper environment, youmust beware of not exposing it to wet or harsh condition, theproduct work temperature rang is 0-40 . Do to use you machine inevery hot environment, keep you machine away from the heatsource and radiator. For long time use it outdoor and the internalheat of the machine, will cause problem to the operationTroubleshootingNotice: Do not attempt to service the machine yourself, exceptas explain in your online documentation or in instructionotherwise. Always follow this user guide closely.AppendixMust to knowOptionsGetting StartBefore StartBefore Start1Basic ConceptsUser Manual V2.0
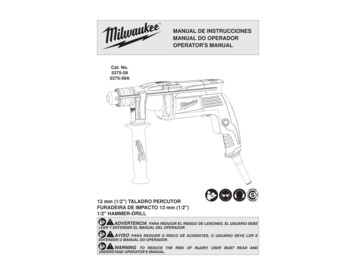
Before Startwear and tear , misuse abuse, accident unauthorized service or usewith unauthorized service parts.Fingerprint Enrollment and Identification shall be taken after theinstallation the fingerprint identification ionInstallationIdentificationHow to place the fingerMake sure the fingerprint image captured is of a core of presentedfinger, a fingerprint is point to locate within innermost recurringridge of any give finger.To obtain a higher success rate, enroll same finger 3times in aslightly adjust angle, one to the center, one incline slightly to theleft. The third incline slightly to the right. You follow the followingplace procedure; the success rate will increase dramatically.-2-
Before StartOptionsGetting StartThe correct way is:Place a finger flatware on the sensor surfacePlace it to the center of the sensor surfaceBasic ConceptsUser Manual V2.0-3-TroubleshootingAppendixNotice: Please adopt the correct way to place the finger; OurCompany is not liable for any damages and troubles whatsoeverarising out of from improper pressing manners.MaintainedView RecordsRelieve AlarmSystem Info.USB ManageThe wrong way is
Before StartUnderstanding the Operator Panel LEDsThe operator panel LEDs signify different, depending on theirsequences. LED s that are off, on or blinking indicates fingerprintmachine work.1.2.3.Normal work.Green light blinks per second.Failure authenticationRed light is of 3 second duration4.Verification successfulGreen light is of 3 second durationNote: If the fingerprint machine Leeds don’t follow abovedescription. Please contact us to get technical assistance-4-
User Manual V2.02Menu treeIndicates this menu item only appear in specific and customizefingerprint machine, this manual give a special instruction.-5-
Before Start-6-
Basic ConceptsThis section contains definitions and descriptions of the fingerprintBefore StartBasic Concepts3Getting StartUser Manual V2.0USB ManageSystem Info.zUser EnrollmentzUser VerificationzMatch Threshold LevelszUser ID NumberszPrivilege (Status) LevelsThe two most important Fingerprint Deification Functions are userenrollment and user verification.OptionsIdentification system concepts,including:-7-View RecordsMaintainedTroubleshootingThough the stored fingerprint reference template match againstplace user’s finger, this fingerprint template is used to identifyuser’s Identity, so an enrolled user is able to achieve the time clockin the appoint machine, the whole procedure take about 2 second,for the same ID number the up to ten different fingerprint ability tobe enrolled, the user may own much more verification way.Ideally. Every finger on each hand should be enrolled, so that if aAppendixEnrollment is the procedure to create an ID number and scan auser’s finger to create a template three times. This template isassociated with a user ID number and stored up.Relieve AlarmUser Enrollment
Basic Conceptsenrolled finger is injured, to alternate the backup finger is available,in normal condition, it is better that last two finger is enrolled, like,left or right index finger, so the user ability to use his (her) anyfinger to identify and keep away the troubles is duo to he (her)forget which finger has been enrolledUser Identification/VerificationThe process of comparing place user’s finger against the storedfingerprint reference template. when a user either input an IDnumber or places a finger in the fingerprint sensor, then inputpassword or press fingerprint, after verification process carry out,the system will show whether identify failure or success and storeup the successful result to equipment Verification occurs when auser either enters an ID number or places a finger in the fingerprintsensor, then input password for comparison with the storedtemplate.ThresholdThreshold - A predefined number, often controlled by a biometricsystem administrator, which establishes the degree of correlationnecessary for a comparison to be deemed a match. If the scoreresulting from template comparison exceeds the threshold, thetemplates are a “match” (though the templates themselves are notidentical).-8-
Notice: FAR and FRR affect each other, if increases FAR thenreduce FRR. The default Threshold is 35, 1:1 matching Thresholdis 15.Table 1—1 Suggested Threshold iddle3515LowHigh2510Getting StartOptionsUSB ManageSystem Info.TroubleshootingFRRRelieve AlarmRaising the threshold increases security, while lowering it increasespass. The correct balance is vital. For a user whose finger is wornor injured, the threshold should be reduced.View RecordsYou can set the threshold to all users. For a user who’s thefingerprint verification is difficult, you can adopt ID & Fingerprintverification (match one to one).MaintainedThe Threshold establishes a balance between False AcceptanceRate (FAR) and False Rejection Rate (FRR). FAR mean theprobability that a biometric system will incorrectly identify anindividual or will fail to reject an impostor. The rate given normallyassumes FRR measure the probability that a biometric system willfail to identify an enrolee, or verify the legitimate claimed identityof an enrolee.Basic ConceptsBefore StartUser Manual V2.0Appendix-9-
Basic ConceptsUser ID NumbersBefore beginning fingerprint enrollment, a user is assigned User IDNumber. This ID number is used to call up the fingerprint templateor password each time that verification is requested.ID numbers are normally inputted via the keypad, but they can becalled up by other means of such as RF Card, Mifare Card (therealizing function condition is that there is card reader in themachine)Privilege (status) LevelsPrivileges are permission that is give to use. These define theability of user to perform specified administrative and other task,including the ability to view, edit, add, or renew specifiedinformation categories.Privilege levels are named set of permission that can be modifiedas required, User’s four privilege levels are assigned by thefingerprint machine, that are user, enroller, administrator, Superadministrator( supervisor).The Fingerprint Identification systems have four Privilege or statuslevels:zUsers are people whose identity must be verified, such togain access to a facility or to have their attendance recorded.zEnrollers are Users who are authorized to enroll new- 10 -
check inor“check out”10:12Getting StartOptionsMaintainedView RecordsFebTroubleshooting06 05 14- 11 -AppendixWelcomeBasic ConceptsBefore StartPress the power button and the screen showed on, a display of awindow was called the Start-up window. The following appears:USB ManageStart-up windowSystem Info.users or delete on to the system.zManagers can do other operations, except set advancedoption and enroll manager’s privilege.zSupervisors are Users who access to all functions andchange all setup in the system.Note: if there is no the Manager and Supervisor status in the system, theEnroller will enroll them. And if there isn’t a Supervisor in the system,the Manager will enroll him.Relieve AlarmUser Manual V2.0
Getting Start4Getting StartThis chapter describes how to enroll and verify users on the Fingerprintverification systemThe following topics are included::zzzzzEnrolling UserTesting an EnrollmentEnrolling a Auxiliary Fingerprint of UserVerifying Your IdentityHints for Successful EnrollmentsEnrolling UsersAfter setting up your fingerprint machine and powering on, youmay enroll the user. If this is the first enrollment in a new or emptysystem, everyone will become an enroller, if there is a manager inthe system, you should be allowed by a manager to enroll a newuser.This machine provides with three ways to enroll, such theFingerprint Enrollment, the Password Enrollment, the Fingerprintand the Password Enrollment. Above three kinds of ways arecorrespond equal to different personnel whose fingerprint quality isdifferent. The Fingerprint Enrollment is suitable to the personnel- 12 -
To start the enrollment process, identify yourself firstly—press[Menu], enter your ID number or fingerprint, and then verify yourGetting StartOptionswhose fingerprint quality is quite good; the fingerprint and thepassword are suitable to the personnel, whose fingerprint may beenrolled successfully, but the verification process is the quitedifficult; the Password Enrollment is suitable to the personnelwhose fingerprint is unable to enroll successfully. According to theactual situation, you may select a proper enrollment way.Basic ConceptsBefore StartUser Manual V2.0New EnrollEnroll No 00011ESCOKEnroll Fingerprint to press [OK], the following display:System Info.Relieve Alarm1) Press the MENU button to enter the User enroll,Access theView RecordsFingerprint EnrollmentMaintainedNote: If this is the first enrollment in a new or empty system,you will not be prompted for verification.USB Manageidentity。TroubleshootingNote: this fingerprint machine default enrolling number is 5Appendix- 13 -
Getting Startdigit,ifyouu enrolled number does not arrive 5 digit, themachine will add 0 in front of this figure , E.g. your number is11, the 00011 will be displayed in the machine.2)Input the enrolling number (the range is 1 to 65534), press [OK],The following appears:New Enroll00011-0ESCOK [Save]Note:00005-0The last number 0 meansThe first fingerprint3)If the test is successful three times in a row, the followingappears:New Enroll00011-0Place Finger ESC4)Press [OK], the previous message continues to be displayedwhile the template is created. If your identity cannot be verified,you are prompted to try again. And you must restart the verificationprocedure (step 2).- 14 -
User Manual V2.0Password Enrollment1)Press the MENU button to enter the User enroll,Access theEnroll PwdNew Enroll?OKpassword enrollment, press [OK], the following appears:New EnrollEnroll No 00006ESCOK3)Input the enroll number (the range is 1 to 65534), press [OK], theNew EnrollInput Pwd *****ESCOKUSB ManageOptionsfollowing appears:Getting StartBasic Concepts2)Press [OK], the following appears:Before StartESCView Records- 15 -Relieve AlarmSystem Info.4)Input your password, the following appears:
Getting StartNew EnrollmentInput Pwd *****Pwd Affirm *****New Enroll00006-PESCNote:00006-PThe last letter P meanspassword.OK [Save]5)Input the password again, press [OK], the following appears:6)Press [OK], the previous message continues to be displayedwhile the template is created.Fingerprint & Password1) Press the MENU button to enter the User enroll,Access theFP& PwdNew Enroll?ESCOK- 16 -
User Manual V2.0Fingerprint& Password, press [OK], the following appears:2)Press [OK], the following appears:3)Input the password (range is 1 to 65534), press [OK], thefollowing appears:New EnrollEnroll NoESC00008OKNew Enroll00008-0Pleasefinger ESCNew EnrollInput Pwd: *****ESCOK4)If the test is successful three times in a row, the followingappears::5)Input your password, the following appears:New EnrollInput Pwd *****Pwd Affirm *****New Enroll00008-0P- 17 ESCOK [Save]
7)Press [OK], the previous message continues to be displayedwhile the template is createdNote:00008-0P; the second from the last 1 means one fingerprint,The last letter P means password.RFIDNew Enroll?ESCOKBefore StartBasic ConceptsRelieve Alarm1)Press the MENU button to enter the User enroll,Access RegSystem Info.USB ManageEnroll ID Getting Start6)Input the password again, press [OK], the following appears::OptionsGetting StartNew enrollPlease show the cardNew enrollEnroll No: 00010ESCOKEnroll No: 00010ESCOK- 18 -MaintainedTroubleshooting3)Input the enroll number (the range is 1 to 65534), press [OK], theAppendix2)Press [OK], the following appears:View RecordsRFID, press [OK], the following appears::
User Manual V2.0following appears:4)Slip the card near the area of induction follow the prompt, readout Card ID, the follow appear:5)press “OK” key to complete Enrollment,go on next operation.New EnrollRFID:16650449Enroll No: 00010ESCOKNew enroll000010-CESCNote :00010-CThe least letter C means ID cardOKthe following appear:6)Press ‘ESC’ key to cancel the new enrollment, press OK to saveenrolled data, so that complete registering ID cardflowNote:IDcard is a option function on the fingerprint machine, ifyou want to customize fingerprint machine with ID cardfunction, please contacts our market supporter and sale. If youwant to know more information please refer to (ID card use- 19 -
Before StartGetting StartNote:HID card is an option function on the fingerprint machine, ifOptionsTroubleshootingMaintainedView Recordsyou want to customize fingerprint machine with HID card function,please contact our market supporter and salesman.USB ManageHID standard card is encrypted by using specify format encode card IDand the equipment code.System Info.This operation procedure is same as ID Card operation, use HID cardonly by Using 125MHZ,13.56 MHz contactless smart card technologyonly, these fingerprint products provide users with new options forsupporting multi-authentication of identity. Combine a contactless cardpresentation with a fingerprint biometric. Or, use a personalidentification number (PIN) number along with a contactless cardpresentation. (See multi-authentication)Relieve AlarmEnroll ID Card Getting StartBasic Conceptsguide)Appendix- 20 -
User Manual V2.0Enroll Mifare Card 1)Press (MENU) KEY on the initial interface, after your privilegeUser ManageEnroll User FPCard MngEnroll Admin are admitted, follow information appear on the screen:2)Press (ok) Key, enter next operation. Information show follows:FPCardMng Create PINCard Enroll FPCardCreate FPCardReg FPCardUnreg FPCardEmpty FPCardDump FPCardESCOkThere are eight sub-item, which is create fingerprint card, enrollfingerprint into card, register fingerprint card, cancel fingerprint- 21 -
Getting Start4. Register Fingerprint Card (Reg FP Card): there is more thantwo attendances machines, A enroll PIN. Card has been registeredin one fingerprint machine, which want to be use to antherfingerprint machine, the Fingerprint Card must be registered firstly.5. Clean Fingerprint Card (Unreg FP Card): this operation is areverse process to above operationBasic ConceptsGetting StartOptionsTroubleshooting- 22 -MaintainedView Records6. Erase fingerprint from Fingerprint (Empty FP Card): clear alldata (fingerprint, PIN) on the fingerprint card.USB Manage3. Create Fingerprint Card (Create FP Card): copy fingerprintfrom the fingerprint machine in which exist to a Card, user can usethe fingerprint to verify, also can utilize a fingerprint and aFingerprint Card to verify.System Info.2.Enroll fingerprint into card (Enroll FP card): directly store thefingerprint that has been register into card, at this time there is afingerprint in the card, and that does not exist in the machine, usermay user “Card Fingerprint” to identify himself, must show theFingerprint card firstly, than place finger.Relieve Alarm1. Create PIN. Card (Create PIN card): utilize registered user in thefingerprint machine to Create PIN card, user may user the card toidentify himself, and don’t place the finger.Before Startcard, erase fingerprint from card, copy fingerprint from card,transfer fingerprint to card, the each follow detail explain is foreight sub-item.
User Manual V2.07. Copy Fingerprint from card. (Dump FP Card): Copy afingerprint from a card to Fingerprint machine, it is able to utilizefingerprint direct attendance after finish this operation process.8. Transfer fingerprint into card (Move to FP Card): the fingerprintin fingerprint machine is transferred to a Fingerprint Card. there isnot fingerprint in the fingerprint machine after transferred.Note:Mifare card is an option function on the fingerprintmachine, if you want to customize the fingerprint machine withMifare card function, please contacts our market supporterand sale. If you want to know more information please refer to(Mifare Card use guide)Testing an EnrollmentAsk the users to place their finger to perform test verification. If thetest was successful, you will adopt Fingerprint enrollment. If thepoor quality of fingerprint, you will be recommended to useFingerprint & Password.Enrolling a Auxiliary Fingerprint of UserFor a long time using, if the system memory is allowed to store, itis better to enroll more than two fingerprints a user. Enter the newenrollment interface Press ‘OK ‘key to continue performing the- 23 -
Getting Startnew user enrolling, Press ‘ESC’ key to cancel the new enrollment,and to enter the backup enrollment interface, the following appears:DisplayEnroll No 00009Enroll No 00008ESCOKESCOKBefore StartNew Enroll(1)1:1 authentication(Verification)In this mode, enter a pre-registered ID first and then a fingerprint.The enrolled fingerprint corresponding to the ID will be comparedto the entered fingerprint on a 1:1 basis. The 1:1 authentication typetakes a short time regardless of the number of users. There is no- 24 -Getting StartOptionsUSB ManageSystem Info.Use fingerprints to validate access authentication with thefollowing types:Relieve AlarmFingerprint authenticationView RecordsAuthentication typeMaintainedoperationNote: Where system memory permits, it is advisable to have atleast two fingers enrolled for a long-term user.Basic ConceptsThis operation procedure is same as above enroll new user
User Manual V2.0need to make any special settings in the system. After entering theID, enter the fingerprint to perform authentication. Block diagramsof enrollment, verification, and identification tasks.Operational trip:In the initial interface, enter your ID number, the followingappears:1:1 FP VerifyESCEnroll No 00011OK[Pwd]Note: This fingerprint machine default enrolling number is 5digit, if you enrolled number does not arrive 5 digit, themachine will add 0 in front of this figure , E.g. your number is11, the 00011 will be displayed in the machine.Press “OK”,then Place the finger on the sensor surface, thefollowing appears:1:1 FP VerifyPlease Move FingerIt continues for about 0.5 seconds. If the test is successful, it willsay “Thank you”, the following appears::- 25 -
Getting StartFP VerifyEnroll No 00001Verified!If your identity cannot be verified, you are prompted to try again,FP VerifyPlace Finger Agn!OptionsOnly enrolled fingerprints are used for authentication. Though theauthentication procedure is simple, this method will take a littlelonger than the 1:1 authentication if there are many users. There isno need to make any special settings in the systemBasic Concepts(2)1:N authentication (Identification)Getting StartIt continues for about 0.5 seconds, return to the start-up window.Before Startthe following appears::Relieve Alarm- 26 -System Info.USB ManageOperational trip:
User Manual V2.0Place the finger on the sensor surface, the following appears:FP VerifyPlease Move FingerIt continues for about 0.5 seconds. If the test is successful, it willsay “Thank you”, the following appears:FP VerifyEnroll No 00001Verified!If your identity cannot be verified, you are prompted to try again,the following appears:FP VerifyPlace Finger Agn!It continues for about 0.5 seconds, return to the start-up window.1: G; 1: H (Group authentication)For group authentication, user can define a range of user ID, if userID is in the range, authentication way must be 1: N, otherwise theauthentication procedure is 1:1 matching.--1: H authentication: user must input the advance part ID toperform fingerprint authentication, if the input ID is entire No., the- 27 -
Getting Startsystem will carry on 1:1 authentication,--1: G authentication: the user must be grouped beforeauthentication, you can specify a group ID of 1--4 digits long foreach user group. You will enter a group ID and press down -key,and then place a fingerprint for authentication. You can specify agroup ID when you register a user. Unlike other methods, you mustenter the group ID, and then press down-key before entering thefingerprint to perform group authentication.Pwd AffirmEnroll No:00008Input Pwd:*****- 28 -Basic ConceptsGetting StartPress [OK], the following appears:OptionsEnroll No 00008ESCOK[Pwd]USB Manage1:1FP VerifySystem Info.To start the enrollment process, enter your ID number, thefollowing appears:Relieve AlarmA password of 1--5 digits long is used to validate accessauthentication. You can use this method in such a special case aswhen the fingerprints are damagedBefore StartPassword authentication
User Manual V2.0Input correct password, press [OK], the following appears:Pwd AffirmEnroll No 00008Verified!If the password cannot be verified, the following appears:Pwd AffirmEnroll No 00008Error P
Though the stored fingerprint reference template match against place user's finger, this fingerprint template is used to identify user's Identity, so an enrolled user is able to achieve the time clock in the appoint machine, the whole procedure take about 2 second, for the same ID number the up to ten different fingerprint ability to

