Transcription
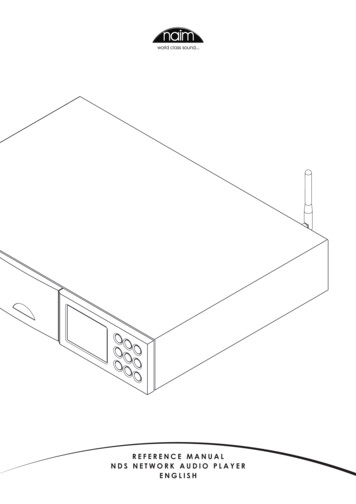
REFERENCE MANUALNDS NETWORK AUDIO PLAYERENGLISH
C onte ntsSectionContents1IntroductionPage5NDS iRadio185.1iRadio Tuner – Seeking Stations1815.2Adding iRadio Stations18Storing Radio Presets181.1The Internet Radio15.31.2The UPnP Audio Interface15.4Using Radio Presets181.3The USB Audio Interface11.4The Digital to Analogue Converter16NDS UPnP Audio Interface196.1UPnP Servers192Installation and Connection26.2Audio File Compatibility196.3Scanning Servers and Playing Files192.1NDS Transit Screws22.2NDS Rear Panel22.3NDS Connected To 555PS Power Supply37NDS USB Audio Interface202.4NDS Connected To XPS Power Supply37.1USB Media and File Compatibility202.5NDS Connected To XP5 XS Power Supply47.2Browsing and Playing USB Files202.6Power Supply Connection42.7Audio Inputs and Outputs48NDS Specifications212.8USB Audio Interface52.9Network Connections52.10System Automation52.11External Control and Update Sockets52.12Signal Ground Switch63NDS Operation73.1NDS Front Panel Features73.2Front Panel Buttons73.3Front Panel Display (normal play mode)73.4Front Panel Display (list display mode)83.5Front Panel Display (setup mode)83.6NDS Remote Handset3.7Handset Text Entry103.8The n-Stream Control App104NDS Setup124.1The Setup Home Menu124.2The Language Menu124.3The Inputs Menu124.4The Analogue Outputs Menu134.5The Network Settings Menu134.6The Digital Output Menu154.7The Front Display Menu154.8The Handset Keys Menu154.9The System Automation Menu164.10The Factory Settings Menu17Note: This manual is Issue No. 1 and describes the operation ofNDS units running software release version 3.13.xx.9Windows Media is a trademark of Microsoft Corporation.UPnP is a trademark of the UPnP Forum.
I ntrod u c tio n1 In t r odu ct ionThe NDS is a highly capable network and digital audio player that will repay time andeffort spent on installation and setup. We strongly recommend that you read this manual.The NDS incorporates four distinct audio components, each routed to analogue or digitaloutputs intended for connection to an appropriate preamplifier input. Each componentis introduced in the paragraphs below and the first three subsequently described in fulldetail in Sections 5 to 7. The components are:An Internet RadioA UPnP Audio InterfaceA USB Audio InterfaceA Digital to Analogue converterPrior to the sections describing NDS components, Section 2 covers installation, Section 3describes operation and Section 4 describes setup.1. 1 The Interne t RadioThe NDS internet radio requires high speed internet accessvia a home network connection. When connected tothe internet the NDS receives data streams and a list ofavailable radio stations from a dedicated internet server.Up to 40 internet radio stations can be stored as presets(favourites).1. 2 The UP nP Audio I nte rf ac eNDS can connect to a home network and play audio filesstored on UPnP drives such as the Naim UnitiServe or onPC and Mac computers.1. 3 The US B A udio I nte rf ac eNDS incorporates a front panel USB interface socket thatenables audio files stored on USB memory devices to beselected and played.1. 4 The D igita l to Analo gue C o nv e r t erNDS incorporates a three input digital to analogueconverter able to handle S/PDIF format digital audio atup to 24 bit and 192kHz resolution. The three DAC inputscomprise one coaxial BNC socket, one coaxial phonosocket and a TosLink optical socket. The analogue outputis available on both 5-pin DIN and phono sockets.1
I nsta lla tio n a nd C o nn ect i on2 In st allat ion a nd Connecti o nYour NDS should be installed on an equipment stand intended for the purpose. Four transitscrews on its underside must be removed before use. Ensure the NDS is well ventilated,and do not stand it directly on top of another item of equipment. It should be installed inits final location before connecting cables or switching on.The NDS requires an external Naim 555PS, XPS or XP5 XS power supply. Connection ofexternal power supplies is illustrated in Diagram 2.3, 2.4 and 2.5, and described in Section2.6.Connecting the NDS to a variety of audio peripherals and sources is described inparagraphs 2.7 onwards. Diagram 2.2 illustrates the NDS rear panel connection sockets.2. 1 ND S Transit Sc re wsThe four transit screws located on the underside of theNDS must be carefully removed before use. Do not invertthe NDS to remove the transit screws but work from theunderside by positioning the NDS at the edge of a table.The transit screws must be replaced if the NDS is to bere-packed or shipped. The transit screw locations areillustrated in the diagram opposite.DO NOT INVERT THE NDS DURING OR FOLLOWING TRANSITSCREW REMOVAL.transit screw locations2. 2 ND S Rear P ane lwireless network(Wi-Fi) antennasocketnetwork remotesocketin2USBupgradeinterfaceremoteout 1 & 2digital inputs1, 2 & 3digitaloutputpower supplysocket 2(link plug fitted)power supplysocket 1analogueoutput(phono)analogueoutput(DIN)signal groundswitch
I nsta lla tio n a nd C o nn ect i on2. 3 ND S Conne c te d T o 5 5 5 P S P o wer S u p p l ySXPS BurndyCable555A BurndyCableCabledirectionmarkermains inputand fuse2. 4 ND S Conne c te d T o X P S P o we r S u p p l ySXPS BurndyCablemains inputand fuseImportant: XPS power supplies with serial numbers below188015 are not compatible with the NDS and should notbe used. Contact your local retailer or distributor for moreinformation.Cabledirectionmarker3
I nsta lla tio n a nd C o nn ect i on2. 5 ND S Conne c te d T o X P 5 X S P o w er S u p p l ySXPS BurndyCablepowerswitchCabledirectionmarkermains inputand fuse2. 6 P ower S up ply C o nne c tio nT he NDS requires an external XP5 XS, XPS or 555PS powersupply connected to one (XP5 XS, XPS) or both (555PS) ofits power supply input sockets. Use only the Burndy cable orcables intended for the specific power supply. Your retaileror local distributor will be able to supply the appropriateBurndy cable or cables.IMPORTANT: XPS POWER SUPPLIES WITH SERIAL NUMBERSBELOW 188015 ARE NOT COMPATIBLE WITH THE NDS ANDSHOULD NOT BE USED. CONTACT YOUR LOCAL NAIMRETAILER OR DISTRIBUTOR FOR MORE INFORMATION.If an XP5 XS or XPS power supply is used it should beconnected to NDS Power Supply Input 1. If a 555PS powersupply is used it should be connected to both NDS PowerSupply Inputs 1 and 2. The link plug must remain fitted toPower Supply Input 2 unless a 555PS power supply is used.Do not switch on the external power supply until all therequired NDS signal and network connections are made.Note: It is possible to power the NDS using a multiple powersupply arrangement comprising two 555PS units, or a 555PSand one other compatible power supply. Contact yourlocal Naim retailer or distributor for more information.2.7 Audio Inputs and Outputs2.7.1 Audio Signal InputsNDS provides three S/PDIF digital inputs. Connection to theinputs is made via a variety of socket types. The followingtable lists the inputs and their socket types:Inputdig. 1dig. 2dig. 3SocketCoaxial (BNC)Coaxial (RCA phono)Optical (TosLink)Always use high quality interconnect cables to connectsources to NDS inputs.The digital inputs are configured via the NDS Digital Inputssetup menu. See Section 4.3.4.2.7.2 Audio Signal OutputsThe NDS provides analogue and digital audio signaloutputs intended for connection to an appropriatepreamplifier or digital to analogue converter input. NDSoutput connections are made via the socket types listedbelow:OutputAnalogue stereoAnalogue stereoS/PDIF digital stereoSocket5-pin DINRCA phonoBNC CoaxialNote: Output sockets are selected and configured via theNDS Analogue Outputs and Digital Output setup menus.See Sections 4.4 and 4.6.4
I nsta lla tio n a nd C o nn ect i on2. 8 US B Audio I nte rf ac eThe NDS is fitted with a front panel USB interface intendedfor the connection of USB memory hardware carryingaudio files. The USB interface should not be used for anyother purpose.Most UMS (Universal Mass Storage) USB devices arecompatible with the NDS USB audio input. Such devicesmight include portable digital music players, smart-phones,tablet computers, USB memory sticks and memory cardreaders.2. 9 Network C o nne c tio nsThe NDS can be connected to a TCP/IP network via eithera wired or wireless connection. Network connectionenables the NDS to play internet radio data streams orplay audio files stored on UPnP servers such as theNaim UnitiServe and HDX, and appropriately configuredcomputers and network drives.2.9.1 Wired Network ConnectionThe NDS is fitted on its rear panel with a standard Ethernetsocket. For wired network connection this socket shouldbe connected to a spare Ethernet socket on your networkrouter.Note: Ethernet-over-mains hardware may be used andprovides a simple and convenient method of wired homenetwork connection. However, depending on mains wiringfactors specific to each home environment, the presenceof network data on the mains supply may compromiseoverall system sound quality. If any sound qualitycompromise is found to be unacceptable, dedicatednetwork cabling should be installed or wireless networkingshould be employed.2.9.2 Wireless Network ConnectionIf NDS is to connect wirelessly to the home network thesupplied Wi-Fi antenna must be fitted to the rear panelwireless antenna socket. Wireless configuration will also benecessary before NDS is able to connect to your homenetwork. See Section 4.5.1.2.9.3 Network SettingsThe NDS is set up when originally shipped not to requireany on-site TCP/IP configuration but to connect toa network automatically (it uses DHCP by default).However, if your NDS has been previously used, its networkconfiguration may have been altered leaving it unableto connect automatically. If this appears to be the caseensure that DHCP is selected in the Network Settingsmenu (see Section 4.5 of this manual) and re-start NDS. Ifproblems still persist contact your retailer, installer or NaimAudio directly.Note: Before reporting network connection problems carryout a Factory Reset operation. Select Reset All Settingsfrom the Factory Settings setup menu. See Section 4.10.Note: An NDS switched on without a working wired networkconnection will only be able to connect to a homenetwork wirelessly. To use an Ethernet (wired) connection,switch the NDS off, connect the network and switch it onagain.Note: For internet radio to operate, the NDS requiresconnection to a high speed internet service.2 . 1 0 S y s t em A u t om a t i onNDS control can be linked using System Automation tothe control of some Naim preamplifiers, CD players andthe Naim DAC. System Automation enables for example,preamplifier inputs to be selected via the NDS, or forn-Stream transport functions to control a CD player. To takeadvantage of System Automation, connect one of theNDS rear panel Remote Out sockets to a preamplifier, CDplayer or DAC Remote In socket. Use a cable terminatedwith a 3.5mm jack plug at one end and a 3.5mm jack orphono plug as necessary at the other end.Using both NDS Remote Out sockets, for example, oneconnected to a preamplifier and one connected to aCD player, enables comprehensive system control via then-Stream app.Note: Stereo and mono 3.5mm jack to 3.5mm jack canbe used for System Automation. If a stereo 3.5mm jack tophono plug cable is used, connect the left channel phonoplug.Note: NDS System Automation is switched off by default. Afull description of its configuration and use can be found inSection 4.9.2.11 External Control and Update SocketsThe NDS is fitted with a 3.5mm jack Remote In socket onits rear panel. The Remote In socket can be used for RC5remote control via a fully wired connection or a remote IRrepeater.The NDS is also fitted with a rear panel mini-USB socket. Thissocket enables firmware upgrades and diagnostic tests to5
I nsta lla tio n a nd C o nn ect i onbe carried out. Contact your retailer for more informationif required.Note: The rear panel mini-USB socket is not intended for theconnection of USB storage hardware and cannot be usedfor audio playback.2. 1 2 S ignal G ro und Switc hThe NDS is fitted on its rear panel with a Signal Groundswitch offering two positions: Chassis and Floating. Selectthe Chassis position unless NDS is connected in a hi-fisystem incorporating another earthed source component,or mains “hum” is audible through the loudspeakers.Contact your retailer, distributor or Naim for advice ifnecessary.Note: “Connected” in the context above means ananalogue audio signal cable that includes an earthconnection.Note: All Naim CD players are earthed so the SignalGround switch should be set to floating if one is connectedin the system (unless a digital signal connection is used).No damage will be done if the wrong Signal Groundposition is chosen, however the system sound quality maybe compromised.2.12.1 General Audio Connection NotesThe NDS power supply mains earth (ground) should alwaysbe connected regardless of what other equipment is used.Note: As an external power supply is used the NDS mainsearth is connected through the Burndy connection cableto the power supply mains earth.A mains earth grounds the chassis and the electrostaticscreen within the power supply transformer, and is onlyconnected to the signal negative if the Signal Groundswitch is set to Chassis. In order to avoid hum loops, thesignal negative of the whole system should be connectedto the mains earth in one place only.6
O pe r a tio n3 NDS O per ati o nThe NDS can be operated from either its front panel controls, from the supplied remotehandset or via the n-Stream iPod, iPhone and iPad app. Setting up and operating an NDSrequires navigation through a menu-driven user interface. The general principles of theinterface are carried across each of NDS’s components so this section of the manualdescribes and illustrates those general principles.3. 1 ND S Front P ane l F e ature sUSB interface3.2 Front Panel Buttonsfront paneldisplayfront panelbuttons3.3 Front Panel Display (normal play mode)P3iRADBBCR6MusicLBBC 6MusicThe NDS front panel buttons function as described below:7playPlays a selected track or radio station. Navigates up a menu or list.inputSequentially selects NDS inputs. Returns to the previous display menu.ok/listEnters list display mode.Confirms menu item selection. Advances to the next display menu.stopStops playing a track or radio station.VNavigates down a menu or list.exitExits list display mode.In normal play mode the NDS screen provides a variety ofinformation on the current setup, the input selected andthe material playing. A typical normal play mode screenis illustrated above showing the internet radio station BBC6Music playing.At the top of the screen, “P3” shows that the radio stationis stored as preset 3, and the “iRad” icon shows thatinternet radio is selected.
O pe r a tio n3.4 Front Panel Display (list display mode)Internet Radio3/8Added StationsNaim’s Choice4LocationGenre3 . 5 Fr on t P a n el Di s p l a y ( s et u p m od e)Setup1/94LanguageInputsAnalogue OutputsNetwork SettingsList mode is entered by pressing the front panel ok/listbutton or handset ok/list key. List mode is used where NDSsources provide data that can be browsed: a list of radiostations or tracks for example.Setup mode is engaged by pressing the handsetsetup ( ) key or pressing and holding the front panelok/list button. Setup mode provides access to all NDS setupfunctions.Lists displayed will depend on the source selected anddata available. A typical list mode screen, illustratedabove, shows the initial internet radio display menu.The illustration above shows the setup home screendisplayed when setup mode is engaged. The “1/9” at thetop right denotes that the selected item is number one ofnine.At the top right of the screen, “3/8” denotes that theselected item is number three of eight.To scroll up and down lists and select items use thefront panel or handset up (5) and down (6) and ok/list buttons or keys. To return to normal display press thehandset exit key or front panel list button.Note: The right (4) key duplicates the ok/list key whennavigating list mode menus.In long item lists the handset numeric/text keys can beused to jump through the list alphabetically.To navigate around the setup menus and make selectionsuse the front panel or handset up (5), down (6) and left(3) arrow keys to navigate around menus and the ok/listbutton or key to confirm a selection.Note: The right (4) key duplicates the ok/list key whennavigating setup mode menus.To exit setup mode press the handset setup ( ) key asecond time or press the exit key or front panel list button.NDS setup is covered in Section 4.Note: If programme material is playing when NDS enterssetup mode it will continue to play. The volume, mute andtransport (play, pause, stop etc.) keys on the handset willremain operational.8
O pe r a tio n3. 6 ND S Remote H andse tThe handset key functions are listed and described in thetables below. Some keys change function when NDS is inlist/setup mode. Normal play mode functions are denotedby the text on each key and list/setup mode functions aredenoted by the text below each key. Keys with only onefunction are listed in the table on the right.The supplied remote control handset is a multifunctionaldevice designed specifically for Naim Streamer and UnitiSeries products.To fit batteries, remove the battery cover and insert thebatteries into the body taking care with their orientation.Replace the battery cover.3.6.1 Normal and List/Setup Mode Keys3.6.2 Normal Play Mode r digits1 to 9Enter characters intext0Enter 0 (zero)Enter spaces intextpresetdelDisplay the radio Delete lastpreset listcharacter in textstoreDisplay the radio Switch text casepreset menu input Select next input5Menu upnavigationinput-Select previousinputMenu downnavigationInputdependent(see note)Previous menuor back onecharacter in textInputdependent(see note)Next menuor forward onecharacter in text634exitNo functionlist/okExits current menuwithout savingchangesDisplay inputConfirm actiondependent list of or selectiontracks/functionsNote: Navigation (3456) key assignmentscan be altered via the Handset Keys setupmenu. See Section 4.8.disp@#abcdefghijklmnopqrstuvwxyzFunctiondisp Switches NDS display on or offvol Increase preamp volumevol –Decrease preamp volumemuteSilence preamp(repeat) Repeat selected track, or playlistpreset(shuffle)Play tracks randomly from list(setup)Display the setup menustoredelinput vol (info) Cycle through input informationmute(play/pause) Play or pause audiooklistexitvol -(previous)Go to previous track/station(next)Go to next track/station(stop)Stop audio(reverse)Fast reverse audio(with system automation)(forward)Fast forward audio(with system automation)input -cdcdradiopciPodtvavhddauxUnassignedradio Selects the iRadio inputpcSelects the UPnP inputiPod Selects the USB audio inputtvSelects the Digital 1 inputav Selects the Digital 2 inputhdd Selects the Digital 3 inputauxUnassignedNote: The default input selection keyassignments can be modified via the HandsetKeys setup menu. See Section 4.8.Note: Use of system automation can modify theaction of remote handset keys. See section 4.9.9
O pe r a tio n3. 7 Handset T e x t Entry3 . 8 Th e n -S t r ea m C on t r ol A p pSome NDS menu screens require text entry - naming inputsfor example. Text entry is carried out using the handsetnumerical buttons in a manner similar to mobile phone SMStext entry.When text entry is required, multiple presses of a key willscroll through the characters associated with that key. Inaddition to characters, the preset key provides a deletefunction, the zero key provides a space and the store keyprovides letter case change. The up (5) and down (6)keys will also scroll through all the available letters.The enlarged handset image illustrates the number keysand the characters associated with each.When prompted on a NDS screen to enter text, selectcharacters in turn by pressing each appropriate keythe required number of times. Confirm the text entry bypressing the ok/list key.disp@#abcdefThe n-Stream NDS control application is available from theiTunes App Store. n-Stream is compatible with iPad, iPhoneand iPod touch models running iOS software Version 3.1.3or later.3.8.1 n-Stream SetupTo begin using n-Stream tocontrol your NDS you must firstinstall the app on your iPad,iPhone or iPod touch. Withthe app installed and theiPad, iPhone or iPod wirelesslyconnected to the samenetwork as your NDS, start theapp by touching its screenicon.Selecting setup opens amenu that enables the NDSto be selected for control.Touch the appropriate NDSas identified by its device name or network address; NDSC135 and 192.168.001.065 respectively in the illustrationabove.Note: Your NDS network address and device name can befound in its Factory Settings setup menu.ghijklmnoNote: The NDS name can be changed from its setupmenu. Doing so can enable individual units in a multipleinstallation to be identified more easily.The setup menu enables the following options to beselected:pqrstuvpresetwxyzstoredelinput vol mutelistexitinput -10Stay connected: If OFF is selected, the n-Streamapp will “sleep” following a presetperiod of inactivity. SelectingON will force n-Stream to remaincontinuously active.Note: Continuous connection of n-Stream may result inyour iPad, iPhone or iPod battery draining.Use Hi-Fi Language: Select ON for the n-Stream app toreflect the selected NDS displaylanguage. If NO is selected then-Stream app will display in thedefault iPad, iPhone or iPodlanguage.okvol -Auto connection: Select ON for automaticconnection to the NDS wheneverthe n-Stream app is running.Clear Image Cache: Deletes album artwork imagesstored by the n-Stream app.
O pe r a tio n3.8.2 Using n-StreamThe n-Stream app is based onthree main screens. The Inputsscreen, the Playing screenand the Library screen. Thesescreens are selected bytouching the icons at the topof the display.The Inputs screen enablesselection of NDS inputs. Inputnames reflect those specifiedin the NDS input setup menus(See Section 4.3) or throughSystem Automation (SeeSection 4.9).Selecting Allegro MediaServer followed by items inthe subsequent lists enablesthe selection of playlists,albums or individual tracks forplayback.The Playing and Libraryscreens for other inputs followthe same protocol of itemselection.The Playing screen displaysthe currently playing itemand provides appropriatetransport controls. Whena Radio station is playingan icon is also provided toopen a preset station menuthrough which presets can beeither stored or recalled.The Library screen displayslists of playback itemsavailable to the selected NDSinput. The adjacent illustrationshows Allegro Media Server isavailable to the NDS UPnP input.Note: Allegro Media Serveris an application that makesiTunes songs and playlistsavailable to UPnP players.11
Se tu p4 NDS Set u pOnce NDS is installed with mains power and all external connections made, it can beswitched on and set up for use.The degree to which you modify NDS default settings will depend upon the uses to whichyou put it and the extent to which you use its capabilities. It may be that you have noneed to modify the default settings at all, however we would encourage you to readthis section of the manual in order that you gain a full understanding of NDS abilities. Thefollowing paragraphs describe each NDS setup menu in turn starting with the setup homemenu.Enter NDS setup mode by pressing the handset setup ( ) key. Navigate around the setupmenus using the handset arrow keys and make selections using the ok/list key. Exit setupby pressing the exit key.4. 1 The S etup H o me M e nuThe NDS setup home menuprovides access to nine setupmenus. The function of eachmenu is listed below:Setup4 . 2 Th e L a n g u a g e M en u1/94LanguageInputsAnalogue OutputsNetwork SettingsLanguage: Enablesthe userinterface language to be changed.Inputs: Enables parameters for each internaland external input to be configured.Analogue Outputs: Enables analogue output socketoptions to be selected.Network Settings: Configures network tschItalianook/list key to select Language.Use the handset up (5) anddown (6) and ok/list keys to select a language. Exit setupmode by pressing the handset exit key.4 . 3 Th e I n p u t s M en uThe Inputs setup menu enables a variety of parametersto be configured for each NDS internal and externalinput. The options available for each are described in thefollowing sections. Two parameters are common to allinputs:Digital Output:Enables digital output options to beselected.Enabled: Switches the input on or off and displays or hidesany associated menus.Front Display:Configures display features.Name: Enables user specified names to be attached toinputs. Use the handset to enter text.System Automation: Enables system automation to beconfigured.Handset Keys: Enables inputs to be assigned to specific handset keys. Also enablesconfiguration of the handsetnavigation (3456) keys.Factory Settings: Enables interrogation of NDS status,monitoring of handset commands,deletion of all user presets, reset ofsystem automation and return tofactory default settings.Each of the nine setup menus is described in detail in thefollowing sections. Use the handset up (5) and down (6)and ok/list keys to select a setup menu.12The Language setup menuenables the NDS user interfacelanguage to be changed. Entersetup mode and use the handset4.3.1 iRadio dioEnabled:Yes / NoAuto Disconnect: 4HrsName: User definableBrowse History:NoAuto Disconnect: Select time.Auto-disconnectis provided so that internet providerdata usage limits are not inadvertentlyexceeded by an NDS left connected tointernet radio.Browse History: Yes / No. If Yes is specified NDS will selectthe last used station if it is available. If Nois specified NDS will display the full list ofavailable stations.
Se tu p4.3.2 UPnP (Network) nabled:Yes / NoServer HistoryYesName: User definableServer History: Yes / No. If Yesis specifiedNDS will remember the last used folderif the UPnP server is still available. If Nois specified NDS will display the full list ofavailable servers.4.3.3 USB bled:Yes / NoFolder History:NoName: User definableFolder History: Yes / No. If Yesis specified NDSwill automatically display the last usedfolder on the USB device. If No is specifiedthe top level folder of the device will bedisplayed.4.3.4 Digital Inputs 1, 2 and 3Digital 11/3ParameterOptions4Enabled:YesName:Dig 1Enabled:Yes / NoUnstable source:NoName:User definableUnstable source: Yes / NoSelect No unlessthe NDS has problems locking to a digitalsignal. Selecting Yes will enable the NDSto lock to unstable digital signals, howeversound quality will be slightly degraded.4 . 4 Th e A n a l og u e O u t p u t s M en uThe Analogue Outputs menuenables the main DIN or RCAphono outputs to be disabledor individually or simultaneouslyselected.Analogue Outputs1/14Main Out:DINParameterOptionsMain out: Disabled / DIN / Phono / DIN-Phono.Select the appropriate option for yourinstallation. Only select the DIN-Phonooption if both outputs are simultaneouslyrequired.4 . 5 Th e N et w or k S et t i n g s M en uThe Network Settings menuenables NDS network parametersto be customised to suit therouter and network. The optionsare tabulated and described inthe following sections:Network Settings1/54Name:NDS-xxxxWireless:Not UsedStatus: Not ConnectedDHCPYesParameterName:OptionsUser definable (text entry)Default: NDS-xxxxWireless:Not Used / Wireless Network NamesStatus: Connected / Not Connected / No Signal/ Login Failure / Busy / Etc.DHCP:Yes / NoMAC:Displays the NDS MAC addressThe Name parameter enables the NDS’s default networkname to be changed.The Wireless parameter enables a wireless network to bechosen and joined. See Section 4.5.1 below for detailedwireless set up notes.Network Status displays the current network connectionstatus.The DHCP parameter enables the NDS network settings tobe modified. In most cases, specifying Yes and leavingNDS set to DHCP, will be the appropriate option. SeeSection 4.5.2 for notes on static address (non-DHCP)network connection.Note: Devices installed on a network have an IP addressthrough which they are identified by all the other itemson the network. DHCP is a set of rules that enable theautomatic allocation of addresses as items are connected(or switched on while connected) to the network. NDS isset up by default to use DHCP.Note: If NDS is connected to the network both wirelesslyand via Ethernet (wired), the Ethernet connection will takepriority.13
Se tu p4.5.1 Wireless NetworkConnection Set UpSelect Network3/6 Don’t Use Wireless LingNetIf the Wireless parameter is4GreenNetselected in the Network SettingsTomNetmenu the Select Network menuwill display a list of the availablenetworks. An option not to use a wireless connection isalso provided. Use the handset up (5) or down (6) keysto scroll through the list and the ok/list key to select anetwork.Note: NDS is compatible with most commonly used Wi-Fistandards. Routers that support 802.11b and 802.11gwill work, however those with 802.11n compatibility arerecommended for best results.Note: As with any wireless network hardware, NDSconnection reliability will be affected by both networkrouter performance and Wi-Fi signal quality. To minimisethe possibility of poor connection reliability, NDS should beconnected to network audio sources by no more than onewireless “leg”. Other “legs” necessary between NDS andthe network audio sources should be wired.Note: NDS cannot connect to a “hidden” wireless network.If the selected network is secureand requires a passphrase oraccess key to join, NDS willdisplay an alert message. Pressingthe handset ok/list key will thenopen a text entry sc
1.1 The Internet Radio The NDS internet radio requires high speed internet access via a home network connection. When connected to the internet the NDS receives data streams and a list of available radio stations from a dedicated internet server. Up to 40 internet radio stations can be stored as presets (favourites). 1.2 The UPnP Audio Interface
