Transcription
Dell XC730xd Hyper-Converged Appliance SolutionsGuide
Notes, cautions, and warningsNOTE: A NOTE indicates important information that helps you make better use of your computer.CAUTION: A CAUTION indicates either potential damage to hardware or loss of data and tells you how to avoid theproblem.WARNING: A WARNING indicates a potential for property damage, personal injury, or death.Copyright 2017 Dell Inc. or its subsidiaries. All rights reserved. Dell, EMC, and other trademarks are trademarks of Dell Inc. or itssubsidiaries. Other trademarks may be trademarks of their respective owners.2017 - 10Rev. A05
Contents1 About Dell Hyper-Converged Appliance solution. 42 Supported hardware, firmware, and software.53 Documentation references. 64 Licensing overview. 7Starter license.7Pro and Ultimate licenses.7Setting up Nutanix Customer Portal. 7License management.85 Deploying your appliance. 9Important information about SATADOM. 9Examples of write intensive applications.9Before you begin. 10Setting up your Dell XC730xd for first use. 10Boot error message for missing SD card. 11Deployment outline. 11Default cluster credentials. 126 Downloading and installing Software applications. 13Installing Dell OpenManage Essentials on a separate server. 13Dell Nautilus . 137 Monitoring. 15Monitoring software.158 Updating firmware. 17Updating drive firmware with Dell Nautilus. 179 Replacing hardware. 19Replacing components with no cluster data.19Replacing failed front HDD and SSD components that contain cluster data.1910 Recovering system. 2011 Getting help. 21Contacting Dell.21Dell SupportAssist. 21Locating Service Tag. 21Quick Resource Locator. 223
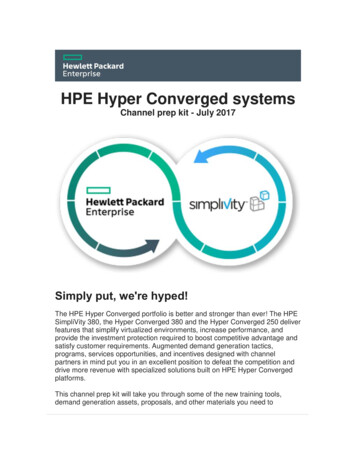
1About Dell Hyper-Converged Appliance solutionDell provides a hyper-converged appliance solution that includes the Dell XC730xd server and software from Nutanix (used as avirtual appliance), which simplifies virtualization by converging computer, storage, and network into a single appliance that isdeployed in a clustered environment. The following figures show the Dell XC730xd. For more information about the Dell XC730xdappliance, see the Dell XC730xd Owner’s Manual available at Dell.com/xcseriesmanuals.Figure 1. Front view of Dell XC730xd — 12 slotsFigure 2. Front view of Dell XC730xd — 24 slotsFigure 3. Back view of Dell XC730xd4
2Supported hardware, firmware, and softwareFor a list of the most up-to-date supported hardware, firmware, and software, see the Dell XC730xd Hyper-Converged ApplianceSupport Matrix available at Dell.com/xcseriesmanuals.5
3Documentation referencesFor information about the Dell documents, see the Support Matrix specific for your product.For information about the Nutanix documents that applies to a specific release of Nutanix solution software, see the Support Matrixspecific for your product.6
4Licensing overviewThe Nutanix virtual computing platform includes various features that allow you to administer your environment according to yourcurrent and future requirements.You can use the default feature set of the Nutanix solution software, upgrade to an enhanced feature set, update your license for alonger term, or reassign existing licenses to nodes or clusters as required.Starter licenseEach Nutanix node and block is delivered with a default Starter license. Starter features do not require the download of a license file.Dell EMC recommends that you create a profile on the Nutanix Customer Portal account assigned to you, when you purchased yournodes.Pro and Ultimate licensesThe Pro and Ultimate license types require you to download a license file from the Nutanix Customer Support Portal and install it onyour cluster. When you upgrade to a Pro or Ultimate license, or add nodes or clusters to your environment with these licensedfeatures, you must generate the license file, download it, and then install it.NOTE: The most current information about your license is available at the Nutanix Customer Support Portal. You canview information about license types, expiration dates, and any free license inventory (that is, unassigned availablelicenses).Setting up Nutanix Customer PortalIf you are new to Nutanix Support, create a personal profile on the Nutanix Customer Portal. Creating a personal profile allows you tomanage your licenses.NOTE: The Nutanix Customer Portal is also required to access some of the advanced Nutanix documentation.To set up your Nutanix Customer Portal, complete the following tasks:1.Go to the Nutanix Customer Portal at http://portal.nutanix.com and click Register Now.2.Register by typing data in appropriate boxes.3.In the Serial Number box, type the Service Tag number of your Dell XC730xd system.NOTE: To find the Service Tag of your Dell XC730xd, see the Locating The Service Tag section in this document.4.After the Customer Portal account is created, you can manage your licenses.7
License managementFor more information about license management, complete the following tasks:1.On the Nutanix Documentation portal, see the Web Console Guide (for access details, see the Documentation matrix section inthe Support Matrix).2.In the Nutanix Web Console Guide, see the License Management section.3.Perform the relevant licensing tasks for your system.8
5Deploying your applianceBefore you deploy your appliance, ensure that you read through this document and have yourself familiarized with the process andrequired materials.WARNING: Before you set up and operate your Dell appliance, review the safety instructions that shipped with yourstorage enclosure.WARNING: The weight of your appliance without the physical disk drives installed (empty weight) is 36.5 kg (80.5 lb).WARNING: Your appliance must be installed by Dell certified service technicians.CAUTION: Before installing your appliance in the rack, make sure that the weight of the appliance does not exceed theweight limit of the rack. For more information, see the Rack Installation instructions that shipped with your appliance.NOTE: For weight stability, always load the rack by using bottom-up approach.NOTE: This solution is deployed by Dell Services. The following deployment steps provide an outline of what DellServices accomplishes during the deployment process.Important information about SATADOMThe SATA Disk‐On‐Motherboard (SATADOM) shipped with XC Series appliances is intended as an appliance boot device.NOTE: Write intensive activities and processes leveraged by XC appliances, are intended to take place on the SSDs andHDDs and not the boot device.The hypervisor boot device is not intended for application use.WARNING: Adding additional write intensive software to the SATADOM boot disk results in heavy wear on the devicebeyond design specifications resulting in premature hardware failure.You should not run applications on the hypervisor operating system.Examples of write intensive applicationsFollowing are the examples of write intensive applications: System Center Agents.– System Center Configuration Manager (CCMExec.exe).– System Center Operations Manager (MonitoringHost.exe). Write‐intensive Agents. Databases. Disk management utilities (third-party disk defragmentation or partitioning tools). Additional roles outside of the appliance’s intended use (web server, domain controller, RDS, and so on.). Client‐based Antivirus. Run Virtual Machines directly on the SATADOM. Ensure that the Virtual Machines run on Solid State Drives (SSDs) and HardDisk Drives (HDDs).9
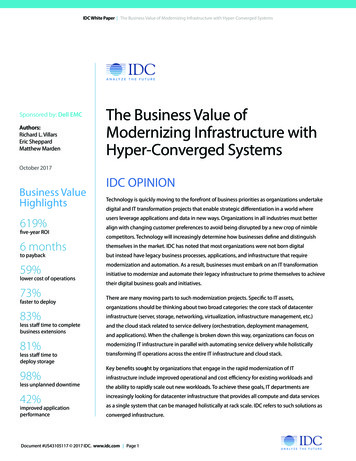
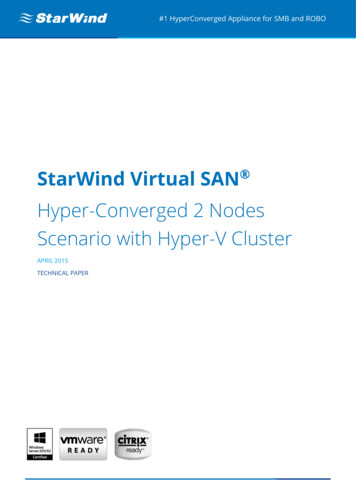
Before you beginCAUTION: It is important that you perform all the steps in this guide prior to doing other configuration steps.Make sure that the following items are available: Power cables Network cables — optical and/or copper (Intel SFP or Category 6 Ethernet) Rail kit Nutanix documentationNOTE: For more information about the names of the guides for your version of the Nutanix solution software, see theDocumentation matrix section in the Support Matrix. Dell DocumentationNOTE: For information about locating required documents, see the Documentation matrix section in the Support Matrix.Setting up your Dell XC730xd for first use1.Make sure that your system components are properly installed.Your system is shipped with physical disk drives, power supply units (PSUs), and fan components already installed. Ensure thatall components are properly seated and have not become dislodged and/or damaged during shipping.2.Install the Dell XC730xd in a rack.The Dell XC730xd requires a compatible rack and a rack installation kit. For information about installing the rails for the DellXC730xd, see the Rack Installation Instructions Guide that shipped with your system.3.Cable your solution based on the best practices cabling diagram shown here.NOTE: At a minimum, there are three Dell XC730xd servers in a cluster. Each Dell XC730xd is referred to as a node.Figure 4. Cabling a system1.Management Network2.Host NetworkNOTE: The preferred (best practice) setup is to connect the management port across all three nodes to the sameswitch (management network).10
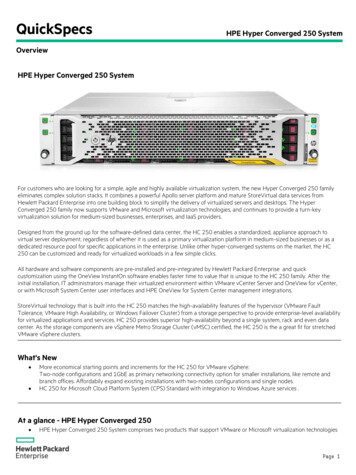
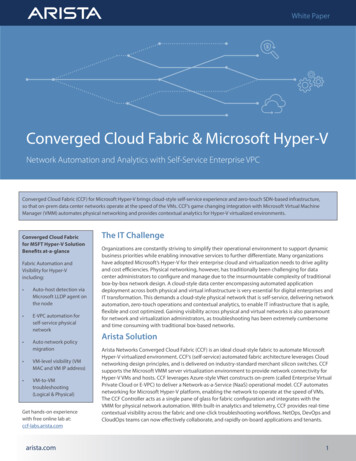
Boot error message for missing SD cardThe XC730xd system has only one SD card. When you start the system, the following error message is displayed:The secondary SD card is missing, not responding, or in write-protected mode. Do one of thefollowing:1.Install an SD card media in the secondary SD card slot.2.Reseat or replace the SD card media.3.If the secondary SD card is intentionally not installed or write-protected mode isexpected, then no response is required.The message is a known issue and you must ignore it.Deployment outlineThe flow of tasks in deploying the XC Series Hyper-Converged Appliance is shown here.Figure 5. Deployment workflow process.First time boot scripts for Nutanix AcropolisNutanix Acropolis nodes have been per-configured and do not require additional first-time boot configuration. These nodes boot tothe hypervisor and are ready to be clustered after the CVM has all services up and running.Create Nutanix storage cluster Use the Nutanix web-based tool to create a Nutanix storage cluster from all locally discovered nodes that are ready to beclustered. During this process, the following parameters are set:– Cluster maximum Redundancy Factory (RF)– Cluster name– Cluster virtual IP (optional for AHV and vSphere)– Subnet mask and default gateway (iDRAC, hypervisor and CVM)– Domain Name Server(s) (DNS)– Network Time Protocol (NTP) servers (hypervisor NTP N/A for Hyper-V)– Hypervisor hostnames– Node IPs (iDRAC, hypervisor and CVM) – Re-installation of new hypervisor and CVM (optional with Nutanix Foundation CVM)Option to create Nutanix storage cluster manually using command line interface.NOTE: In Acropolis base (NOS) 4.5, a new web-based clustering tool called Nutanix Foundation CVM replaces theearlier used cluster initialization page (deprecated). Nodes with Acropolis base (NOS) 4.5 or later installed in factoryuses Nutanix Foundation CVM for initial deployment while those installed with NOS prior to Acropolis base (NOS) 4.5will continue to use the traditional cluster initialization page.11
Configure Nutanix storage cluster using hypervisor management GUINOTE: For information about document name, see the Nutanix documentation section in the Support Matrix. Thedocument name varies depending on the solution software version you are running.Acropolis Hypervisor (AHV): Create storage pool and containers through the Nutanix web console. Create, deploy, and manage virtual machines through the Nutanix web console. For more information, see the Acropolis Virtualization Administration Guide.VMware vSphere: Create storage pools through the Nutanix web console. Create and mount containers as NFS datastores on appropriate hosts through the Nutanix web console. Manually add and configure vSphere clusters by using the Nutanix guidelines. For more information, see the vSphereAdministration Guide.Microsoft Hyper-V: Create storage pools and containers through the Nutanix web console. Run Hyper-V setup script from any CVM to join hosts to a domain, create a Hyper-V failover cluster, and register a storagecluster as an SMB share. Optionally, add a cluster to System Center Virtual Machine Manager either with the Hyper-V setup script or manually.Default cluster credentialsThe default cluster credentials for the system differ from those stated at the beginning of all Nutanix documentation. See Table 3 fordefault cluster credentials, which are specific to the system.NOTE: The default password is not set for ESXi hosts.Table 1. Default Cluster CredentialsInterfaceTargetUsernamePasswordWeb management consoleiDRACrootcalvinSSH client or consoleAHV hostrootnutanix/4uRemote desktop or consoleHyper-V hostAdministratornutanix/4uSSH client or consoleESXi hostrootSSH clientNutanix Controller VMnutanixnutanix/4uNutanix Web ConsolePRISM Interface (after clusterconfiguration)adminadmin12
6Downloading and installing Software applicationsOpenManage Essentials is a hardware management application on a separate server that provides a comprehensive view of the DellXC730xd and its components. OpenManage Essentials enables you to: Discover and list the system inventory Monitor the health of a system Perform system updates and remote tasks View hardware inventory and compliance reportsFor information about the supported OpenManage Essentials versions, see the Supported hardware, firmware, and software sectionin this document.To download OpenManage Essentials management software, go to Dell.com/support/home or the Dell TechCenter website atDellTechCenter.com/OME.To download the OpenManage Essentials User’s Guide, go to Dell.com/openmanagemanuals.NOTE: To install OpenManage Essentials, you must have local system administrator privileges, and the system you areusing must meet the criteria mentioned in the Installation Prerequisites and Minimum Requirements section of theOpenManage Essentials User’s Guide.NOTE: OpenManage Essentials must be installed on the management network or a network that has access to the IMPIor iDRAC ports.Installing Dell OpenManage Essentials on a separate serverTo install OpenManage Essentials:1.Go to Dell.com/openmanagemanuals and open the OpenManage Essentials User’s Guide.2.Go to the Installation Prerequisites and Minimum Requirements section and complete the tasks as described.3.Go to the Installing OpenManage Essentials section and complete the tasks as described.4.Install the following optional software applications: Dell OpenManage Essentials Dell Repository ManagerNOTE: Install Dell Repository Manager only if you want to customize the Firmware Bundles and UpdatePackages. DocumentationDell NautilusDell Nautilus is a general maintenance release utility for updating firmware for SAS and SATA drives (or disks).For information about the supported Dell Nautilus version number, see the Supported hardware, firmware, and software section inthis document.13
To download the Dell Nautilus Firmware Update Utility for SAS and SATA disk Solid State Drives (SSDs):1.Go to Dell.com/support/drivers.2.Under the Customized support section, in the Enter your Service Tag or Express Service Code box, type the Service Tag ofyour Dell XC730xd, and then click Submit.NOTE: If you do not have a Service Tag, select Detect My Product to allow the system to automatically detect yourService Tag, or select Choose from a list of all Dell products to select your product from the Product Selection page.3.On the Product Support page, click Drivers & downloads.4.From the Operating System drop-down menu, select Not Applicable.5.Go to the SAS Drive section.6.Search for Dell Nautilus Firmware Utility for SAS and SATA disk and SSDs.7.Click Download. Click Download again to download the .exe file. In your Download folder, locate the latest version of DellNautilus and click to expand the compressed files.8.In the extracted folder, run the USBMake Utility.9.Create the bootable Nautilus package and perform one of the following tasks:14 To create a bootable CD or DVD image (ISO), click Create Bootable CD Image and follow instructions. Burn the .iso imagefile to CD or save the bootable ISO on a management workstation. Connect a USB flash drive to the system and follow instructions to create a bootable USB flash drive.
7MonitoringTable 2. System component monitoring guideSystem ComponentsMonitor UtilitySystem memoryDell OpenManage EssentialsCooling fansDell OpenManage EssentialsNetwork Daughter CardDell OpenManage EssentialsProcessorsDell OpenManage EssentialsPSUsDell OpenManage EssentialsNICDell OpenManage EssentialsDell PERC 730 Mini or HBA330 miniDell OpenManage EssentialsFront HDDsNutanix web consoleFront SSDsNutanix web consoleNOTE: For instructions about using Dell OpenManage Essentials to monitor the Dell XC730xd system, do the following:1.See the OpenManage Essentials User’s Guide.2.For information about discovering components of a Dell XC730xd system, see the Discovering and Inventorying Devicessection.3.To use the functionality of OMSA preinstalled on each node, configure it by using the OpenManage Essentials User'sGuide.4.To add Dell XC730xd to the discovered list of systems, discover Dell XC730xd by using an IP range.Monitoring softwareTo monitor the health of a cluster, VMs, performance, and alerts and events, the Nutanix web console provides a range of statuscheck features.For more information about monitoring with the Nutanix web console, view the Web Console Guide document on the Nutanixdocumentation portal (for more information, see Documentation Matrix section in the Support Matrix).In the Nutanix Web Console Guide document, see the following sections: Health Monitoring Virtual Machine Monitoring Performance Monitoring15
16Alert and Event Monitoring
8Updating firmwareTable 3. Appliance component update guideAppliance componentsUtilityNetwork Daughter CardDell OpenManage EssentialsPSUsDell OpenManage EssentialsNICDell OpenManage EssentialsBIOSDell OpenManage EssentialsiDRACDell Update PackageDell PERC H730 Mini or HBA330 miniDell OpenManage EssentialsFront HDDsNutanix web consoleFront SSDsNutanix web consoleSATADOMContact Dell SupportTo update the firmware of the discovered system components, use Dell OpenManage Essentials. For instructions about using DellOpenManage Essentials to monitor and update the discovered components of the Dell appliance, see Updating Server BIOS,Firmware, Drivers, and Applications in the OpenManage Essentials User’s Guide.NOTE: You may use Dell Nautilus as an alternative to the Nutanix web console for updating firmware on the front HDDsand SSDs.NOTE: Dell Nautilus may be used as an alternative to the Nutanix web console for updating firmware of the front HDDsand SSDs.Updating drive firmware with Dell NautilusTo update disk firmware with Dell Nautilus:1.Turn off Controller Virtual Machine (CVM).For information about how to turn off a node, see the Nutanix Hardware Replacement document.2.Put hypervisor in Maintenance mode.3.Access system GUI, and do one of the following: Connect the physical keyboard or monitor or mouse to the ports on the Dell XC730xd. Connect to the iDRAC GUI.4.NOTE: For information about configuring and accessing the iDRAC GUI, see the iDRAC Quick Start Guide atDell.com/support/home.Mount the Dell Nautilus ISO or the USB key to the system using virtual media.5.While restarting the server, press F11 to open BIOS boot manager.17
6.From the list, select EFI Boot Manager.7.From the EFI boot list, select Virtual CD or the USB drive.8.To update drive firmware, click Update Firmware.NOTE: Dell Nautilus updates all HDD and SSD firmware for all HDDs and SSDs connected to the system.18
9Replacing hardwareThis section describes high-level tasks to replace components correctly within the Dell appliance solution.Before you begin, for information about downloading the following required documents for the three hardware replacement tasks,see the Documentation matrix section in the Support Matrix. The documents are: Hardware Replacement Documentation Dell XC730xd Hyper-Converged Appliance Owner’s ManualAfter you review these documents, proceed to hardware replacement tasks.Replacing components with no cluster dataThe hardware you can replace that involve no cluster data includes: System memory Cooling fans Network Daughter Cards or Network Interface Cards PSUs1.In the Nutanix Hardware Replacement Guide, see the Failure of Components that do not Contain Cluster Data section and turnoff the node for the relevant hypervisor.2.In the Dell XC730xd Hyper-Converged Appliance Owner’s Manual, see the Installing and removing system components sectionand replace the failed component.3.See the Nutanix Hardware Replacement Documentation, see the Failure of Components that do not Contain Cluster Datasection, and then restart the node of the relevant hypervisor.Replacing failed front HDD and SSD components that contain clusterdataTo replace the failed front HDDs and SSDs that contain cluster data, do the following:1.In the Nutanix Hardware Replacement Documentation, see the Data Drive Failure section and identify the failed HDD or SSD.2.In the Dell XC730xd Hyper-Converged Appliance Owner’s Manual, see the Installing and removing system components, HDDs,Removing a hot-swap hard drive, and Installing a hot-swap HDD sections.NOTE: New HDDs and SSDs being installed must have any foreign RAID configuration removed before being addedto the system. Otherwise, they will not be recognized by the CVM.3.See the Nutanix Hardware Replacement Documentation again, see the Completing Data Drive Replacement section andcomplete the replacement of the failed HDD or SSD.19
10Recovering systemFor information about recovering your system, contact Dell Support.20
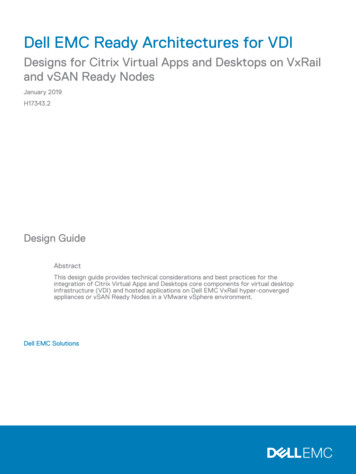
11Getting helpContacting DellDell provides several online and telephone-based support and service options. If you do not have an active internet connection, youcan find contact information on your purchase invoice, packing slip, bill, or Dell product catalog. Availability varies by country andproduct, and some services may not be available in your area. To contact Dell for sales, technical assistance, or customer-serviceissues:1.Go to Dell.com/support.2.Select your country from the drop-down menu on the bottom right corner of the page.3.For customized support:a. Enter your system Service Tag in the Enter your Service Tag field.b. Click Submit.The support page that lists the various support categories is displayed.4.For general support:a. Select your product category.b. Select your product segment.c. Select your product.The support page that lists the various support categories is displayed.5.For contact details of Dell Global Technical Support:a. Click Global Technical Support.b. The Technical Support page is displayed with details to call, chat, or e-mail the Dell Global Technical Support team.Dell SupportAssistFor an enhanced Support Experience, Dell recommends installing and configuring Dell SupportAssist.Dell SupportAssist is a software application that transparently collects information about your system and automatically createssupport cases when issues are detected. Dell SupportAssist helps Dell to provide you an enhanced, personalized, and efficientsupport experience. Dell uses the data to solve common problem, designs and markets the products.For more information about installing and configuring Dell SupportAssist, see: servers-storage-networking.Locating Service TagYour system is identified by a unique Express Service Code and Service Tag number. This information is used by Dell to route supportcalls to the appropriate service provider.21
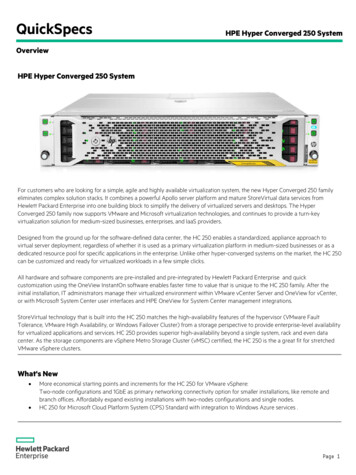
Figure 6. Locating service tagQuick Resource LocatorUse the Quick Resource Locator (QRL) to get immediate access to system information and how-to videos. This can be done byvisiting Dell.com/QRL or by using your smartphone or tablet and a model specific Quick Resource (QR) code located on your Dellsystem. To try out the QR code, scan the following image.Figure 7. Quick Resource Locator22
Dell provides a hyper-converged appliance solution that includes the Dell XC730xd server and software from Nutanix (used as a virtual appliance), which simplifies virtualization by converging computer, storage, and network into a single appliance that is deployed in a clustered environment. The following figures show the Dell XC730xd.