Transcription
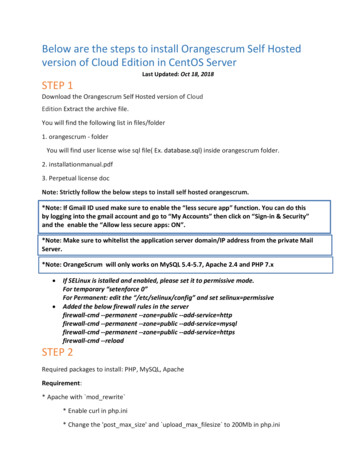
Below are the steps to install Orangescrum Self Hostedversion of Cloud Edition in CentOS ServerLast Updated: Oct 18, 2018STEP 1Download the Orangescrum Self Hosted version of CloudEdition Extract the archive file.You will find the following list in files/folder1. orangescrum - folderYou will find user license wise sql file( Ex. database.sql) inside orangescrum folder.2. installationmanual.pdf3. Perpetual license docNote: Strictly follow the below steps to install self hosted orangescrum.*Note: If Gmail ID used make sure to enable the “less secure app” function. You can do thisby logging into the gmail account and go to “My Accounts” then click on “Sign-in & Security”and the enable the “Allow less secure apps: ON”.*Note: Make sure to whitelist the application server domain/IP address from the private MailServer.*Note: OrangeScrum will only works on MySQL 5.4-5.7, Apache 2.4 and PHP 7.x If SELinux is istalled and enabled, please set it to permissive mode.For temporary “setenforce 0”For Permanent: edit the “/etc/selinux/config” and set selinux permissiveAdded the below firewall rules in the serverfirewall-cmd --permanent --zone public --add-service httpfirewall-cmd --permanent --zone public --add-service mysqlfirewall-cmd --permanent --zone public --add-service httpsfirewall-cmd --reloadSTEP 2Required packages to install: PHP, MySQL, ApacheRequirement:* Apache with mod rewrite * Enable curl in php.ini* Change the 'post max size' and upload max filesize to 200Mb in php.ini
* PHP 7.xRequired PHP Extensions: -cli
.2-soapphp7.2-zipphp7.2-dba* MySQL 5.5- 5.7* If STRICT mode is On, turn it Off.wkhtmltopdf installation Processyum -y groupinstall “Development Tools”yum -y install wgetyum install –y epel-releasewget s/download/0.12.5/wkhtmltox0.12.5-1.centos7.x86 64.rpmrpm -Uvh wkhtmltox-0.12.5-1.centos7.x86 64.rpmCheck version - wkhtmltopdf –VDefine the path for wkhtmltopdf in Constants.phpFor Ex. define('PDF LIB PATH', '/usr/local/bin/wkhtmltopdf');STEP 3 Extract the archive file. Upload folder (orangescrum) to your working directory (/var/www/html). Provide proper write permission to oranegscrum folder and their subfolders. Provide proper write permission to " app/tmp" folders and their sub folders Provide Proper ownership to oranegscrum folder and their sub folders.
chmod -R 0755 /var/www/html/orangescrumchmod -R 0777 app/tmpchown –R apache:apache /var/www/html/orangescrum
STEP 4Install the Apache Server:yum -y install httpdApache start in system boot time:Systemctl enable httpdStart Apache Service:/etc/init.d/httpd start Or service httpd startSTEP 5Install MySQL: (Login as root user)yum -y localinstall e-el7-9.noarch.rpmyum -y install mysql-community-serversystemctl enable mysqldservice mysqld restartThen we will setup the system startup links for MySQL (MySQL starts automaticallywhenever the system boots):chkconfig --levels 235 mysqld onStart the MySQL server:/etc/init.d/mysqld startSetup the MySQL root password:mysql secure installationNOTE:During password creation, MySQL will ask for root passwordRun the below command to get the temporary MySQL root passwordsudo grep "temporary password" /var/log/mysqld.logAfter putting the temporary password, you may ask to change the MySQL rootpassword.Password must be 8 characters including 1 uppercase letter, number, andspecial charactersNOTE: RUNNING ALL PARTS OF THIS SCRIPT IS RECOMMENDED FOR ALL MySQL SERVERS INPRODUCTION USE! PLEASE READ EACH STEP CAREFULLY!
In order to log into MySQL to secure it, we'll need the current password for the root user. Ifyou've just installed MySQL, and you haven't set the root password yet, the password willbe blank, so you should just press enter hereEnter current password for root (enter for none): OK, successfully used password, moving on.Setting the root password ensures that nobody can log into the MySQL root user withoutthe proper authorisation.Set root password? [Y/n] ENTERNew password: yourrootsqlpassword Re-enter new password: yourrootsqlpassword Password updated successfully!Reloading privilege tables. Success!By default, a MySQL installation has an anonymous user, allowing anyone to log into MySQLwithout having to have a user account created for them. This is intended only for testing, andto make the installation go a bit smoother. You should remove them before moving into aproduction environment.Remove anonymous users? [Y/n] ENTER. Success!
Normally, root should only be allowed to connect from 'localhost'. This ensures thatsomeone cannot guess at the root password from the network.Disallow root login remotely? [Y/n] ENTER. Success!By default, MySQL comes with a database named 'test' that anyone can access. This isalso intended only for testing, and should be removed before moving into a productionenvironment.Remove test database and access to it? [Y/n] ENTER- Dropping test database. Success!- Removing privileges on test database. Success!Reloading the privilege tables will ensure that all changes made so far will take effectimmediately.Reload privilege tables now? [Y/n] ENTER. Success!Cleaning up.All done! If you've completed all of the above steps, your MySQL installation should now besecure.Thanks for using MySQL!STEP 6Login To MySQL & Create Database named "orangescrum" (you can rename to any name)login to mysql:[root@server ]# mysql -u root -pEnter password:create the database:mysql create database orangescrum; (database name)verify that it's there:mysql show databases;create the user:mysql create user orangescrum; (database user name)Grant all privileges while assigning the password:mysql grant all on orangescrum.* to 'orangescrum'@'localhost' identified by 'your password';Exit from the database:mysql exit
Import database sql file:Navigate to /var/www/html/orangescrum directory by typingcd /var/www/html/ orangescrum[root@server ]# mysql -u orangescrum -p orangescrum database.sqlEnter password:Login to the database and check whether your tables are created or not:[root@server ]# mysql -u orangescrum -pEnter password:mysql show databasesif your database exist then trigger the below command:mysql use orangescrum;mysql show tables;mysql exitmysql exitManage MySQL Databases (Optional)Install phpMyAdmin(To access database Graphically)yum install phpmyadminTo access phpmyadmin in browserOpen the filevim /etc/httpd/conf.d/phpMyAdmin.confAnd addRequire all grantedin the below patterns. IfModule mod authz core.c # Apache 2.4 RequireAny Require ip127.0.0.1 Requireip ::1Require all granted /RequireAny /IfModule IfModule !mod authz core.c After that restart apache server.service httpd restart
Open Browser and access the phpmyadminhttp://IPADDRESS/phpmyadmin
STEP 7Install the PHP Packages: (Recommended Version PHP 72)yum -y install .rpmyum install yum-utils.noarch remi-release.noarchyum-config-manager --enable remi-php72yum -y install php php-cli.x86 64 php-common.x86 64 php-bcmath.x86 64 php-dba.x86 64php-embedded.x86 64 php-enchant.x86 64 php-fpm.x86 64 php-gd.x86 64 php-imap.x86 64php-intl.x86 64 php-ldap.x86 64 php-mbstring.x86 64 php-mcrypt.x86 64 php-mysql.x86 64php-pdo.x86 64 php-pecl-zip.x86 64 php-pecl-memcache.x86 64 php-pecl-imagick.x86 64php-soap.x86 64 php-tidy.x86 64 php-xml.x86 64 php-opcache.x86 64Restart the Apache service:/etc/init.d/httpd restartOrservice httpd restartSTEP 8Setup the database information in app/config/database.phpUpdate the database connection details. (host, login, password and database name).STEP 9Virtual Host setup in Apache conf file.vi /etc/httpd/conf/httpd.confAdd this below details to last line in httpd.conf file
VirtualHost *:80 ServerName localhost # eg: demo.orangescrum.comDocumentRoot /var/www/html/orangescrum / Directory /var/www/html/orangescrum / Options Indexes FollowSymLinks MultiViewsAllowOverride AllOrder allow,denyallow from all /Directory /VirtualHost Save the file and Restart the Apache service/etc/init.d/httpd restart / service httpd restartSTEP 10General Configuration management:MySQL: If STRICT mode is On, turn it Off.Disable Strict mode on mysql for Centos/Fedora :vim /etc/my.confsql mode NO ENGINE SUBSTITUTION,STRICT TRANS TABLEStosql mode ””sudo service mysql restartMake sure that, the .htaccess is working in your server.SMTP (IMPORTANT)Provide your valid Gmail ID and Password for SMTP email sending Or, you can use Sendgridor Mandrill in app/Config/Constants.php fileFROM EMAIL - this will be the default from email through out Orangescrum.FROM EMAIL EC All the task created/updated notification email will be sent from thisEmail ID.SUPPORT EMAIL All Other Emails and support related Emails will be sent from this Email ID.Please follow below steps to configure your SMTP:
Step 1:Go to the path in your application: app/Config/constants.phpStep 2:Set the following in Gmail SMTP:define(“SMTP HOST”, “ssl://smtp.gmail.com”);define(“SMTP PORT”, “465”);
define(“SMTP UNAME”, “youremail@gmail.com”);define(“SMTP PWORD”, “******”);Please provide your smtp username and password to configure your SMTP.If you are finding problem after setting the username and password, then please checkthe below:Go to your php.ini file and enable the “php openssl” in you PHP setting.You need to enable extension php openssl.dll on php.ini file. If you are still facing theproblem, then the port 465 is not available. Try with 587 port.Otherwise, please contact with your server administrator.Please run the following URL to check email is working or not:http://YOURDOMAINNAME/cron/test email/?to est email/?to emailId (if you are using localhost)http://127.0.0.1/orangescrum/cron/test email/?to emailId (if you are using IP)http://myprojects.orangescrum.com/cron/test email/?to emailId (if you are using anyvalid domain)If the email is not working, then please follow the installation guide again.Check Gmail security issues here. Please see below links, you have to changesome configuration at email 0255?hl ureappsAlso check app/tmp/logs/os-email.log file for any error.Check SMTP Port:If ports (465,587) are not enabled, then open it.Still mail functionality is not working then try with changing the ports to (465,587, 25)Add the hostname according to the mail server imap setting and Imap port. If ssl is enable thenadd no validate-cert parameter to the host name.Then Add HOST Name, User Name & PasswordTo Use Own Email Server:
For own Email server: Add HOST NAME, PORT, SMTP UNAME, SMTP PWORDin constant.php instead of gmailconfiguration.Incorrect authentication data error:Please double check the username and password.If both are correct then check the server configuration. It’s somehow blocking the serverto connect to the mail server. We cannot do anything to fix this.Also make sure you’re not using 2 step verification and less secure app setting is ON.FROM EMAIL EC All the task created/updated notification email will be sent from this Email ID.SUPPORT EMAIL All Other Emails and support related Emails will be sent from this Email ID.STEP 12Email Reply - Nohup Cron Job setup (Linux Server)Make sure to do the following changes on the Email server connection details inthe app/webroot/EmailReply.php file. username- This will be the FROM EMAIL EC Email set on your app/Config/constants.phpAll the task created/updated notification email will be sent from FROM EMAIL EC . Whensomebody will reply on that task created/updated notification email, the FROM EMAIL EC willget that Email in the inbox.EmailReply.phppage is going to read the emails from FROM EMAIL EC and It will post to themas a reply to the respective tasks in Orangescrum. password- Password of FROM EMAIL ECclient- Change it, if you are not using GmailAfter this setup, you can reply to a task created/updated notification email and that emailreply will be posted to Orangescrum under that Task. This will help you to respond to a taskwhile on the go from your Mobile.(Assuming your Application is in "/var/www/html/orangescrum/ ")Enable extension php imap in your php.ini fileCreate a orangescrum.sh file in your servervi orangescrum.sh (or, open that file to write the below code)#!/bin/bash while(true)
docd /var/www/html/orangescrum/app/webrootphp q EmailReply.php 1 &2sleep 1?doneGive the execute permission for orangescrum.sh: chmod x orangescrum.shStart the Nohup using the command: nohup sh orangescrum.sh customout.log &STEP 13Browse the Orangescrum website http://YourIpAddress or server IP address or domain name.Ex. http://localhost/orangescrumSTEP 14You will be asked to provide your Company Name, Email address and a Password to loginand start using Orangescrum.STEP 15Advanced SetupGoogle Signup, Google Login, Google ContactTo setup the Google Signup, Google Login, Google Contact, define the following details inthe app/Config/constants.php file##################### Google Keys (Login, Drive, T ID", "CLIENT ID NUM", "XXXXXXXXXXXX"); define("CLIENT SECRET","xXxXXxxxx xXxXXxxxx"); define("API KEY","xXxXXxxxxxXXXXXXXXXXXXXxXXxxxx"); define("REDIRECT URI",HTTP ROOT . "users/googleConnect");define("USE GOOGLE", 0); //Set this parameter to 1, to use Google Login, Drive and ContactsDropbox Setup##################### Dropbox Key ############################define("DROPBOX KEY", "xXxxXxxxXx");
define("USE DROPBOX", 0); //Set this parameter to 1, to use Dropbox file sharingAWS S3 Bucket Setupdefine('USE LOCAL', 1);##################### AWS S3 Bucket ############################define('USE S3', 0); //Set this parameter to 1 to use AWS S3 Bucket (“0” for local storage)define('BUCKET NAME', 'Bucket Name');define('DOWNLOAD BUCKET NAME', 'Download Bucket Name');define('awsAccessKey', 'XXXXXXXXXXXXXX');define('awsSecretKey', 'XXXX/XXXXXXXXXXXXXX/ XXXXXXXXXXXXXX');STEP 16For Installing Node.jsAdded the node repository:curl -sL https://rpm.nodesource.com/setup 8.x sudo bash Optional:curl /v0.33.11/install.sh bash Install nodejs:yum install nodejs Check the node and npm version:node -vnpm -v Install socket.io:npm install socket.io Install pm2 tools to run the notification.js file:npm install pm2 -g Go to the directory where the notification.js file is present and run thecommand:pm2 start notification.js Run the command to see the notification:pm2 list If you want to use http, then no need to change in the notification.js file. If you want to use https, then enable the ssl part and added the ssl detailslike below:var options {key: fs.readFileSync('/etc/ssl/certs/grantham.key'),
cert: fs.readFileSync('/etc/ssl/certs/grantham.crt'),ca: ')};var app require('https').createServer(options, handler);And disable the http part like below://var app require('http').createServer(handler); // For non-ssl server After that stop the pm2 tools with pid 0pm2 stop 0 At last start the pm2 tools with pid 0pm2 start 0Now node server is ready. You can test by checking the below URLhttp://your-domain:3002Ex. yorange.com:3002If output is "Welcome to socket.io." then node.js is working fine and you can usethat url in the constant.php as "NODE HOST"Note: you can find notification.js, node-js-installation-linux.pdf, node-jsinstallation-windows.pdf file in Orangescrum folder after install the In-App chat.STEP 17Profile Setting Go to Setting, click on My profile to set up your profile photo. Select Time zone for your account Click on Update to save the changesNotifications Setting Go to Settings Click on Notifications under Profile Setting
Select “Yes” to get notifications in your email inbox
Click on Email Reports from the Personal setting Select Yes to get Email ReportsCompany Setting Go to Setting Select My Company from the Company Settings Upload the company logo and click on Update to save changesFor Any Queries, Contact us: support@orangescrum.com
During password creation, MySQL will ask for root password Run the below command to get the temporary MySQL root password sudo grep "temporary password" /var/log/mysqld.log After putting the temporary password, you may ask to change the MySQL root password. Password must be 8 characters including 1 uppercase letter, number, and special characters


