Transcription
Skip to contentManuals User Manuals Simplified.Verbatim External Slimline CD DVD Writer Blu-ray UserManualHome » Verbatim » Verbatim External Slimline CD DVD Writer Blu-ray User Manual
Contents [ hide1 Verbatim External Slimline CD DVD Writer Bluray2 General information2.1 Hardware Requirements3 Precautionary measures4 Hardware Installation5 Driver Installation6 Installation of the application software7 Using the Drive7.1 How to Use the Discs7.2 Load the disc7.3 Disc ejection7.4 Emergency Eject8 Trouble shooting – General problems9 Warranty9.1 Your Guarantee9.2 Conditions9.3 Limited Warranty Terms (US)10 FCC Compliance10.1 WEEE Notice11 File Downloads12 References13 Related ManualsVerbatim External Slimline CD DVD Writer Blu-ray
General informationReliable performance of the Verbatim External Slimline CD/DVD Writer / External Slimline Blu-rayWriter cannot be guaranteed for configurations that do not meet the following requirements:Hardware RequirementsTo use the Verbatim External Slimline CD/DVD Writer / External Slimline Blu-ray Writer, you must have a computerwith the following minimum requirements:PC:Intel / AMD CPU 1.6 GHz or fasterAvailable USB-A / USB-C port (dependent on your model type)At least 2 GB of free hard disk space (10 GB recommended)Internet connection for online warranty registration, software updates and downloadsOperating systems: Windows 10, 8 and 7Mac:PowerPC G5 or Intel MacAvailable USB-A / USB-C port (dependent on your model type)Internet connection for online warranty registration, software updates and downloadsAt least 2 GB of free hard disk space (10 GB recommended)Operating system: Mac OS X 10.4.8 or higherMedia standards (External Slimline CD/DVD Writer)MDISC DVD R, DVD single/double layer, DVD-R, DVD R, DVD-RW, DVD RW, CD-DA, CDROM, CD-ROM XA, CDExtra, CD-I, Mixed-ModeCD, VideoCD, PhotoCD, CD TEXT, Bootable CD, Disc At Once, Session At Once, Track AtOnce, Multi-Session.USB 3.2 Gen 1 is backwards compatible with USB 2.0. To achieve optimal performance from the Verbatim ExternalSlimline CD/DVD Writer / External Slimline Blu-ray Writer your computer should be equipped with an USB 3.2 Gen 1port. For maximum performance of the Verbatim External Slimline CD/DVD Writer / External Slimline Blu-ray Writer,both computer system and software must support USB 3.2 Gen 1.Precautionary measuresTo ensure that your Verbatim External Slimline CD/DVD Writer / External Slimline Blu-ray Writer functions properly,please take note of the following precautions.If these are not followed, you may void your warranty and damage the drive.Safely remove the Verbatim External Slimline CD/DVD Writer / External Slimline Blu-ray Writer via youroperating system (the “unplug or eject hardware” option in the Windows taskbar) before disconnecting the cableor power cable and before switching off the device. Failing to do so may result in data loss.Do not drop the Verbatim External Slimline CD/DVD Writer / External Slimline Blu-ray Writer or expose it toother kinds of sudden mechanical shocks as this may result in data loss and damage to the drive.The device should not be operated in the vicinity of strong electromagnetic radiation sources (loudspeakers,mobile telephones etc.).Due to the high data transfer rates, the cable length should not exceed 1 m. Error-free transmission cannot beguaranteed for longer cables.Operate the Verbatim drive only in a horizontal position, to prevent damage to the media or mechanical parts.Operate the device only at temperatures ranging from 10 – 35 C.If the Verbatim External Slimline CD/DVD Writer / External Slimline Blu-ray Writer is moved from a coolenvironment to a warmer environment, please allow the drive to acclimatize to the ambient temperature beforeoperating the device. Failing to do so may lead to condensation within the drive enclosure, which in turn maycause the drive to malfunction.Do not place liquids or drinks on the Verbatim External Slimline CD/DVD Writer / External Slimline Blu-rayWriter. When liquids are spilled and get in contact with the electronics within the drive enclosure, it will damagethe drive and will cause the drive to malfunction.
Do not use the Verbatim External Slimline CD/ DVD Writer / External Slimline Blu-ray Writer in a dustyenvironment. Dust inside the enclosure may damage the internal electronics and result in drive malfunction.Opening the Verbatim External Slimline CD/ DVD Writer / External Slimline Blu-ray Writer will void the warranty.Maximum recording speed of Blu-ray discs is limited by the device interface. Through USB 2.0, maximumrecording speed for Blu-ray discs is 6x.Since USB 3.2 Gen 1 is backwards compatible with USB 2.0, the Verbatim External Slimline CD/DVD Writer /External Slimline Blu-ray Writer can be connected to all USB ports. When connected to a USB 2.0 port,however, the performance (data transfer rate) of the drive will be much lower than when the drive is connectedto a USB 3.2 Gen 1 port.Hardware InstallationExternal Slimline CD/DVD WriterConnect the USB cable to the interface port of your computer. For most computers, power through the data transferport alone will be sufficient.Connect the USB interface cable to the Verbatim External Slimline CD/DVD Writer.External Slimline Blu-ray Writer
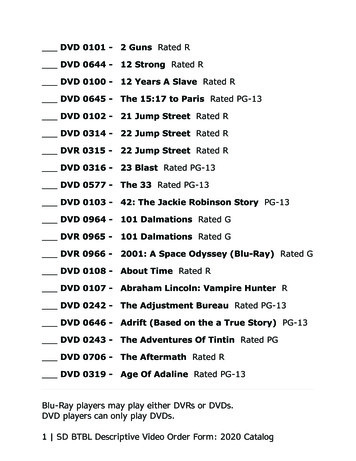
Connect the USB cable to the interface port of your computer.USB – power (optional)USB – data transferIf the USB bus on your computer does not provide enough power to run the drive, connect the USB power cable.Connect power (1) before connecting data transfer (2).Connect the USB interface cable to the Verbatim External Slimline Blu-ray Writer.External Slimline CD / DVD Writer USB-C , External Slimline Blu-ray Writer USB-C and External SlimlineBlu-ray Writer Ultra HD 4K USB-C
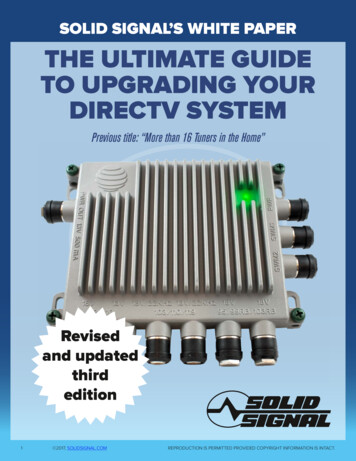
Connect the USB cable to the port of your PC.Connect the USB interface cable to the device.Driver InstallationUnder Windows 10, 8, 7 and Mac OS X a separate driver is not required. The drivers will be installed automaticallyby the operating system after plugging in the Verbatim External Slimline CD/DVD Writer / External Slimline Blu-rayWriter into the USB port of your computer.Allocation of the drive letter to the Verbatim drive (PC)After successfully completing the installation of the Verbatim drive a new drive letter is assigned automatically. Thiscan shift the drive letter of an internal drive (for example, ‘D’ to ‘E’). If this leads to problems, it is possible to changethe drive letter assignment as follows:1. Click on the “Start”/”Windows” button.2. Right-click on “Computer” and select “Manage” – “Disk Management”.3. Right-click on the drive whose drive letter is going to be changed and select “Change drive letter and path ”.
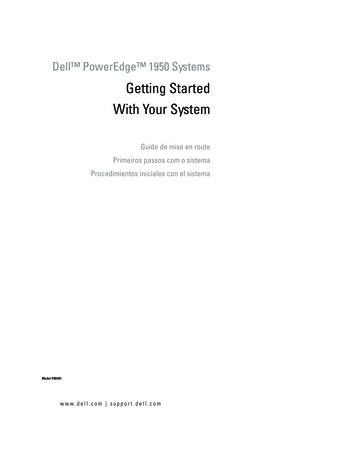
4. In the next window, click “Change” and select a drive letter in “Assign the following drive letter ”.5. Confirm the change by clicking on “OK”.Installation of the application softwareSoftware Installation PC (Windows only)To record blank media, you must first install the Recording Software.We recommend using the software which has been provided with your drive.1. To install the application software, insert the “Application and Manuals” DVD.2. Click on “StartPC.exe” in the main directory of the DVD. The Verbatim start menu opens.For illustration purposes only.Screen grabs will differ dependent on your model type.3. Click on “Software” button.4. The installation starts now. Follow the instructions on the screen, confirm with “Next” in order to continue withthe installation.Using the DriveHow to Use the DiscsATTENTION:When using CD-ROM, CD-R, CD-RW, DVD R/RW or Blu-ray discs, do not attach any stickers or labels to the discs.Using discs with labels attached not only causes read and write errors, but data on the disc may be lost due todamage to the disc itself.Load the disc1. Press the eject button.2. Place the disc on the disc tray.NOTE: When using a 8 cm CD/DVD, place it in the small round depression.The recording side of the disc should be down. Never place two discs in the tray at the same time. Be carefulnot to touch the recording surface of the disc.3. Load the disc by pressing the eject button or by lightly pushing in the disc tray.Disc ejection1. Press the eject button.2. Slowly take the disc out of the disc tray.3. Press the eject button or push the disc tray and the tray will be brought back into the drive.After ejecting the disc, return the tray inside the unit quickly. When the tray is in the ejected position, dust and otherdebris could enter, possibly causing read errors, write errors, or drive failure.
Special Instructions before Writing a CD / DVD / BD (Blu-ray discs only Verbatim External Blu-ray Writer)You should realize that writing CD/DVDs/BDs is principally a sensitive data transmission procedure which canbe disrupted by even the smallest mechanical disturbance.Never clean the Verbatim External Slimline CD/DVD Writer / External Slimline Blu-ray Writer with acommercially available CD or a CD-ROM cleaning set. This can damage the drive.Recordable and Rewritable CD/DVDs/BDs (blanks) are more sensitive than commercially availableCD/DVDs/BDs. Use only a solvent-free, non-abrasive marker when writing on a CD/DVD/BD.Do not stick any labels on the CDs/DVDs/BDs.The drive recognizes the medium as soon as it is placed into the drive. CD-R media are compatible with thevast majority of CD-ROM drives and CD audio players and work in most DVD-ROM drives. DVDs and Blu-rayscreated on this DVD / Blu-ray Writer can be viewed on nearly all DVD / Blu-ray players and DVD-ROM drives.Emergency EjectThis drive has a function that allows the CD/DVD/BD to be ejected manually if this becomes necessary in anemergency such as failure of the drive or a power outage. Follow the following procedures in such a case. Don’t usethis feature except in an emergency.1. Turn the power to OFF.2. Insert a fine tipped object into the small hole above the eject button. The front door pops open and the disk traycomes partway out.3. Pull the front door to open it all the way, then grip the disc tray between thumb and forefinger and gently pull itstraight out. This feature is a last measure to be used only in an emergency.Using it excessively will cause malfunction.Trouble shooting – General problemsIf you still have problems getting your Verbatim drive to function properly despite having installed it correctly, thenplease check the following items:Hardware requirementsDoes your system meet the hardware requirements (see page 4)?Connecting the Verbatim deviceIs the cable connected correctly to your computer and the Verbatim device? Check whether the cable is pluggedin correctly. The cable must be firmly in place!Does the device have a power supply? Determine if the media can be ejected and if the device is getting powerwhen the system boots.Recording speed (BD)The Verbatim External Slimline Blu-ray Writer is USB 3.2 Gen 1 compliant. While USB 3.2 Gen 1 supports recordingspeeds higher than 6x, if this drive is connected to a USB 2.0 port the maximum CD recording speed is 6x.WarrantyWe thank you for purchasing this Verbatim product and hope you will enjoy using it.In order to avoid unnecessary inconvenience on your part, we suggest reading the quick install guide, instructionmanual and any additional electronic and or printed manuals. When problems occur we have a database withFrequently Asked Questions (FAQ) on our Verbatim website www. verbatim.com , please check this site beforeyou contact the helpdesk.Your GuaranteeAll Verbatim products come with unlimited technical phone and web support. By this Guarantee, Verbatim warrantstheir products to be free from defects in material and workmanship for a period listed below from the date of itsoriginal purchase. If during this period of guarantee the product proves defective due to improper materials orworkmanship, Verbatim will, without charge for labour or parts, at its sole discretion, repair or replace the product orits defective parts upon the terms and conditions set out below.
ConditionsThis guarantee will be granted only when the original invoice or sales receipt (indicating the date of purchase, productand serial number) is presented together with the defective product and a Verbatim RMA number received from theVerbatim Website or given by a Verbatim Service Center. Verbatim reserves the right to refuse the free-of-chargeguarantee services when the date of purchase of the product cannot be proven. This guarantee will not apply if theRMA number is missing, the serial number on the product has been altered, removed or made illegible. Thisguarantee covers only the hardware components packaged with the product. This guarantee covers none of thefollowing: (a) any consumable supplied with the product, such as media or batteries; (b) damage to or loss of anysoftware programs, data or removable storage media; (c) any damage resulting from adaptations, changes oradjustments, which may have been made to the product, without the prior written consent of Verbatim; (d) attemptedrepair by any party other than authorized by Verbatim and (e) accidents, lightning, water, fire or any other such causebeyond the reasonable control of Verbatim.With respect to all services provided, Verbatim is not responsible for any damage to or loss of any programs, data orother information stored on any media or any part of any product serviced. Verbatim is not liable for the consequenceof business loss in case of system failure. Be sure to exclude all parts not covered by this guarantee prior to returningthe product to Verbatim. Verbatim is not liable for any loss or damage to these items. If during the repair of theproduct the contents of the hard drive are altered, deleted or in any way modified, Verbatim is not liable whatsoever.Repair parts and replacement products will be provided on an exchange basis and will be either new, equivalent tonew or reconditioned. All replaced parts and products become the property of Verbatim. The period of guarantee forany product or part repaired or replaced in warranty shall be the balance of the original guarantee. Repairs orreplacements on product or parts out of warranty carry 6 (six) months guarantee.Limited Warranty Terms (US)The Verbatim Americas LLC warranty obligations for this hardware product are limited to the terms set forth below:Verbatim warrants its products to be free of defects in material and workmanship under normal use and service for aperiod of 2 years from the date of purchase. Verbatim’s sole obligation with respect to claims of non-conformancemade within the warranty period described above shall be, at its option, to repair or replace any item of Equipmentthat Verbatim, in its sole discretion, determines to be defective, subject to the procedure set forth below. Verbatim’swarranty obligations hereunder are expressly conditioned upon (i.) the Products being properly installed, used andmaintained at all times by Customer; (ii.) the Products not being subject to unusual mechanical stress or unusualelectrical or environmental conditions or other acts of God; (iii.) the Products not being subjected to misuse, accidentor any unauthorized installation/deinstallation by Customer or other third party; (iv.) the Products not being altered ormodified in an unauthorized manner, unless approved in writing or otherwise performed by Verbatim and (v.)Customer promptly installing all Product revisions that have been released for such Products by Verbatim throughoutthe warranty term. Verbatim does not warrant that the Products will operate in any specific combination that may beselected for use by Customer or that the operation of the Products will be uninterrupted or error free, or that allnonconformance or defects will be remedied. Additionally, Verbatim shall have no warranty obligationsfor any failure of the Products to conform to the applicable product specifications resulting from the combination ofany Product(s) with hardware and/or software not supplied by Verbatim. If it is determined that any Product(s)reported as defective or non-conforming by Customer during the warranty period is not defective or non-conforming,Verbatim may, at its option, charge Customer for any labor provided and expenses incurred by Verbatim inconnection with such determination, at Verbatim’s then current rates.Verbatim is not liable for any damage to or loss of any programs, data, or other information stored on any mediacontained within the Verbatim hardware product, or any non- Verbatim product or part not covered by this warranty.Recovery or reinstallation of programs, data or other information is not covered under this Limited Warranty.Verbatim shall not be responsible for unauthorized sale or misrepresentation by unauthorized third party resellers.Verbatim warranties are not transferable with ownership. Products purchased by auction, yard sale, flea market orpurchased as demo units may not be covered under Verbatim’s warranty.THE WARRANTIES OF VERBATIM AND REMEDIES OF CUSTOMER SET FORTH IN THIS SECTION AREEXCLUSIVE AND ARE GIVEN BY VERBATIM AND ACCEPTED BY CUSTOMER IN LIEU OF ANY AND ALLOTHER WARRANTIES, WHETHER EXPRESSED OR IMPLIED, INCLUDING WITHOUT LIMITATION, ALLWARRANTIES OF MERCHANTABILITY AND FITNESS FOR A PARTICULAR PURPOSE, ALL SUCH OTHERWARRANTIES BEING HEREBY EXPRESSLY AND UNEQUIVOCALLY DISCLAIMED BY VERBATIM AND
WAIVED BY CUSTOMER TO THE EXTENT ALLOWED BY LAW (AND TO THE EXTENT NOT WAIVABLE BYLAW, ARE LIMITED TO THE TERM OF THE EXPRESS WARRANTY SET FORTH HEREIN).FCC ComplianceThis equipment has been tested and found to comply with the limits for a Class B digital device, pursuant to Part 15of the FCC Rules. These limits are designed to provide reasonable protection against harmful interference in aresidential installation. This equipment generates, uses and can radiate radio frequency energy and, if not installedand used in accordance with the instructions, may cause harmful interference to radio communications. However,there is no guarantee that interference will not occur in a particular installation. If this equipment does cause harmfulinterference to radio or television reception, which can be determined by turning the equipment off and on, the user isencouraged to try to correct the interference by one or more of the following measures:Reorient or relocate the receiving antenna.Increase the separation between the equipment and receiver.Connect the equipment into an outlet on a circuit different from that to which the receiver is connected.Consult the dealer or an experienced radio/TV technician for help.WEEE NoticeThe Directive on Waste Electrical and Electronic Equipment (WEEE), which entered into force as European law on13th February 2003, resulted in a major change in the treatment of electrical equipment at end-of-life.The WEEE logo (shown at the left) on the product or on its box indicates that this product must not be disposed of ordumped with your other household waste. For more information about electronic and electrical waste equipmentdisposal, recovery, and collection points, please contact your local municipal household waste disposal service orshop from where you purchased the equipment.File DownloadsUser ManualDownload [optimized]External Slimline CD DVD Writer Blu-ray DownloadReferencesSupport Center Verbatim: Digital Media Storage Solutions, USB Flash Drives, External Hard Drives,SD Memory CardsWelcome to Verbatim: Removable External Storage Drives - Digital Memory Cards, Blu ray, CD &DVD MediaUSB-C TrademarkRelated Manuals1. LG Streaming Blu-ray Disc DVD Player User Manual LG Streaming Blu-ray Disc DVD Player User Manual To view.2. INSIGNIA NS-LBD32X-10A Insignia 32″ LCD TV/ Blu-ray DVD Combo, 1080p User Guide INSIGNIA NSLBD32X-10A Insignia 32″ LCD TV/ Blu-ray DVD Combo, 1080p.3. Panasonic Blu-ray Disc Player Owner’s Manual Panasonic Blu-ray Disc Player Thank you for purchasing this product.
4. BLAUPUNKT 2.0CH Blu-Ray Playe Instruction Manual BLAUPUNKT BP200BR Instruction Manual 2.0CH Blu-RayPlayer General Safety Read.5. LG Ultra HD Blu-ray Disc Player Owner’s Manual LG Ultra HD Blu-ray Disc Player Owner’s Manual – Download.6. Verbatim VAPBT064 True Wireless Earbuds User Manual User Manual Verbatim VAPBT064 True Wireless EarbudsIntroduction: Thank.
To record blank media, you must first install the Recording Software. We recommend using the software which has been provided with your drive. 1. To install the application software, insert the "Application and Manuals" DVD. 2. Click on "StartPC.exe" in the main directory of the DVD. The Verbatim start menu opens. For illustration .