Transcription
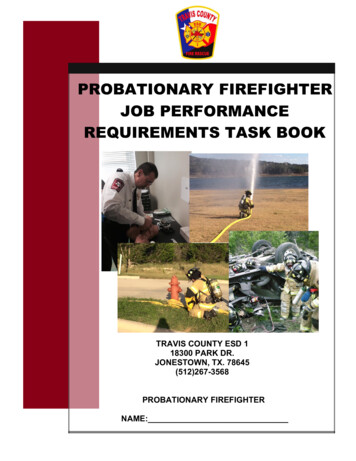
PROBATIONARY FIREFIGHTERJOB PERFORMANCEREQUIREMENTS TASK BOOKTRAVIS COUNTY ESD 118300 PARK DR.JONESTOWN, TX. 78645(512)267-3568PROBATIONARY FIREFIGHTERNAME:
Job Performance Requirement Task Books (Task Book) have beendeveloped for various training levels within Travis County ESD 1.Each Task Book lists the job performance requirements (JPRs) forthe specific task in a format that allows a candidate to be trainedand evaluated. Successful performance of all tasks, as observed andrecorded by a qualified and approved evaluator, will result in thecandidate’seligibilityfor completing the probation period.To complete the probation period, the candidate must successfullycomplete the job performance requirements in sequence. Before a jobperformance evaluation can be taken, all requisite knowledge and skillsmust be satisfied. In addition, all relative task book evaluations must bechecked off by the evaluator. It is the responsibility of the candidate, thatthe task book be completed during the timeframe allowedThese JPRs serve as general guidelines. As such they are not intended toreplace specific sequences of apparatus or equipment operation that maybe outlined by manufacturer specifications. At all times, standardoperating procedures will govern. The department, should have availablefor evaluators, a copy of manufacturer specifications and thedepartment’s standard operational guidelines.The JPRs covered in this Task Book meet or exceed all NFPA publishedstandards for this certification level at the time of this publication. Mentionof NFPA and its standards do not, and are not intended as adoption of—orreference to—NFPA standards.HOW TO EVALUATE PERFORMANCE:Each JPR has a corresponding box to the right in which to confirm acandidate’s success in a task. The evaluator shall indicate successfulpassing by the candidate of each JPR by initialing and dating within thebox next to the task. The evaluator shall not check a task complete unlessthe evaluator is confident the candidate is competent in, and understands thetask fully.
All evaluators that are tasked with checking off the candidate's task book mustwrite their "Name", "Initials" and "Rank" on the evaluator's log to identify theevaluator that evaluated the candidate for a given task. Failure to fill out the logwill result in a "Task not Complete" for the candidate.EVALUATOR'S LOGEvaluators NameInitialsRank
Probationary Firefighter OverviewMODULECURRICULUM TOPICSSCHEDULE1Apparatus, PPE, SCBA, Water Supplies, FF Toolsand Equipment, NIMSMonth 12Hose, Fire Streams, NIMSMonth 23Ladders, Ventilation , NIMS,Month 34FF Safety, Search and Rescue, NIMS,Month 45Ropes, Wildland, NIMSMonth 56Communications, Forcible Entry, Water Rescue,Month 6
Testable skillsModule1234Skill SCBA/PPE #1: Don Structural Firefighting PPE including SCBA Water Supplies #3: Flush a Hydrant and Connect a 5” Hose Hose #1: Deploy a Rackline and Prepare for Fire Attack Hose #2: Deploy the a Bundle and Prepare for Fire Attack Hose #6: Deploy a 3” Supply Hose for a Bundle Fire Attack Ladders #6: One Firefighter 24-Foot Extension Ladder Carry and Raise Ladders #7: Two Firefighters 35-Foot Extension Ladder Carry and Raise Ventilation #2: Positive Pressure Fire Attack/Outside Team Member Safety #3: Unconscious Firefighter SCBA Harness Drag (1FF) Safety #4: RIC Search and Rescue Rescue #4: Remove an Unconscious Victim (1FF)5No skills testing6No skills testing
“Module 1”(Tabbed divider location)
MODULE 1 CHECKLISTPROBATIONARY FIREFIGHTER SKILL OBJECTIVESAPPARATUSTCESD 1ObjectiveReferenceTraining Session1-1Perform the Function of a Back-UpGuide1-2a1-2bComplete TCESD 1 ApparatusFamiliarization1-3aOperate a Portable Radio1-3bCommunicate using an TCESD 1 Radio1-4aObtain TCESD 1 Knox Box Key andOpen a Knox Box1-4bObtain TCESD 1 Knox Box Key andOperate a Security GateDateOfficer’s InitialsDateOfficer’s InitialsDateOfficer’s InitialsPPETCESD 1ObjectiveReferenceTraining Session1-5a1-5bPPE Required by TCESD 1 Policy DonTCESD 1 PPE (TCESD 1 SCBA/PPE #1PFF Final Skill)1-6aPerform an Inspection of TCESD 1 PPE1-6bPerform a Cleaning of TCESD 1 PPESCBATCESD 1ObjectiveReferenceTraining Session1-7aPerform an TCESD 1 SCBA Inspection1-7bEnter an SCBA Inspection into FireRMS
MODULE 1 CHECKLISTPROBATIONARY FIREFIGHTER SKILL OBJECTIVESFIREFIGHTER TOOLS & EQUIPMENTTCESD 1ObjectiveReferenceTraining Session1-9aPerform TCESD 1 Rescue ToolMaintenance1-9bPerform TCESD 1 PositivePressure Fan Maintenance1-9c1-9dPerform TCESD 1 Chainsaw and RotarySaw MaintenanceDateOfficer’s InitialsWATER SUPPLYTCESD 1ObjectiveReferenceTraining Session1-10aFlush a Fire Hydrant1-10bConnecting 5” to a Hydrant for aForward Lay(TCESD 1 Water Supplies #3 – PFFFinal Skill)DateOfficer’s InitialsNIMSTraining SessionComplete NIMS 100.bDateOfficer’s Initials
APPARATUS1-1MODULE 1 LESSON NOTESPerform the Function of a Back-Up Guide (Equipment Location)1. TCESD 1 support vehicles (sedans, SUVs, pickups, and small vans) may be backed without a back upguide as long as the driver makes a thorough check around and behind the vehicle prior to backing.2. If TCESD 1 support vehicles are on scene and there are obstructions or reduced visibility, the vehicleoperator shall have a back up guide.3. TCESD 1's goal is “zero contact with other objects”.4. All large apparatus shall use a back up guide at all times for backing, and spotters shall be used for closeclearance maneuvering.5. TCESD 1 apparatus, large vans and specialized vehicles shall utilize the following procedure when backing:a. After the vehicle has come to a complete stop, the backing guide(s) may exit.b. When on a public street, the backing guide(s) shall wear a reflective vest.c. During low visibility, a hand light should be carried but not shined at the vehicle mirrors or into the eyes ofmotorists.d. Fire personnel shall utilize hand signals when backing an apparatus.e. Backing directives will be given using hand signals.f. Backing guides will give an approx. distance with their hands and the "STOP” hand sign as theapparatus approaches an obstacle so that the driver can better estimate its proximity and rate ofclosure.g. Before getting into position, the backing guide should survey the top and right sides of the vehicle,confirming that there are no overhead obstacles in the planned path nor protruding items in the hose bed,and that all doors and hatches on the officer side are securely closed.h. The primary backing guide should be positioned at the driver’s side rear of the vehicle. (This backingguide should be visible in the side view mirror.)i. At any time during back-up, should the driver lose site of the backing guide or is clearly not aware of theirlocation, the vehicle shall come to an immediate stop.j. If more than one backup guide is being used, the driver should receive hand signals from only onebacking guide.k. At night, the spotlights or rear scene lights should illuminate the area behind the vehicle.l. The driver shall leave the transmission in neutral and the parking brake engaged or their foot on the brakeuntil the backing guide(s) is in position and gives the directive to back up.m. The driver must confirm that all doors and hatches on the right side are closed.n. Directives will be by hand signal for those vehicles not equipped with a headset communication jack atthe rear.o. Personnel may utilize the radio system on Direct 16 for voice communication.p. Use hand signals as follows:i. Straight back: one arm extended above the head with the palm of the hand towards the face,waving backii. Turn: both arms pointing the same direction with index fingers extended (point in the direction therear of the apparatus needs to go)iii. Stop: both arms extended above the head with palms open towards the driverq. The backing guide(s) will continuously check the clearance above, below and on each side of theapparatus.r. It is the responsibility of the Company Officer to make sure enough guides are deployed for safemovement.Additional References:TCESD 1 Standard Operating Guideline F1-Driving Policy
MODULE 1 LESSON NOTESAPPARATUS1-2aComplete TCESD 1 ApparatusFamiliarization (Equipment Location)1. Know the location of all equipment on the apparatus to which you are assigned.2. Know the proper names of all of the equipment/tools on the apparatus to which you are assigned.3. Be able to go directly to the correct compartment for any piece of equipment needed.Additional References:TCESD 1 Standard Operating Guideline B5-Apparatus InspectionAPPARATUS1-2bComplete TCESD 1 ApparatusFamiliarization (Equipment Operation)1. Know how to properly operate all equipment on the apparatus to which you are assigned. (This doesnot include the aerial device, or the fire pump.)2. Know any safety concerns with the operation of each piece of equipment.3. Be able to operate any piece of equipment for a task assigned by officer.APPARATUS1-3aOperate a Portable Radio1. Know how to transmit/receive messages2. Know to wait for the “Talk Permit” tones to clear before speaking3. Know radio features Emergency ID with 10 second open microphone feature PTT button Channel and Zone Navigation Audible cues such as “Talk Permit”, “Power up” and “Low Battery” Collar mikeAdditional References:TCESD 1 Standard Operating Guideline B4-Emergency Responce and Radio Procedures
MODULE 1 LESSON NOTESAPPARATUS1-3bCommunicate Using an TCESD 1 Radio1.2. Know that TCESD 1 radio communications shall utilize "plain English" onlyKnow that radio communications with personnel from a particular apparatus shall be as followsCommunications directed to the officer shall be the apparatus number of the unit the officer is assignedto (e.g., "Engine 102") Communications directed to the driver/operator shall be the apparatus number "driver" (e.g., "Engine102 driver") Communications directed to the firefighter shall be the apparatus number "firefighter" the task orarea assigned, if the task or area is appropriate to distinguish between firefighters (e.g., "Engine102 firefighter" or "Engine 102 firefighter at the hydrant")3.Know the National Fire Academy six-step communication model Step One: Sender formulates idea to be sent Step Two: Sender sends message Step Three: Message is sent Step Four: Receiver receives message Step Five: Receiver interprets message Step Six: Receiver sends back feedback, becomes a sender4.Know TCESD 1 radio terminologyAdditional References:TCESD 1 Standard Operating Guideline B4-Emergency Responce and Radio Procedures
MODULE 1 LESSON NOTESAPPARATUS1-4aObtain an TCESD 1 Knox Box Key and Open a Knox Box1. TCESD 1 Operations Units are equipped with Key Secure Knox master key retention boxes.2. Key Secure devices are accessed by entering individual PIN number on the devices keypad3. Procedure for obtaining Knox Box Master Key from a Key Secure PIN controlled device: To release the Knox Master Key make sure the vehicle’s master battery switch is in the onposition. The keypad on the Key Secure box will be back lit, the Status LED will be green, and the keywill be locked. Enter your 4 digit PIN followed by the pound symbol (#). The amber keypad back light shouldblink as you press each number. If at any time you make a mistake entering your PIN just press the pound symbol and startagain. If you enter an incorrect PIN the yellow Program LED will blink. Reenter your PINfollowed by the pound symbol. When your PIN is entered correctly you will hear a click, the Green Status LED will change toRed, and the key will be unlocked. Turn the key to the left and pull it out. You have 5 seconds to retrieve the key before the boxlocks again. The blue light on top of the box will flash whenever the key is unsecured. To secure the Knox Master Key reinsert the key and turn it to the right until it clicks. The RedLED will change to green and the blue light will stop flashing.4. Procedure for Opening a Knox Box: Locate building’s Knox Box Insert master key into Knox Box keyhole Turn keyhole to open Knox Box and obtain building keys Return master key to Key Secure Knox box when finishedAdditional References:TCESD 1 Standard Operating Guideline B9 Knox Box
MODULE 1 LESSON NOTESAPPARATUS1-4bObtain an TCESD 1 Knox Box Key and Operate a Security Gate1. TCESD 1 Operations Units are equipped with Key Secure Knox master key retention boxes.2. Key Secure devices are accessed by entering individual PIN number on the devices keypad3. Procedure for obtaining Knox Box Master Key from a Key Secure PIN controlled device: To release the Knox Master Key make sure the vehicle’s master battery switch is in the onposition. The keypad on the Key Secure box will be back lit, the Status LED will be green, and the keywill be locked. Enter your 4 digit PIN followed by the pound symbol (#). The amber keypad back light shouldblink as you press each number. If at any time you make a mistake entering your PIN just press the pound symbol and startagain. If you enter an incorrect PIN the yellow Program LED will blink. Reenter your PINfollowed by the pound symbol. When your PIN is entered correctly you will hear a click, the Green Status LED will change toRed, and the key will be unlocked. Turn the key to the left and pull it out. You have 5 seconds to retrieve the key before the boxlocks again. The blue light on top of the box will flash whenever the key is unsecured. To secure the Knox Master Key reinsert the key and turn it to the right until it clicks. The RedLED will change to green and the blue light will stop flashing.4. Procedure for opening a security gate with a Key Secure Knox master key. Find Knox Box for security gate by looking at the keypad, security gateposts, or other area Insert Knox Box master key in keyhole and turn clockwise to open gate. This position is theemergency use position and will leave the gate open. It may or may not be marked To keep gate in the open position, remove key from keyhole. The gate should be left in the open position for all emergencies that have multiple TCESD 1units responding, especially structure fires. To allow gate to return to closed position normally, turn the master key back to the original position.This is the normal use position and may or may not be marked. After the incident, if gate was left in the open position, use key to return gate to normal operationbefore leaving scene Return master key to retention device.Additional References:TCESD 1 Standard Operating Guideline B9 Knox Box
MODULE 1 LESSON NOTESPPE1-5aPPE Required by TCESD 1 Policy1. TCESD 1 full protective clothing for structural fires TCESD 1 issued Helmet TCESD 1 issued Turnout coat TCESD 1 issued Turnout pants with suspenders or belt TCESD 1 issued Boots TCESD 1 issued Firefighting gloves TCESD 1 issued hood2. TCESD 1 full protective clothing for wildland fires Head/Neck – TCESD 1 issued hood with standard firefighting helmet, OR wildland helmet with earand neck guard and goggles Upper Body – TCESD 1 issued Turnout coat or Wildland coat Lower Body-TCESD 1 issued Nomex uniform pants, turnout pants, or wildland pants Feet – Rubberized firefighting boots, leather lace-up boots (provided by the firefighter after approvalby the Safety Officer per NFPA 1977-Specifications for Wildland Firefighting) Hands – Leather firefighting gloves3. TCESD 1 full protective clothing for medical calls Full protective clothing includes, at a minimum, exam gloves Depending on circumstances and the patient’s signs and symptoms, full protective clothing mayalso include breathing, eye and splash protection4. Circumstances where a reduction in turnout clothing is allowed on the fireground Only authorized by Command or the Safety Officer5. For Vehicle Rescue alarms full protective clothing will be worn with either firefighting gloves orapproved personal extrication gloves.6. Protective clothing is required when operating at an incident on or near a public roadway (i.e. providingmedical care at a traffic collision, absorbing and picking up fluid spills, etc.). Reflective traffic vests should be worn when turnout clothing is not being utilizedAdditional References:TCESD 1 Standard Operating Guideline B3 - PPE
MODULE 1 LESSON NOTESPPE1-5bDon TCESD 1 PPE(TCESD 1 SCBA/PPE #1 – PFF Final Skill)1. Following TCESD 1 protective clothing policy, member can be fully outfitted with PPE, includingSCBA, within 1:55. (one minute and fifty-five seconds)2. TURNOUT PANTS Removes safety shoes Steps into turnout pants one foot at a time Pulls pants up by the waistband (not suspenders) Zips pants and secures Velcro3. TURNOUT COAT Dons turnout coat Dons protective hood Zips coat and secures Velcro Turns up and secures collar4. SCBA Checks cylinder gauge, verbally states P.S.I. Properly dons SCBA using the coat or overhead method Fastens and adjust straps Turns the cylinder valve on fully and listens for alarm Dons and secures face piece Checks face piece for proper seal Pulls protective hood over face piece webbing Breathes air from SCBA5. HELMET AND GLOVES Dons helmet with earflaps down (adjusts chinstrap) Dons gloves Protective ensemble is properly donned, no skin exposedAdditional References:TCESD 1 Standard Operating Guideline B3 - PPEEssentials of Firefighting 5th Edition, IFSTA p. 167-176, 200-204
TRAVIS COUNTY ESD 1Performance StandardsSCBA/PPE #1Don TCESD 1Firefighting PPENFPA 1001 5.1.2, 5.3.1TCESD 1 SOG B3-PPEOBJECTIVEThe firefighter trainee, given the necessary equipment, will demonstrate the proper method ofdonning TCESD 1 firefighting personal protective equipment (PPE), including SCBA. Thetrainee shall verbalize to the instructor each step identified in italic print. An acceptableperformance is within 1:55.INSTRUCTIONS TO BE READ BY THE EVALUATOR TO THE FF TRAINEEYou will be given a complete set of protective clothing (turnout coat, turnout pants, hood,gloves, helmet, boots, and SCBA). An acceptable performance is within 1:55. The skill willbegin when you state you are ready and on my instruction to start. The skill will end when youstate to me that you have completed all of the identified steps. Do you understand theseinstructions?EXAMINER’S NOTE1. The firefighter trainee will not be allowed to review the performance steps at the time oftesting.2. Examiner must check to ensure cylinder valve is completely open.PREPARATION & EQUIPMENTTurnout coatTurnout pantsHoodGlovesHelmetBootsSCBA with face pieceCONDITIONSThe firefighter trainee shall accomplish the skill "to a degree that would be required in anemergency situation".REFERENCESIFSTA, Essentials of Fire Fighting, 5th Edition, pages 167-176, 200-204TCESD 1-PFF ProgramRev. 3/18/2016
TRAVIS COUNTY ESD 1Performance StandardsSCBA/PPE #1 DonTCESD 1 Firefighting PPEFirefighter Trainee:EmpID#Evaluator:Date:Notes:(No partial points given)If the firefighter trainee:TURNOUT PANTSa. Removes safety shoes1.0b. Steps into turnout pants one foot at a time1.0c. Pulls pants up by the waistband (not suspenders)1.0d. /Zips/velcro's/buckles pants1.0e. Secures Velcro (including back support and/or metal fastener if equipped.1.0TURNOUT COATa. Dons turnout coat1.0b. Dons protective hood1.0c. Zips coat1.0d. Secures Velcro1.0e. Turns up and secures collar1.0SCBAa. Checks cylinder gauge, verbally states P.S.I.P/F b. Properly dons SCBA using the coat or overhead method1.0c. Fastens and adjust straps1.0d. Turns the cylinder valve on fully and listens for alarmP/F e. Dons and secures facepiece1.0f. Checks face piece for proper seal1.0g. Pulls protective hood over facepiece webbing1.0h. Breathes air from SCBA1.0HELMET AND GLOVESa. Dons helmet with earflaps down (adjusts chinstrap)1.0b. Dons gloves1.0PPEa. Full PPE, including SCBA is donnedP/F 4.0b. Ensures no skin is exposedTOTALAllotted time for this skill:1:55Time:minutessecondsP/FTotal points possible: 22Total points needed to pass: 17Total points scored by this candidate:TCESD 1 PFF ProgramP/FRev. 3/18/2016
TRAVIS COUNTY ESD 1Performance StandardsSCBA/PPE #1Don TCESD 1Firefighting PPEPerformance rating of trainee on this standard inaccordance with the objectives and conditions of the skill:PASSFAILComments:Circle one:First AttemptRetest Denotes mandatory passage of this stepTCESD 1 PFF ProgramRev. 3/18/2016
MODULE 1 LESSON NOTESPPE1-6aPerform an Inspection of TCESD 1 PPE (PPE Inspection Procedure)1. Routine Inspections shall be completed After each use After exposure to an event that could have resulted in damage to the PPE or, as warranted Prior to the start of each shift2. Perform a Routine Inspection of jacket and trouser for Soiling or contamination Physical damage such as rips, tears, and cuts Thermal damage such as charring, burn holes, and melting Damaged or missing reflective trim3. Perform a Routine Inspection of hood for Look for NFPA Label, label should not be removed Soiling or contamination Physical damage such as rips, tears, and cuts Thermal damage such as charring, burn holes, and melting Loss of face opening adjustment4. Perform a Routine Inspection of helmet for Soiling or contamination Physical damage to the shell such as cracks Thermal damage to the shell such as bubbling, soft spots, warping or discoloration Physical damage to the ear flaps such as rips, tears, and cuts Thermal damage such as charring, burn holes, and melting Damaged or missing components of the suspension and retention systems Damaged or missing components of the goggles, including discoloration, crazing, and scratchesto the goggles Damaged or missing reflective trim5. Perform a Routine Inspection of gloves for Soiling or contamination Physical damage such as rips, tears, and cuts Thermal damage such as charring, burn holes and melting Inverted liner Shrinkage Loss of elasticity/flexibility6. Perform a Routine Inspection of footwear for Soiling or contamination Physical damage such as cuts, tears, and punctures Thermal damage such as charring, burn holes, and melting Exposed/deformed steel toe, steel midsole, and shank Loss of water resistanceAdditional References:TCESD 1 Standard Operating Guideline B3 - PPE
MODULE 1 LESSON NOTESPPE1-6bPerform a Cleaning of TCESD 1 PPE (PPE Cleaning Procedures)1. Drying Procedures for Garments Place elements in a clean, dry, well ventilated area Do not dry in direct sunlight Use forced air methods for drying2. Perform a Routine Cleaning of jacket and trouser Know to wear protective gloves and eye/face splash protection When possible, initiate cleaning at the incident scene Brush off any dry debris Gently rinse off debris with water hose If necessary, scrub gently with soft bristle brush and rinse again Only use manufacturer approved cleaning agents Inspect for soiling or contamination Repeat process or submit for Advanced Cleaning3. Perform a Routine Cleaning of helmet Know to wear protective gloves and eye/face splash protection Helmets shall not be machine cleaned or dried Helmets shells, headbands, crown straps, ear covers, suspension systems, and all othercomponents shall be hand washed Clean helmet with approved cleaning solutions if necessary The manufacturer shall be consulted if stronger cleaning agents are required No solvents shall be used Clean Helmet goggles only with warm water. Do not use soaps or Windex. Dry off with a softcotton cloth. Reapply Anti-Fog coating with approved Anti-Fog Cloth.4. Perform a Routine Cleaning of hood Know to wear protective gloves and eye/face splash protection Hand wash using an approved cleaning solution or detergent (liquid is preferred) Dried in accordance with Drying Procedures5. Perform a Routine Cleaning of gloves Know to wear protective gloves and eye/face splash protection Hand wash using an approved cleaning solution or detergent (liquid is preferred) Dried in accordance with Drying Procedures6. Perform a Routine Cleaning of footwear Know to wear protective gloves and eye/face splash protection Footwear shall not be machine washed Hand wash with an approved cleaning solution or detergent Footwear shall be dried in a clean, dry, well ventilated area Footwear shall not be machine dried Know that if Routine Cleaning is not successful, the PPE must be submitted for AdvancedCleaningAdditional References:TCESD 1 Standard Operating Guideline B3 - PPE
MODULE 1 LESSON NOTESSCBA1-7aPerform an TCESD 1 SCBA Inspection (Daily SCBA and PASS Inspection)1. TCESD 1 SCBA and PASS inspection procedures Inspect complete facepiece for worn or aging rubber parts, worn or frayed harness webbing, ordamaged components Harness straps shall be fully extended Inspect cylinder for dents or gouges in the composite wrapping Check cylinder pressure for “full” indication (4000 psi or greater); if less than full, replace cylinder Ensure that the SNAP-CHANGE connector on the cylinder is locked in (the unit will sound a seriesof ascending tones and flash the backframe lights) Make sure the breathing regulator purge valve is closed Fully depress the center of the donning/air saver switch on the top of the regulator and release Slowly open cylinder valve fully by rotating the knob counter-clockwise placing the PASS in theMonitor ModeoThe Vibralert alarm should actuate, then stopoThere should be no airflow from the facepieceo You will hear 3 quick chirps, and a green light will flash on the control console of the PASSand the backframe lights Compare the air pressure indicated on the console gauge to the pressure indicated on the cylindergauge Dock the regulator to a face mask Check the Heads-Up display for two green lights (full bottle) Don the face mask or hold to face and obtain a good seal Inhale sharply to automatically start the flow of air Breathe normally from the face mask and check for normal flow and proper operation Doff the face mask, air should flow freely Fully depress the center of the donning switch or air saver switch on the top of the regulator andrelease, the flow of air should stop Rotate the purge valve a ½ -turn counter-clockwise, air should flow freely from the regulator Close the purge valve, the flow of air should stop Hold the unit motionless for 20 seconds, placing the PASS into the Pre-Alarm Modeo Each second, the red lights will flash and are accompanied by an ascending/descendingaudible tone which increases in volume Move the SCBA to reset the PASS to the Monitor Mode Hold the SCBA motionless, allowing it to go into the Pre-Alarm Modeo Each second, the red lights will flash and are accompanied by an ascending/descendingaudible tone which increases in volume for twelve seconds until in the Full Alarm Mode Manually reset the PASS by pressing the yellow reset button twice Movement will not reset the device when it is in Full Alarm Mode Test the manual PASS alarm by pressing the red alarm button on the control console Manually reset the PASS by pressing the yellow reset button twice Push in and rotate the cylinder valve knob clockwise to close it Open the red purge valve slightly to vent residual air from the systemo The Vibralert should activate as the pressure drops below the ¼ marko The reserve gauge lights on the heads up display should correspond
MODULE 1 LESSON NOTESSCBA (CONT.)1-7aPerform an TCESD 1 SCBA Inspection (Daily SCBA and PASS Inspection)When the airflow stops, return the purge valve to the fully closed positionPress the PASS yellow reset button twiceYou will hear an audible two tone chirp indicating it is resetThe blinking light on the remote gauge will turn off; Ensure the SCBA is clean and ready for serviceNote: The heads up display provides an approximate air cylinder reading:o Two green lights indicates full (3200-4500 psi)o One green light indicates ¾ full (2100-3200 psi)o One yellow light indicates ½ full (1200-2100 psi)o One red light indicates ¼ full or less (200-1200 psi)2. Complete the Inspection Log by accessing FireRMS and logging your airpack in the appropriatearea3. SCBA and PASS maintenance. If the PASS device has a low battery:o The green light will not flash when you open the cylinder valve and you will hear a single chirpabout once every two seconds.o Battery replacement requires three “C” cells and is done at the station using approved batteries When a SCBA, PASS device or air mask needs repair or servicing by the Air Shop:o Remove the item from the apparatus and mark it with a repair tago Fill out an repair request form found on the departments website and indicate service level on FireRMSo After hours and on weekends, call Fire Dispatch and request the response of an Air Technicianif putting an SCBA out of service reduces the number of SCBA available below current staffingfor apparatus. Additional References:TCESD 1 Standard Operating Guideline B6-SCBA with PASS
MODULE 1 LESSON NOTESSCBA1-7bEnter an SCBA Inspection into FireRMS (Recording SCBA Inspectionon FireRMS)1. According to Texas Commission on Fire Protection rules, SCBAs that are in service must be inspectedat the beginning of the duty period and the inspection documented.2. Each TCESD 1 SCBA on an apparatus shall be inspected at the beginning of each shift.3. SCBA inspection reports shall be completed as close to 0700 as possible.4. Enter SCBA inspection report on FireNet On station PC, open FireRMS by clicking the FireRMS icon On FireRMS, Then click on "Vehicles & Equipment" Click on the "Equipment" button under "View" and then on the search icon next to "Catagory" under"View Options". In the next window, highlite "SCBA" and click "Select" Select the SCBA pack that you are going to log and then click on "Equipment Info" The new window will have the packs information. Look to the far right and click "SCBA Daily" For each airpack entered, Click the "ADD" button and enter the proper information If an SCBA failed inspection, enter reason for failure and comments for repair5. After entering a SCBA, click the save disk icon. If finished,
REQUIREMENTS TASK BOOK TRAVIS COUNTY ESD 1 18300 PARK DR. JONESTOWN, TX. 78645 (512)267-3568 PROBATIONARY FIREFIGHTER . Communications directed to the firefighter shall be the apparatus number "firefighter" the task or area assigned, if the task or area is appropriate to distinguish between firefighters (e.g., "Engine

