Transcription
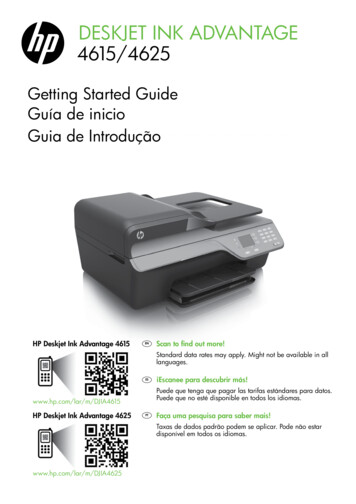
DESKJET INK ADVANTAGE4615/4625Getting Started GuideGuía de inicioGuia de IntroduçãoHP Deskjet Ink Advantage 4615ENScan to find out more!Standard data rates may apply. Might not be available in alllanguages.ESPuede que tenga que pagar las tarifas estándares para datos.Puede que no esté disponible en todos los idiomas.www.hp.com/lar/m/DJIA4615HP Deskjet Ink Advantage 4625¡Escanee para descubrir más!PTFaça uma pesquisa para saber mais!Taxas de dados padrão podem se aplicar. Pode não estardisponível em todos os idiomas.www.hp.com/lar/m/DJIA4625
Copyright Information 2012 Copyright Hewlett-Packard DevelopmentCompany, L.P.Edition 1, 6/2012Reproduction, adaptation or translation without priorwritten permission is prohibited, except as allowedunder the copyright laws.The information contained herein is subject to changewithout notice.The only warranties for HP products and services areset forth in the express warranty statementsaccompanying such products and services. Nothingherein should be construed as constituting anadditional warranty. HP shall not be liable fortechnical or editorial errors or omissions containedherein.Trademark creditsMicrosoft and Windows are U.S. registeredtrademarks of Microsoft Corporation.2
ContentsUse the printer. 4HP Digital Solutions.5HP ePrint.6Update the printer.8Set up wireless (802.11) communication.18Solve setup problems. 20Problems setting up the printer.20Problems installing the software. 21Problems setting up fax. 21Wireless (802.11) setup problems .23Problems using HP ePrint.25Use the embedded web server (EWS). 26HP limited warranty statement. 27Safety InformationAlways follow basic safety precautions when usingthis printer to reduce risk of injury from fire or electricshock.8. Refer servicing to qualified service personnel.There are no user-serviceable parts inside.Note: Ink from the cartridges is used in theprinting process in a number of different ways,including in the initialization process, whichprepares the printer and cartridges for printing,and in printhead servicing, which keeps printnozzles clear and ink flowing smoothly. Inaddition, some residual ink is left in thecartridge after it is used. For more informationsee www.hp.com/go/inkusage.1. Read and understand all instructions in thedocumentation that comes with the printer.2. Observe all warnings and instructions markedon the printer.3. Unplug this printer from wall outlets beforecleaning.4. Do not install or use this printer near water, orwhen you are wet.5. Install the printer securely on a stable surface.6. Install the printer in a protected location whereno one can step on or trip over the line cord,and the line cord cannot be damaged.7. If the printer does not operate normally, see theuser guide. For information about finding theuser guide, see “Where is the user guide?” onpage 4.3EnglishSet up and use fax. 9Set up fax.9Use fax. 14Fax and digital phone services. 17
Use the printerTo scan, copy, and send faxes, you can use theprinter control panel. You can also use the controlpanel to change settings, print reports, or get help forthe printer.Thank you for purchasing this printer! With thisprinter, you can print documents and photos, scandocuments to a connected computer, make copies,and send and receive faxes.EnglishTip: You can also change the printer settingsusing the printer software or embedded webserver (EWS). For more information about thesetools, see the user guide. For information aboutfinding the user guide, see “Where is the userguide?” on this page.Where is the user guide?The user guide for this printer (also called “Help”) is placed on your computerwhile installing the recommended HP software.This guide provides information on the following topics: Troubleshooting information Detailed instructions for using the printerInformation about supported printing supplies and accessories (if availablefor the printer)Important notices, environmental, and regulatory informationYou can open this guide either from the HP printer software (Microsoft Windows ) or from the Help menu(Mac OS X): Windows: Click Start, select Programs or All Programs, select HP, select the folder for your HP printer,and then select Help. Mac OS X: From the Finder, click Help Mac Help. In the Help Viewer window, choose your printer fromthe Mac Help pop-up menu.Also, an Adobe Acrobat version of this guide is available on HP’s support website(www.hp.com/go/customercare).Tip: If you cannot find the user guide on your computer, it might not have been copied to your computerwhen you installed the HP software. For more information, see “How do I install the user guide?” onpage 20. Regulatory and compliance information for the European Union is available in the “Technicalinformation” section of the user guide (also called “Help”). Also, the Declaration of Conformity isavailable at the following website: www.hp.eu/certificates.4
Use the printerHP Digital SolutionsThe printer includes a collection of digital solutionsthat can help you simplify and streamline your work.Learn more!EnglishFor more information about setting up and usingthese digital solutions, see the user guide. Forinformation about finding the user guide, see“Where is the user guide?” on page 4.Scan to ComputerYou can simply walk up to the printer, press a buttonon the control panel, and scan documents directlyto a computer. You can then attach the scanneddocuments to your email and share them with yourbusiness partners.restart your HP software’s scan function on thedestination computer. To restart the scan function,click the Start on your computer desktop, selectPrograms or All Programs, select HP, select thefolder for your HP printer, and then select yourHP printer. In the window that appears, selectPrint, Scan & Fax, and then select the ManageScan to Computer option under Scan.Note: If you are using a computer runningMicrosoft Windows and if your computerdoes not appear in the list of destinations on theprinter control panel display, you will need toHP Digital Fax (Fax to PC and Fax to Mac)Never lose important faxes misplaced within a stackof paper pages again!In addition, you can turn off fax printing altogether—saving money on paper and ink, as well as helpingreduce paper consumption and waste.Use Fax to PC and Fax to Mac to automaticallyreceive faxes and save faxes directly to yourcomputer. With Fax to PC and Fax to Mac, you canstore digital copies of your faxes easily and alsoeliminate the hassle of dealing with bulky paper files.5
Use the printerHP ePrintNote: HP ePrint is only supported by HP DeskjetInk Advantage 4625 e-All-in-One series.ePrint email address of your printer to print, and gethelp for HP ePrint.EnglishHP ePrint is a free service from HP that allows you toprint to your HP ePrint-enabled printer anywhere youcan send an email. Just send your documents andphotos to the email address assigned to your printerwhen you enable Web Services. No additionaldrivers or software are needed.Note: To use HP ePrint, the printer must beconnected to the Internet using wirelessconnection. You cannot use these web features ifthe printer is connected using a USB cable.Learn more!Once you have signed up for an account onePrintCenter (www.eprintcenter.com), you can signin to view your HP ePrint job status, manage yourHP ePrint printer queue, control who can use the HPTo learn more about the Web Services Terms ofUse, visit ePrintCenter (www.eprintcenter.com).Set up HP ePrintTo set up HP ePrint, complete the following steps.Note: If you have already installed the HPprinter software, see the user guide for setupinstructions.1.If you are connecting to a wireless network, enterthe wireless network name and password (ifprompted).4.When prompted, do the following: Accept the Web Services Terms of Use. Enable the printer to automatically check forPlace the HP software CD into the computer, andthen follow the onscreen instructions.Note: If the firewall software on yourcomputer displays any messages during theinstallation, select the “always permit/allow”option in the messages. Selecting this optionallows the software to install successfully onyour computer.2.3.and install product updates. If your network uses proxy settings whenconnecting to the Internet, enter these settings.5.After the printer prints an information page,follow the instructions to finish the setup.Follow the instructions for your operating system: Windows: When prompted, click NetworkLearn more!(Ethernet/Wireless), and then follow theonscreen instructions.For more information about managing andconfiguring HP ePrint settings and to learnabout the latest features, visit ePrintCenter(www.eprintcenter.com). Mac OS X: Double-click the HP Installer icon onthe software CD, and then follow the onscreeninstructions.Note: If prompted, temporarily connect theprinter to the computer with a USB cable.While connected, the computer sends thewireless settings to the printer. After thesesettings are sent, the installation program willprompt you to disconnect the USB cable.6
Use the printerUse HP ePrintTo print documents using HP ePrint, complete thefollowing steps:On your computer or mobile device, open youremail application.Note: For information about using the emailapplication on your computer or mobiledevice, see the documentation provided withthe application.2.3. Maximum size of email and attachments:5 MB Maximum number of attachments: 10Supported file types:--PDFCreate a new email message, and then attach thefile that you want to print. For a list of files that canbe printed using HP ePrint, as well as guidelinesto follow when using HP ePrint, see “HP ePrintguidelines” on this page.--HTML--Standard text file formats--Microsoft Word, PowerPoint--Image files, such as PNG, JPEG, TIFF,GIF, BMPEnter the email address of your printer in the “To”line of the email message, and then select theoption to send the email message.Note: You might be able to use othertypes of files with HP ePrint. However,HP cannot guarantee that the printerwill print other types of files becausethey have not been fully tested.Note: The ePrint server does not accept emailprint jobs if there are multiple emailaddresses included in the “To” or “Cc” fields.Only enter the email address of your HPprinter in the “To” field. Do not enter anyadditional email addresses in the otherfields.Finding your HP ePrint email addressTo obtain the HP ePrint email address for your(HP ePrint) button on theprinter, press theprinter control panel.7English1.HP ePrint guidelines
Use the printerRemove Web ServicesNote: If you remove Web Services, HP ePrintwill cease to work. To use HP ePrint again, youmust set it up. For more information, see ”Set upHP ePrint” on page 6.To remove Web Services, complete the followingsteps:On the printer control panel, press the(HP(Setup)ePrint) button, and then press thebutton.2.Using the buttons on the right, scroll to and selectRemove Web Services, and then press the buttonto the right of OK.English1.Update the printerTo enable the printer to automatically check forupdates:Note: This section is only applicable to HPDeskjet Ink Advantage 4625 e-All-in-One series.HP is always working to improve the performanceof its printers and bring you the latest features. If theprinter is connected to a network and Web Serviceshas been enabled, you can check for and installprinter updates.To update the printer, complete the following steps:1.On the printer control panel, press the(HP(Setup) button, andePrint) button, press thethen, using the buttons on the right, select PrinterUpdate.2.Press the button to the right of Check for UpdateNow, and then follow the instructions on thedisplay.81.On the printer control panel, press the(HP(Setup)ePrint) button, and then press thebutton.2.Using the buttons on the right, select PrinterUpdate, select Auto Update: Off, and then selectOn.
Set up and use faxThis printer allows you to sendand receive black-and-white andcolor faxes.Learn more!EnglishFor more information about fax featuresavailable with the printer, see the user guide.For information about finding the user guide, see“Where is the user guide?” on page 4.Set up
4 English Use the printer Thank you for purchasing this printer! With this printer, you can print documents and photos, scan documents to a connected computer, make copies,

