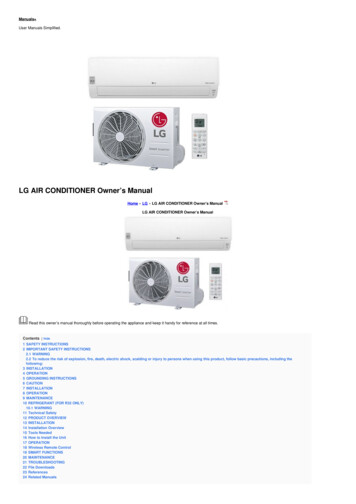
Transcription
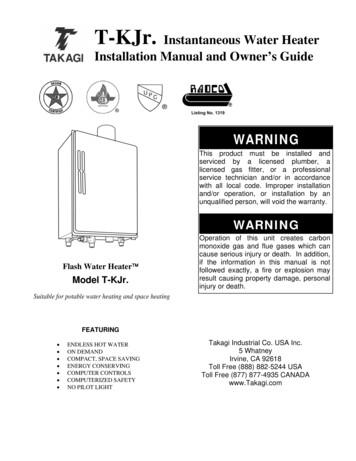
T-KJr.Instantaneous Water HeaterInstallation Manual and Owner’s GuideWARNINGThis product must be installed andserviced by a licensed plumber, alicensed gas fitter, or a professionalservice technician and/or in accordancewith all local code. Improper installationand/or operation, or installation by anunqualified person, will void the warranty.WARNINGFlash Water Heater Model T-KJr.Operation of this unit creates carbonmonoxide gas and flue gases which cancause serious injury or death. In addition,if the information in this manual is notfollowed exactly, a fire or explosion mayresult causing property damage, personalinjury or death.Suitable for potable water heating and space heatingFEATURING ENDLESS HOT WATERON DEMANDCOMPACT, SPACE SAVINGENERGY CONSERVINGCOMPUTER CONTROLSCOMPUTERIZED SAFETYNO PILOT LIGHTTakagi Industrial Co. USA Inc.5 WhatneyIrvine, CA 92618Toll Free (888) 882-5244 USAToll Free (877) 877-4935 CANADAwww.Takagi.com
SPECIFICATIONSCONTENTSSpecification . 2Introduction .3For your safety .3-4Danger .19ApplicationSpace HeatingDual-purpose heatingStorage TankRe-Circulation .20 .20 .21 .22 .22Optional Items .23Component Diagram 24-25Parts List .26Output temperature Chart .27LPG InputMin. 17,500 BtuMax. 1 40,00 0 Btu¾” NPT¾” NPTWater PressureMin. 15 psiMax. 150 ps iNatural Gas Pressure InletLP Gas Pressure InletNormal operation . 14Flow . 14Temperature setting . 15Freeze Protection Device . 15-16Maintenance and Service .16-17Error codes .17 .18Min. 19,500 BtuMax. 140, 00 0 B tuGas ConnectionWater ConnectionsInstallation . 5General . 5Accessories . 5Outdoor Installation .5-6Indoor Installation .6-7Venting Instructions .7 -9Gas Supply/Gas Pipe sizing .10-11Water Connection . 11-12Electrical Connection . 13Initial operation . 13For your SafetyNatural Gas InputMin. 5.5” WCMax. 10.5” WCMin. 9.5” WCMax. 14” W CManifold PressureNatural 3.2” WCPropane 3.2” WCWeightDimensionsIgnitionElectrical Supply32 lbs.20”x14”x6”Electronic IgnitionAC 120 V*** NOTE ***Check the rating plate to ensure thisproduct matches your specifications;This appliance is certified for use ataltitudes from 0ft to 4500ft (1,370m) inaccordance to the latest CAN/CGA 2.17High Altitude Installation procedures atnormal manifold pressure 3.2" W.C.(Natural Gas). Do not alter the orifice jetsor gas supply pressure. At altitudes of4500ft to 5,000ft (1524m) lower themanifold pressure to 2.9" W.C. (NaturalGas). At 5000ft to 6000ft (1,829m), lowerthe manifold pressure to 2.7" W.C. (NaturalGas). For elevations above 6000ft or forspecific instructions on how to lower themanifold pressure, please call the Takagioffice.Manufacturer reserves the right to discontinue, or change at any time, specifications ordesigns without notice and without incurring obligations.2
INTRODUCTIONFOR YOUR SAFETYThe installer is responsible for the correctinstallation of your Flash T-KJR WaterHeater. Installation and service must beperformed by a qualified installer (forexample, a licensed plumber or gas fitter)otherwise the warranty by Takagi will bevoid.This manual provides information necessaryfor the installation, operation, and maintenanceof the Model T-KJR water heater. This unitincludes a fan enabling sidewall (power)venting and an advanced electronic ignitionsystem.The model description is listed on the ratingplate which is attached to the front cover of thewater heater. Please read all installationinstructions completely before installing thisproduct.If you have any problems orquestions regarding this equipment, consultwith Takagi or its local representative.Experiences have shown that most operatingproblems are caused by improper installation.PLEASE READ THIS MANUAL CAREFULLYAND FOLLOW ALL DIRECTIONS.1. Follow all local codes, or in the absence oflocal codes, follow the most recent editionof the National Fuel Gas Code, ANSIZ223.1/NFPA 54 in the USA or theCAN/CSA B149.1 Natural Gas andPropane Installation Code in Canada.2. Properly ground the unit in accordance withall local codes or in the absence of localcodes, with the National Electrical Codes,ANSI/NFPA 70 in the USA or CSAstandard C22.1 Canada Electrical CodePart 1 in Canada.3. Carefully plan where you intend to installyour T-KJR Water Heater. Ensure that yourheater will have enough combustible airand proper ventilation and locate yourheater where water leakage will not dodamage to surrounding areas. If there is apossibility of water damage, install asuitable drain pan under the unit which willnot restrict combustible airflow.4. Check the rating plate for the correct gastype, gas pressure, water pressure andelectrical rating. If this unit does not matchyour requirements, do not install.The T-KJR Water Heater is an instantaneous,tankless water heater designed to supplyendless hot water to your entire householdand/or commercial facility utilizing totalefficiency. The principle behind the T-KJRWater Heater is simple. Once you open a hotwater tap, water flows through the T-KJRWater heater. Once a minimum of 0.75 GPM isachieved, the flow sensor automaticallycommands the computer to turn on the fan,activate the electronic igniter and open the gasvalves. The computer monitors watertemperature, water flow rate and gas flow toensure that you get the right amount of hotwater at the correct hot water temperature.After the burners are ignited, the “fire on” lampis lit. The computer will modulate the gassupply valve and water flow. 0.75 gallons perminute is required to turn the burners on; afterthe burners are ignited, the flow rate can belowered to 0.6 gallons per minute to maintainthe heater on. It is advisable to open furtherthe cold tap rather than decreasing the hot tapto adjust the water temperature. As long asyou have water, gas and electricity, you will getan endless flow of hot water. Open a hot watertap to turn on your water heater. Close the tapto turn off your water heater.RATINGPLATE5. If any problem should occur, turn off all hotwater taps and turn off the gas. Then call atrained technician or the Gas Company orthe manufacturer.3
6. WARNING: Do not disconnect theelectrical supply if the ambient temperaturewill drop below freezing. The FreezePrevention Device only works if the unithas electrical power. The FreezePrevention Device is rated for temperaturesdown to 5º F ( -15º C ) in a wind freeenvironment. Refer to the section onWinterizing and the Freeze PreventionDevice for more information. The Warrantywill not be covered if the heat exchanger isdamaged due to freezing.GENERALThe T-KJR. Water Heater is an instantaneous,tankless water heater designed to supplyendless hot water to your entire householdand/or commercial facility utilizing totalefficiency. The principle behind the T-KJRWater Heater is simple. Once you open a hotwater tap, water flows through the T-KJRWater heater. Once a minimum of 0.75 GPM isachieved, the flow sensor automaticallycommands the computer to turn on the fan,activate the electronic igniter and open the gasvalves. The computer monitors watertemperature, water flow rate, and gas flow toinsure that you get the right amount of hotwater at the correct hot water temperature.After the burners are ignited, the “fire on” lampis lit. The computer will modulate the gassupply valve and water flow 0.75 gallons perminute is required to turn the burners on; afterthe burners are ignited, the flow rate can belowered to 0.6 gallons per minute to maintainthe heater on. It is advisable to increase thecold tap rather than decreasing the hot tap toadjust the water temperature. As long as youhave water, gas and electricity, you will get anendless flow of hot water. Open a hot water tapto turn on your water heater. Close the tap toturn off your water heater.7. WARNING: Water temperatures over125ºF can cause severe burns instantly ordeathfromscalding.Thewatertemperature is set at 122ºF (50ºC) from thefactory to minimize any scalding risk.Before bathing or showering always checkthe water temperature.8. WARNING: Do not use this appliance ifany part has been in contact with or beenimmersed water. Immediately call a trainedtechnician to inspect and/or service the unitif necessary.9. WARNING: Do not store or use gasoline orother flammables, vapors or liquids in thevicinity of this appliance.10. WARNING: Do not reverse the waterand/or gas connections as this will damagethe gas valves and can cause severe injuryor death. Following the diagram belowwhen installing your water heater:ThermistorCold InHot OutGas4FlowSensor
INSTALLATIONAccessoriesGENERALCheck that the installation manual, theextension cable and the warranty card wereincluded with the unit.All gas water heaters require careful andcorrect installation to ensure safe and efficientoperation. This manual must be followedexactly. Read the “For Your Safety” section atthe beginning of this manual.1. The gas regulator is preset at the factory;2.3.4.5.6.7.8.9.it is computer controlled and should notneed adjustment.Maintain proper space for servicing. Installthe unit so that it can be connected orremoved easily;The electrical connection requires ameans for switching off the power supply;If you will be installing the unit in acontaminated area with a high level ofdust, sand, flour, aerosols or othercontaminants, they can become airborneand enter and buildup within the fan andburner causing damage to the unit. Inthose environments, please purchase theoptional TK-TV09 direct vent conversionkit and convert the T-KJR to a sealedcombustion unit. The warranty will notcover damage caused to the unit due toinstallation in a contaminated environmentthat has not be converted using the TKTV09.Particles from these objects may clog theair vent or reduce the functions of therotating fan and cause improper burningof the gas. Regular maintenance isrecommended for these types ofenvironment.Do not install the unit where the exhaustvent is pointing into any opening in abuilding or where the noise may disturbyour neighbors. Make sure the venttermination is 4 feet from a doorway oropening to prevent exhaust from entering.Some chemicals used in a beauty salonmay affect the flame sensor. Water heatermay not work properly. Please consultwith Takagi, when the water heater isinstalled in a beauty salon.Water hardness may affect the waterheater. Water heater may be damaged.The warranty will not cover damagecaused by water quality.When converted into a direct-vent unit, theT-KJR is RADCO certified to be installedin mobile homes and manufacturedhomes.OUTDOOR INSTALLATIONFollow all local codes, or in the absence oflocal codes, follow the most recent edition ofthe National Fuel Gas Code ANSIZ223.1/NFPZ 54 in the USA or the CAN/CSAB149.1 Natural gas and Propane InstallationCode in Canada.Ensure that the unit is set for outdoorinstallation.The ‘OUT’ dipswitch on thecomputer board should be switched to its ‘ON’(up) position:Outdoor dip switch settingThe outdoor vent cap must be used when unitis installed outdoor. Takagi recommends theuse of its part No. TK-TV04.When installed outdoors, the T-KJR waterheater shall be wall mounted only. Locate thewater heater in an open, unroofed area andmaintain the following minimum clearances:Outdoor Installation Service ClearancesPiping side (Bottom)12”Front (Maintenance space)24”Back of heater1”Sides of heater6”Top of heater36”5
The diagram below details the requiredclearances around the unit:WARNING: Do not install this water heater underan overhang less than 3 feet from its top or eaves.The area under an overhang must be open to threesides.WARNING: Do not have the vent terminalpointing toward any opening into a building. Donot locate your heater in a pit or location wheregas and water can accumulate.WARNING: Do not install the heater wherewater, debris or flammable vapors may get intothe flue terminal. This may cause damage tothe heater and void the warranty.Combustion Air SupplyThe water heater location must provide enoughair for proper combustion and ventilation of thesurrounding area. See the latest edition ofANSI Standard Z223.1 or any applicable localcodes. In general, these requirements specifythat if the unit is installed in a confined space,there must be a permanent air supply opening.Air Supply from Outside BuildingWhen combustion air is supplied from outsidethe building, an opening communicatingdirectly with the outside should have aminimum free area of one square inch per15,000 BTUH input of the total input rating ofwater heater in the enclosed area.WARNING: Do not install the water heatervent terminator within 4 feet in the USA of anyair intake or building opening, and with in 3 feetin Canada of any air intake or building opening.(Refer to Page.9)Air Supply from Inside BuildingINDOOR INSTALLATIONWhen combustion air is supplied from insidethe building, an opening communicating withthe rest of the dwelling should have a minimumfree area of one square inch per 1000 BTUHinput of the total input rating of water heater inthe enclosed area. These openings shouldnever be less than 100 sq. in.When installed indoors, the T-KJR waterheater shall be located in an area to maintainthe following minimum clearances around theunit:Indoor Installation Service ClearancesPiping side (Bottom)Min. 6”Front (Maintenance space)Min 24”Back of heater1”Sides of heater2”Top of heater12"Minimum recommended air supply opening sizefor water heater:Water heater When drawingsizemake-up airfrom outsidethe buildingMax. 140.000BTU66.2 Sq. INWhen drawing make-upair from inside thebuilding (from otherrooms within)119 Sq. IN
Exhaust VentCombustible Air Supplied byMechanical fan or Make up air device.This is a Category III appliance and must bevented accordingly. The vent system must besealed air tight. All seams and joints must besealed with high heat resistant silicone sealantor UL listed aluminum adhesive tape having aminimum temperature rating of 350ºF. For bestresults, a vent system should be as short andstraight as possible.The T-KJR water heater is equipped with acombustible air sensor that will shut off the unitwhen inadequate combustible air supply to unitis detected.If a mechanical fan or make up air device isused to supply air to the water heater or utilityroom, the installer should make sure it doesnot create drafts which could cause nuisanceshutdowns. If a blower is necessary to provideadequate combustion air to the water heater, aswitch or equivalent device must be wired(interlocked) with the water heater controlcircuit or other proper devices to prevent thewater heater from firing unless the blower isoperating.This unit requires 4”, Category III approved,single wall stainless steel vent pipe or anyother Category III approved, non-combustible,corrosion-resistant material. The following areUL listed manufacturers: ProTech Systems Inc.(FasNSeal), Flex-L Inc., Z-Flex Inc. (Z-Vent III)and Heat-Fab Inc. (Saf-T Vent). Follow thevent pipe manufacturer’s instructions wheninstalling the vent pipe. Do not common ventthis appliance with any other vented appliance.The maximum length of exhaust vent pipingmust not exceed 35 ft. deducting 5 ft. for eachelbow used in the venting system. Do not usemore than 3 elbows.DiamMax.Max. Vertical oreterNo. ofHorizontal run inElbowLength4”3 Ea.35 ftFor each elbow added, deduct 5 ft. frommax. Vent length.Direct intake vent systemThis T-KJR water heater may be converted toa direct vent (sealed combustion) appliance byinstalling an adapter (part No TK-TV09) whichwill bring all required combustible air fromoutside the building. The T-KJR must beinstalled in a location where the proper amountof combustible air will be available to it at alltimes without obstructions. If used as a directvent appliance, the T-KJR requires a 3”combustible air supply pipe. The intake pipemust be sealed airtight with aluminum tape andcan be made of ABS, galvanized steel,corrugated aluminum, corrugated stainlesssteel or Category III stainless steel.T-KJr is not necessary to change the dipswitch setting.No. of ElbowsMax. Vertical orHorizontal Length012335 ft.30 ft.25 ft.20 ft.VENTING INSTRUCTIONSWhen installing the vent system, all applicablenational and local codes must be followed. Ifyou install thimbles, fire stops or otherprotective devices and they penetrate anycombustible or noncombustible construction,be sure to follow all applicable national andlocal codes.GeneralWARNING: Improper venting of this appliancecan result in excessive levels of carbonmonoxide which can result in severe personalinjury or death.This water heater must be vented inaccordance with the section “Venting ofEquipment" of the latest edition of the NaturalFuel Gas Code, ANSI Z223.1 and allapplicable local building codes. In Canada,follow section 7 of the CAN/CSA B149.1Natural Gas and Propane Installation Code.When the horizontal vent run exceeds 5 ft., thefollowing criteria must be observed:Support the vent run at 3 ft intervals withoverhead hangers.Slope the vent run downwards toward thevent terminal at a rate of ¼” per foot.7
Vent TerminationGeneral rules for venting the T-KJR waterheater are:A sidewall vent terminator must be used whenthe water heater is vented through a sidewall.Takagi recommends the use of its part No.TKTV01 or the TK-TV05 with the TK-TV09 whenusing the direct vent option. The ventterminator provides a means of installing ventpipe through the building wall and must belocated in accordance with ANSI Z223.1/NFPA54, or in Canada with CAN/CSA-B149.1 andlocal applicable codes.1. Place the water heater as close as possibleto the vent terminator;2. The vent collar of the water heater must befastened directly to an unobstructed ventpipe.3. Do not weld the vent pipe to the waterheater collar.4. The weight of the vent stack must not reston the water heater.5. The vent must be easily removable fromthe top of the water heater for normalservice and inspection of the unit.6. The water heater vent must not beconnected to any other gas appliance orvent stack.7. Avoid locating the water heater ventterminator near any air intake devices orair-conditioning units. These fans can pickup the exhaust flue products from the waterheater and return them to the building. Thiscan create a health hazard.8. Avoid using an oversized vent pipe or usingextremely long runs of the pipe.Locate the vent terminator so that it cannot beblocked by snow. Most codes require that theterminator be at least 12 inches above grade,but the installer may determine if it should behigher depending on the job site condition andapplicable codes.WARNING: Improper installation can causenausea or asphyxiation, severe injury or deathfrom carbon monoxide and flue gasespoisoning. Improper installation will voidproduct warranty. For high altitude installationabove 4,500 feet, contact Takagi on how tohandle this situation.Rain capThe exhaustgoes to the roofRoof FlashingCondensation drain(Install according tolocal code)Regarding the clearance from theterminator to the air inlet or opening,refer to the next page.Install a condensation drain in theventing.Follow the vent system to ventmanufacture’s instruction and localcode.Do not common vent or connect anyvent of appliance to the vent.Use the 4” category III Vent pipeapproved, single wall stainless steelvent pipe.TK-TV03 (Back flowprevention)8
CanadaDirect vent andother than Direct VentU . S .ADirect ventOther than Direct Vent1 footAClearance above grade, veranda, porch,deck, or balcony.1 foot1 footBClearance to window or door that may beopened.3 feet1 foot4 feet from below orside opening. 1 footfrom above opening.***C Clearance to permanently closed windowVertical clearance to ventilated soffit locatedabove the vent terminator within a horizontal***Ddistance of 2 feet (61cm) from the centerline of the terminator.***E Clearance to unventilated soffit***F Clearance to outside corner***G Clearance to inside cornerClearance to each side of center line3 feet**Hextended above meter/regulator assembly3 feet**I Clearance to service regulator vent outlet.Clearance to non-mechanical air supply inlet4 feet from below or3 feet1 footside opening. 1 footJ to building or the combustion air inlet to anyother application.from above opening.6 feet3 feet3 feetK Clearance to mechanical air supply inlet.Clearance above paved sidewalk or paved7 feet*7 feetLdriveway located on public property.Clearance under veranda, porch deck, or1 foot**Mbalcony.*For clearances not specified in ANSI Z223.1 / NFPA 54 or CAN/CSA-B149.1, please use clearances inaccordance with local installation codes and the requirement of the gas supplier.9
GAS SUPPLY AND GAS PIPE SIZINGCheck that the type of gas matches the ratingplate located on the cover of your water heater.TO TURN OFF GAS TOAPPLIANCEThe minimum and maximum inlet gas pressuresare:Natural GasMin. 5.5” WC - Max. 10.5” WCPropane Gas Min. 9.5” WC - Max. 14” WC1. Turn off all electric power to thewater heater if service is to beperformed.2. Turn the manual gas valve locatedon the outside of the unit clockwiseto the off position.Gas pressure below this specified range for theT-KJR and/or insufficient gas volume willadversely affect performance. Inlet gas pressuremust not exceed the above maximum values; gaspressure above the specified range will causedangerous operating conditions and damage tothe unit. Until testing of the main gas line supplypressure is completed, ensure the gas line to theT-KJR is disconnected to avoid any damage tothe water heater.FOR YOUR SAFETY, READBEFORE OPERATING:Size the gas pipe appropriately to supply thenecessary volume of gas required for the T-KJR(140,000 BTUH) using ANSI233.1/NAPA 54 inthe USA or CAN/CSA B149.1 in Canada or localcodes. Install a manual gas shut-off valvebetween the T-KJR and the gas supply line.When the gas connections are completed, it isnecessary to perform a gas leak test either byapplying soapy water to all gas fittings andobserving for bubbles or by using a gas leakdetection device. Always purge the gas line ofany debris before connecting to the heater gasinlet.A. This water heater does not have apilot.It is equipped with anelectronic ignition device thatautomatically lights the burner. Donot try to light the burner manually;B. BEFORE OPERATING, check allaround the water heater area forgas leaks. Be sure to check nextto the floor as some gases areheavier than air and will settle onthe floor;C. Use only your hand to turn the gasvalve knob. Never use tools. If theknob will not turn by hand, do notattempt to repair it. Call a qualifiedservice technician. Force orattempted repair may result in a fireor explosion.D. WARNING: Conversion of this unitfrom natural gas to propane orpropane to natural gas cannot bedone in the field. Contact your localdistributor to get the correct unit foryour gas type. Conversion done byanyoneotherthanthemanufacturer will void all warranty.Pipe Sizing Example: This table below is forNatural gas piping supply straight to the waterheater without any tabs to other gas appliancesRecommend Gas pipe size forT-KJR Water Heater(Example for NG)Distance from Gas Meter Pipe Size (inches)0' - 60'3/4"60' - 150'1"150' – 300’1-1/4"10
Natural Gas Supply PipingMaximum Capacity of Natural Gas Based on a 0.60 specific gravity at a 0.5” WC pressure dropPipe SizekBTU of Natural 0’100’ 125’ 02482387331293266245228213202179 1621 ¼”1441 990795680603546503468439415367 3321 ½”2158 1483 1191 1019 903819753701658621550 4992”4155 2856 2293 1963 1740 1576 1450 1349 1266 1195 1060 960200’74139285427822Propane (LP) Gas Supply PipingMaximum Capacity of Propane (LP) Gas Based on 11” WC supply pressure at a 1.0” WC pressure dropPipe SizeLength¾”1”1 ¼”1 ½”2”kBTU of ��100’ 125’ 150’ 200’5673933152672372171961851731621461321121071 7325905044484093783463223072752522132205 1496 1212 1039 9138347717246776305675114403307 2299 1858 1559 1417 1275 1181 1086 1023 9768667876756221 4331 3465 2992 2646 2394 2205 2047 1921 1811 1606 1496 1260a wire mesh filter within the cold inlet to trapdebris from entering your heater. This will needto be cleaned periodically to maintain optimumflow.WATER CONNECTIONSFOR YOUR SAFETY, READBEFORE OPERATING:Unit Draining & Filter Cleaning ProceduresDo not use this water heater if any parthas been submersed under water.Immediately call a qualified servicetechnician to inspect the water heater andto replace any damaged parts.To drain your unit, please follow theseinstructions carefully:1. Turn off the power supply to the T-KJRWater Heater.2. Close the manual gas shut off valvelocated on the gas supply line.3. Close the manual water shut off valvelocated on the water supply line.4. Open all hot water taps in the house.(Bathroom, kitchen, laundry room, etc.).When the residual water flow has ceased,close all hot water taps.5. Have a bucket or pan to catch the waterfrom the unit’s drain plugs. Remove thedrain plugs to drain all the water out of theunit.6. Wait a few minutes to ensure all water hasdrained from unit.7. At this time, please check the water filterlocated within the cold inlet. With a tinybrush, clean the water filter of any debriswhich may have accumulated and reinsertthe filter back into the cold water inlet.8. Securely screw the drain plugs back intoplace. Hand- tighten only.All pipes, pipe fittings, valves and othercomponents, including soldering materials,must be suitable for potable water systems. Amanual shut off valve must be installed on thecold water inlet to the water heater betweenthe main water supply line and the T-KJR. Inaddition, a manual shut off valve is alsorecommended on the hot water outlet of theunit. If the T-KJR is installed within, orsubjected to, a closed loop water system, suchas one having an anti-backflow device in thecold water supply line, a thermal expansiontank must be installed. Contact the watersupplier or local plumbing inspector on how tocontrol this situation.After installation of the water heater iscomplete, purge the water line to remove allthe debris and air from the line. Failure to doso may cause damage to the heater. There is11
To re-start your heater, follow these steps:Pressure Relief Valve1. Make sure all hot water taps are closedand the drain plugs are securely attached.2. Purge the water line of debris.3. Open the manual water shut-off valvelocated on the water supply line.4. Open all the hot water taps to verify waterflows to the taps. Then close the hot watertaps.5. Open the manual gas shut-off valve locatedon the gas supply line.6. Turn on the power supply to the T-KJRWater Heater.The FLASH T-KJR has a high-temperatureshut off switch built in as a standard safetyfeature (called a Hi-Limit switch) therefore a“pressure only” relief valve is required.This unit does not come with an approvedpressure relief valve. An approved pressurerelief valve must be installed on the hot wateroutlet. The pressure relief valve must conformto ANSI Z21.22 or CAN 1-4.4 and installationmust follow local code.The discharge capacity must be at least140,000 BTU/hr. The discharge piping for thepressure relief valve must be directed so thatthe hot water cannot splash on anyone or onnearby equipment. Attach the discharge tubeto the pressure relief valve and run the end ofthe tube to within 6" from the floor. Thisdischarge tube must allow free and completedrainage without any restrictions.If the pressure relief valve installed on the TKJR discharges periodically, this may be dueto a defective thermal expansion tank ordefective pressure relief valve.The pressure relief valve must be manuallyoperated periodically to check for correctoperation.Note: Do not reverse the hot outlet and coldinlet connections to the T-KJR Water Heater.This will not activate the water heater.Cold InHot OutGasHOTValve6’’T-FittingHot12
ELECTRICAL CONNECTIONSINITIAL OPERATIONWARNING: Follow the electrical coderequirements of the local authority havingjurisdiction. In the absence of suchrequirements, follow the latest edition of theNational Electrical Code ANSI/NFPA 70 in theU.S. or the latest edition of CSA C22.1Canadian Electrical Code, Part 1, in Canada.For your safety please read beforeoperating the unit for the first time.Once you have properly installed the unit andbefore firing it for the first time, check the gasand water connections for leaks. Open themain gas supply valve to the unit using onlyyour hand to avoid any spark. Never use tools.If the knob will not turn by hand, do not try toforce it; call a qualified service technician.Force or attempted repair may result in a fire orexplosion due to gas leaks. Be sure to checknext to the bottom of the unit because somegases are heavier than air and may settletowards the floor.The heater must be electrically grounded. Donot attach the ground wire to either the gas orthe water piping. Plastic pipe or dielectricunions may isolate the water heaterelectrically.CAUTION: When servicing or replacing partswithin the T-KJR, label all wires prior todisconnection to facilitate an easy and errorfree reconnection. Wiring errors can causeimproper and dangerous operation. Verifyproper operation after servicing.CAUTION: IF YOU SMELL GAS:1. Do not try to start the water heater.2. Do not touch any electric switch; do notuse any phone in your building.3. Immediately call your gas supplier froma neighbor’s phone. Follow the gassupplier’s instructions.4. If you cannot reach your gas supplier,call the fire department.The FLASH T-KJR water heater requires AC120V 60 Hz electrical power supply that isproperly grounded.An on/off switch controlling the main powerto the T-KJR must be provided for servicereasons;Connect the power supply to the T-KJRexactly as shown in the wiring diagram;A green screw is provided in the junction boxto ground the connection.This water heater does not have a pilot light. Itis equipped with an electronic ig
when installing your water heater: GENERAL The T-KJR. Water Heater is an instantaneous, tankless water heater designed to supply endless hot water to your entire household and/or commercial facility utilizing total efficiency. The principle behind the T-KJR Water Heater is simple. Once you open a hot water tap, water flows through the T-KJR .