Transcription
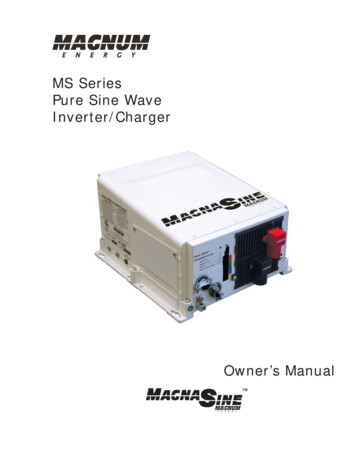
MS SeriesPure Sine WaveInverter/ChargerOwner’s ManualTM
Disclaimer of LiabilityThe use of this manual and the conditions or methods of installation, operation, use, andmaintenance of the MS Series inverter/charger is beyond the control of Magnum Energy, Inc.Therefore, this company does not assume responsibility and expressly disclaims liability for loss,damage, or expense whether direct, indirect, consequential or incidental that may arise out of orbe any way connected with such installation, operation, use, or maintenance.Due to continuous improvements and product updates, the images shown in this manual may notexactly match the unit purchased.Restrictions on UseThe MS Series inverter/charger may only be used in life support devices and systems with theexpress written approval of Magnum Energy. Failure of this inverter can reasonably be expectedto cause failure of that life support device or system, or to affect the safety or effectiveness ofthat device or system. If the MS Series inverter fails, it is reasonable to assume the health of theuser or other persons may be endangered.Copyright NoticeCopyright 2012 by Magnum Energy, Inc. All rights reserved. Permission to copy, distribute, and/ormodify this document is prohibited without express written permission from Magnum Energy, Inc.Document InformationDescription – MS Series Owner’s ManualPart Number and Revision – 64-0007 Rev DDate Published – August 2012This entire manual is available for download—with many of the diagrams available in color—underthe Document Library tab on our website at: www.magnumenergy.com.Contact InformationMagnum Energy, Inc.2211 West Casino Rd.Everett, WA 98204Phone: 425-353-8833Fax: 425-353-8390Web: www.magnumenergy.comStatement of AppreciationThank you from all of us at Magnum Energy for purchasing this MS Series inverter/charger.We understand that you have many purchasing options in the marketplace, and are pleased thatyou have decided on a Magnum Energy product. This MS Series inverter/charger was proudlyassembled and tested in the United States in our Everett, Washington, facility.At Magnum, we are committed to providing you with quality products and services, and hope thatyour experience with us is pleasant and professional.Record unit’s model & serial number in case you need to provide this information in the future.Model:Serial Number:MS2000 (-15B/-20B)T1MS2012 (-15B/-20B)J1MS2812H1MS2024AJMS4024K1Magnum Energy is a registered trademark of Magnum Energy, Inc.Page i 2012 Magnum Energy, Inc.
Safety InformationIMPORTANT SAFETY INSTRUCTIONSSAVE THESE INSTRUCTIONSTHIS MANUAL CONTAINS IMPORTANT INSTRUCTIONS FOR THE MS SERIES INVERTER/CHARGERTHAT SHALL BE FOLLOWED DURING THE INSTALLATION AND OPERATION OF THIS PRODUCT.Before using the MS Series, read all instructions and cautionary markings. Also, be sure to reviewthe individual manuals provided for each component of the system. The installation instructionsare for use by qualified personnel only. Do not perform any installation or servicing other thanthat specified in this owner’s manual unless you are qualified to do so. Incorrect installation orservicing may result in a risk of electric shock, fire, or other safety hazard.Safety SymbolsThe following safety symbols have been placed throughout this manual to indicate dangerous andimportant safety instructions.WARNING: This symbol indicates that failure to take a specified action could result inphysical harm to the user.CAUTION: This symbol indicates that failure to take a specified action could result indamage to the equipment.Info: This symbol indicates information that emphasizes or supplements importantpoints of the main text.Safety Precautions All electrical work must be performed in accordance with local and national electrical codes.This product is designed for indoor/compartment installation. It must not be exposed to rain,snow, moisture, or liquids of any type.Use insulated tools to reduce the chance of electrical shock or accidental short circuits.There are no user-serviceable parts contained in this product.This unit is provided with integral protection against overloads.Live power may be present at more than one point since an inverter utilizes both DC (batteries,PV, etc.,) and AC (utility or generator) power. To reduce risk of electric shock, ensure all DCand AC wiring is disconnected prior to installing or performing maintenance on the inverter.Turning off the inverter will not reduce this risk, the inverter must be totally disconnected fromall sources.Use Class 1 wiring methods for field wiring connections to terminals of a Class 2 circuit.Listed or labeled equipment shall be installed and used in accordance with any instructionsincluded in the listing or labeling.Always verify proper wiring prior to starting the inverter.Use only copper wires with a minimum temperature rating of 75 C.AC wiring must be no less than 10 AWG (5.3 mm²) gauge copper wire.Battery cables should be no less than #4/0 AWG for 12 and 24-volt systems. Crimped andsealed copper ring terminal lugs with a 5/16 hole should be used to connect to the DCterminals on the inverter.Torque all AC wiring connections and DC cable connections to the required torque values.The inverter must be properly mounted, see Section 2.2 “Mounting the Inverter” in thismanual.Overcurrent protection for the battery supply is not provided as an integral part of thisinverter. Overcurrent protection of the battery cables must be provided as part of the systeminstallation. Refer to Section 2.4 “DC Wiring” for more information. 2012 Magnum Energy, Inc.Page ii
Safety Information Overcurrent protection for the AC output wiring is not provided as an integral part of thisinverter. Overcurrent protection of the AC output wiring must be provided as part of thesystem installation. Refer to Section 2.5 “AC Wiring” for more information.The AC output neutral conductor and the DC negative conductors are not connected (bonded)to the inverter chassis. Both the input and output conductors are isolated from the enclosureand each other. System grounding, if required, is the responsibility of the system installer andmust comply with local and national electrical codes and standards. Refer to the Section 2.6“Grounding Inverters” for more information.Battery Safety Use insulated tools and be very careful when working around batteries, they can produceextremely high currents if short-circuited (e.g., dropping a metal tool across the batteryterminal), which could cause a fire or explosion. Read and follow the battery manufacturer’s safety precautions before installing the inverterand batteries. Always verify proper polarity and voltage before connecting the batteriesto the inverter. Once the batteries are connected to the inverter, ensure the maintenanceand charging requirements (i.e., charge voltage and charge rate) provided by the batterymanufacturer are followed to extend the life of the batteries and to prevent damage to thebatteries while charging. Wear eye protection such as safety glasses, and avoid touching your eyes and face whenworking with batteries to keep any fluid/corrosion on the battery from coming in contactwith eyes and skin. Have plenty of fresh water and soap nearby and thoroughly wash in casebattery acid contacts skin, clothing, or eyes. In the event of exposure to the eyes, flood themfor at least 15 minutes with running water and seek immediate medical attention. Baking sodaneutralizes lead acid battery electrolyte and vinegar neutralizes spilled NiCad and NiFe batteryelectrolyte; depending on your battery type, keep a supply on hand near the batteries. Remove all jewelry such as rings, watches, bracelets, etc., when installing or performingmaintenance on the batteries and inverter. A battery can produce a short-circuit current highenough to weld metal jewelry, causing severe burns. Never work alone. Always have someone within the range of your voice or close enough tocome to your aid when working around batteries. Use proper lifting techniques when working with batteries. Never use old or untested batteries. Check each battery’s label for age, type, and date codeto ensure all batteries are identical. Batteries are sensitive to changes in temperature. Install batteries in a stable environment. Batteries can produce explosive gasses, so install batteries in a well-ventilated area. Forcompartment or enclosure installations, always vent batteries from the highest point to theoutside. Design the battery enclosure to prevent accumulation and concentration of hydrogengas in “pockets” at the top of the compartment. Provide at least one inch of air space between batteries to provide optimum cooling. Never smoke or allow a spark near batteries. To prevent a spark at the battery and reduce the chance of explosion, always connect thecables to the batteries first. Then connect the cables to the inverter. Never charge a frozen battery.The battery bank should be installed in a clean, dry, ventilated environment where they areprotected from high and low temperatures. If installed in a vehicle/boat, the batteries must bemounted upright (if using liquid batteries) and securely fastened. The location must be fullyaccessible and protected from exposure to heat producing devices, and away from any fueltanks.Page iii
Safety InformationCONSIGNES DE SÉCURITÉ IMPORTANTESCONSERVER CES INSTRUCTIONSCE MANUEL CONTIENT DE IMPORTANTES POUR LA SÉRIE MS ONDULEUR/CHARGEUR QUI DOIVENTETRE SUIVIES PENDANT L’INSTALLATION ET FONCTIONNEMENT DE CE PRODUIT. Avant d’utiliser lasérie MS, lire toutes les instructions etles mises en garde. Aussi, n’oubliez pas depasser en revue lesdifférents manuels fournispour chaque composant du système. Lesinstructions d’installation sont pourune utilisationpar du personnel qualifié. Ne pas effectuer une installation ou d’entretien autres queceux spécifiés dans ce manuel, sauf si vous êtes qualifié pour le faire. Une mauvaise installation oud’entretien peut entraîner un risque de choc électrique, un incendie ou autre danger pour la sécurité.Symboles de sécuritéLes symboles de sécurité suivants ont été placéstout au long de ce manuel pour indiquer desconditions dangereuses et les consignes de sécurité importantes.AVERTISSEMENT: Ce symbole indique que le défaut de prendre une action spécifiéepourraitcauser des dommages physiques à l’utilisateur.ATTENTION: Ce symbole indique que le défaut de prendre une action spécifiée peutentraîner des dommages à l’équipement.Info: Ce symbole indique une information qui met l’accent ou des suppléments pointsimportants du texte principal.Consignes de sécurité Tous les travaux électriques doivent être effectués en conformité avec les codes locaux etnationaux électriques.Ce produit est conçu pour l’installation / du compartiment intérieur. Il ne doit pas être exposéà la pluie, la neige, l’humidité ou des liquides de tout type.Utiliser des outils isolés pour réduire le risque de choc électrique ou courts-circuits accidentels.Il n’y a pas réparable par l’utilisateur contenues dans ce produit.Cet appareil est fourni avec une protection intégrale contre les surcharges.Puissance en direct peuvent être présents à plus d’un point depuis un onduleur utilise à la foisDC (piles, PV, etc) et AC (utilitaire ou générateur) d’alimentation. Pour réduire le risque dechoc électrique, assurez-vous que tout le câblage DC et AC est débranchée avant l’installationou la maintenance sur le variateur. Mise hors tension de l’onduleur ne réduira pas ce risque,l’onduleur doit être totalement déconnectée de toutes les sources.Utiliser des méthodes de câblage classe 1 pour les connexions de câblage sur le terrain auxbornes d’un circuit de Classe 2.Coté ou étiquetés équipement doit être installé et utilisé conformément aux instructionsfigurant dans la liste ou l’étiquetage.Toujours vérifier le câblage avant de commencer l’onduleur.Utilisez des fils de cuivre seulement avec une cote de température minimale de 75 C.AC câblage ne doit pas être inférieure à 10 AWG (5.3 mm²) de cuivre de calibre.Les câbles de batterie ne doit pas être inférieur à # 4/0 AWG pour 12 et 24-volts systèmes.Frisées et scellé cosses en cuivre anneau des bornes avec un trou de 5/16 doit être utilisépour se connecter à des bornes de courant continu sur l’onduleur.Couple toutes les connexions de câblage ca et les connexions de câbles à courant continu àdes valeurs de couple nécessaires.L’onduleur doit être correctement monté, voir le montage de la section onduleur dans lechapitre Installation de ce manuel.Protection contre les surintensités pour l’alimentation de la batterie n’est pas fourni en tantque partie intégrante de cet inverseur. La protection contre les surintensités des câbles debatterie doivent être fournis dans le cadre de l’installation du système. Reportez-vous à lasection Câblage cc dans le chapitre d’installation pour plus d’informations. 2012 Magnum Energy, Inc.Page iv
Safety Information Protection contre les surintensités pour le câblage de sortie AC n’est pas fourni en tant quepartie intégrante de cet onduleur. Protection contre les surintensités du câblage de sortie CAdoit être fournie dans le cadre de l’installation du système. Reportez-vous à la Section 2.5Câblage ca dans le chapitre d’installation pour plus d’informations.Le conducteur de sortie CA conducteurs neutre et continue négative ne sont pas connectés(servitude) au châssis inverseur. La fois l’entrée et des conducteurs de sortie sont isolés del’enceinte et l’autre. La terre du système, si nécessaire, est de la responsabilité de l’installateurdu système et doit se conformer à des codes locaux et nationaux et les normes électriques.Reportez-vous à la Section 2.6 Mise à la terre Onduleurs dans le chapitre d’installation pour plusd’informations.Sécurité de la batterie Utiliser des outils isolés et être très prudent lorsque vous travaillez près des batteries, elles peuventproduire des courants extrêmement élevés si en court-circuit (par exemple, échapper un outilmétallique à travers la borne de la batterie), ce qui pourrait provoquer un incendie ou une explosion.Lisez et suivez les consignes de sécurité du fabricant de la batterie avant d’installer l’onduleuret des batteries. Toujours vérifier la polarité et la tension avant de brancher les batteries àl’onduleur. Une fois que les batteries sont connectées à l’onduleur, assurer la maintenance etles exigences de charge (c.-à-tension de charge et taux de charge) fournis par le fabricant dela batterie sont suivies pour prolonger la vie des batteries et pour éviter d’endommager lesbatteries pendant la charge.Porter des lunettes de protection tels que des lunettes de sécurité, et évitez de toucher vos yeuxet le visage lorsque l’on travaille avec des piles de garder tout fluide / corrosion sur la batteried’entrer en contact avec les yeux et la peau. Ayez suffisamment d’eau fraîche et de savon àproximité et se laver dans le cas d’acide contact avec la peau de la batterie, les vêtements ou lesyeux. Dans le cas d’exposition pour les yeux, les inonder pendant au moins 15 minutes à l’eaucourante et consulter immédiatement un médecin.Le bicarbonate de soude neutralise l’acidede plomb électrolyte de la batterie et le vinaigre neutralise renversé NiCad et NiFe batterie àélectrolyte; en fonction de votre type de batterie, gardez sous la main près des batteries.Enlevez tous les bijoux tels que bagues, montres, bracelets, etc, lors de l’installation ou lamaintenance sur les batteries et l’onduleur. Une batterie peut produire un court-circuit assezde courant élevé pour souder les bijoux en métal, provoquant de graves brûlures.Ne jamais travailler seul. Toujours avoir quelqu’un au sein de la gamme de votre voix ousuffisamment près pour vous venir en aide lorsque vous travaillez près des batteries.Utiliser des techniques de levage appropriées lorsque vous travaillez avec des piles.Ne jamais utiliser de piles usagées ou non testés. Vérifiez l’étiquette de chaque batterie àl’âge, le type et le code de date afin d’assurer toutes les batteries sont identiques.Piles sensibles aux changements temporaires, installer dans un environnement stable.Les batteries peuvent produire des gaz explosifs, etc installer les piles dans un endroit bienventilé. Pour les installations compartiment ou une enceinte, toujours évacuer les piles duplus haut point à l’extérieur. Concevoir le boîtier de piles pour éviter l’accumulation et laconcentration de gaz d’hydrogène dans “poches” en haut du compartiment.Fournir au moins un pouce de l’espace aérien entre les batteries pour fournir un refroidissement optimal.Ne jamais fumer ou laisser une étincelle près des batteries.Pour éviter une étincelle à la batterie et de réduire le risque d’explosion, toujours connecterles câbles aux batteries en premier. Ensuite, connectez les câbles à l’onduleur.Ne jamais charger une batterie gelée.La banque de la batterie doit être installé dans un endroit propre, sec, aéré et où ils sontprotégés contre les températures élevées et basses. S’il est installé dans un véhicule / bateau,les batteries doivent être monté en position verticale (si vous utilisez des piles liquides) etsolidement fixés. L’emplacement doit être pleinement accessible et protégé contre l’expositionà la chaleur la fabrication de dispositifs, et loin de toute réservoirs de carburant.Page v
Table of ContentsImportant Safety Information .ii1.0Introduction .11.11.21.31.42.0Installation .82.12.22.32.42.52.62.72.82.93.0Pre-Installation. 8Mounting the Inverter .11Wiring the Inverter - General Requirements .13DC Wiring .14AC Wiring .21Grounding Inverters .34Inverter Notification Requirements .41Final Inspection .41Functional Test .42Operation .443.13.23.33.43.53.63.73.83.93.104.0Features and Benefits . 2How an Inverter/Charger Works. 5Advantages of a Pure Sine Wave vs Modified Sine Wave Inverter . 6Appliances and Run Time . 7Inverter Mode .44Standby Mode .45Battery Charging .45Transfer Time .47Battery Temperature Sensor .47Protection Circuitry Operation .48Inverter Startup .49Factory Default Values .50Inverter Fan Operation .51Using a Remote with the MS Series Inverter .51Maintenance and Troubleshooting .524.14.24.34.44.5Recommended Inverter and Battery Care .52Storage for Mobile Installations.52Troubleshooting .53Performing an Inverter Reset.54Performing a Power Reset .54Appendix A – Specifications and Optional Equipment .55A-1A-2A-3A-4Inverter/Charger Specifications .55Inverter Efficiency.56AC Input Voltage to Output Charge Amps . 56Optional Equipment and Accessories.57Appendix B – Battery Information atteryBatteryLocation .58Types .58Temperature .58Bank Sizing .58Bank Sizing Worksheet .59Wiring Configurations .60Appendix C – Inverter/Charger Terminology.63Limited Warranty .65How to Receive Repair Service .65 2012 Magnum Energy, Inc.Page vi
List of ureFigureFigureFigureFigure1-1, Power Switch, Status LED, and Accessory Connection Ports . 21-2, Electrical Connection Points . 31-3, Left Side Features (MS2012, MS2812, MS2024, MS4024) . 41-4, Left Side Features (MS2000 Series) . 51-5, AC Waveforms . 62-1, Simplified Installation Diagram for Permanent Installations . 92-2, Approved Mounting Positions .112-3, MS Series Dimensions and Side Reference .122-4, DC and Battery Temperature Sensor Wiring .152-5, Battery Hardware Installation .172-6, Inverter DC Hardware Installation .172-7, Battery Temperature Sensor .192-8, AC Terminal Block .222-9, AC Wiring for Single In – Single Out (30 A) Configurations .252-10, AC Wiring for Single In – Single Out (60 A) Configurations .262-11, AC Wiring for Single In – Dual Out Configurations .272-12, AC Wiring for Dual In – Single Out Configurations .282-13, AC Wiring for Dual In – Dual Out Configurations .292-14, AC Wiring for MS2000 Models .322-15, AC Wiring for MS2000-15B/-20B Models .332-16, Grounding System for MS Series .342-17, Multiple Connections to DC Ground Rod (Method 1).352-18, Multiple Connections to DC Ground Rod (Method 2).362-19, Single Connection to DC Ground Rod (Method 3) .362-20, Neutral-to-Ground Connection (Inverter Mode) .392-21, Neutral-to-Ground Connection (Standby Mode).392-22, Disconnecting the Neutral-to-Ground Connection .402-23, Connecting a Large DC Ground Wire .402-24, Warning Label .412-25, AC Voltage Checks .432-26, AC Voltage Checks (MS2000 models) .432-27, AC Voltage Checks (MS2000-15B/-20B models) .433-1, Power Flow – Inverter Mode.443-2, Power Flow – Standby Mode .453-3, Automatic 4-Stage Charging Graph .463-4, BTS Temperature to Charge Voltage Change .473-5, Power Switch and Status Indicator.494-1, Performing an Inverter Reset .54A-1, MS Series Efficiency Chart .56A-2, MS Series VAC Input to Charge Amps .56B-1, Series Battery Wiring .60B-2, Parallel Battery Wiring .60B-3, Series-Parallel Battery Wiring .60B-4, Battery Bank Wiring Examples (12-volt) .61B-5, Battery Bank Wiring Examples (24-volt) .62Page vii 2012 Magnum Energy, Inc.
List of 2,3-3,4-1,A-1,Typical Appliance Power Consumption . 7Recommended DC Wire/Overcurrent Device for Rated Use .16DC Wire Size For Increased Distance .17AC Input/Output Wiring Configurations (MS2012, MS2812, MS2024, MS4024) .24AC Input/Output Wiring Configurations (MS2000 models).31AC Grounding Electrode Conductor Sizing .35Equipment Grounding Conductor Sizing .37Inverter Battery Turn On/Off Levels.48Inverter/Charger Default Values .50Inverter Compatibility Level .51Basic Troubleshooting .53Inverter/Charger Specifications .55 2012 Magnum Energy, Inc.Page viii
Introduction1.0 IntroductionCongratulations on your purchase of a MS Series inverter/charger from Magnum Energy. The MSSeries is a “pure” sine wave inverter designed especially for rugged mobile applications, homebackup power, and standalone applications. Powerful, yet simple to use, this inverter/charger willprovide you with years of trouble-free performance you have come to expect from Magnum Energy.Installation is easy. Simply connect the inverter’s output to your distribution circuits or electricalpanel, connect your utility or AC generator power to the inverter’s easy-to-reach terminal block,connect the batteries, and then switch it on for power.Info: This is a sizable manual and much of it is fairly technical. Terms may be usedthroughout the manual that are unfamiliar to you. Refer to the Inverter/ChargerTerminology glossary in Appendix C for clarification.The MS Series inverter/charger includes the following: 2000, 2800, or 4000 watt model in a small footprint – less area needed for installation Pure sine wave output Automatic PFC (Power Factor Corrected) multi-stage battery charging RS485 standard communication protocol Remote and Network ports (easy connection for optional accessories) Inverter-mounted ON/OFF switch with LED indicator 30-amp per leg AC pass-
Phone: 425-353-8833 Fax: 425-353-8390 Web: www.magnumenergy.com Statement of Appreciation Thank you from all of us at Magnum Energy for purchasing this MS Series inverter/charger. We understand that you have many purchasing options in the marketplace, and are pleased that you have decided on a Magnum Energy product.