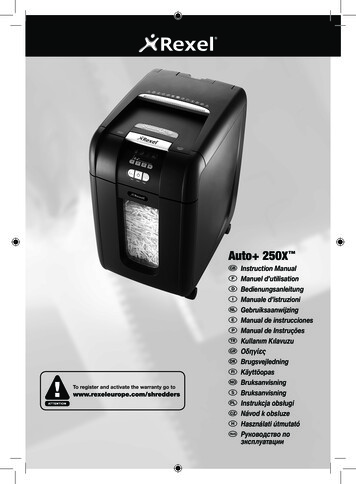
Transcription
Auto 250X GFDIOEPTKcFIoNOoSQCZoHoRUSInstruction ManualManuel d’utilisationBedienungsanleitungManuale d’istruzioniGebruiksaanwijzingManual de instruccionesManual de InstruçõesKullanım BruksanvisningBruksanvisningInstrukcja obsługiNávod k obsluzeHasználati útmutató Руководствo позкcплyатации
044485256606468
4
SpecificationsDescription of product partsRexel Auto 250XSheet CapacityManual Feed Slot8 sheets (80gsm)Sheet CapacityAuto-feed Chamber250 sheets (80gsm)Duty Cycle12 min ON / 40 min OFFRun Time from Cold16 minutesVolts / Hz230V / 50HzAmperage1.2 AmpsMotor Watts270 WattsIntroductionThank you for choosing this shredder from Rexel. We are sure it willserve you well, but please take a little time to study these instructions toensure you get the best out of your machine.Safety FirstmTo guard against injury, the following basic safety precautions must beobserved in the set-up of this product. Ensure the machine is plugged into an easily accessible power outlet,and ensure the cable is not likely to trip up a passer by. Any attempt to repair this unit by unqualified personnel will invalidatethe warranty. Please return to supplier. Unplug your shredder before moving it or when it is not in use for anextended period of time. Do NOT operate with a damaged power supply cord or plug, after itmalfunctions, or after it has been damaged in any manner. Do NOT overload electrical outlets beyond capacity as this can resultin fire or electrical shock. The socket-outlet should be installed near the equipment and shall beeasily accessible. Do NOT alter the attachment plug. The plug is configured for theappropriate electrical supply. Do NOT use near water. Do NOT use aerosol dusters or cleaners. Do NOT spray anything into the shredder. Do NOT load the auto-feed chamber with unopened junk mail,magazines, bound documents etc.Although this shredder has been designed to comply with UL 60950safety standards including the “probe accessibility tests”, do not operatethe shredder near children or pets.Control Panel and IndicatorsAutoUCContinuousJam BoostReverseJam Free Indicator – This alerts the user when too muchpaper is fed into the manual feed slot (see section on Jam FreeTechnology).Paper jam indicator – This means there is a paper jam in theauto feed chamber.Paper Loading Door/Bin Door Open or Bin Full indicator –This means either: Paper loading door is open Bin is open Bin is fullPower On indicator – This means the machine is turned on.Cool Down indicator – This means the machine is coolingdown.Lock indicator – This means the paper loading door is locked(during shredding).1 2 Paper loading Door Locking Mechanism – PIN Password3 4 Buttons Enter a four digit code, to lock the loading door duringshredding.This means don’t reach into the feedopening of the cutters.This means do not insert CDs into themanual feed slot.This means you should be carefulbecause long hair can becomeentangled in the cutters.This means keep children away fromshredder.Sheet capacity of manual feed entryslot.This means be careful of ties and otherloose clothing which could becomeentangled in the cutters.This means no aerosols.This means the shredder can acceptsmall staples.This means no oil lubricant (oil sheetsonly).This means the shredder can acceptsmall paperclips.This means do not insert credit cardsinto the manual feed slot.This means the shredder can acceptcredit cards.Safety FirstThis means be careful of loosejewellery which could becomeentangled in the cutters.4UA O N/OFF switch (at rear of machine)UB Important safety symbols(see shredder control panel below)UC Jam free indicatorUD Paper loading door handleUE Paper loading doorUF Door for binUG Continuous jam boost buttonUH Auto buttonUI Reverse buttonUJ Paper loading door locking mechanism –PIN password buttonsUK Indicator panelUL CastersUM Manual feed entry slotUN Credit card entry slotUO CD entry slotUP CD bin ‘in use’ locationUQ Paper stack viewing windowUR Pull out bin with viewing windowUS CD bin in storage location
GIlluminated Icons ExplainedLED IlluminationLockBin Full/Cool down Paper JamDoor Open IndicatorAuto Jam FreeColour of symbolGreen RedRedRedRedBlueGreenPower ON/OFF switch OFFSleep modePower ON/OFF switch ONStand byAuto modelightlightContinuous jam boost modelightlightReverse modelightlightPaper loading door openlightlightBin full/bin openlightlightMotor is cooling downflashlightPaper jamlightlightToo many sheets are being fed into manual feed slotlightCutters are self-cleaningflashlightEntering PIN passwordflashPaper loading door is locked lightIncorrect PIN password has been entered flash x3Correct PIN password re-enteredflash x3RedlightlightlightlightlightlightlightAuto 250X Shredding CapabilityAuto 250X CAN shredthe following: Stapled paper25mm within the corner Paper clip paper25mm within the corner A3 folded in halfmax. 2 sheets 26/6 and 24/6 or smallerstaples Capable of shredding small/medium (max wire thickness 0.9 mm) paper clips 2 50 sheets single sidedprinted paper Small sized paper loadedcentrally 250 sheets plain paper 8 0 gsm paper- A4 - 210mm x 297mm- A5 - 148mm x 210mm- A3 single sheet folded inhalf to make A4Although the Auto 250X will acceptfastened sheets,Rexel recommendthat staples and paperclips are removed priorto shredding to extendthe life of the product. 250 sheets colour printing 100gsm paper (throughmanual feed slot ONLY) Heavy Duty Staples. Check thestaple leg length is not greaterthan 6mm. A document with more than25 sheets held together by astaple or clip. Bound documents Bulldog clips Large clips. Check the lengthof the paperclip is not longerthan 32mm. Multiple folded sheets*(e.g. A3 sheets folded in half). Magazines or other documentsbound by multiple staplesor clips Unopened mail* e.g. junk mail.Open mail and place in autofeed or feed through manualfeed slot.Auto 250X CANNOTshred the following: Thick paper or card Adhesive labels Crumpled sheets* Plastic sheets, laminateddocuments, plastic folders, glossypaper or a sheet covered with* We recommend you feed these types of documents through the manual feed slot. However, theprint on both sides.Auto 250X can automatically shred folded and crumpled sheets if flattened out prior to loading.5
Auto-feed TechnologyThe Auto 250X has been designed to automatically shred up to 250sheets from the auto-feed chamber and up to 8 sheets through themanual feed slot. The auto-feed mechanism has been designed tohandle paper fastened with staples and paper clips and to only pull afew sheets of paper into the cutting mechanism to minimise the risk ofpaper jams.Operation1 Unpack the product.Jam Free Technology in manualfeed slotSensors in the paper feed area measure the thickness of paper aboutto be shredded. The ability to shred or not is communicated through redand green lighting. Green means that the stack of paper is within theshredders sheet capacity and OK to shred. Red means that you have toomuch paper, remove some sheets in order to shred.Given that you are unable to shred more sheets of paper than theshredder is capable of shredding, paper jams are prevented.This prevents time wasted through reversing paper and unblocking jamsnot to mention the mess it can create.2 Connect the shredder to mains supply.3 Ensure the ON/OFF button on the back of the machine is in the ON).position, which will illuminate the blue standby symbol (), which sets4 To commence shredding, press the Auto button (the shredder into auto mode. You are now ready to shred.5 To load the shredder, simply lift the loading door handle (see fig 1) toopen the loading door and insert documents. You can open the doorfurther to 90 degrees for easier access if required Load up to 250sheets at a time into the feed chamber. Do not fill above the 250MAX level, this could damage the shredder (see fig 2).6 The shredder will start the shredding cycle automatically ONLY afterclosing the loading door (see fig 1). Attention: If required you can now lock the loading door by enteringa 4 digit code (see below).In the unlikely event of the shredder jamming, the Auto 250X will stopshredding. Check that the bin is not full then try clearing the jam using) and continuous jam boost () buttons then returnthe reverse (). If this is unsuccessful follow the reverse functionto Auto mode (instructions.Reverse Function1 Should you wish to reverse paper out whilst shredding, a reverse) has been fitted for your convenience.button (8 Insert paper to be shredded into the feed area. The shredder willdetect the paper and start automatically.2 Reverse the paper out then turn the machine off using the ON/OFF switch at the rear of the shredder. Remove the paper from themanual feed slot (if being used) or open the loading door, removethe remaining stack of paper, then pull the jammed paper free of thecutting mechanism.9 If the shredder is left in auto mode for more than 2 minutes withoutbeing used, the shredder will automatically turn back to standbymode in order to save power.3 To resume shredding return the slide switch to the auto position) and turn on the shredder by using the ON/OFF switch at the(rear of the shredder.7 If you only have up to 8 sheets to shred, you can use the manualfeed slot, provided the auto feed chamber is empty (see fig 3).J The shredder will automatically ‘wake up’ from sleep mode whenpaper is inserted into the shred mouth or you open the loading door.).There is no need to press the Auto button (Locking the Paper Loading DoorFor additional security the paper loading door can be locked during theshredding of confidential material.To lock shredder:1 Place documents in tray. Close paper loading door (see fig 1).2 Press any 4 digits. REMEMBER YOUR CODE!Shredder unlocks automatically when: 4 digit code is re-entered. Shredding is complete. Shredder is inactive for 30 minutes (but documents remain in tray)Bin or Loading Door Open SafetyFunctionAs a safety precaution, if the bin or loading door is opened duringshredding, the shredder will stop and icon will illuminate.6Rare Occasions of JammingOver HeatingIf the Auto 250X is used continuously for over 24 minutes theshredder may overheat and the cool down indicator will illuminate red( ). Please allow the shredder to cool down. When the shredder isready to be used the thermometer symbol will no longer illuminate. If theshredder needs to cool down while shredding, no action is needed. Theshredder will automatically restart shredding paper once it has cooleddown after periods of continuous use. All you need to do is ensure paperis loaded into the chamber and the bin is empty when the machine iscooling down.Bin FullThe shredder will not function when the bin is full and the bin full) is illuminated. You should empty the bin.symbol ( Pull open the bin slowly to empty. Push the empty bin back into place and press the auto button toresume shredding.
GCD ShreddingA separate CD tray is provided to collect the shredded CD shards,ensure that this is correctly mounted onto the bin before shredding.1 Lift up the paper loading door (see fig 4).2 Always insert CDs in the CD slot (see fig 5). Only shred one CD at atime.3 Close the paper loading door.4 Empty the CD bin after 8 CDs to avoid waste spilling over into thepaper waste bin.5 Remove the CD tray before recommencing to shred paper.Credit Card Shredding1 Lift up the paper loading door (see fig 4).2 Insert the credit card into the roller as shown (see fig 6). Only shredone credit card at a time.3 Close the paper loading door.Rexel encourages customers to recycle shredded paper. Pleasenote that shredded paper cannot be recycled if mixed with creditcard shards. If recycling, please separate shredded paper andcredit cards.Self-cleaning CuttersAfter emptying and replacing a full bin, the shredder will run in reversefor 4 seconds, stop for 2 seconds and then forward for 4 seconds toclear away any remaining paper from the cutter mechanism. Thisunique ‘self-cleaning’ mechanism is additional jam preventiontechnology from Rexel.MaintenanceThe rollers on the auto-feed mechanism may become dirty over time,please wipe clean with a dry cloth to maintain maximum productperformance (see fig 7).The auto-start infra-red sensor, located in the paper feed entry-slot, canoccasionally become covered in paper-dust causing the shredder torun despite no paper being fed into the machine. Switch the shredderoff at the rear of the machine and carefully clean the sensor using acotton-swab (see fig 8).Lubrication of the ShredderOnly use Rexel Oil Sheets (2101948 & 2101949) to lubricate. ACCOBrands Europe accepts no liability for product performance or safetywhen other types or brands of lubricants are used on any part(s) ofthis machine. Rexel recommend using an oil sheet after the bin hasbeen emptied three times (and for on-going three bin cycle thereafter).Insert the oil sheet into the manual feed slot and NOT in the auto-feedchamber. Using an oil sheet in the auto-feed chamber will contaminatethe feed rollers preventing the auto-feed mechanism shredding. Followthe maintenance instructions if the rollers become contaminated.Shredder AccessoriesWe recommend that a paper waste sack for recycling shredded paper isused on all models.AccessoryRecycling Waste SackOil SheetsPart NumberBox Qty1765029EU20 sacks210194921019482012GuaranteeACCO Brands Europe warrants its products and their parts againstdefects in materials and workmanship under normal use for a periodof 24 months from the original date of purchase. During this period wewill repair or replace a defective product or part subject to the followingwarranty conditions:The warranty applies only to defects in materials and workmanshipunder normal use and does not extend to damage to the Product orparts which result from:- alteration, repair, modification or service carried out by anyoneother than an authorised ACCO service centre.- accident, neglect, abuse or misuse owing to failure to comply withthe normal operating procedures for a product of this type.Nothing in this Warranty shall have the effect of excluding the liability ofACCO in respect of death and personal injury caused by the negligenceof ACCO. This Warranty is offered (subject to these terms and conditions)in addition to, and does not affect your statutory rights.Additional GuaranteeACCO Brands Europe guarantees the cutting blades of the shredder tobe free from defects in material and workmanship for 15 years from thedate of purchase by the original consumer.*Please note that the cutter blades will be progressively worn downby shredding fastened sheets (staples and paperclips) - this is notcovered in the warranty. The Auto 250X has been design to shred upto 50 credit cards and 50 CDs in the standard 2 year warranty period.Any excessive credit card or CD shredding will invalidate the extendedcutter warranty.These conditions shall in all respects be governed and construed inaccordance with English Law and subject to the exclusive jurisdiction ofthe English Courts.For any questions relating to your warranty, please contact your localservice agent (see back cover).7
Description des composantsdu produitSpécificationsRexel Auto 250XCapacité de destructionFente d’alimentation manuelle8 feuilles (80 g/m2)Capacité de destructionCompartiment d’auto-alimentation250 feuilles (80 g/m )Cycle de fonctionnement12 min marche /40 min arrêtDurée de fonctionnement initialeaprès démarrage à froid16 minutesVolts/Hz230 V / 50 HzAmpérage1,2 APuissance du moteur270 watts2IntroductionMerci d’avoir choisi ce destructeur Rexel. Veuillez prendre quelques minutespour lire le mode d’emploi qui vous indiquera comment profiter au maximum devotre nouvel appareil.La sécurité d’abordmPour vous protéger contre les accidents, veuillez observer les consignes desécurité de base suivantes lors de l’installation de l’appareil. Branchez le destructeur dans une prise de courant facile d’accès, en veillant àce que personne ne puisse trébucher sur le fil. La garantie sera annulée en cas de tentative de réparation par du personnelnon qualifié. En cas de problème, renvoyez l’appareil au fournisseur. Débranchez l’appareil avant de le déplacer ou en cas d’inutilisation prolongée. N’utilisez PAS l’appareil en cas d’endommagement de la fiche ou ducordon d’alimentation, après un mauvais fonctionnement ou après unendommagement quelconque. Ne surchargez PAS les prises électriques au-delà de leur capacité, au risquede causer un incendie ou de subir un choc électrique. L’appareil doit être installé à proximité d’une prise de courant facilementaccessible. Ne modifiez PAS la fiche. La fiche est configurée pour une alimentationélectrique déterminée. N’utilisez PAS l’appareil près de l’eau. N’utilisez PAS de bombe aérosol dépoussiérante ou nettoyante. Ne pulvérisez AUCUN produit dans le destructeur. Ne mettez PAS, entre autres, d’imprimés publicitaires sous enveloppe, derevues ni de documents reliés dans le compartiment d’auto-alimentation.Bien que ce destructeur ait été conçu conformément aux normes de sécuritéUL 60950, intégrant les « essais d’accessibilité à l’aide de sondes », n’utilisezjamais le destructeur à proximité d’enfants ou d’animaux domestiques.La sécurité d’abordFaites preuve de diligence si vous avez lescheveux longs car ils pourraient s’emmêlerdans le bloc de coupe.Attention aux cravates et autres vêtementsamples qui pourraient être happés par lebloc de coupe.Attention aux bijoux qui pourraient êtrehappés par le bloc de coupe.8UA C ommutateur marche/arrêt (arrière de l’appareil)UB S ymboles de sécurité importants(voir panneau de contrôle du destructeur ci-dessous)UC V oyant anti-bourrageUD P oignée du couvercle du compartimentUE C ouvercle du compartimentUF P aroi avant de la corbeille extractibleUG T ouche de déblocage par marche avant en continuU outon mode automatiqueH BUI T ouche marche arrièreU écanisme de verrouillage du couvercle du compartiment –J MTouches de saisie de code PINUK P anneau d’indicateursUL RoulettesUM F ente d’alimentation manuelleUN Fente d’alimentation pour carte bancaireUO Fente d’alimentation pour CDUP Emplacement de la corbeille à déchets CD en cas d’utilisationUQ F enêtre de visualisation de la liasse papierUR C orbeille extractible avec fenêtre de contrôle du niveau deremplissageUS E mplacement de la corbeille à déchets CD en cas d’inutilisationPanneau de contrôle etindicateurs du destructeurModeautomatiqueUCMarche avanten continuMarchearrièreVoyant anti-bourrage – Il avertit l’utilisateur au cas où celui-cialimente trop de papier dans la fente d’alimentation manuelle (voirsection sur la technologie anti-bourrage).Indicateur de bourrage – Il indique l’existence d’un bourrage depapier dans le compartiment d’auto-alimentation.Indicateur corbeille pleine/porte ouverte – Il indique l’une despossibilités suivantes : le couvercle du compartiment est ouvert la corbeille est ouverte la corbeille est pleineIndicateur de mise sous tension – Il indique que l’appareil est allumé.Indicateur de refroidissement – La machine est en train de se refroidir.Indicateur de verrouillage – Il indique que le couvercle ducompartiment est verrouillé (pendant la destruction).1 2 Mécanisme de verrouillage du couvercle du compartiment –3 4 Touches de saisie de code PIN Saisissez un code à quatre chiffrespour verrouiller le couvercle du compartiment pendant la destruction.Ne mettez pas la main dans la fented’alimentation pour saisir des feuilles.Gardez le destructeur hors de portée desenfants.N’utilisez pas de bombes aérosols.N’utilisez pas de lubrifiant liquide(uniquement des feuilles lubrifiantes).N’insérez pas de cartes bancaires dans lafente d’alimentation manuelle.N’insérez pas de CD dans la fented’alimentation manuelle.Capacité de destruction de la fented’alimentation manuelle.Le destructeur peut accepter de petitesagrafes.Le destructeur peut accepter de petitstrombones.Le destructeur peut détruire les cartesbancaires.
FExplication des icônes lumineusesVerrouillageCorbeille pleine/Porte ouverteVoyants LEDRefroidisse- Indicateurment de bourrageCouleur du symboleVert RougeRougeRougeRougeCommutateur marche/arrêt, arrêtMode de veilleCommutateur marche/arrêt, marcheMise en veilleMode automatiqueMode anti-bourrage par marche avant en continuMode marche arrièreAlluméCouvercle du compartiment ouvertAlluméCorbeille pleine/ouverteAlluméRefroidissement du moteurClignoteBourrage papierAlluméInsertion d’un trop grand nombre de feuilles dans la fented’alimentation manuelleAuto-nettoyage des lames ClignoteSaisie du code PINClignoteLe couvercle du compartiment est verrouillé AlluméSaisie d’un code PIN incorrect Clignote x3Nouvelle saisie du code PIN correctClignote x3Auto Anti-bourrageBleuVert méAllumé AlluméAllumé AlluméCapacité de destruction de l’Auto 250XL’Auto 250X PEUTdétruire ce qui suit : Feuilles agrafées à 25 mm ducoin au plus Feuilles avec trombone, à 25 mmdu coin au plus Feuille A3 pliée en deux –2 feuilles maxi Agrafes 26/6 et 24/6 ou pluspetites Trombones petits/moyens(épaisseur maxi du fil 0,9 mm) 250 feuilles de papier impriméesd’un côté Feuilles petit format chargéescentralement 250 feuilles de papier blanc Papier de 80 g/m2- A4 – 210 mm x 297 mm- A5 – 148 mm x 210 mm- Une seule feuille A3 pliée endeux au format A4 250 feuilles imprimées en couleur Papier 100 g/m2 (uniquementvia la fente d’alimentationmanuelle) Agrafes grande capacité. Vérifiezque l’agrafe ne fait pas plus de6 mm de haut. Un document de plus de 25feuilles attachées avec uneagrafe ou un trombone. Gros trombones. Vérifiez que letrombone ne fait pas plus de 32mm de long Plusieurs feuilles pliées*(p. ex. plus de deux feuillesA3 pliées en deux)Bien que l’Auto 250Xaccepte les feuillesattachées, Rexel conseilled’enlever les agrafeset trombones avantla destruction afin deprolonger le cycle de viede l’appareil.L’Auto 250X NE PEUTPAS détruire ce qui suit : Documents reliés Pinces double clip Revues ou autres documents Du courrier sous enveloppe*, comme des imprimésreliés à l’aide de plusieurspublicitaires. Ouvrez le courrier et placez-le dansagrafes ou trombonesle compartiment d’auto-alimentation ou insérez-ledans la fente d’alimentation manuelle. Feuilles en plastique, documents Papier épais ou carton Étiquettes adhésives Feuilles froissées*plastifiés, dossiers en plastique,papier brillant ou une feuille * Nous conseillons d’alimenter ces types de documents via la fente d’alimentation manuelle. L’Auto 250X peut cependant détruireimprimée recto/versoautomatiquement des feuilles pliées et froissées à condition qu’elles soient aplaties avant leur alimentation dans le destructeur.9
Technologie d’auto-alimentationL’Auto 250X a été conçu pour détruire automatiquement jusqu’à 250 feuillesplacées dans le compartiment d’auto-alimentation et jusqu’à 8 feuilles par lebiais de la fente d’alimentation manuelle. Le mécanisme d’auto-alimentation aété conçu pour détruire les feuilles attachées avec une agrafe et un trombone etpour n’introduire que quelques feuilles de papier à la fois sur le mécanisme decoupe afin de réduire les risques de bourrage.Fonctionnement1 Déballez l’appareil.2 Branchez le destructeur à une prise secteur.3 Vérifiez que le commutateur marche/arrêt situé à l’arrière de l’appareil esten position de marche ().4 Pour démarrer la destruction automatique, appuyez sur la touche centralede mode automatique (), auquel cas le symbole de mise en veille bleusur la touche de mode automatique s’allume. Vous pouvez maintenantcommencer à détruire vos documents.5 Pour ouvrir le couvercle et charger le destructeur, soulevez simplement lapoignée du couvercle du compartiment (voir fig. 1) et insérez les documents.Vous pouvez ouvrir le couvercle à un angle de 90 degrés pour faciliter lamanipulation si besoin est. Chargez jusqu’à 250 feuilles à la fois dans lecompartiment d’auto-alimentation. Ne dépassez PAS le niveau MAXIMUMde 250 feuilles au risque d’endommager le destructeur (voir fig. 2).6 Le destructeur se mettra automatiquement à fonctionner UNIQUEMENT sivous avez fermé le couvercle du compartiment (voir fig. 1). Attention ! Si besoin est, vous pouvez maintenant verrouiller le couvercledu compartiment en saisissant un code à 4 chiffres (voir ci-dessous).7 Si vous ne voulez détruire que jusqu’à 8 feuilles, vous pouvez utiliser lafente d’alimentation manuelle à condition que le compartiment d’autoalimentation soit vide (voir fig. 3).8 Insérez les feuilles à détruire dans la fente d’alimentation manuelle. Ledestructeur détecte le papier et lance automatiquement la destruction.9 Si le destructeur est laissé en mode automatique pendant plus de 2 minutessans servir, il se met automatiquement en mode de veille afin d’économiserde l’énergie.J À l’alimentation de papier dans la fente d’insertion ou à l’ouverture ducouvercle du compartiment, le destructeur passe automatiquement dumode de veille au mode de fonctionnement. Il est inutile d’appuyer sur latouche de mode automatique ().Verrouillage du couvercle ducompartimentPour accroître la sécurité, le couvercle du compartiment peut être verrouillépendant la destruction de documents confidentiels.Comment verrouiller le destructeur :1 Placez les documents dans le bac du compartiment de destruction. Fermezle couvercle du compartiment (voir fig. 1).2 Saisissez 4 chiffres de votre choix. N’OUBLIEZ PAS CE CODE !Le destructeur se déverrouille automatiquement dans les cas suivants : à la saisie du code à 4 chiffres si la destruction est terminée si le destructeur est inactif pendant 30 min (mais que les documents sonttoujours dans le compartiment)Fonction d’arrêt automatique en casde corbeille ou couvercle ouvert10Par mesure de sécurité, si la corbeille ou le couvercle du compartiment estouvert pendant la destruction, le destructeur s’arrête de fonctionner et l’icônes’allume.Technologie anti-bourrage encas d’alimentation manuelleDes capteurs situés dans l’aire d’alimentation du papier mesurent l’épaisseurde la liasse à détruire. Le destructeur indique sa capacité à détruire ou non laliasse entière par le biais d’un voyant lumineux vert ou rouge. Vert signifie quela liasse respecte la capacité de destruction et peut être détruite. Rouge signifieque la liasse est trop épaisse et que vous devez retirer quelques feuilles avantla destruction.Comme il vous est ainsi impossible de détruire un nombre de feuilles excédantla capacité de destruction, les bourrages sont évités.Plus de perte de temps à renverser la marche et retirer le papier, ni à nettoyer ledésordre occasionné !Rares cas de bourrageDans le cas improbable de bourrage, l’Auto 250X s’arrête de fonctionner.Vérifiez alors si la corbeille est pleine, puis essayez d’éliminer le bourrage àl’aide des touches marche arrière () et marche avant en continu (),puis remettez-le en mode automatique ( ). Si le bourrage persiste, suivez lesinstructions d’utilisation de la fonction de marche arrière.Fonction marche arrière1 Si, lors de la destruction de papier, vous souhaitez faire ressortir les feuillespar l’avant, utilisez la touche marche arrière () mise à votre dispositionà cet effet.2 Faites ressortir le papier par l’avant, puis mettez le destructeur hors tensionà l’aide du commutateur marche/arrêt situé à l’arrière de l’appareil. Retirezle papier de la fente d’alimentation manuelle (en cas d’utilisation) ou ouvrezle couvercle du compartiment et retirez les feuilles restantes, puis enlevez lepapier du mécanisme de coupe.3 Pour reprendre la destruction, mettez l’appareil sous tension à l’aide ducommutateur marche/arrêt situé à l’arrière de l’appareil et appuyez sur latouche de mode automatique ( ).4 La fonction marche arrière ne fonctionne pas tant que le destructeur estverrouillé.SurchauffeSi l’Auto 250X sert continuellement pendant plus de 24 minutes, il risque desurchauffer auquel cas l’indicateur de refroidissement rouge s’allume ( ).Veuillez alors laisser l’appareil se refroidir. Lorsque le destructeur peut être denouveau utilisé, le symbole à thermomètre s’éteint. S’il a besoin de se refroidiren cours de destruction, votre intervention est inutile. En effet, il recommenceautomatiquement la destruction du papier dès qu’il s’est refroidi après unepériode d’utilisation continue. Il vous suffit de vérifier que le papier est chargédans le compartiment d’auto-alimentation et que la corbeille est vide pendantque l’appareil se refroidit.Corbeille pleineLe destructeur ne fonctionne pas si la corbeille est pleine, auquel cas le symbolecorbeille pleine ( ) s’allume. Vous devez alors vider la corbeille. Retirez lentement la corbeille pour la vider. Remettez la corbeille vide en place en la poussant et appuyez sur la touchemode automatique pour relancer la destruction.
FDestruction de CDLe destructeur est doté d’un bac à déchets de CD séparé pour récupérer lesmorceaux de CD détruits. Veillez à bien l’installer sur la corbeille avant deprocéder à la destruction.1 Soulevez le couvercle du compartiment (voir fig. 4).2 Insérez toujours les CD dans la fente d’alimentation pour CD (voir fig. 5).Ne détruisez qu’un seul CD à la fois.3 Fermez le couvercle du compartiment.4 Videz le bac à déchets de CD après la destruction de 8 CD pour éviter queles déchets retombent dans la corbeille à papier.5 Retirez le bac à déchets de CD avant de reprendre la destruction de papier.Destruction de cartes bancairesL’Auto 250X peut détruire les cartes bancaires. Pour cela, appuyez sur latouche de
credit cards. This means do not insert credit cards into the manual feed slot. Jam Free Indicator - This alerts the user when too much paper is fed into the manual feed slot (see section on Jam Free Technology). UC Paper Loading Door/Bin Door Open or Bin Full indicator - This means either: Paper loading door is open Bin is open