Transcription
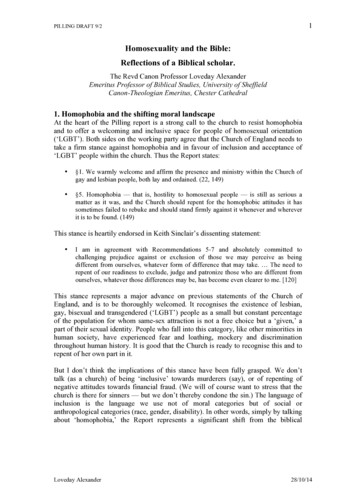
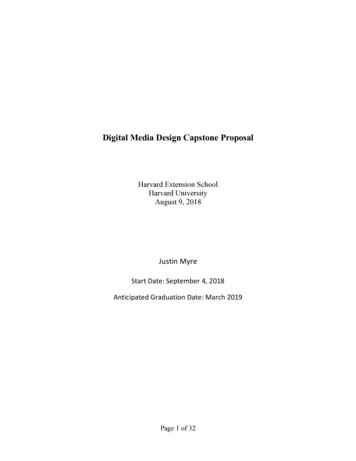
Reflections Project TutorialDigital Media 1You are creating your own floor and wall for your advertisement.Please do this before you begin on the Diamonds Project:1. Reset all tools in Photoshop.2. Create a new composition. File New: Width 720 Pixels / Height 486 Pixels.Resolution 72. Color Mode RGB. Transparent Background.3. Create 4 Layers. In this order: Dark Floor, Bright Floor, Dark Wall, and BrightWall.4. The FloorConsists of 2 Layers. A Dark floor and a Bright Floor. The Dark Floor Layershould be painted Black and the Bright Floor layer should be painted gray (choose anyshade).5. Dark Floor: Remove all of the black with the exception of the lower third. You cando this by using the Rectangular Marquee Tool and select the lower third of thecomposition. Make sure you are not feathering your selection. Select the Add avector/layer mask button found at the bottom of the layers window. Now only the lowerthird of the black layer is visible.6. Bright Floor: Repeat same steps from Dark floor using the exact same size and
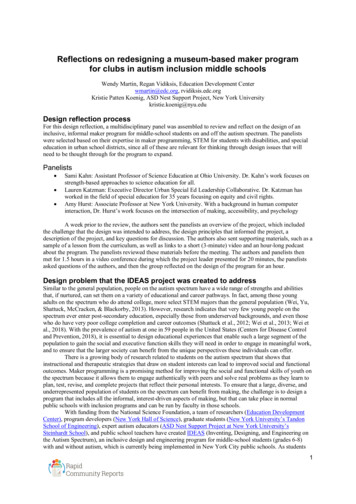
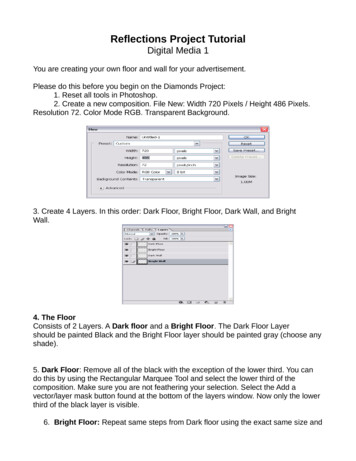
shape. Now if you look at the image thumbnail for both your Dark Floor andBright Floor the shapes should match. The Layer Mask thumbnails shouldmatch as well.7. Creating the Highlight on the Dark Floor Layer:We want to create a hole in our Dark Floor layer in order to reveal some of the greylayer below. We call this a highlight. You must create a Highlight on the Dark Floorlayer by using the Elliptical Marquee Tool. Do not forget to set the Feather BEFOREyou actually make your selection. *Feathering the selection softens the edges of theselection. If you want to change your feather after you have already made a selectionyou must first change the feather’s numerical value at the top of the page. Set this toabout a 25 to 45, depending on the look you want. Then use your Elliptical MarqueeTool to make a new selection. The selection should be in the shape of an oval. Itshould cover the majority of the floor.Once you are happy with your selection click the backspace/delete button to removethat area of the black dark floor, make sure you are on the right layer. You may have toredo this several times and experiment with the feather in order to get the desiredlook. Now your gray layer will show through and look like a highlight on the floor.8. The Wall:Consists of 2 Layers. A Dark Wall and a Bright Wall. You can pick any colorthat you wish as long as the Dark Wall color is a Darker shade of the Bright Wall
color. Below is a different example of the layers showing a Dark Wall and BrightWall using pink in one example and green in the other.Below you can see how I picked a dark shade of green and a bright shade ofgreen.9. The Product:You can pick anything you want advertise as long as it is school appropriate. It can bejewelry, an automobile; fruit it is completely up to you. Remove the background fromthe image(s) using a Layer Mask and add it to the composition. Label the layerProduct. Below are some examples of the Diamonds project. Your project should lookprofessional. Remember that you will be focusing on the overall design in addition tothe Photoshop tools.The Reflection:Make sure your product layer is on top of all of the other layers. Scale your image if
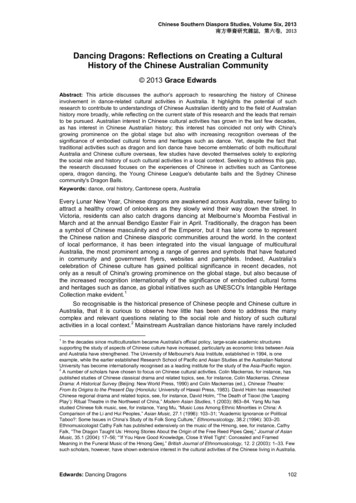
you need to. Remember to preserve the aspect ratio as you scale the image, hold thedown the shift key are you transform your image. Place the product so that a smallportion is touching the floor as shown below.10. Now it is time to make the reflection:Duplicate the Product Layer and title the duplicated layer Reflected Product.Notice that you have 6 layers inside your layers palette. If you look at the imagethumbnails of each layer you will see that 2 layers look exactly alike. The ProductLayer and the Reflected Product Layer.Click on the Reflected Product layer and we are going to flip this image. Go toEdit/Transform/Flip Vertical. Then use the Move Tool in order to move the ReflectedProduct below the Product. Both images should touch slightly. It is starting to look likea reflection. See below:11. Drop the opacity of the Reflected Product. You decide how much.
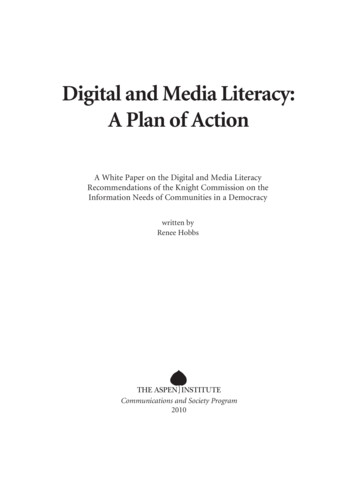
12. To make the Reflected Product look real. Scale the Reflected product slightly sothat it is slightly smaller than the Product image. Remember to preserve the AspectRatio. Once it is scaled you will have to reposition the Reflected Product imageunderneath the Product. See below.13. Creating the textured Background using the Stained Glass filter It is your decisionon what filters you would like to use in order to create a custom background inPhotoshop. In this tutorial, I am only showing you how to use the Stained Glass effect.You can choose any effects that we have talked about in class.Make sure your foreground and background colors match your Dark Wall andBright Wall colors. If they do not, use the Eye Dropper to match the colors. Seebelow.
Make sure the Dark Wall color is your foreground color and the Bright Wall color is thebackground color.Click on your Dark Wall Layer. Click on the Image Thumbnail of the Dark Wall layerand not the Layer Mask thumbnail. Go to the top of the page and click onFilter/Texture/Stained Glass. Press ok. You may notice a slight change. Repeat theeffect to get the desired look. The more you reapply the Stained Glass effect, the moreyour background will change. Also, experiment with swapping the foreground andbackground color order. You can also experiment/adjust the Cell size, BorderThickness, and Light Intensity. This will also affect the effect. Look below as I reapplythe effect 5 times.
14. Now click on the Bright Wall layer. Repeat the process as above. Experimentwith the foreground and background colors. See below.You will need to add a logo and another additional images to the composition alongwith a reflection. You will also add text to the composition using a number of LayerStyles that we will discuss in class. Please look at the examples for inspiration andremember the Elements and Principals of Design! Make sure your center of interest isvery clear!
Reflections Project Tutorial Digital Media 1 You are creating your own floor and wall for your advertisement. Please do this before you begin on the Diamonds Project: 1. Reset all tools in Photoshop. 2. Create a new composition. File New: Width 720 Pixels / Height 486 Pixels. Resolution 72. Color Mode RGB. Transparent Background. 3. Create 4 Layers. In this order: Dark Floor, Bright Floor .