Transcription
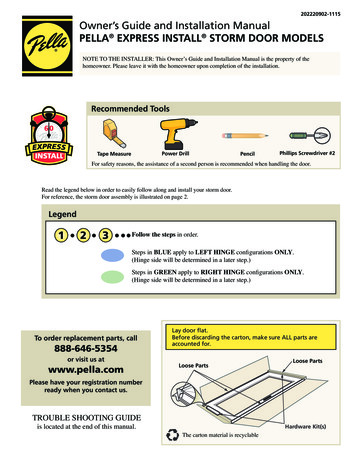
202220902-1115Owner’s Guide and Installation ManualPELLA EXPRESS INSTALL STORM DOOR MODELSNOTE TO THE INSTALLER: This Owner’s Guide and Installation Manual is the property of thehomeowner. Please leave it with the homeowner upon completion of the installation.12Recommended ToolsPower DrillTape MeasurePencilPhillips Screwdriver #2For safety reasons, the assistance of a second person is recommended when handling the door.Read the legend below in order to easily follow along and install your storm door.For reference, the storm door assembly is illustrated on page 2.Legend123Follow the steps in order.Steps in BLUE apply to LEFT HINGE configurations ONLY.(Hinge side will be determined in a later step.)Steps in GREEN apply to RIGHT HINGE configurations ONLY.(Hinge side will be determined in a later step.)To order replacement parts, call888-646-5354or visit us atwww.pella.comLay door flat.Before discarding the carton, make sure ALL parts areaccounted for.Loose PartsLoose PartsPlease have your registration numberready when you contact us.TROUBLE SHOOTING GUIDEis located at the end of this manual.Hardware Kit(s)The carton material is recyclable
Storm Door ComponentsNOTE: Actual door styles may vary from illustrations, however, the installation steps will be the same.Glass Insert(may be sold separately)Retainer Strips (4)Screen InsertDrip CapORHandle SetInstallationTemplate(may be sold separately)Screw Covers (3)Closer KitHardwareLock BodyDoor Framewith HingeHinge Side ExtenderExpanderLatch Side ExtenderLatch RailBefore you beginaDetermine the hinge side ofyour storm door.1-in wide x 1-in deep mounting surface is required. Hinge-sideshimming may be required to fit existing opening.bNominalDoor SizesOpening Width(No shim required)Opening Width(Shim required)Shim to thisOpening Width36-in x 81-in35-7/8-in – 36-in36-1/16-in – 36-3/8-in35-7/8-in – 36-in34-in x 81-in33-7/8-in – 34-in34-1/16-in – 34-3/8-in33-7/8-in – 34-in32-in x 81-in31-7/8 in – 32-in32-1/16-in – 32-3/8-in31-7/8-in – 32-in30-in x 81-in29-7/8-in – 30-in30-1/16-in – 30-3/8-in29-7/8-in – 30-in-OpeningHeight80-in to 81-inTop ViewLeft HingeRight HingeHouse DoorJamb1-incShim on your hinge side, asdetermined above. Shim may beone long piece or small 8-in to 12-insections. Use an appropriate shimthickness to reduce the opening asnoted in the chart. Household shimmaterials may include paint stir sticksor wooden yardsticks.LEFTHINGEDOORSshimthis side2RIGHTHINGEDOORSd1-inStorm Door Opening WidthCheck for existing doorhardware interference. If stormdoor hardware will interferewith your house door hardware,we recommend placing thestorm door hinge on the oppositeside. Nail shim in place.Shim(s)shimthis sideShim must not extendbeyond entryway faceExterior BrickMold TrimeVerify house door trimis securely attached andsquare. If you removedan old storm door, youmay wish to fill and paintany existing holes beforeproceeding.
1Turn door so the interior faces up.Remove any shipping clips or retainerstrips. Remove screen. Set aside lockbody and loose parts.Rememberthis is theINTERIOR SIDEof the doorftLiSnapInstallBothTopandBottomInstall BothLeft and Right2Set glass insertinto opening with“Exterior Side”sticker facing down.3Install the short retainerstrips into the top andbottom channels.4Install the long retainersinto the side channels.3
5Locate the rail extenders. Slide the rail extender into thebottom of the hinge rail. For LEFT HINGE installation, usethe rail extender marked with an “L”. For RIGHT HINGEinstallation, use the rail extender marked with an “R”.RIGHTHINGESHOWNLEFTHINGESHOWN6Slide the bottom expander ontothe bottom of the door, with theslots to the interior. Do NOTsecure with screws at this time.7Locate the screw template in Bag A of the CloserKit. Position it with the proper end UP based on yourhinge position. Place the template tight against thehinge side of the door frame, and slide to the top.8Holding the template in place, install theplaceholder screw into the center of hole. Do nottighten all of the way. Leave 1/8-in of the screwexposed. Remove and discard template.Left HingeQty. 14Left HingeRight HingeRight HingePlaceholder Screw#8 x 3/4” Pan HeadActual Size
9Hang storm door onto door frame usingthe placeholder screw. The door will settleapproximately 1/16-in. Tighten screw whilepushing top of hinge rail tight against thedoor frame.door installation screw from10 InstallBag B in the lowest hole on the hingerail, and secure door in opening.PUSHQty. 1Installation Screw#8 x 3/4-in Pan HeadActual Size11Slide rail extender to sill. Loosendoor installation screw if needed andthen retighten.12Install door installation screws fromBag B on the inner side of hinge railin remaining six locations.Qty. 6Installation Screw#8 x 3/4-in Pan HeadActual Size5
13Push door tight against door frame. Installdoor installation screws from Bag B on theouter face of the hinge rail. Do not overtighten screws.Qty. 514Cut extender weather stripping to length,remove adhesive backing and install.Installation Screw#8 x 3/4-in Pan HeadActual Size15Rest the drip cap on top of the door, using spacers foralignment. Close door and align the end of the drip capwith the outside edge of the hinge rail.16Secure drip cap with installation screws fromBag B. Remove and discard the spacer clips.Caulk along top edge of drip cap if desired.Qty. 317Slide the remaining rail extender into the bottom ofthe latch rail. For LEFT HINGE installation, use therail extender marked with an “R”. For RIGHT HINGEinstallation, use the rail extender marked with an “L”.Installation Screw#8 x 3/4-in Pan HeadActual SizeRemoveclips afterinstallingscrewsLeft Hinge6Right Hinge
182019Place latch rail tight against the drip cap.Verify that the door closes freely withouthitting the latch rail. Align outside edge of thelatch rail with outside edge of the drip cap.Fasten the latch rail with doorinstallation screws from Bag B.Qty. 521Slide rail extender to the sill.Installation Screw#8 x 3/4-in Pan HeadActual Size22Cut extender weather stripping to length,remove adhesive backing and install.23Following the instructions in the handle kit,install the lock body and handle.Handle Kit may be sold separately.7
24Install screw cover strips (1 horizontal, 2 vertical).125Close the door. Adjust the bottom expander to lightlycontact the sill. Install expander screws from Bag D.Qty. 2Installation Screw#8 x 1/2-in Pan HeadActual Size82
Locate the two closer basesin the closer kit. Removeand discard the hole plugs.2627Determine which side toinstall the closers, based onyour hinge installation.28From inside your house,measure 1-1/2-in down fromthe top of the hinge mountingrail and mark with a pencil.29Measure 1-1/2-in up from thebottom of the hinge mountingrail and mark with pencil.30Align the arrow on the closerbase with the mark you made,and rest the base against theback of the hinge mounting rail.31Secure base with four closerbase screws. Repeat forsecond closer base, aligningbase arrow with your mark.LEFT HINGE Install Closers on this sideRIGHT HINGE Install Closers on this sideAPPROX 1.5"Interiorside ofdoorRight HingeAlign Arrowwith Pencil MarkRest AgainstBack of HingeMounting RailRight HingeQty. 8TopCloserBottomCloserCloser Base Screw#10 x 1 1/2-in Pan HeadActual Size32Break off alignment tabs.9
33TOPCloserLocate the top and bottom closers.One-Touch CloserBOTTOMCloser34Attach jamb bracket to bottom closerwith the short pin, positioningOne-Touch button facing up as shown.Leave yellow clip in place.35Slide top and bottom closersonto their bases.Top CloserLeftHingeIllustrationLeft HingeIllustrationJAMBBRACKEToveRemardDiscLeave Clipin PlaceDOORBRACKET36Attach door bracket to closer assemblywith the long pin.37Close door.Secure the door bracketwith door bracket screws.ertInsRight HingeTopCloserBottomCloserSlideQty. 4 One-TouchButtonDoor Bracket Screw#10 x 5/8-inBottom CloserActual SizeAdjustment Screw4010Adjust closer speed with39 adjustment screw.erRemDi an ovsc d eardFas- Slowter38Discard clips(top and bottom).TO USE: Open the door, then tap the button.TO CLOSE: Nudge the door open slightly.One-Touch Button
Care and MaintenanceDoorCleaningUse a soft cloth with any household grease-cutting cleaner to clean the door.PLEASE NOTE: Thin marks on the painted surfaces of the door can be removedusing turpentine and light rubbing with a clean cloth.IMPORTANT: DO NOT use brass polish or steel wool on the bottom expander. Usea household grease-cutting cleaner or a mild soap and water solution.PLAIN GLASSDO NOT use an ammonia-based cleaner for the first cleaning of the glass.GlassCleaningFIRST CLEANING: Use a mixture of one part vinegar with four parts water to removethe protective coating (for shipping purposes) from the glass.ROUTINE CLEANING: Use any household glass cleaner.LOW-E GLASSRECOMMENDED ROUTINE CLEANING: Clean the glass with plain water, using aclean soft sponge or lint-free cloth to remove as much surface grime from the glass aspossible. If needed, wash the surface of the glass again with a solution of 80% water and20% vinegar with a clean soft lint-free cloth. Dry with a new soft cloth. Cleaning maycause streaks when dried if the glass is exceptionally dirty. In this case repeat cleaning.NOTE: Care must be exercised when using rubber squeegees on the coated surface, as they can leavestreaks that are hard to remove if they are used incorrectly or are in poor condition. Never use ANY type of scraper or abrasive cleaner on the coated surface. Particles from thesematerials can be deposited on the coated surface and are very difficult to remove. For unusually hard to remove spots such as crayon or grease, isopropyl alcohol, GooGone orGoofOff may be used. After spot cleaning, the full glass surface should be cleaned following therecommended routine cleaning instructions.HandleCleaningBRASS & NICKEL FINISHESRoutine Cleaning: Use a soft cloth with a mild soap and water solution to clean thesurfaces. Apply a high quality, non-abrasive automobile wax to polish.Note: NEVER use ammonia-based cleaners on brass or other metallic finish handles.If your Pella door includes a solid brass handle, the brass is polished and sealed with a clear coating by the manufacturer. Should the finishbe accidentally damaged by an abrasive or sharp object, it will succumb to a natural oxidation process that occurs when the elements contactunprotected brass. Brass has an enduring quality, in that it can be refurbished to its original polished finish again and again by using a quality brasspolish and a soft cloth. Do not clean the bottom expander in this manner - see door cleaning above.1. Remove the hardware from the door so the finish of the door will not be affected. See the hardware instructions for removal. NOTE: you may beable to leave the hardware in place on the door when polishing the handle only – make certain tocompletely mask off all areas around the handle before starting. If polishing the key cylinder, protect the internal mechanismby covering the opening with tape.2. Use a quality brass polish or cleaner to clean the brass - follow the product’s directions and cautions. Note: Firm rubbing maybe necessary to loosen the coating on the brass.3. Reseal the brass per instructions below.a. Use the properties from the brass polish you used to clean the brass. (Easiest method, but requires more frequent polishing.)b. Apply a high quality, non-abrasive, polymer-based automobile wax to seal the surface.c. Apply a new clear coat with a clear lacquer spray - follow the product’s directions. (Most difficult, but lasts the longest.)PLEASE NOTE: If you removed the hardware from the door, lubricate any internal workings with a spray lubricant. Re-install the hardware on thedoor. See the hardware instructions for installation.11
Trouble Shooting GuideIf you have a question that you do not see listed here, or have not been able to resolve through your Pella Owner’s Manualand Installation Guide, call one of our customer service representatives toll-free at 1-800-374-4758.Common QuestionsProbable CausesSuggested SolutionsDoor does not open or close properly.Entryway framing is out or square/plumb orframe is warped1. Verify the entryway framing and shim asnecessary. [See Page 2]Closer(s) out of position or adjustment.1. Remove the adjustment screw from thecloser(s), cycle the door a few times, thenreplace the screw. [See Page 10, Step 39]2. Adjust the position of the closer doorbracket until the door operates properly. [seePage 10, Step 37]3. If switching from glass to screen, vary thecloser speed for proper operation. [see page10, Step 39]Bottom Expander is out of position.1. Verify the expander is centered on the door– adjust if necessary. [See Page 4]2. Verify the expander is not too low - adjustas necessary. [See Page 8, Step 25]Drip Cap is out of position.1. Verify drip cap is centered and aligned inthe opening - adjust as necessary. [See Page 5,Step 12, Page 6, Step 13]Hinges are binding1. Verify mounting frame screws are not overtightened - back off screws slightly. [See Page6, Step 13]2. Verify entryway framing is not twisted orwarped - shim or modify as necessary.3. Verify hinge mounting frame is not twistedor bent - replace if necessary.Latch not hitting trim plate1. Adjust the trim plate until the latch catches.[See separate hardware instruction]Closer is out of position1. See “Closer(s) out of position" in the “Doordoes not open or close properly" questionabove.Bottom Sweep is making a tight seal againstthe door sill1. Open the storm door and notch up to 1/2-inoff the ends of the black vinyl sweep.Handle does not latch properly.Water between the storm door and entrydoor.Pella Storm Doors Limited WarrantyCongratulations on choosing a Pella storm door to protect and beautify your home. This superior quality door has been designed to give you years of trouble-freeservice, and you are protected by this limited warranty:Pella warrants to the ORIGINAL HOMEOWNER PURCHASER of this storm door that it will, without charge to the purchaser, provide parts or exchange, at its option, anydoor determined to be defective in material or workmanship for 20 years after the purchase date. The purchaser will be responsible for transportation charges. Shouldthe door be determined to be defective in material or workmanship AFTER 20 years from the purchase date, the original purchaser may buy one new Pella storm doorat 50% of the then- current manufacturer’s suggested list price for as long as the original purchaser owns the home on which the door was installed. The purchase mustbe made directly from the factory, and all transportation charges are the responsibility of the purchaser.Should the door be determined to be defective and the purchaser incurs a reinstallation cost within three years of the purchase date, he or she may be reimbursed forthese costs up to a maximum of 25.00, upon furnishing a copy of the invoice for the reinstallation costs.As a condition of this warranty, it is required that the door be used for residential use only in an owner-occupied home, that it be installed properly as an operatingdoor according to manufacturer’s instructions, and that it not be altered in any way. For multi-unit housing applications, ask your dealer for a copy of the appropriatewarranty or phone Pella’s Customer Service Department at the phone number listed below. This warranty is not transferable.To make a claim under this warranty, you should:a) Call our Customer Service Department at 1-888-646-5354 or write to Pella Warranty Service; 2333 Eastbrook Drive; Brookings, SD 57006 USA.b) Furnish the original or a copy of the sales receipt or other documents showing the original purchase date and that you are the original purchaser of this door.Exchange is limited to supplying a replacement door of comparable size, style, and color and does not include any cost of removal or installation except as notedabove.The warranty on the latch set and air closer is one year, and any labor charges are not covered. This warranty excludes all damage to glass and screen. This warrantydoes not cover problems caused by improper storage, handling, installation, use, modification, or maintenance, by Acts of God or by accidents, including accidentalglass breakage. It does not apply to normal wear or discoloration of finish; finish problems caused by mechanical damage or abrasion; normal effects of sun and weather, including acid rain, salt spray, or other corrosive elements; damage caused by severe wind; or damage caused by customer abuse or neglect. Oil-Rubbed Bronze isa living finish that will develop its own unique patina with use and is not covered under the Lifetime Finish Guarantee. Bright Brass, Antique Brass, Brushed Brass andSatin Nickel hardware is guaranteed not to tarnish and carries a lifetime finish warranty for as long as the purchaser owns their home.THIS WARRANTY EXCLUDES ALL INCIDENTAL AND CONSEQUENTIAL DAMAGES. Nothing in this document shall give rise to or extend the period of any warranties implied under state or provincial law, and no implied warranty shall extend beyond the periods covered by this written warranty. Neither Pella Corporation nor any sellerof Pella products will be responsible for incidental or consequential damages which may result from a product defect or malfunction. Some states do not allow theexclusion or limitation of incidental or consequential damages, so the above limitation or exclusion may not apply to you. This warranty gives you specific legal rights,and you may have additional rights which vary from state to state. Effective 7/2006.12 2015
Storm Door Components NOTE: Actual door styles may vary from illustrations, however, the installation steps will be the same. Before you begin 1-in wide x 1-in deep mounting surface is required. Hinge-side shimming may be required to fit existing opening. Determine the hinge side of your storm door. Shim on your hinge side, as determined above.