Transcription
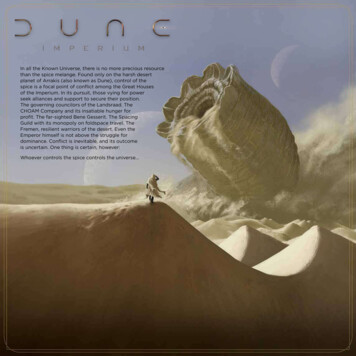
In all the Known Universe, there is no more precious resourcethan the spice melange. Found only on the harsh desertplanet of Arrakis (also known as Dune), control of thespice is a focal point of conflict among the Great Housesof the Imperium. In its pursuit, those vying for powerseek alliances and support to secure their position.The governing councilors of the Landsraad. TheCHOAM Company and its insatiable hunger forprofit. The far-sighted Bene Gesserit. The SpacingGuild with its monopoly on foldspace travel. TheFremen, resilient warriors of the desert. Even theEmperor himself is not above the struggle fordominance. Conflict is inevitable, and its outcomeis uncertain. One thing is certain, however:Whoever controls the spice controls the universe
Across the ImperiumDUNE: IMPERIUM is a deck-building worker placement game that findsinspiration in elements and characters from the Dune legacy, both thenew film from Legendary Pictures and the seminal literary series fromFrank Herbert, Brian Herbert, and Kevin J. Anderson.This page contains no game rules; you can skipahead if you’d like. But if you don’t know muchabout the world of Dune, or want to learn how thegame board connects to the story, see below.Note: The game comes with two leaders each from four Great Houses.For the most authentic story experience, two leaders from the sameHouse shouldn’t be used in the same game. But the game is alsodesigned to allow nonstandard leader combinations and “What If?”scenarios.Shaddam IV ofHouse Corrino is theruthless Emperor ofthe Known Universe.Making inroads with him will fillyour coffers with Solari, themain currency of the Imperium.The Spacing Guildhas a monopoly onfoldspace travel.Their massiveheighliners can transport largeamounts of troops to Dune foryou, if you can afford to pay thehigh price they ask in spice.The intrigues andmachinations of theBene Gesseritsisterhood and theirgenerations-long planning areeverywhere in the Imperium,seen and unseen.The Fremen arefierce warriors, andtheir water disciplinegives them a uniqueadvantage in the struggle forcontrol of Dune. Theirassistance is essential toharvesting the valuable spice.2The Emperor presides over theLandsraad, the governing body thatrepresents the Great Houses of theImperium. It’s no coincidence thatSolari go a long way here at makingconnections, earning favors, or gaining apermanent strategic advantage.In the world of Dune, computers (orthinking machines) have been banned formany millennia, since a great war in whichArtificial Intelligence almost destroyedhumanity. In that war’s aftermath, somehumans devoted themselves to rigoroustraining to become “human calculators” — theseare called Mentats.The Combine Honnete Ober AdvancerMercantiles (or simply CHOAM) is amassive commercial organization thatspans the Imperium. If you needto make some quick Solari, they’realways willing to cut a deal.The populated areasof Dune areimportant sites fromwhich to stage anymilitary campaigns, as you canmuster troops at most ofthese locations.The colossalsandworms of Dunerule its deserts, aconstant threat tothose who seek the planet’sspice. But you must brave thedesert to earn its rewards.One good harvest can openmany doors.
Game ComponentsBoard Space Guide sheetGame board15 water tokens18 Conflict cards4 Conflict I10 Conflict II4 Conflict III24 Reserve cards8 Arrakis Liaison10 The Spice Must Flow6 Foldspace8 Leaderswith Turn Sequenceguide on their backsPlayer ComponentsStarting deck cards can beidentified by this symbol.16 cubes3 Control markersSpice tokens3 large (worth 5)20 small (worth 1)Mentat4 Alliance tokens40 Intrigue cards67 Imperium Deck cards10-card starting deckContaining:Convincing Argument (2)Dagger (2)Diplomacy (1)Dune, the Desert Planet (2)Reconnaissance (1)Seek Allies (1)Signet Ring (1)Solari tokens4 large (worth 5)20 small (worth 1)First Playermarker4 Baron Harkonnen tokensUsed with the BaronVladimir Harkonnen LeaderUsed only in a Solo orTwo-Player Game2 discs1 Score marker1 Councilor token3 Agents31 House Hagal cardsCombat markerThe above components come in differentcolors for each player. Only red is shown.House Hagal rules sheet3
SetupDo you prefer to learn by watching a video?AA2Each player takes a Leader and places it in front of them.(You may choose or select at random.)Leaders have from one to three icons after their names.Leaders with more icons are more strategically complex.For your first game, it is recommended that each playerchooses a Leader with just one icon: Paul Atreides,Glossu “The Beast” Rabban, Earl Memnon Thorvald, orCount Ilban Richese.Place the game board in your play area, andthen place the following components on it:A1BDPlace the Mentat on its side in theMentat space.Place the four Alliance tokenson the marked areas of theFaction’s Influence tracks(Emperor, Spacing Guild,Bene Gesserit, and Fremen).C2Create a Conflict Deck:Separate the Conflict cards by their backs:Conflict I, Conflict II, and Conflict III.C1A2Shuffle the four Conflict III cards and place all of themface down in the marked area of the game board.Shuffle the 10 Conflict II cards, then deal five facedown on top of the Conflict III cards.A1G4A2Shuffle the four Conflict I cards, then deal one facedown on top of the Conflict II cards.You should now have a 10-card Conflict Deck onthe game board, with one Conflict I card on top,five Conflict II cards below it, then the four ConflictIII cards on the bottom. Return the unused Conflictcards to the game box without looking at them.CA2Prepare these cards along the edge of the game board:C1CC3G4Shuffle the Intrigue Deck and place it face down.Shuffle the Imperium Deck and place it face down.2From it, deal five cards face up to form anImperium Row.4G4Next to the Imperium Row, place the Reserve cardsin three stacks: one for Arrakis Liaison, one forThe Spice Must Flow, and one for Foldspace.A2G4B
Want to enhance your DUNE: IMPERIUMexperience? Check out the Dire Wolf Game Roomcompanion app for your PC, smartphone or tablet.EF1GG1Create a bank next to the game board containing the Solari, spice,and remaining water tokens. These are not meant to be limited;if you run out and need more, make any convenient substitution.F2Each player takes a 10-cardstarting deck, shuffles it,and places it face down in theirsupply to the left of their Leader.C3Each player takes 1 water and places it in their supply.Each player chooses a color and takes all of its components.G1Place two of your Agents on your Leader. Place your third Agent(your Swordmaster) next to the game board.G2Place one of your two discs on the Score track. In a 4-player game,place it on the 1 space. Otherwise, place it on the 0 space.G3Place your Combat marker (with the side shown at the right face up)on the 0 space of the Combat track.G4Place four cubes, one each, on the bottom spaces of the Influencetracks of the four Factions.G5The other 12 cubes represent your troops. Place three in one of the four circulargarrisons on the game board (each player taking the one closest to them).G6Place your remaining components in your supply, in clearview of all players.F,G16ED, G1F2Each player has their own supply,with similar components.G5HG3Determine a first player randomly. They take the FirstPlayer marker.G2Solo and Two-Player games require additional setup.For details, see the separate rules sheet: House Hagal Cards.5
Game Overview and Major ConceptsObjectiveYou are a Leader of one of the Great Houses of the Landsraad. Defeat your rivals in Combat, wield political Influence, and form alliances withthe four major Factions. Your successes will be measured in Victory Points.Whenever you gain or lose a Victory Point, move your Score marker up or down one space on the Score track. At the end of around, if any player has reached 10 or more Victory Points (or if the Conflict Deck is empty), the game ends, and whoever has themost Victory Points wins.LeadersEach Leader has two different unique abilities:The first, on the left, is used during play as described on the Leader.The second, on the right and marked by the Signet Ring icon, is activated whenyou play your Signet Ring card on one of your Agent turns.Deck BuildingYou start the game with a 10-card deck containing the same cards as the other players. Adding to and changing that deck is the key elementof play in a deck-building game. During each round, you may acquire new cards to add to your deck. Because cards do many different things,each player’s deck and strategy will diverge as the game unfolds.Whenever you acquire a new Imperium or Reserve card, it is first placed in your discard pile.And any time you’re unable to draw a card because your deck is empty, you reshuffle yourdiscard pile to form a new deck, then continue to draw as needed.Cards of any type can overridethe usual rules of the game!There are also ways to “trash” cards, removing them from your deck altogether for the rest ofthe game. By strategically removing weaker cards from your deck, you increase the chances of drawing your stronger cards more often.AgentsYou start the game with two Agents (and can gain a thirdduring play). You send Agents to spaces on the gameboard, sometimes gathering resources, sometimes payingresources to advance your strategy. (This is explained fullyin Phase 2: Player Turns, while board spaces are described indetail in the separate Board Space Guide sheet.)In DUNE: IMPERIUM, Agents and cards are tightly linked; you can’tsend an Agent to a board space without first playing a card thatallows it.6The Mentat AgentThe Mentat is a special freelance Agent thatyou can temporarily add to your roster ofAgents for one round. See the Mentat boardspace in the separate Board Space Guide sheetfor more details.
FactionsIn DUNE: IMPERIUM, the four Factions represent powerful forces on Dune and elsewhere in the Imperium. Increasing your Influence andearning an Alliance with one or more of them is one of the key routes to victory in the game. See “Across the Imperium” on Page 2 for shortdescriptions of each of the Factions.Your Faction cubes begin at the bottom of each Faction’s Influence track. Throughout the game, your Influencewith a Faction will increase or decrease, depending on the cards you play and the actions you take. When yousend an Agent to a Faction’s board space, gain one Influence with that Faction by advancing your cube onespace on its Influence track. Other game effects can also move your cube up (and occasionally down) the track.When you reach 2 Influence with a Faction, you gain a Victory Point. If you drop back below 2 Influence, you losethat Victory Point.When you reach 4 Influence, you earn the bonus shown on that space of the track. If you drop back below 4Influence, you do not give back the bonus. (It’s possible—though unusual—to earn the same bonus more thanonce, if you move back then advance again.)The first player to reach 4 Influence with a Faction also earns an Alliance with that Faction. They take the Alliancetoken from the track, put it in their supply and gain the Victory Point shown on the Alliance token. If they are everpassed by an opponent rising to a higher space on the track, they must give the Alliance token to that opponent;they lose that Victory Point and the opponent gains it.Intrigue CardsIntrigue cards represent subterfuge, backroom dealings, and surprise twists—they can provide resources like water or spice, increase your Influence with aFaction, or even score Victory Points. Each Intrigue card indicates when it can beplayed, what effect it has, and whether there are costs or conditions to playing it.You receive Intrigue cards primarily from three board spaces: Carthag, Conspire,and Secrets. (But look for other opportunities on cards, wherever you see theIntrigue card icon.) They are kept face down, separate from your deck. You maylook at them at any time. Reveal them to your opponents only when you playthem. Once an Intrigue card is played and resolved, place it face up in a discardpile next to the Intrigue Deck.There are three types of Intrigue cards: Plot, Combat, and Endgame. You may play a Plot Intrigue card any time during one of your Agent or Reveal turns. You may play a Combat Intrigue card only during Combat. You may play an Endgame Intrigue card only at the end of the game.7
Round StructureDUNE: IMPERIUM is played in a series of rounds. Each round consists of five phases, in this order:1. Round Start2. Player Turns3. Combat4. Makers5. RecallAgent TurnReveal TurnPhase 1: Round StartEach round begins by revealing a new Conflict card from the top of the Conflict Deck. Place it faceup in the space next to the Conflict Deck (on top of any Conflict cards from previous rounds).Next, each player draws five cards from their own deck, forming theirhand for the round.Phase 2: Player TurnsCard AnatomyStarting with the player who has the First Player markerand continuing clockwise, players take one turn at a time.On your turn, you will take either an Agent turn or a Revealturn. These types of turns are detailed over the next threepages. Generally, you will take Agent turns until you runout of Agents to place, then you will take a Reveal turn.(Note that Agent turns are optional. If you choose to, youcan take a Reveal turn while you still have Agents insteadof taking an Agent turn.)Once you’ve taken a Reveal turn, your turns are skipped forthe rest of the phase, while other players finish taking theirturns. Once all players have taken a Reveal turn, this phaseends.You may play any Plot Intrigue cards you have duringthis phase, at any point during one of your own Agent orReveal turns.8The effects of each card in your deck are divided into two parts: anAgent box and a Reveal box. On any given turn, you may use theeffects contained in only one of those boxes: the Agent box duringan Agent turn, or the Reveal box during a Reveal turn.ANameABFactionBCAgent iconsDAgent boxEReveal boxFPersuasion CostGAcquire effectNot all cards are part of a Faction.FGCDENot all cards have an Acquire effect. (Learn about Acquire on this rulebook’s back cover.)
Player Turn – Agent TurnIn an Agent turn, you play one card from your hand face up infront of you, using it to send an Agent from your Leader to anunoccupied space on the game board.This board space must have an iconin its upper left corner matching oneof the Agent icons on the card.You must choose only one Agent icon on yourcard; one card can’t send multiple Agents.You can’t send an Agent to a board space that already has one.You must pay any costs or meet any requirements of the board spaceyou choose.In addition, the Agent box of the card you played may provide an effectwhen you play it on an Agent turn. (You ignore the Reveal box of the cardduring Agent turns.)If a card does not have any Agent icons on it, you maynot play it during an Agent turn. It may only be revealedduring a Reveal turn.Board Space CostsTo send an Agent to some board spaces, you must pay a cost.If you can’t pay the cost immediately (before resolving any effectsof the space or the card you played), you can’t send your Agentthere.Here are the two Emperor spaces on the gameboard. The top space, “Conspire,” requires thatyou pay 4 spice to send an Agent there.The bottom space, “Wealth,” has noadditional cost.Sietch Tabr InfluenceThe Sietch Tabr board space has a uniquerequirement. To send an Agent there, you musthave 2 or more Influence with the Fremen.The seven different Agent icons are:EmperorSpacing GuildBene GesseritFremenLandsraadCitySpice TradeThis Sardaukar Legion card has two Agent icons.The Emperor icon allows you to send your Agent toeither of the two Emperor board spaces, while theLandsraad icon allows you to send it to one of thefive board spaces in the Landsraad instead.When you play a card and send an Agent to a board space,you gain the effects of the board space as well as theeffects contained in the Agent box of the card. If the boardspace belongs to one of the Factions, you also move yourcube one space up on its Influence track. You may carryout all these effects in any order.Some card effects are written out, but many are iconized.Refer to the separate Board Space Guide sheet for anexplanation of all board spaces, and the back cover of therulebook for a guide to all game icons and additional gameterms.) indicate that thereArrows on cards and on the board (is a cost (left of the arrow, or above it) you must pay to getthe effect (right of the arrow, or below it). You are neverforced to pay such a cost. However, if you don’t, you won’tgain the effect.When you play Fremen Camp, you may decidenot to pay 2 spice to recruit 3 troops.9
Player Turn – Agent Turn (Continued)Deploying Troops to the ConflictHarvesting SpiceAt the start of each round, the current Conflict card is revealed,offering rewards for which the players will compete in Combat.There are three board spaces on Arrakis with a Makericon, where you may harvest spice: The Great Flat,Hagga Basin, and Imperial Basin. When you send anAgent to one of them, you gain the base value of spiceshown on the space, plus any bonus spice that hasaccumulated there. (See Phase 4: Makers for details.)Whenever the cube icon appears on a card or boardspace, you recruit one troop. Take a troop from yoursupply and place it in your garrison on the game board. (If yourun out of troops in your supply, you can’t recruit more untilsome return there.)You can’t earn rewards with troops sitting in yourgarrison, however. You may deploy them to aConflict when you send an Agent to a Combatspace. Combat spaces are board spaces thatfeature a desert illustration and crossed swords. While most ofthese appear on the planet Dune itself, three appear with theFactions: one with the Spacing Guild (Heighliner) and two withthe Fremen (Hardy Warriors and Stillsuits).When you send an Agent to a Combatspace, you may deploy troops to theConflict area—the area of the gameboard in the center of the garrisons. Youmay deploy any or all troops recruitedduring your current turn (from both theboard space and the card you played),plus up to two more troops from your garrison. (Any troopsyou recruit but choose not to deploy to the Conflict are placedin your garrison as usual.)Control BonusesSome Conflict cards (explained more in Phase 3: Combat)reward a player with control over one of three spaces on Dune:Arrakeen, Carthag, or Imperial Basin (based on the card’stitle). If you win such a Conflict, take a Control marker fromyour supply and place it on the flag below theappropriate board space.While your Control marker is on one of thesespaces, you receive the bonus shown wheneverany player (yourself included) sends an Agent there. The bonusis 1 Solari for Arrakeen or Carthag, and 1 spice for ImperialBasin.When a Conflict card is revealed for a space that you alreadycontrol, you receive a defensive bonus: you may deploy onetroop from your supply to the Conflict.10When you send an Agent to HaggaBasin, you gain 2 spice from the bankand take any bonus spice that hasaccumulated there.John plays Dune, the Desert Planetto send an Agent to Imperial Basin. Hecollects spice from the space. His cardprovides no additional Agent turn effect.Imperial Basin is a Combat space. John didn’t recruit anytroops with either the card he played or the board spacewhere he sent his Agent. But he does have three troops in his garrison.He decides to fight as hard as he can, and deploys two troops from hisgarrison to the Conflict—the maximum number allowed.Abby plays Duncan Idaho to send anAgent to Carthag. John’s Control marker isthere from an earlier round, so he takes1 Solari from the bank.From the board space, Abby recruits a troop and drawsan Intrigue card. With Duncan Idaho, she chooses to pay1 water to recruit another troop and draw a card from her deck.Abby could place her two newly recruited troops in her garrison. ButCarthag is also a Combat space, and she senses the possibility of victoryover John. She deploys those troops to the Conflict, plus one more that shealready had in her garrison. (If she’d had a second troop there, she couldhave deployed it too.)Ned decides to use his turn to buildup forces to fight on a later round. Heplays Bene Gesserit Initiate to sendan Agent to Rally Troops. He must paythe space’s additional cost of 4 Solari. From the BeneGesserit Initiate, he draws a card from his deck. From theRally Troops board space, he recruits four troops. It isn’t aCombat space, however, so he can’t deploy any troops to the Conflict, andplaces them in his garrison instead.
Player Turn – Reveal TurnWhen a player has no more Agents for Agent turns (or chooses not to use any Agents they have remaining), that player takes a Reveal turn.This consists of the following steps in order: Reveal Cards, Resolve Reveal Effects, Set Strength, and Clean Up.Reveal CardsReveal all cards remaining in your hand, placing themface up in play in front of you. Keep them separate fromother cards you played previously on Agent turns.Resolve Reveal EffectsYou now gain the effects in the Reveal boxes of all thecards you just revealed (but not those of any cards youplayed during Agent turns earlier in the round).You may resolve Reveal effects in anyorder you like. In addition, you mayuse Persuasion that you’ve gainedto acquire new cards for your deckbefore, between, or after your Revealeffects.Set StrengthTotal your strength for the Combat this round.Each troop you have in the Conflict is worth 2 strength.(Troops in your garrison or supply contribute nothing.)Each sword you revealed during your Reveal turn isworth 1 strength.You must have at least one troop in the Conflict tohave any strength. If your last troop is ever removed,your strength becomes 0, and can’t be increased by anymeans, including swords on cards you revealed.When you’ve totaled yourstrength, announce it toyour opponents and moveyour Combat marker tothe corresponding space on the Combat track. If yourstrength is over 20, flip the Combat marker to the 20 side and start again from the beginning of the track.Clean UpRemove all the cards from in front of you (from yourAgent and Reveal turns) and put them in your discardpile.Acquiring CardsThe Persuasion you gain during a round is used during yourReveal turn to acquire new cards for your deck. You mayacquire any of the five cards in the Imperium Row, or Arrakis Liaisonor The Spice Must Flow from the Reserve. (Foldspace is acquired atthe board space of the same name, as described in the separateBoard Space Guide sheet.)1The cost to acquire a card is shown at the top right of that card.You may acquire as many cards as you like, as long as you haveenough Persuasion to spend. You may pool Persuasion from multiplesources (cards and board spaces) to acquire one card, and may splitPersuasion from a single source to pay for different cards. Persuasionis not represented by any tokens because you can never save it; anyPersuasion you don’t use during your Reveal turn is lost.When you acquire a card, place it in your discard pile (face up to theright of your Leader). You don’t get to use the new card right away;you will shuffle it along with the rest of your discard pile when yourun out of cards to draw.The Imperium Row must always have five cards; whenever it doesnot, replace missing cards from the top of the Imperium Deck. Thismeans that after you acquire one card, you may then acquire thecard that replaces it (if you have enough Persuasion).John has no more Agents when his turn comes, so hetakes a Reveal turn. He reveals the three cards remaining inhis hand: Imperial Spy, Smuggler’s Thopter, and Stilgar.Smuggler’s Thopter has an effect for John to resolve.He takes 1 spice from the bank. His cards also providePersuasion and swords.John’s cards give him a total of 4 Persuasion. He uses 3 ofit to acquire Space Travel from the Imperium Row, placingit in his discard pile. A new card is then dealt from theImperium Deck to fill the empty space in the Imperium Row.Although John has 1 Persuasion remaining, there are nocards available that cost only 1.John has two troops in the Conflict, providing a total of 4 strength. The cards he revealedthis turn provide 4 more: 1 sword from Imperial Spy and 3 swords from Stilgar. He sets hisCombat marker at 8 on the Combat track.Finally, John takes the cards in front of him and puts them in his discard pile.The phase continues. Abby and Ned will take a Reveal turn at some point. John is done untilthe Combat phase.11
Phase 3: CombatCombat is resolved during this phase, but first, players have the chance to play Combat Intrigue cards.Combat Intrigue CardsStarting with the player who has theFirst Player marker and continuingclockwise, each player with at leastone troop in the Conflict may play anynumber of Combat Intrigue cards, ormay pass.You are not required to pass justbecause you passed earlier in theCombat phase. Once all playersinvolved in Combat pass consecutively,you then resolve the Combat.If a card changes the number of troops a player has inthe Conflict (or otherwise alters their strength), theyadjust their Combat marker accordingly on the Combattrack. (Remember: if you have no troops in the Conflict,your strength is 0.)A few Combat Intrigue cards do something “whenyou win a Conflict.” You do not play these now, beforeresolving the Combat. Instead, wait until you’ve won,then play them (before moving on to the next phase).Resolve CombatRewards from the Conflict card are given to players based on theirstrength, as shown on the Combat track.The player with the highest strength wins the Conflictand gains the top reward on the Conflict card.The player with the second highest strength gains thesecond reward. In a 4-player game (only), the playerwith the third highest strength receives the thirdreward.A player with 0 strength does not receive any reward.Refer to this rulebook’s back cover for a guide to theicons used on Conflict cards.Once all rewards have been given, each player takes their troops fromthe Conflict and puts them in their supply (not their garrison). Reset allCombat markers to 0 on the Combat track.TiesWhen players tie for first place, no one wins the Conflict. The tiedplayers each receive the second reward. (In a 4-player game, if twoplayers tie for first place, the other two players still compete for thethird reward.)When players tie for second place, they each receive the third reward.Players tying for third place receive nothing.As the Combat Phase begins, John has 8 strength and Abby has 6 strength. John has the First Player marker, but he’s already ahead in theConflict. He passes on the chance to play a Combat Intrigue card.Abby is next, and does play an Intrigue card, Ambush. It gives her 4 more strength, and she advances her Combat marker to 10.Ned is next in player order, but has no troops in the Conflict. He has 0 strength and can’t take part in this phase.It’s now back to John. Even though he passed earlier in this phase, he could now decide to play an Intrigue card. But he checks his Intriguecards, and none of them are Combat Intrigue cards. He passes again.Abby, satisfied with her victory, also passes.With 10 strength, Abby wins the Conflict. The top reward of the Conflict card, Siege of Arrakeen, gives her 1 Victory Point and control ofArrakeen. She advances her Score marker one space on the Score track, and places one of her Control markers on the flag below the Arrakeenboard space.John wins the second-place reward, taking 4 Solari from the bank.Ned receives nothing from this Conflict. He has 0 strength, and the third-place reward isn’t available in a 3-player game anyway.12
Phase 4: MakersIn this phase, spice can accumulate on certain board spaces. Check each of the three board spaces with a Maker icon: The Great Flat,Hagga Basin, and Imperial Basin. If the space does not have an Agent, place 1 spice from the bank on that space (in the spot designated forbonus spice). This spice is added to any bonus spice that may already be there from previous rounds.There is an Agent in Imperial Basin. (John played it there earlier this round.) There are no Agents in the Great Flat or Hagga Basin,however, so each of those spaces gets 1 bonus spice. The Great Flat already had 1 bonus spice from a previous round, so now it has 2bonus spice.Phase 5: RecallIf any player is at 10 or more Victory Points on the Score track, or if the Conflict Deck isempty, the Endgame is triggered.If no one has won, prepare the next round: Return the Mentat to its designated space in the Landsraad (if it’s not already there). Players recall their Agents, returning them to their Leaders. Pass the First Player marker clockwise to the next player, then begin a newround with Phase 1.No one has reached 10 Victory Points, so the Mentat and the player Agents are returned to the appropriateplaces, and the First Player marker passes clockwise to Abby. A new round then begins, with phase 1.EndgameFirst, you may play and resolve anyEndgame Intrigue cards you have.Then whoever has the most VictoryPoints is declared the winner.If the case of a tie, tiebreakers are,in order: amount of spice, Solari,water, and garrisoned troops.ClarificationsBaron Vladimir Harkonnen — To use the Masterstroke ability,choose two of the four Baron Harkonnen tokens and place them onyour Leader with the Faction side face down. (Return the other twoto the box without letting any opponents see them.) Later, revealyour choices as described to gain your reward.Bindu Suspension — You must play this Intrigue card at the start ofyour Agent turn, before doing anything else. When you do, draw acard, then immediately end your turn.Calculated Hire — This Intrigue card can only take the Mentat fromits starting position in the Landsraad.Demand Respect — If you win a Conflict that rewards you withspice, you may take that spice first, then use it to play this Intriguecard. (You may also play To the Victor to gain the spice to thenpla
DUNE: IMPERIUM is a deck-building worker placement game that finds inspiration in elements and characters from the Dune legacy, both the new film from Legendary Pictures and the seminal literary series from Frank Herbert, Brian Herbert, and Kevin J. Anderson. Note: The game comes with two leaders each from four Great Houses.