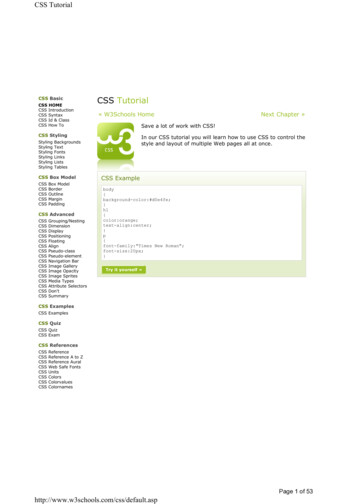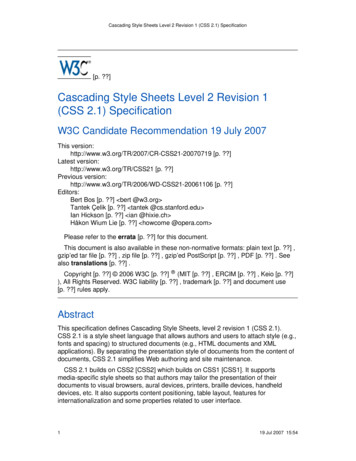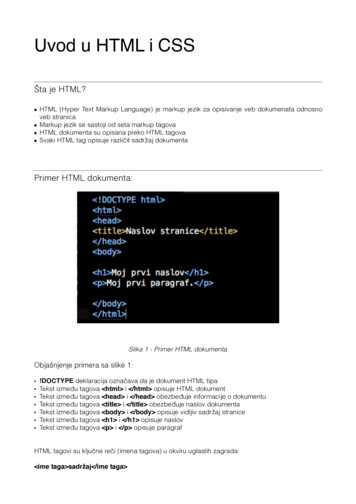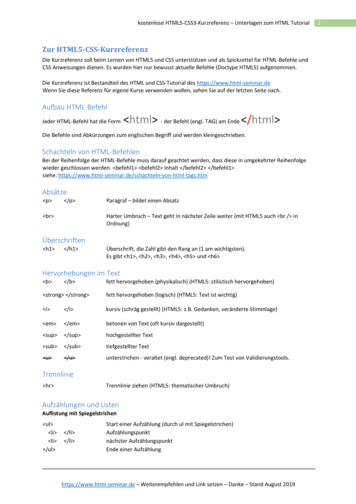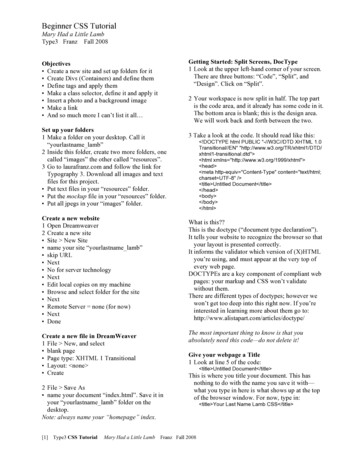
Transcription
Beginner CSS TutorialMary Had a Little LambType3 Franz Fall 2008Getting Started: Split Screens, DocType1 Look at the upper left-hand corner of your screen.There are three buttons: “Code”, “Split”, and“Design”. Click on “Split”.Objectives Create a new site and set up folders for it Create Divs (Containers) and define them Define tags and apply them Make a class selector, define it and apply it Insert a photo and a background image Make a link And so much more I can’t list it all 2 Your workspace is now split in half. The top partis the code area, and it already has some code in it.The bottom area is blank; this is the design area.We will work back and forth between the two.Set up your folders1 Make a folder on your desktop. Call it“yourlastname lamb”2 Inside this folder, create two more folders, onecalled “images” the other called “resources”.3 Go to laurafranz.com and follow the link forTypography 3. Download all images and textfiles for this project. Put text files in your “resources” folder. Put the mockup file in your “resources” folder. Put all jpegs in your “images” folder.Create a new website1 Open Dreamweaver2 Create a new site Site New Site name your site “yourlastname lamb” skip URL Next No for server technology Next Edit local copies on my machine Browse and select folder for the site Next Remote Server none (for now) Next DoneThe most important thing to know is that youabsolutely need this code—do not delete it!Give your webpage a Title1 Look at line 5 of the code: title Untitled Document /title 2 File Save As name your document “index.html”. Save it inyour “yourlastname lamb” folder on thedesktop.Note: always name your “homepage” index.Mary Had a Little Lamb !DOCTYPE html PUBLIC "-//W3C//DTD XHTML 1.0Transitional//EN" al.dtd" html xmlns "http://www.w3.org/1999/xhtml" head meta http-equiv "Content-Type" content "text/html;charset UTF-8" / title Untitled Document /title /head body /body /html What is this?This is the doctype (“document type declaration”).It tells your website to recognize the browser so thatyour layout is presented correctly.It informs the validator which version of (X)HTMLyou’re using, and must appear at the very top ofevery web page.DOCTYPEs are a key component of compliant webpages: your markup and CSS won’t validatewithout them.There are different types of doctypes; however wewon’t get too deep into this right now. If you’reinterested in learning more about them go te a new file in DreamWeaver1 File New, and select blank page Page type: XHTML 1 Transitional Layout: none Create[1] Type3 CSS Tutorial3 Take a look at the code. It should read like this:This is where you title your document. This hasnothing to do with the name you save it with—what you type in here is what shows up at the topof the browser window. For now, type in:Franz Fall 2008 title Your Last Name Lamb CSS /title
Building your page structure with DIVs.In order to put your elements into your webpage,we need to give them somewhere to “live.”We’ll do this by making DIVs.DIV is short for DIVision.A div /div is a container.It basically looks like this: Click and hold that icon Select “new” You’ll get a window that looks like this:You are adding a new CSS rule to your document.Because you are creating a div, which is a uniqueelement and will only be used once, you need tocreate what we call an ID selector. Selector Type: select “Advanced” (IDs, pseudoclass selectors). Selector: name it “#main container” (Note: all IDselectors must start with a #. This is how thebrowser knows to “read” it as an ID selector.) Define in: select “(New Style Sheet File)” click “OK”To build your page structure, we are going tomake a big container that holds all the piecestogether, with smaller containers that fit into itlike pieces of a puzzle. We are going to callthat big container “main container.” Let’s doit now.2 Save your CSS file before defining any rules.Name your CSS file: “yourlastname lamb.css”and save it in your folder. You will only have todo this once. The next time we add a rule, it willbe much easier.Creating your main containerCreating anything using CSS is a two stepprocess. Your browser “filters” the code soyou can see the visual forms. The code thebrowser reads is your html code. The htmldocument contains the elements, butreferences the CSS document to tell thebrowser what the element should look like.3 Once “yourlastname.css” is saved, a window willautomatically pop up. Along the left you see allthe ways to define how your div will look. Set the size of the container. Under “Box” makethe width 770, the height 470, float left,padding 0 (for all), margin 0 (for all). Give the container a border so we can see it whenwe put it into the html. Under “Border” set a solidline (for all), 1 pixel (for all), choose black for thecolor (for all).Therefore, to create the main container div, weneed to both create and define what it lookslike in CSS and insert the div itself into thehtml.When creating divs, I find it easier to create anddefine them in CSS first, then insert them intothe html.4 Now, let’s insert the container into your html. Allelements meant to be seen should be insertedwithin the body /body tags. in the code view, type in the following in betweenthe body tags.1 Look in the upper right hand corner of yourscreen. You should see a panel called “CSS.” In the upper-right hand corner of the panel isthe icon for “more options.”[2] Type3 CSS TutorialMary Had a Little LambFranz Fall 2008 div id “main container” /div
It should look like this in your code view3 Now, in the code view, type in the following codewithin your main container div. That means, typeit in between the div tags for main container. body div id “main container” div id “nav container” /div /div /body /html The design should look like thisNow look at the design view. There should be770 x 470 box with a 1 pixel black frame all theway around. You just mastered your first div !Notice the box you created isn’t flush with theupper left-hand corner of your design view. Fix that by going to modify page propertiesand set the margins for left and top to 0 (zero).But Yikes! In the code view, we’re getting a bunch of div tags all nested in each other. Let’s makesome comments to help us identify which tag belongsto which container.Commenting in your html document.To type comments in html so they don’t show up inyour webpage, you use the following code !-- comment goes here -- I always comment my code so I know what the heckI’m looking at. Enter some comments like soNow, let’s define ALL the boxes for yourpage. Let’s start with the Navigation Bar1 In the CSS window, underneath properties,click on the page icon. (New CSS rule) Select “Advanced” radial button and name thenew rule “nav container”. Make sure that the bottom radial button readsas “define in: yourlastname lamb.css”.2 a window will automatically pop up. Alongthe left you will see all the ways you candefine how your div will look. Set the size of the container. Under “Box”make the width 770, height 30, float none,padding 0 (for all), margin 0 (for all). Give the container it’s blue background color.Under “Background” type #455E78 for thebackground color(Note: always use a # before a color code).[3] Type3 CSS TutorialMary Had a Little Lamb body !-- start MAIN container-- div id "main container" !--start NAV container-- div id "nav container" /div !-- end NAV container-- /div !-- end MAIN container-- /body Back to defining boxes. Let’s do the photo.1 In the CSS window, underneath properties, clickon the page icon. (New CSS rule) Select the“Advanced” radial button and name the new rule“#photo”. Make sure that the bottom radial buttonreads as “define in: yourlastname lamb.css”.Note: I didn’t call the div “#photo container”. Youcan do this if you wish, but you can name it anythingyou want, and “#photo” works fine for ourpurposes.Franz Fall 2008
2 Define the following rules for “#photo” Set the size of the container. Under “Box”make the width 353, height 440, float left,padding 0 (for all), margins 0 (for all).3 Now, in code view, add this to your html mark-up: body !-- start MAIN container-- div id "main container" !--start NAV container-- div id "nav container" /div !-- end NAV container-- 3 Now, in code view, add this to your htmlmark-up: body !-- start MAIN container-- div id "main container" !-- start PHOTO container -- div id ”photo” /div !-- end PHOTO container-- !--start NAV container-- div id "nav container" /div !-- end NAV container-- !-- start TITLE COLUMN container -- div id ”title column” /div !-- end TITLE COLUMN container-- !-- start PHOTO container div id ”photo” /div !-- end PHOTO container-- /div !-- end MAIN container-- /body /div !-- end MAIN container-- /body The design view should look like thisThe design view should look like thisYou might not see anything. The div is emptyand doesn’t have a background color or border.It would help if we could see what we’rebuilding, so if you can’t see a light dotted borderaround the div in design view, turn your CSSLayout Outlines on: View Visual Aids CSS Layout OutlinesDefine the column with the title in it1 In the CSS window, underneath properties,click on the page icon. (New CSS rule)Select the “Advanced” radial button and namethe new rule “#title column”. Make sure thatthe bottom radial button reads as “define in:yourlastname lamb.css”.Define the column with the lyrics in it1 In the CSS window, underneath properties, clickon the page icon. (New CSS rule) Select the“Advanced” radial button and name the new rule“#lyrics column”. Make sure that the bottomradial button reads as “define in:yourlastname lamb.css”.2 Define the following rules for “#lyrics column” Set the size of the container. Under “Box” makethe width 213, height auto, float right,padding 0 (for all), margins 0 (for all).3 Now, in code view, add this to your html mark-up:2 Define the following rules for “#title column” Set the size of the container. Under “Box”make the width 160, height auto, float left,padding 0 (for all), margins 0 (for all).[4] Type3 CSS TutorialMary Had a Little LambFranz Fall 2008 body !-- start MAIN container-- div id "main container" !--start NAV container-- div id "nav container" /div !-- end NAV container-- !-- start PHOTO container --
div id ”photo” /div !-- end PHOTO container-- Lets look at the code view. You’ll see the text wasautomatically entered into the code within theappropriate div. The br / tag means “break” orwhat we call a soft return. The p /p tags definea “paragraph” and all text within the tags are partof the same paragraph. Note: if we didn’t have br/ and p /p tags, the text would just keep goingon the same line, because the browser wouldn’tknow to put in a line break! !-- start TITLE COLUMN container -- div id ”title column” /div !-- end TITLE COLUMN container-- !-- start LYRICS COLUMN container -- div id ”lyrics column” /div !-- end LYRICS COLUMN container-- /div !-- end MAIN container-- /body The design view should look like thisWAIT! There’s not text or images in thecontainers yet, but there is something definitelywrong. I think the text columns should be loweron the page. In the mock-up, the text does notstart right under the navigation bar. Let’s getsome text in there and see what’s happening.The design view should look like thisPutting in our content1 Flow in the lyrics open the lamb text document highlight and copy the lyrics text in Dreamweaver, in the design view, clickyour cursor in the lyrics column paste in the text2 Flow in the Title column text open the lamb text document highlight and copy the title column text in Dreamweaver, in the design view, clickyour cursor in the title column paste in the textYiikes. That’s not what we want. We’ll have to go inand set the type correctly. We need the rightmargins, font, size, leading, color, etc. We’ll do thatin a minute, but first, let’s put in the photo.Putting in our photoWe can’t just copy and paste the photo into the DWdocument like we did the text. But DW does havean easy way to insert an image.[5] Type3 CSS TutorialMary Had a Little LambFranz Fall 2008
Usually, one is able to put the cursor in the divthey want the photo to live in, and insert thephoto. I can’t seem to do that this time around,so we are going to insert it directly into thecode. put your cursor in the code, between the photodiv tags. go to insert image find the image “lamb photo.jpg” and choose it the Alternate Text window will automaticallycome up. Give the photo a short descriptionfor those who cannot see the photo.In split mode view, the code for the image hasbeen inserted in the photo div, and the image isvisible in the design view.Define the H1 tag1 In the CSS window, underneath properties, clickon the page icon. (New CSS rule) Select the“tag” radial button and select the tag “h1” from thelist of options (accessed via the button with thearrows). Make sure that the bottom radial buttonreads as “define in: yourlastname lamb.css”.2 Define the following rules for “h1” Use font Georgia, size 30, line height 36,decoration none, weight normal, color #7B8A45Tag the text under the title, using the propertieswindow (bottom of screen)1 In design view, highlight all of the text under thetitle in the properties window, choose format: Heading2 from the format menuYou have just told the browser that this text istagged as a “Headline 2.” If you look at the code,you’ll see the h2 /h2 tags around that text.Yuck. The default H2 is not what we want. Let’smake a CSS rule to define what H2 type shouldlook like.Define the H2 tag1 In the CSS window, underneath properties, clickon the page icon. (New CSS rule) Select the“tag” radial button and select the tag “h2” from thelist of options (accessed via the button with thearrows). Make sure that the bottom radial buttonreads as “define in: yourlastname lamb.css”.OK, now let’s take care of the type!To make type look a specific way, we need toboth create and define a rule about what itlooks like in CSS and insert the tag for thatrule into the html.2 Define the following rules for “h2” Use font Georgia, size 12, style italic, lineheight 18, decoration none, weight normal,color #000000 (black)When I work with text, I find it is easier to putthe text into the html document first, then tag thetype, then do the CSS to define what the taggedtype should look like.Tag the title first, typing in the code1 In code view, find the title find the tag directly in front of the M (itshould be a p ), and change it to H1 find the tag directly after the b (it should be a br / ) and change it to /H1 You have just told the browser that your title istagged as a “Headline 1.” Yuck. The defaultH1 is not what we want. Let’s make a CSS ruleto define what H1 type should look like.[6] Type3 CSS TutorialMary Had a Little LambTag the lyrics, using the properties window1 In design view, highlight all of lyrics in the properties window, choose format:paragraphYou have just told the browser that this text istagged as a “paragraph.” If you look at the code,you’ll see the p /p tags around theparagraphs. The br / tags do not change.Once again, the default p is not what we want.Let’s make a CSS rule to define what paragraphtype should look like.Define the paragraph tag1 In the CSS window, underneath properties, clickon the page icon. (New CSS rule) Select the“tag” radial button and select the tag “p” from theFranz Fall 2008
list of options. Make sure the bottom radialbutton reads “define in:yourlastname lamb.css”.Fix the vertical (paragraph) spacing. In the CSS panel, double-click on h1 Go to “Box” and set bottom padding 18 pixels.Set all other padding and margins to 0. Click OK.You’ve just told the browser the space below all h1 paragraphs is 18 pixels. The space aboveall h1 paragraphs is 0. Notice how the titlenow tucks up to the top of the div.2 Define the following rules for “p” Use font Georgia, size 12, line height 18,decoration none, weight normal,color #000000 (black)Let’s take a look at what we’ve got so far Go up to the “world” icon, click and hold, andchoose a browser to preview the page in.You should see In the CSS panel, double-click on h2 Go to “Box” and set all padding and margins to 0. Click OK.You’ve just told the browser the space above andbelow all h2 paragraphs is 0. In the CSS panel, double-click on p Go to “Box” and set bottom padding 12 pixels.Set all other padding and margins to 0. Click OK.You’ve just told the browser the space below all p paragraphs is 12 pixels. The space above all p paragraphs is 0. Notice how the lyrics nowtuck up to the top of the div, but there is goodspace between the stanzas.The type isn’t bad, but the margins aren’tcorrect, and what’s with those quotation marks?Fix the hideous quotation marksIn code view, use the following code whereveryou want double left quotation marks“wherever you want double right quotation marksLet’s add the ornament, using two skills you’vealready learned: inserting an image, and settingpadding below the text, so the image is properlyplaced. Put your cursor at the end of the italic type in thetitle div Hit return Insert Image Find “ornament.gif” and choose it Type in the alternative text, and hit OK”wherever you want single left quotation marks‘wherever you want single right quotation marks’Fix the margins on the columns In the CSS panel, double-click on#title column Go to “Box” and change the margins byturning off “same for all” and setting the topmargin 84 pixels, left margin 12 pixels. Click OK. In the CSS panel, double-click on#lyrics column In “Box,” set the top margin 78 pixels, andthe right margin 12 pixels. Keep the othermargins at 0. Click OK.[7] Type3 CSS TutorialMary Had a Little LambNotice how the ornament is set tight to the textabove it. Let’s fix that by adding padding to thebottom of the text. In the CSS panel, double-click on h2 Go to “Box” and set the bottom padding 12.Leave all other padding and margins at 0. Click OK.You’ve just told the browser the space below all h2 paragraphs is 12 pixels. The ornament isnow properly placed.We’ve got one more thing to take care of in thiscolumn. We need to set a couple of words as smallcaps with a loose tracking.We need to create a “Class” Selector.Why a class selector? Like ID selectors, classselectors can be used to “override” additionalFranz Fall 2008
formatting onto text that has been formattedusing a tag (like p, h1, h2 )Plus, class selectors can be used more than onetime (unlike the unique ID selectors we used tomake the divs).You might ask, why not just use a tag? Classselectors can be used to format just a coupleof words in a line. The tags (p, h1, h2, etc.) allautomatically insert a line break with theclosing tag. When you want to format textwithout a line break, use a class selector.Creating a class selector to format text. Let’scall it “subhead”As usual, this is a two-part process. To create a“subhead” class, we need to both create anddefine what it looks like in CSS and mark theappropriate text as “subhead” in the html.When creating classes, I find it easier to createand define them in CSS first, then mark the textin the html. As you’ve probably figured out bynow, we can always go back and change whatwe’ve made.Define the subhead class selector1 In the CSS window, underneath properties,click on the page icon. (New CSS rule)Select the “Class” radial button and name thenew rule “subhead”. Make sure that thebottom radial button reads as “define in:yourlastname lamb.css”.2 We only need to define the changes from the h2 tag to the subhead: size, style, case,letterspacing.Define the following rules for “subhead” In “Type” make size 10, style normal,case uppercase. In “Block” make letterspacing 1 pixel (watchout! don’t use ems! the space will be huge!) Click OKNotice the Class shows up in your CSS list. Ithas a “.” in front of the word “subhead.” This isnormal. Just like we needed to add a # in frontof IDs for the browser to recognize an IDselector, we need a [dot] in front of Classes sothe browser will recognize them. It’s sort ofweird that DW automatically adds one and notthe other, but there it is.[8] Type3 CSS TutorialMary Had a Little LambApply the subhead class, typing it in the code. in code view, find the words you want to set as“subhead” and add these tags to your html span class "subhead" /span So, to apply the subhead class to “written by” yourhtml would look like this span class "subhead" Written By /span Apply the subhead class, using the propertieswindow (at bottom of the screen). in design view, find the words you want to set as“subhead” and highlight them go down to the properties window and choose thestyle “subhead” from the style menu DW will automatically write the code for you. So, if you apply the subhead class to “copyright”and then look in the code view, your html willlook like this span class "subhead" Copyright /span We’ve only got one last bit of text to attend to the Navigation! (links at top). Go to the lamb text document and copy the textfor the links Go to DW design view, click in the nav containerand paste the links text into the container.Tag the navigation text, using the propertieswindow (bottom of screen) In design view, highlight all of the navigation text in the properties window, choose format: Heading3 from the format menuYou have just told the browser that this text istagged as a “Headline 3.” If you look at the code,you’ll see the h3 /h3 tags around that text.Yuck. The default H3 is not what we want. Let’smake a CSS rule to define what H3 type shouldlook like.Define the H3 tag1 In the CSS window, underneath properties, clickon the page icon. (New CSS rule) Select the“tag” radial button and select the tag “h3” from thelist of options (accessed via the button with thearrows). Make sure that the bottom radial buttonreads as “define in: yourlastname lamb.css”.2 Define the following rules for “h3” Use font Verdana, size 12, style normal, lineheight 18, decoration none, weight normal,color #FFFFF (white) In “Box” set top padding 4, left padding 64, allother padding 0, and all margins 0.Franz Fall 2008
Give the separation lines between the linksmore space using a class selector1 In the CSS window, underneath properties,click on the page icon. (New CSS rule)Select the “Class” radial button and name thenew rule “nav lines”. Make sure that thebottom radial button reads as “define in:yourlastname lamb.css”.2 We only need to define the changes from the h3 tag to the subhead: margins. Define thefollowing rules for “nav lines” In “Box” make the left and right padding 6.Leave everything else the same. Click OKApply the “nav lines” class, using theproperties window (at bottom of the screen). in design view, highlight one of the separationlines in the navigation text. go down to the properties window and choosethe style “nav lines” from the style menu DW will automatically write the code for you. So, if you apply the nav lines class to aseparation line and then look in the code view,your html will look like this span class "nav line" /span Repeat for all the navigation separation lines.Make a link by linking “UMassD Home” tothe UMassD Homepage. In design view, highlight “UMassD Home” In the properties window type“http://www.umassd.edu” where it says link.You needed to type in the entire URL includingthe http:// because you are linking to anexternal webpage. It will be easier linking toanother page in your own site. Also, since youare linking to an external site, it’s good tohave it come up in a new window, so let’s giveit a target. for target, choose “ blank” DW did the code for you. Look in your codeview to see it. The link lives between the ahref /a tags. a href "http://www.umassd.edu"target " blank" UMassD Home /a Excellent. You just made your first link. Now wejust have to make it look the way we want it to.Define the a tags, starting with “a:link”1 In the CSS window, underneath properties,click on the page icon. (New CSS rule)Select the “Advanced” radial button and[9] Type3 CSS TutorialMary Had a Little Lambchoose “a:link” from the pop-up options. Makesure that the bottom radial button reads as “definein: yourlastname lamb.css”.2 Define what the links should look like. Use font Verdana, size 12, style normal, lineheight 18, docration none, weight normal,color #FFFFFF (white) Click OKYou just told the browser what your links shouldlook like. Next, we need to define what links look likewhen a cursor “hovers” over them, when a mouseclick “activates” one, and when a link has been“visited.”Define “a:hover”1 In the CSS window, underneath properties, clickon the page icon. (New CSS rule) Select the“Advanced” radial button and choose “a:hover”from the pop-up options. Make sure that thebottom radial button reads as “define in:yourlastname lamb.css”.2 Define what the links should look like when themouse hovers over them. Use font Verdana, size 12, style normal, lineheight 18, decoration underline, weight normal,color #FFFFFF (white) Click OKDefine “a:active”1 In the CSS window, underneath properties, clickon the page icon. (New CSS rule) Select the“Advanced” radial button and choose “a:active”from the pop-up options. Make sure that thebottom radial button reads as “define in:yourlastname lamb.css”.2 Define what the links should look like when theyare activated by a click. Use font Verdana, size 12, style normal, lineheight 18, decoration underline, weight normal,color #C0AB90 Click OKDefine “a:visited”1 In the CSS window, underneath properties, clickon the page icon. (New CSS rule) Select the“Advanced” radial button and choose “a:visited”from the pop-up options. Make sure that thebottom radial button reads as “define in:yourlastname lamb.css”.Franz Fall 2008
2 Define what the links should look like whenthey have been visited. Use font Verdana, size 12, style normal, lineheight 18, decoration none, weight normal,color #FFFFFF Click OKTest your links in Firefox Go up to the “world” icon, click and hold, andchoose a browser to preview the page in.Add a background imageWe still have to put in the running sheep. You’llnotice they run behind the photo container, thetitle column, and the lyrics column. That meansthey live in the main container. The easiest wayto do this so they don’t conflict with the divs isto make them a background image in the maincontainer. In the CSS panel, double-click on“#main container” in “Background” find and choose the image“running lamb.gif” Repeat repeat-x Horizontal position left Vertical position 36 pixels Click OKmargins, and set the left margin auto and the rightmargin auto. This will make the left and rightmargins adjust as the browser window gets biggerand smaller. Click OK.Add a background color around the page Go to Modify Page Properties In “Appearance” click on the square next toBackground Color. An eyedropper appears Move the eyedropper over to the photo of the lamband choose a color you think works well with theblue navigation bar, the photo, and the green titleand ornament. Click OK.Yiikes! The background color is showing throughmost of the main container! We want it white.Change the background color of yourmain container. In the CSS panel, double-click on“#main container” In “Background” set your background color towhite. Click OK.Take another look in Firefox Go up to the “world” icon, click and hold, andchoose a browser to preview the page in.Take another look in Firefox Go up to the “world” icon, click and hold, andchoose a browser to preview the page in.It should look like thisWhen I looked at mine in Firefox, I didn’t like theblack border around the page. I had put it there so Icould see the div, but now I want to get rid of it. So, Ijust removed the borders from my“#main container” rule in the CSS panel.Now it looks like thisWe’re going to add a couple of fine touches.Make the page horizontally center in thebrowser. In the CSS panel, double-click on“#main container” in “Box” turn off the “same for all” under[10] Type3 CSS TutorialMary Had a Little LambFranz Fall 2008
Put your completed tutorial on the server Move the entire folder “yourlastname lamb”into your server space.It is very important that you move the entirefolder over! Your page won’t work without theimages! Open your server space the same way you openyour student storage space To view the completed space online, go to:“www.des.umassd.edu/yourusername/yourlastname lamb”Look at the CSS codeWe haven’t looked at the CSS code closely.In DW, notice there are two tabs at the top of your work area.Each tab allows you to access a file you have open in DW.When working in your “index.html” file, you’ve been creating code inyour “lastname lamb.css” file as well.It should look something like this.@charset "UTF-8";#main container {margin: 0px auto;padding: 0px;height: 470px;width: 770px;border: 1px none #000000;background-image: url(images/running lamb.gif);background-repeat: repeat-x;background-position: left 36px;background-color: #FFFFFF;}h1 {font-family: Georgia, "Times New Roman", Times, serif;font-size: 30px;line-height: 36px;font-weight: normal;text-decoration: none;color: #7B8A45;margin: 0px;padding: 0px 0px 18px;}h2 {font-family: Georgia, "Times New Roman", Times, serif;font-size: 12px;font-style: italic;line-height: 18px;font-weight: normal;text-decoration: none;color: #000000;margin: 0px;padding: 0px 0px 12px;}.subhead {font-size: 10px;text-transform: uppercase;letter-spacing: 1px;font-style: normal;}p{font-family: Georgia, "Times New Roman", Times, serif;font-size: 12px;line-height: 1
View Visual Aids CSS Layout Outlines Define the column with the title in it 1 In the CSS window, underneath properties, click on the page icon. (New CSS rule) Select the "Advanced" radial button and name the new rule "#title_column". Make sure that the bottom radial button reads as "define in: yourlastname_lamb.css".
