Transcription
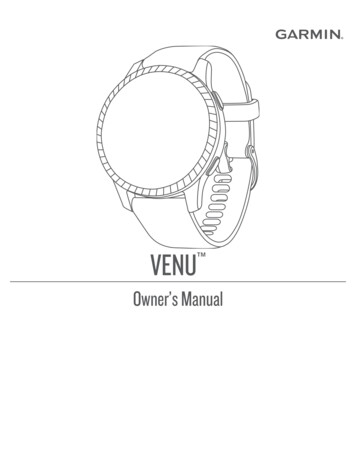
VENU 2 PLUS Owner’s Manual
2022 Garmin Ltd. or its subsidiariesAll rights reserved. Under the copyright laws, this manual may not be copied, in whole or in part, without the written consent of Garmin. Garmin reserves the right to change orimprove its products and to make changes in the content of this manual without obligation to notify any person or organization of such changes or improvements. Go towww.garmin.com for current updates and supplemental information concerning the use of this product.Garmin , the Garmin logo, ANT , Approach , Auto Lap , Auto Pause , Edge , and Venu are trademarks of Garmin Ltd. or its subsidiaries, registered in the USA and other countries.Body Battery , Connect IQ , Firstbeat Analytics , Garmin AutoShot , Garmin Connect , Garmin Express , Garmin Golf , Garmin Index , Garmin Move IQ , Garmin Pay , HealthSnapshot , tempe , TrueUp , and Varia are trademarks of Garmin Ltd. or its subsidiaries. These trademarks may not be used without the express permission of Garmin. Android is a trademark of Google LLC. Apple , iPhone , and iTunes are trademarks of Apple Inc., registered in the U.S. and other countries. The BLUETOOTH word mark andlogos are owned by the Bluetooth SIG, Inc. and any use of such marks by Garmin is under license. iOS is a registered trademark of Cisco Systems, Inc. used under license by AppleInc. Wi‑Fi is a registered mark of Wi-Fi Alliance Corporation. Windows is a registered trademark of Microsoft Corporation in the United States and other countries. Other trademarksand trade names are those of their respective owners. This product is ANT certified. Visit www.thisisant.com/directory for a list of compatible products and apps. M/N: A04125
Table of ContentsIntroduction.1Overview. 1Touchscreen Tips. 2Locking and Unlocking theTouchscreen. 2Icons.2Setting Up Your Watch. 2Smart Features. 3Pairing Your Phone. 3Connected Features. 3Phone Notifications.3Enabling BluetoothNotifications. 4Viewing Notifications. 4Replying with a Customized TextMessage. 4Calling from the Watch. 5Receiving an Incoming PhoneCall. 5Managing Notifications. 5Turning Off the Bluetooth PhoneConnection. 5Using the Voice Assistant. 5Using Do Not Disturb Mode. 6Finding Your Phone. 6Connect IQ Features. 6Downloading Connect IQ Features. 6Downloading Connect IQ FeaturesUsing Your Computer. 6Wi‑Fi Connected Features.6Connecting to a Wi‑Fi Network. 7Controls. 8Customizing the Controls Menu.9Music. 9Downloading Personal AudioContent. 10Connecting to a Third-Party Provider. 10Downloading Audio Content from aThird-Party Provider. 10Disconnecting from a Third-PartyProvider. 10Connecting Bluetooth Headphones. 11Table of ContentsListening to Music. 11Music Playback Controls. 12Garmin Pay.12Setting Up Your Garmin Pay Wallet.12Paying for a Purchase Using YourWatch. 13Adding a Card to Your Garmin PayWallet. 13Managing Your Garmin Pay Cards. 13Changing Your Garmin PayPasscode. 14Safety and Tracking Features. 14Adding Emergency Contacts. 14Adding Contacts.14Incident Detection. 15Turning Incident Detection On andOff. 15Requesting Assistance. 15Heart Rate Features. 15Wrist-based Heart Rate. 16Wearing the Watch. 16Tips for Erratic Heart Rate Data. 16Viewing Heart Rate Information. 17Setting an Abnormal Heart RateAlert. 17Broadcasting Heart Rate.17Turning Off the Wrist-based HeartRate Monitor. 18About Heart Rate Zones. 18Setting Your Heart Rate Zones. 18Fitness Goals. 18Heart Rate Zone Calculations. 19About VO2 Max. Estimates. 19Getting Your VO2 Max. Estimate. 19Viewing Your Fitness Age. 19Pulse Oximeter. 20Getting Pulse Oximeter Readings. 20Changing the Pulse Oximeter TrackingMode. 20Tips for Erratic Pulse OximeterData. 20Activity Tracking. 20Auto Goal. 21i
Using the Move Alert. 21Sleep Tracking. 21Intensity Minutes. 21Earning Intensity Minutes. 21Garmin Move IQ . 22Activity Tracking Settings. 22Turning Off Activity Tracking. 22Glances. 23Viewing Glances. 24Customizing the Glances. 25Heart Rate Variability and StressLevel. 25Using the Stress Level Glance. 25Body Battery. 25Viewing the Body Battery Glance. 26Tips for Improved Body BatteryData. 26Women's Health. 26Menstrual Cycle Tracking. 26Logging Your Menstrual CycleInformation. 27Pregnancy Tracking. 27Logging Your PregnancyInformation. 27Hydration Tracking. 28Using the Hydration TrackingGlance. 28Using the Varia Camera Controls. 28Apps and Activities.29Starting an Activity. 29Tips for Recording Activities. 29Stopping an Activity. 29Adding a Custom Activity. 29Adding or Removing a FavoriteActivity. 30Health Snapshot. 30Indoor Activities. 30Recording a Strength TrainingActivity. 30Recording a HIIT Activity. 31Calibrating the Treadmill Distance. 31Outdoor Activities. 31Going for a Run. 32Going for a Ride. 32Viewing Your Ski Runs. 32iiGoing for a Pool Swim. 33Setting the Pool Size. 33Swim Terminology. 33Golfing. 33Downloading Golf Courses. 33Playing Golf. 34Hole Information. 34Changing the Pin Location. 35Viewing the Direction to the Pin. 35Viewing Layup and DoglegDistances. 35Viewing Hazards. 36Measuring a Shot with GarminAutoShot . 36Keeping Score. 37Setting the Scoring Method. 37Tracking Golf Statistics. 37Recording Golf Statistics. 37Viewing Your Shot History. 38Viewing Your Round Summary. 38Ending a Round. 38Garmin Golf App. 38Training. 38Setting Up Your User Profile. 38Workouts. 38Starting a Workout. 39Using Garmin Connect TrainingPlans. 39Adaptive Training Plans. 39Starting Today's Workout. 39Viewing Scheduled Workouts. 39Personal Records. 40Viewing Your Personal Records. 40Restoring a Personal Record. 40Clearing Personal Records. 40Navigation. 40Saving Your Location. 40Deleting a Location. 41Navigating to a Saved Location. 41Navigating Back to Start. 41Stopping Navigation. 41Compass. 41Calibrating the Compass Manually. 41History. 42Table of Contents
Using History. 42Viewing Your Time in Each Heart RateZone. 42Garmin Connect. 42Using the Garmin Connect App. 43Using Garmin Connect on YourComputer. 43Customizing Your Watch. 44Changing the Watch Face.44Creating a Custom Watch Face. 44Editing a Watch Face. 44Setting Up a Shortcut Control. 45Activities and App Settings. 45Customizing the Data Screens. 46Alerts. 46Setting an Alert. 47Auto Lap. 47Marking Laps Using the AutoLap Feature. 47Using Auto Pause . 48Using Auto Scroll. 48Changing the GPS Setting.48Phone and Bluetooth Settings. 49Battery Manager. 49System Settings. 49Time Settings. 49Time Zones. 50Setting an Alarm. 50Deleting an Alarm. 50Starting the Countdown Timer. 50Using the Stopwatch. 50Sound Settings. 50Customizing the Display Settings. 51Changing the Units of Measure. 51Garmin Connect Settings.51Wireless Sensors. 52Pairing Your Wireless Sensors. 52Calibrating Your Speed Sensor. 53Updating the Software Using GarminExpress. 54Viewing Device Information. 54Viewing E-label Regulatory andCompliance Information. 54Specifications. 55Battery Life Information. 55Device Care. 55Cleaning the Watch. 56Changing the Bands. 56Troubleshooting. 56Is my phone compatible with mywatch?. 56My phone will not connect to thewatch. 57My headphones will not connect to thewatch. 57My music cuts out or my headphones donot stay connected. 57My watch is in the wrong language. 57My watch does not display the correcttime. 58Maximizing Battery Life. 58Restarting the Watch. 58Restoring All Default Settings. 58Acquiring Satellite Signals. 59Improving GPS Satellite Reception. 59Activity Tracking. 59My step count does not seemaccurate. 59The floors climbed amount does notseem accurate. 59Getting More Information. 59Appendix. 60Data Fields. 60VO2 Max. Standard Ratings. 62Wheel Size and Circumference. 63Symbol Definitions. 64Device Information. 53About the AMOLED Display. 53Charging the Watch. 53Product Updates. 54Updating the Software Using theGarmin Connect App. 54Table of Contentsiii
IntroductionWARNINGSee the Important Safety and Product Information guide in the product box for product warnings and otherimportant information.Always consult your physician before you begin or modify any exercise program.OverviewAction button: Hold for 2 seconds to turn on the watch.Press to start and stop the activity timer.Hold for 2 seconds to view the controls menu, including power.Hold until the watch vibrates 3 times to request assistance (Safety and Tracking Features, page 14).Back button: Press to return to the previous screen, except during an activity.During an activity, press to mark a new lap, start a new set or pose, or advance to the next stage of a workout.Hold to view a menu of watch settings and options for the current screen.Custom/Voice Assistant button: Press to view the custom shortcut feature.Hold to activate the voice assistant on your phone.Touchscreen: Swipe up or down to scroll through glances, features, and menus.Tap to select.Double-tap to wake the watch.Swipe right to return to the previous screen.During an activity, swipe right to view the watch face and glances.Introduction1
Touchscreen Tips Drag up or down to scroll through lists and menus.Swipe up or down to scroll quickly.Tap to select an item.From the watch face, swipe up or down to scroll through the glances on the watch.Tap a glance to view additional information, if available.During an activity, swipe up or down to view the next data screen.During an activity, swipe right to view the watch face and glances, and swipe left to return to the activity datafields. When available, selector swipe up to view additional menu options. Perform each menu selection as a separate action.Locking and Unlocking the TouchscreenYou can lock the touchscreen to prevent inadvertent screen touches.1 Holdto view the controls menu.2 Select .The touchscreen locks and does not respond to touches until you unlock it.3 Hold any button to unlock the touchscreen.IconsA flashing icon means the watch is searching for a signal. A solid icon means the signal was found or thesensor is connected. A slash through an icon means the feature is turned off.Phone connection statusHeart rate monitor statusLiveTrack statusSpeed and cadence sensor statusVaria bike light statusVaria bike radar statustempe sensor statusSetting Up Your WatchTo take full advantage of the Venu 2 Plus features, complete these tasks. Pair the watch with your phone using the Garmin Connect app (Pairing Your Phone, page 3). Set up Wi‑Fi networks (Connecting to a Wi‑Fi Network, page 7). Set up music (Music, page 9). Set up your Garmin Pay wallet (Setting Up Your Garmin Pay Wallet, page 12). Set up safety features (Safety and Tracking Features, page 14). Go to garmin.com/voicefunctionality/tips for tips about using the voice assistant. 2Introduction
Smart FeaturesPairing Your PhoneTo set up the Venu 2 Plus watch, it must be paired directly through the Garmin Connect app and the Bluetoothsettings on your phone.1 From the app store on your phone, install and open the Garmin Connect app.2 Select an option to enable pairing mode on your watch: If this is the first time you are setting up your watch, holdto turn on the watch. If you previously skipped the pairing process or paired your watch with a different phone, hold , andselect Connectivity Phone Pair Phone to manually enter pairing mode.3 Select an option to add your watch to your Garmin Connect account: If this is the first device you have paired with the Garmin Connect app, follow the on-screen instructions. If you have already paired another device with the Garmin Connect app, from theormenu, selectGarmin Devices Add Device, and follow the on-screen instructions. Connected FeaturesConnected features are available for your Venu 2 Plus watch when you connect it to a compatible phone usingBluetooth technology and install the Garmin Connect app on the connected phone. Go to www.garmin.com/apps for more information. Some features are also available when you connect your watch to a Wi‑Fi network.Phone notifications: Displays phone notifications and messages on your Venu 2 Plus watch.LiveTrack: Allows friends and family to follow your races and training activities in real time. You can invitefollowers using email or social media, allowing them to view your live data on a Garmin Connect trackingpage.Activity uploads to Garmin Connect: Automatically sends your activity to your Garmin Connect account as soonas you finish recording the activity.Connect IQ : Allows you to extend your watch features with new watch faces, glances, apps, and data fields.Software Updates: Allows you to update your watch software.Weather: Allows you to view current weather conditions and weather forecasts.Bluetooth sensors: Allows you to connect Bluetooth compatible sensors, such as a heart rate monitor.Find my phone: Locates your lost phone that is paired with your Venu 2 Plus watch and currently withinBluetooth range.Find my device: Locates your lost Venu 2 Plus watch that is paired with your phone and currently withinBluetooth range.Phone NotificationsPhone notifications require a compatible phone to be within Bluetooth range and paired with the watch. Whenyour phone receives messages, it sends notifications to your watch.Smart Features3
Enabling Bluetooth NotificationsBefore you can enable notifications, you must pair the Venu 2 Plus watch with a compatible phone (Pairing YourPhone, page 3).1 Hold .2 Select Connectivity Phone Notifications.3 Select During Activity to set preferences for notifications that appear when recording an activity.4 Select a notification preference.5 Select Not During Activity to set preferences for notifications that appear when in watch mode.6 Select a notification preference.7 Select Timeout.8 Select a timeout duration.9 Select Privacy.10 Select a privacy preference.Viewing Notifications12345From the watch face, swipe up or down to view the notifications glance.Select the glance.Select a notification to read the full notification.Swipe up to view the notification options.Select an option: To act on the notification, select an action, such as Dismiss or Reply.The available actions depend on the type of notification and your phone operating system. When youdismiss a notification on your phone or the Venu 2 Plus watch, it no longer appears in the glance. To return to the notification list, swipe right.Replying with a Customized Text MessageNOTE: This feature is available only if your watch is connected to an Android phone using Bluetoothtechnology.When you receive a text message notification on your Venu 2 Plus watch, you can send a quick reply byselecting from a list of messages. You can customize messages in the Garmin Connect app.NOTE: This feature sends text messages using your phone. Regular text message limits and charges may apply.Contact your mobile carrier for more information.1 Swipe up or down to view the notifications glance.2 Select the glance.3 Select a text message notification.4 Swipe up to view the notification options.5 Select Reply.6 Select a message from the list.Your phone sends the selected message as a text message.4Smart Features
Calling from the WatchNOTE: This feature is available only if your watch is connected to a compatible phone using Bluetoothtechnology.1 Hold .2 Select Phone Calling.3 Select an option: To dial a phone number using the dial pad, select , dial the phone number, and select . To call a phone number from your contacts, select, select a contact name, and select a phone number. To view recent calls made or received on the watch, swipe up.NOTE: The watch does not sync with the recent calls list on your phone.TIP: You can selectto hang up before the call connects.Receiving an Incoming Phone CallWhen you receive a phone call on your connected phone, the Venu 2 Plus watch displays the name or phonenumber of the caller. To accept the call, select . To decline the call, select . To decline the call and immediately send a text message reply, select , and select a message from the list.NOTE: This feature is available only if your watch is connected to an Android phone using Bluetoothtechnology.Managing NotificationsYou can use your compatible phone to manage notifications that appear on your Venu 2 Plus watch.Select an option: If you are using an iPhone , go to the iOS notifications settings to select the items to show on the watch. If you are using an Android phone, from the Garmin Connect app, select Settings Notifications. Turning Off the Bluetooth Phone ConnectionYou can turn off the Bluetooth phone connection from the controls menu.NOTE: You can add options to the controls menu (Customizing the Controls Menu, page 9).1 Holdto view the controls menu.2 Selectto turn off the Bluetooth phone connection on your Venu 2 Plus watch.Refer to the owner's manual for your phone to turn off Bluetooth technology on your phone.Using the Voice AssistantTo use the voice assistant, your watch must be connected to a compatible phone using Bluetooth technology(Pairing Your Phone, page 3). Go to garmin.com/voicefunctionality for information about compatible phones.You can communicate with the voice assistant on your phone using the integrated speaker and microphone inyour watch. Go to garmin.com/voicefunctionality/tips for tips about how to set up your voice assistant.1 From any screen, hold .When connected to the voice assistant on your phone, appears.2 Say a command phrase, such as Call Mom or Send a text message.NOTE: Communication from the voice assistant is audible only.Smart Features5
Using Do Not Disturb ModeYou can use do not disturb mode to turn off vibrations and the display for alerts and notifications. This modedisables the gesture setting (Customizing the Display Settings, page 51). For example, you can use this modewhile sleeping or watching a movie. To manually turn on or off do not disturb mode, hold , and select . To automatically turn on do not disturb mode during your sleep hours, open the device settings in the GarminConnect app, and select Sounds & Alerts Do Not Disturb During Sleep.Finding Your PhoneYou can use this feature to help locate a lost phone that is paired using Bluetooth technology and currentlywithin range.1 Hold .2 Select .Signal strength bars appear on the Venu 2 Plus screen, and an audible alert sounds on your phone. The barsincrease as you move closer to your phone.3 Pressto stop searching.Connect IQ FeaturesYou can add Connect IQ features to your watch from Garmin and other providers using the Connect IQ app. Youcan customize your watch with watch faces, device apps, data fields, and music providers.Watch Faces: Allow you to customize the appearance of the clock.Device Apps: Add interactive features to your watch, such as glances and new outdoor and fitness activitytypes.Data Fields: Allow you to download new data fields that present sensor, activity, and history data in new ways.You can add Connect IQ data fields to built-in features and pages.Music: Add music providers to your watch. Downloading Connect IQ FeaturesBefore you can download features from the Connect IQ app, you must pair your Venu 2 Plus watch with yourphone (Pairing Your Phone, page 3).1 From the app store on your phone, install and open the Connect IQ app.2 If necessary, select your watch.3 Select a Connect IQ feature.4 Follow the on-screen instructions.Downloading Connect IQ Features Using Your Computer1234Connect the watch to your computer using a USB cable.Go to apps.garmin.com, and sign in.Select a Connect IQ feature, and download it.Follow the on-screen instructions.Wi‑Fi Connected FeaturesActivity uploads to your Garmin Connect account: Automatically sends your activity to your Garmin Connectaccount as soon as you finish recording the activity.Audio content: Allows you to sync audio content from third-party providers.Software updates: You can download and install the latest software.Workouts and training plans: You can browse for and select workouts and training plans on the Garmin Connectsite. The next time you sync your watch, the files are wirelessly sent to your watch.6Smart Features
Connecting to a Wi‑Fi NetworkYou must connect your watch to the Garmin Connect app on your phone or to the Garmin Express applicationon your computer before you can connect to a Wi‑Fi network (Using Garmin Connect on Your Computer,page 43).To sync your watch with a third-party music provider, you must connect to a Wi‑Fi network. Connecting thewatch to a Wi‑Fi network also helps to increase the transfer speed of larger files.1 Move within range of a Wi‑Fi network.2 From the Garmin Connect app, selector.3 Select Garmin Devices, and select your watch.4 Select General Wi-Fi Networks Add a Network.5 Select an available Wi‑Fi network, and enter the login details.Smart Features7
ControlsThe controls menu lets you quickly access watch features and options. You can add, reorder, and remove theoptions in the controls menu (Customizing the Controls Menu, page 9).From any screen, hold .Icon Name8DescriptionAlarmsSelect to add or edit an alarm (Setting an Alarm, page 50).AssistanceSelect to send an assistance request (Requesting Assistance, page 15).Battery SaverSelect to enable or disable the battery saver feature.BrightnessSelect to adjust the screen brightness (Customizing the Display Settings,page 51).Broadcast HeartRateSelect to turn on heart rate broadcasting to a paired device (Broadcasting HeartRate, page 17).ContactsSelect to open your Garmin Connect contact list on your watch.Dial PadSelect to open the phone dial pad (Calling from the Watch, page 5).Do Not DisturbSelect to enable or disable do not disturb mode to dim the screen and disablealerts and notifications. For example, you can use this mode while watching amovie.Find My PhoneSelect to play an audible alert on your paired phone, if it is within Bluetooth range.The Bluetooth signal strength appears on the Venu 2 Plus watch screen, and itincreases as you move closer to your phone.Lock ScreenSelect to lock the buttons and the touchscreen to prevent inadvertent pressesand swipes.Music ControlsSelect to control music playback on your watch or phone.Phone CallingSelect to open the phone controls, such as contacts and the dial pad.Controls
Icon NameDescriptionPhone ConnectionSelect to enable or disable Bluetooth technology and your connection to yourpaired phone.Power OffSelect to turn off the watch.Save LocationSelect to save your current location to navigate back to it later.Set Time with GPSSelect to sync your watch with the time on your phone or using satellites.StopwatchSelect to start the stopwatch (Using the Stopwatch, page 50).SyncSelect to sync your watch with your paired phone.TimerSelect to set a countdown timer (Starting the Countdown Timer, page 50).Voice AssistantSelect to connect to voice assistance (Using the Voice Assistant, page 5).VolumeSelect to open the watch volume controls.WalletSelect to open your Garmin Pay wallet and pay for purchases with your watch(Garmin Pay, page 12).Customizing the Controls MenuYou can add, remove, and change the order of the options in the controls menu (Controls, page 8).1 Hold .The controls menu appears.2 Hold .The controls menu switches to edit mode.3 Select the shortcut you want to customize.4 Select an option: To change the location of the shortcut in the controls menu, select the location where you want it toappear, or drag the shortcut to a new location. To remove the shortcut from the controls menu, select .5 If necessary, selectto add a shortcut to the controls menu.NOTE: This option is available only after you remove at least one shortcut from the menu.MusicNOTE: This section is about three different music playback options for your Venu 2 Plus watch. Third-party provider music Personal audio content Music stored on your phoneOn a Venu 2 Plus watch, you can download audio content to your watch from your computer or from a thirdparty provider, so you can listen when your phone is not nearby. To listen to audio content stored on your watch,you can connect headphones with Bluetooth technology. You can also listen to audio content directly throughthe speaker in your watch.Music9
Downloading Personal Audio ContentBefore you can
Touchscreen Tips Drag up or down to scroll through lists and menus. Swipe up or down to scroll quickly. Tap to select an item. From the watch face, swipe up or down to scroll through the glances on the watch.