Transcription
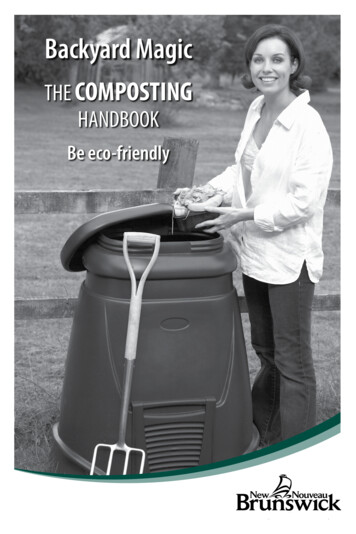
Backyard MagicTHE COMPOSTINGHANDBOOKBe eco-friendly
Backyard MagicTable of Contents Backyard Magic. 1How A Compost Pile Works. 2Using the Compost You Produce. 2 The Compost Recipe. 4-Air.Water.Food.Materials to Use.Materials to Avoid.46677 Building A Hot Compost Pile. 8 The Compost Container. 10 Other Ways to Compost. 12- Cold Composting. 12- Soil Incorporation. 13- Mulching. 14 Can I Compost This?. 15 15 Questions and Answers about Composting. 18 Composting Indoors. 21 Worm Composting. 22 Explorations in Composting. 24
Backyard MagicIs there a compost pile in your past? For most NewBrunswickers, the answer is yes. Our grandparents’generation knew the value of composting their yard andkitchen wastes. Giving back some of the nourishment theytook from the earth made good common sense, and it stilldoes!In today’s New Brunswick, composting is a traditional ideawith a broad new appeal. It’s making a strong comeback inall parts of the Province, as people look for positive thingsthey can do themselves to benefit the environment. Withjust a little effort, the results can be very satisfying.Composting uses nature’s own recycling system. Weedsand leaves, grass clippings, vegetable peels, and variousother organic wastes are turned into humus. That’s an essential soil conditioner richerthan anything we can buy.Why throw away the raw material which generates something so valuable? Especiallywhen composting has other benefits as well.Reducing GarbageUp to 30% of the garbage we throw out each week can go in the compost pile. Cuttingdomestic waste generation means a longer life for landfill sites and better environmentalmanagement for the entire community.Helping Plants GrowYour lawn, garden and house plants can never get too much compost. It graduallyreleases a variety of nutrients just when they’re required by the growing plants. Insectsand diseases don’t seem to do as much damage where the soil is enriched with plenty ofdecayed organic matter. And there’s another bonus: dark compost draws the sun’s heatto warm the garden soil, making our short growing season a few days longer.Building Up the SoilPlenty of compost added to the soil will also act like a sponge, soaking up water when itrains and releasing it in dry spells. It improves the structure of both sand and clay soils,protecting them against drought and erosion.COMPOSTING
How A Compost Pile WorksWhen leaves drop from a tree, they decay into soft black humus over time, withoutany help from people. When an animal dies, its remains slowly return to the earth.Anything that once lived will eventually decompose.Composting is based on this natural process and begins with the thousands ofmicroorganisms which live naturally in soil. They feed on a moist heap of organic wastematerials, generating considerable heat in the process. Other groups of “decomposer”organisms go to work as the temperature rises, an ever-changing workforce of bacteria,fungi, and insects.When the temperature drops, turning or stirring the pile gives the decomposers moreoxygen and the heat builds again, helping to kill harmful bacteria. When all the easilydecomposed material has been consumed, the temperature drops for the last time andearthworms and ants may move in, signalling that the compost is ready to feed newplants with its “recycled” nutrients.Finished compost has the distinctive fresh smell of newly-turned soil or a forest floorin spring, and won’t heat up again no matter how often you turn air into the pile. Theideal result of the composting process is crumbly, dark, soil-like humus where noneof the original material can be identified. The nutrients stored in compost depend onthe richness and variety of its ingredients, and on its exposure to harsh weather. Butexperienced gardeners know there is no such thing as bad compost!Using the Compost You ProduceFinished compost adds nutrients and organic matter to the soil, improving its textureand increasing its ability to hold air and water. Because it doesn’t burn plant roots,large quantities of compost can be applied to the soil at any time.Soil ImprovementTry digging several centimeters (one inch) of finished compost into a flower bed orvegetable garden before planting. How much you use will depend on how much youhave available: the soil can use it all.You can also give trees, shrubs, and nursery seedlings a good start by planting them inhalf-and-half soil and compost. New lawns will develop healthy roots to keep them green,if compost is dug into the soil before the grass seed is applied. When an establishedlawn suffers winter-kill, working some compost into the bald spots before seeding againis another good idea. COMPOSTING
Top DressingTreating lawns with just over a centimeter (half-inch)of compost serves as a very effective feeding when theground has dried in the spring. By sifting the compostfirst, you can remove any unattractive large pieces ormaterials that may not be fully decomposed. Theselarge pieces can be returned to the compost for furtherbreakdown.Side DressingYou can also apply compost as a spot fertilizer. Scratchit lightly into the top layers of soil around the plant thatneeds a boost, and water deeply.Compost “Tea”Here’s a tidy way to supply compost nutrients to house plants or to spot-fertilizeseedlings. Soak a burlap bag or old pillowcase of compost in a pail of water until theliquid is tea-coloured. Or stir one part compost into three parts water and pour off the“tea.” Using this liquid to water plants makes a difference, particularly in the middle ofthe warm growing season.MulchMulching should be done late in the spring when the ground is thoroughly warmed, butbefore summer’s heat, to conserve moisture. Spread approximately 8 cm (3 inches) ofcompost on top of the soil around trees and shrubs, from near the base of the trunk outto the dripline. You can also mulch around vegetables and flowers as soon as the plantsare approximately 8 cm (3 inches) high, to keep roots cool and discourage weeds.Potting SoilHouse plants, window boxes and hanging baskets will all benefit from a potting soilmixed with sifted compost. Compost alone can be used for growing vegetables incontainers, and for starting plants from seed. For indoor use, you may want to sterilizecompost in the oven for an hour at 95oC (200oF), but don’t be alarmed by the (temporary)strong smell.COMPOSTING
The Compost RecipeComposting is a very basic process. You can simply toss grass clippings and leaves ina heap and let nature do the rest in its own good time, or you can help it along, byproviding a balanced diet for the micro-organisms who’ll do most of the work, as well asa home that meets their needs.Just like us, these decomposer organisms have three basic requirements: air, water, andfood.Air provides oxygen and enables bacteria to carry out “aerobic” decomposition.Without oxygen, “anaerobic” decomposition of the waste may take place instead. This issomething we normally want to avoid, since anaerobic bacteria produce the rotten-eggsmell often associated with decay.There are two methods of aerobic composting, depending on whether or not the pileheats up. A “cold” compost pile will decompose as surely as a “hot” one, but it’ll takemuch longer.Cold composting is slow but it’s easy. Someone with more space for compost thanphysical energy and time to devote to it may opt for the “cold” approach. This couldalso be the method to choose if your primary concernis reducing waste, rather than making quantities ofcompost.In contrast, hot composting is a fairly fast method ofcreating compost and makes efficient use of smallerspaces. It does take more physical effort than coldcomposting, but gardeners who want as much compostas possible will usually choose this method.There are many variations of approach, as individual asthe people who compost. You might pick one methodto start with and adapt it, as you gain experience overtime. Above all, keep your system simple, convenient, andsuited to your lifestyle.AirAir penetrates only the top layers of the pile, so it needs help to reach the centre. A vilesmell around the compost tells you that anaerobic bacteria are moving in, and the pilemay simply need to breathe. In hot composting, plenty of air is essential to develop thehigh temperatures that kill pathogens and speed the process of decomposition. COMPOSTING
TurningThe most effective method of introducing air is to turnthe pile with a garden fork. Lift the material from the topand sides, toss it into the more active centre of the newpile, then add the partially decomposed centre to theoutside.StirringIf you would rather not do the work of turning a pile, trystirring it with a stick instead; this won’t distribute the airas evenly, however, so the composting process will besomewhat slower.Aerator ToolsYou can buy an aerator, a rod with flaps on one end and a handle on the other, at agarden centre. You jab the tool into the compost pile, and the flaps unfold to loosen thematerials as you pull it back out. The result is easier than turning and produces more airthan stirring.Air StacksAnother approach is to build your compost pile around a perforated pipe, a bundle oflong twigs, or a tube of wire mesh standing on end. This carries air to the centre betweenturnings. With air stacks, you can skip the turning, although the pile won’t heat up asefficiently.Elevated CompostMost compost piles rest on bare ground, but you can build the pile on a raised platform ofloosely spaced boards, allowing air to be drawn up from the bottom. If you elevate yourcompost, however, be sure to sprinkle garden soil through the compost to introducethose essential soil bacteria.COMPOSTING
WaterYour compost pile should be as damp as a wrung-out sponge, moist to the touch, but nowater should come out when you squeeze a handful.Too dry?You can poke holes in the pile and water it from the top with a trickling hose. Better yet,pull the pile apart and rebuild it, wetting each layer as it goes on. Very fibrous materialssuch as dead leaves may need to be soaked in a bucket for an hour or two.Too wet?A soggy pile should be turned so that clumps of material are broken up, letting air inand water out. If the compost is absolutely soaked, you can spread the materials to dryin the sun, or scatter peat moss through the pile as you rebuild it with the drier materialsin the centre.FoodDecomposer organisms work best with as varied a diet as you can feed them. Theingredients are all around us, almost anything that once lived is a candidate for thecompost, so try for lots of variety to get a good mix of textures and plant nutrients.In composting jargon, woody materials that are high in carbon (autumn leaves, paper,peat moss, sawdust, cornstalks, hay and straw, etc.) are called “brown” ingredients.Materials like garden refuse, manure, tea and coffee grounds, feathers, hair, and foodscraps are high in nitrogen, or “green.” Some materials can actually be both: fresh grassclippings are “green,” for example, but dried grass is “brown.”For successful results, you can use thesimple rule that compost needs to be abouthalf “brown” and half “green” by weight.Don’t bother to weigh your ingredients,though: an estimate is fine. Compostingsoon becomes a matter of instinct, like thecook who bakes without a recipe. If thepile doesn’t heat up, you know there’s notenough “green” in the mix, while a smell ofammonia means it needs more “brown.” COMPOSTING
Materials To UseGreen (Nitrogen Rich)Brown (Carbon Rich) Algae Bone meal Coffee grounds Eggshells Feathers Flowers Fruit and fruit peels Grass clippings (fresh) Hair Manure Seaweed Tea Leaves Vegetables and peelings Weeds Buckwheat hulls Coffee filters Corn cobs Cotton/wool/silk scraps Grass clippings (dried) Hay Leaves (dead) Paper Peat moss Pine needles Sawdust Straw Tea bags Wood chips Wood ashThis list is far from complete. Anything organic can, in theory, be composted -- somemore easily than others. But common sense suggests a few exceptions. The followingmaterials may cause problems in a backyard compost pile.Materials To Avoid pet wastes can contain extremelyharmful bacteria; meat, fish, fats and dairy productsare likely to smell as they rot andmay attract four-footed visitors; insect-infested or diseased plantsmay persist in the compost; materials contaminated bysynthetic chemicals or treatedwith herbicides or insecticidesshould never be used;COMPOSTING weeds with mature seeds, andplants with a persistent rootsystem (like crabgrass, groundivy, or daylilies), may not bekilled by the heat of the compost; leaves of rhubarb and walnutcontain substances toxic toinsects or other plants so mostpeople choose not to compostthem.
Building A Hot Compost PileDirections1.Gather both “green” and “brown” ingredients, enough to make a compost pilemeasuring at least 1 meter (3 feet) in each direction (high, wide and long).A smaller pile won’t generate or retain enough heat to effectively kill any harmfulbacteria present. If you choose healthy ingredients to compost, and keep pets andpests out, there’s no reason for concern.A much larger pile is more likely to compact, shutting out air, and is more difficult towork with.2.Chop or shred into small pieces as much of the material as possible. Dry materialslike leaves can be run through a shredder or under a lawn mower. A whipper-snipperin a garbage can works well too, like a big blender.Shredded materials make a better home for decomposer organisms, with moresurface area for them to work on. A shredded pile is also better insulated, has morepockets for air and retains moisture more easily. The finer the pieces, the faster yourcompost will be finished.3.Layer 15 cm (6 inches) of well-watered “browns” and 15 cm of “greens,” mixing thetwo layers together.4.Alternate and mix layers of each type of material, adding water as needed, until thepile is at least one meter (3 feet) high.Adding the material in layers simply helps you judge the right proportions of“brown” and “green.” But everything should then be thoroughly combined tocompost efficiently.5.Cover the pile to protect it from heavy rain, and wait. The compost should begin toheat up within hours.To witness decomposition in action, you can stick a metal rod into the centre of thepile for a few minutes, then check if it has warmed up. Compost thermometers areavailable at garden centres, or you can mount a meat thermometer at the end of astick, if you want precise temperature readings.Vapour emerging from aeration holes, and a fine grey fungus just under the surface,are other good signs of an active hot compost. COMPOSTING
What if it doesn’t heat up?When a compost pile won’t heat up, the problem is almost certainly one of three things:a) the pile is too small; b) it’s too dry; c) it needs more “greens” or, especially in coldweather, a “starter” to give it more nitrogen.Compost ActivatorsGarden suppliers sell compost starters or “activators,” often composed of high-nitrogenfertilizers. In some cases, “inoculants” of dehydrated bacteria are also described ascompost activators.While high-nitrogen fertilizers may be helpful, the benefits of adding more bacteriafrom a package have yet to be proven. All the bacteria you need should already bepresent in the soil under the compost pile or the food and garden waste you add. Youcould try soaking ordinary garden soil in water for an hour and douse the heap with theteacoloured liquid. But giving a boost of nitrogen to the bacteria you already have is thebest solution.Fresh stable manure is the ideal compost starter, though it may be hard for some ofus to find; harder yet to explain to your next-door neighbours. While the commercialactivators based on high-nitrogen fertilizers do heat up the compost quickly, it’s hard tocontrol the amount of nitrogen added this way and the excess may leach out or escapeas ammonia into the air.There are several effective organic alternatives: bloodmeal, finished compost, or wellcomposted manure, for example. Or, you can simply rebuild the compost pile withadditional grass clippings or other “green” materials.The Hot Composting TimetableThe temperature of the pile should rise steadily, peaking between 50oC to 65oC (120oF to150oF), 24 hours to one week later. When the temperature begins to drop, the compostis ready for turning. Break up any clumps of material, and move the outside parts to thebase and centre. If the pile is too dry, this is the time to wet it. Cover the pile again, andwait.The temperature should peak again in about a week, in a pile made of well-shreddedmaterials. Remember, the smaller the pieces, the faster the compost. As soon as itbegins to cool, turn the pile once more. In another week or two, the compost should befinished; that is, dark and crumbly, fresh-smelling, with very little of the original materialidentifiable. When compost is ready for use, the temperature of the pile won’t rise above43oC (110oF) no matter how often you turn it.COMPOSTING
Key Points to Remember Use equal amounts of “greens” and “browns.”Mix together a variety of ingredients.Shred or chop all ingredients, if possible.Build the pile large enough to retain heat.Turn or aerate the heap regularly to let in the air.Keep the pile as moist as a damp sponge.The Compost ContainerAnyone who has come back home after a long holidayknows that, given enough time, organic matter candecompose even in the back of the fridge. Out in thebackyard, nature certainly doesn’t care whether thecompost is heaped out in the open or enclosed in a bin.However, a container of some sort does help to keep theyard neat and the neighbours happy. A covered containeralso means the pile can retain both heat and nutrients,while keeping out rodents, raccoons and pets.Hot compost piles need regular turning, and you’ll want to harvest finished compostfrom time to time. So, above all, the container should make it easy to do this work. Beyondthat consideration, you’re safe in choosing a container for its appearance, convenience,cost, size, or other qualities.All sorts of composting units are available commercially.Some are simply “digesters,” such as a cone covering acollecting basket in a pit. Others, with solid bases, havedoors or chutes to let you harvest the compost from thebottom and put it to use.Your own system may be as simple as a circle of chickenwire, or a bottomless barrel with air holes in its sides. Justlift it away from the pile, set it up again nearby, and putthe newer layers back in, leaving behind the finishedcompost.10COMPOSTING
PensOne of the simplest structures is a circle of snow fencing or wire mesh supported byposts or stakes. At turning time, you unwrap and remove the fencing, set it up in a newlocation nearby, and fork the compost back into the pen. This requires a little more spaceand some lifting effort, and it leaves the compost in full view; but it is inexpensive, strongenough, and very easy to construct.BinsBins are sturdier and more discreet than pens. They may require a little more skill to buildbut are still inexpensive. The four sides can be made of almost anything: wire screenstretched on wooden frames or old pallets standing on end. Three walls are normallyfixed permanently together, but may be hinged, hooked or tied. One design has threewalls of concrete blocks, stacked without mortar, and a fourth wall of removableboards.To turn the pile, the front of the bin is removed and the compost forked out onto theground. Then the pile is rebuilt in the bin. You do need the extra ground space in frontof the bin for turning, but you don’t have to lift the compost over a wall to get it back in.One variation calls for the bin to be set over a pit, to provide extra insulation. Althoughthis encourages the presence of helpful earthworms, it does mean reaching down belowground level to turn the compost.DrumsA rotating barrel composter can be made from a largedrum with aeration holes punched in it, and fins inside tolift and mix the compost materials. A hinged loading doorin the side allows wastes to be added gradually. Someare rolled on the ground to mix the contents; others aremounted horizontally on stands with crank attachments.Various commercial models are available.If bacteria is introduced with a good amount of gardensoil and the barrel is turned every few days, compostcan be made in a few weeks this way with little physicaleffort.COMPOSTING11
BoxesPerhaps the best small-scale system for the relatively energetic composter is a design known as the New Zealandbox. A bottomless wooden box with ventilation spacesbetween the wall boards, its face is easily removable tofacilitate turning. Since the compost rests directly onthe ground, a lid is normally added to prevent nutrientsleaching from the pile during heavy rains.A New Zealand box or something similar can be made athome with a minimum of skill. It can be moved to a new location fairly easily, if required,and it keeps the compost neatly out of sight.A popular variation has two or three compartments in a row: compost is turned from onebox into another; the emptied box then accumulates the makings for another batch. It isideal for people who use kitchen and yard wastes as they accumulate and can’t save upenough materials to make a really big pile.Other Ways to CompostCold CompostingIf you aren’t interested in the physical task of turning a compost pile, or if you haveplenty of space and don’t need the compost in a hurry, cold composting is the answer.Small households may accumulate organic waste too slowly to build a hot compost pileall at once, but you don’t need much to start a cold compost. The pile builds graduallyas materials come to hand.Although the feeding process is less demanding, the results take a long time. You canwait from 6 months to a year for a batch of compost to be produced by this method. Itdepends on what goes into the pile: soft “greens” like grass clippings and kitchen wastesbreak down much faster than woody “browns” or unshredded pieces. On the plus side,absolutely no turning is required! But it’s a good idea to build the pile around an airstack, or to poke it with an aerator tool occasionally, to help it along.As with a hot compost, cold piles should be kept moist, and need a variety of foods forthe decomposer organisms to prosper. The lower layers decompose first, because newmaterial is constantly being added to the top. A compost container isn’t necessary, butit may help you to get at the finished stuff on the bottom.12COMPOSTING
Whatever you choose, a fancy container or a pile in the corner of the yard, compostproduced slowly will need to be covered or a lot of its nutrients will be “weathered away”over time. This means the resulting material will still be valuable as a soil conditioner, butnot very effective as a fertilizer.Soil IncorporationSoil incorporation is probably the simplest method of composting. Food and yard wastesare finely chopped, mixed with soil, and buried 20 cm (8 inches) or deeper in the earth.Depending on soil temperature, bacterial activity, and the carbon content of the wastes,decomposition will take from one month to a year.One word of caution, however! High-carbon materials (like raw autumn leaves) are notappropriate for this method, because they’ll steal their nitrogen from the surroundingsoil. Leaves may also acidify the soil or inhibit the growth of plants if they are dug intothe ground without first being at least partially composted.Even high-nitrogen materials should be given ample time to decompose undergroundbefore the area is used for planting, because the decomposer organisms will takenitrogen wherever they can find it while they’re working. Some people get around theproblem of nitrogen loss by adding bloodmeal to the soil before they bury the compostmaterials.PostholingA posthole digger is a handy tool for soil incorporation, although a spade will do. Theidea is to dig a series of holes around the drip line of trees and shrubs, or in a fallow areaof the garden (to avoid stealing nitrogen from growing plants), and bury organic wastesthere. The compost is made right where it is most needed. You can use what space youhave, then start over where the first load has composted. If the holes are dug beforethe ground freezes, you can continue to dispose of wastes in this way all through thewinter.Rotation TrenchingTrenching involves digging a long pit instead of separate holes, usually between rows ina garden. It is capped with a layer of soil as the wastes are gradually added.This method is often used by British gardeners in a simple three-year rotation of 1)soil incorporation, 2) crops, and 3) pathways. In the first year a trench is dug, filled withnitrogen-rich wastes, and covered with soil. The row next to it is used to grow crops anda third row is used as a path.COMPOSTING13
In each successive year, the fertile soil of the previous year’s trench is used to grow thecrops, and the former path is the composting trench.Thus the garden’s soil is continuouslyrenewed. Although this method demands far less space than a conventional compostingsystem, it does require three rows to grow one row of crops. Each garden will suggest itsown variations. Trenches can be dug under the pathways in use, one section at a time,as the space is needed. In a garden too small for paths, a two-year rotation of crops andtrench is fine.MulchingMulching copies nature’s way of composting on the surface of the soil and gardenershave been doing it for centuries. Woody, “brown” organic materials are spread in a layeron the ground, over a garden, or around shrubs and trees. Because they are not dug intothe soil but decompose on the surface, they don’t disturb the pH balance of the soil orrob it of nitrogen.Although it is perhaps the slowest method of composting, mulching offers otherbenefits. It discourages weeds, protects soil from compacting or eroding, and keeps theroots of plants cool and moist in hot weather, insulated in the winter.14COMPOSTING
Can I Compost This?AshesMaybeFrom untreated wood or paper, yes,in small amounts; but not frombarbecues, plywood, coloured orglossy paperBanana SkinsYesDecompose rapidly; can help toactivate a slow compost; loaded withplant nutrientsCardboardYesShred, soak, and mix with “greens”;but try first to reuse or recycle itCitrus FruitsYesShred rinds; bury in compost todiscourage fruit fliesCoffee GroundsYesGood earthworm food; use directlyon many plants; compost shreddedfilters, tooCorn CobsYesShred; adds both fibre and nutrientsto compost; good mulch; slow tobreak downDairy ProductsNoFats seal off air from compost;odours attract pestsDiseased PlantsNoCompost heat may not destroydisease; destroy or discard to avoidspreadingDishwaterMaybeIf water doesn’t contain grease orchemical cleansers, use it to wet pileDust and LintMaybeUse vacuum cleaner debris and lintfrom clothes dryer, if mostly naturalfibresEggshellsYesDry and crush first; good earthwormfood; slow to break down; helpneutralize acidity; as mulch, maydiscourage slugsCOMPOSTING15
Evergreen NeedlesMaybeHighly acidic; better yet, use asmulchFabricsMaybeSmall scraps of wool, cotton, felt andsilk; not synthetic fibres or blendsFeathersYesKeep somewhat wetter than usual;extremely high in nitrogenFishMaybeOdours and pests are problems withfresh or smoked fish, but driedfishmeal is fineGrass ClippingsYesAvailable and valuable; mix well toavoid clumps; leave some clippingsto feed lawnHairYesBoth human and pet hair; keep quitedamp; avoid using if coloured withchemicalsHay and StrawYesVery good fibre, nutrients usually lowLeavesYesShred and soak; add both nutrientsand fibre; tend to be slightly acidicManureYesCow, horse, pig, rabbit, poultry, thefresher the better, helps any compostMeat and BonesNoOdours and pests are problems; butdried, ground bonemeal is finesource of nitrogenSoilYesAdds decomposer soil organisms;scatter lightly through pile to avoidcompactingNutshellsMaybeCrush delicate shells like peanuts;heavier shells are better used asdecorative mulchPaperMaybeShred; not glossy/coloured whichcontain chemicals; better to recycleif possible16COMPOSTING
Pet WastesNoRisk of pathogen
Composting is based on this natural process and begins with the thousands of microorganisms which live naturally in soil. They feed on a moist heap of organic waste materials, generating considerable heat in the process. Other groups of "decomposer" organisms go to work as the temperature rises, an ever-changing workforce of bacteria, .
