Transcription
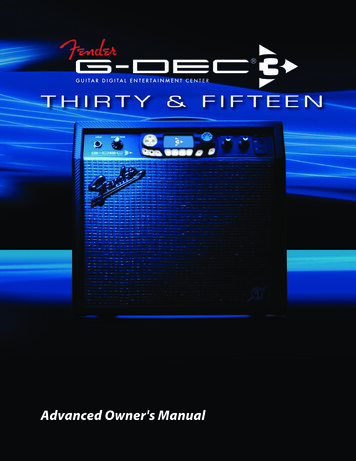
Advanced Owner's Manual
Advanced ManualNavigationThere are just a few basics of G-DEC 3 navigation that youshould know before you explore any further.IntroductionThis manual is your step-by-step guide to all the advancedfeatures found on your G-DEC 3 amplifier. For information onusing Fender FUSE , Ableton Live or Amplitube , please seethe separate manuals for each product on the G-DEC 3 DVDor log on to www.fender.com/support.Table of ContentsNavigating the G-DEC 3 . . . . . .Encoder KnobThe big encoder knob always controls the highlighted itemon screen. In play mode, the current Preset is highlighted, soturning the big knob will select presets. In other modes, turning the encoder knob will control everything from selectingeffects to amplifier tone.Highlighted item2 Using the encoder knob and the soft-keysStart-Stop Button . . . . . . . . 3Band track playbackEncoder Knob Quick Access . . . . . . . . . . 3Quick track audition and quick access presetsAmp Menus . . . . . . . . . . . 4Selecting amp types and advanced amp settingsFX Menus . . . . . . . . . . .5Save Button . . . . . . . . . .6Tap/Tuner Button . . . . . . . .6Band Menus . . . . . . . . . .7Selecting effects and advanced effect settingsSaving presets, copying and renaming presets Soft-KeysThe four plain keys below the display are called "soft-keys"and their functions are software defined. The display aboveeach soft-key shows you the current function of each key.From play mode, for example, the soft-keys will take you toother modes, such as AMP, FX, BAND and PHRASE:Soft key functionsTapping delay intervals and the built-in instrument tunerSelecting band tracks and advanced band settingsSoft keysPhrase Sampler . . . . . . . . . 8Phrase recording, overdubbing and phrase menusPhrase Menus . . . . . . . . . . 9Overdub menus and advanced phrase sampler settingsUtility Menus . . . . . . . . . . 10Once you have entered a G-DEC 3 mode, the two soft-keys onthe ends will take you to different menus within that mode.For instance, in Phrase mode, the two end soft-keys will takeyou to the DELETE and UNDO menus (3–or–4):Amplifier settings and quick access preset assignment3 Previous menuSD Card Slot . . . . . . . . . .11USB Port . . . . . . . . . . .11External storage of tracks and presetsConnecting the G-DEC 3 to your computerFootswitch . . . . . . . . . . . 12Remote functions using the Fender ULT-4 footswitchFAQ . . . . . . . . . . . . . 12Where to go to ask questions, read threads and FAQs Next menu 4Sometimes, two soft-keys will have the same function,such as COMMIT, as shown above. Other times a softkey may have no function at all.Now you are ready to go wherever the music and yourG-DEC 3 take you!2fender.com
1. Press the QUICK ACCESS button.Start–StopPress the START-STOP button to start and stop playback of theband track. The title of the band track is displayed below theamplifier and effects icons in play mode.Start-Stop buttonBand Track title2. Turn the big knob to scroll through the list of all bandtracks and phrases on the G-DEC 3 and SD card.3. Press the START-STOP button to start/stop playing theselected track. Try turning the big knob while a track is playing to automatically start each track the instant it is selected. To search for tracks by location and file type: To start or stop the band track:1. Press the START-STOP button to start playing the bandtrack.1. Press the QUICK ACCESS button to activate Quick Accessmode.2. Press the QUICK ACCESS button repeatedly to changethe location and file type of the tracks listed for selection.Tracks will be grouped by two locations (HD or SD) and byfour file types (WAV / PHRASE / MIDI / MP3).2. Press the START-STOP button again to stop playing theband track. To audition tracks in an endless (repeating) loop:There is no "pause" button for the band track. Every timeyou start the band track it will play from the beginningof the track.Quick AccessPress the QUICK ACCESS button to quickly find anysong (or phrase) on the G-DEC 3 or SD card andinstantly play it with the current preset. This is a fasterway to "audition" tracks than using the Band File menu to finda song because Quick Access mode allows you to search fortracks in alphabetical order as well as sort tracks by locationand file type.Another exciting feature of Quick Access Mode is that it turnsthe G-DEC 3 soft-keys into "quick preset keys" that allow youto instantly activate your three favorite presets by pressingthe QA1 / QA2 / QA3 soft-keys:Quick Access buttonLocations and file types that are not available will notappear as categories.1. Press the QUICK ACCESS button to activate Quick Accessmode.2. Press the LOOP soft-key. The loop icon will appear in thedisplay.3. Press the LOOP soft-key again to cancel track looping.Quick Access PresetsTo quickly access your three favorite presets:1. Press the QUICK ACCESS button.2. Press any of the three Quick Access soft-keys (QA1 / QA2 /QA3) to instantly activate the preset assigned to that key. You can also activate your Quick Access Presets from aFender ULT-4 footswitch. See Footswitch on page 12.To assign different presets to the QA1 / QA2 / QA3 keys:Track location & typeTrack titleQuick Access Presets1. Press the QUICK ACCESS button to activate Quick Accessmode.2. Press and HOLD any of the three Quick Access soft-keys(QA1 / QA2 / QA3) while turning the big knob to select thepreset you want to assign. Auditioning TracksYou can also assign Quick Access Presets in the UtilityMenus. See Utility Menus on page 10.To quickly audition tracks for the current preset:fender.com3
Amp menusUse the Amp menus to select a different amplifiertype for the current preset and adjust all amplifier settings, or to import the amp type (with all amp settings) from another preset.Amp Type—Use the Amp type menu to select one of the following 22 amplifier types:Blackface CleanAmp Volume—Use the Amp Volume menu to adjust theloudness of the selected guitar amp type.Treble—Use the Treble menu to adjust the high-frequencytone of the selected amplifier type.Middle—Use the Middle menu to adjust the mid-frequencytone of the selected amplifier type.Bass—Use the Bass menu to adjust the low-frequency toneof the selected amplifier type.Compressor—Use the Compressor menu to select a level ofsignal compression.Blackface DriveBlackface Distorted Jazzmaster Garage RockGarage PunkCompression is used to "squeeze" the volume range ofa signal to reduce high volume spikes and boost lowvolume sustain.Very DistortedTimbre—Use the Timbre menu to select one of the followingtimbre types:British JangleBritish BluesBritish SteelNoneModern CrunchFull BodyModern MetalFull StackModern ShredRazors EdgeHot Rod GritBright LightHot Rod LeadBass BoostAcoustic Dreadnought MahoganyNew MetalAcoustic JumboSuper BrightAcoustic Dreadnought RosewoodAcoustic Parlor (small body) Tweed CleanTweed DriveTweed DirtGain (Piezo Mix)—Use the Gain menu to adjust the amountof preamplifier gain and signal distortion. Use the Piezo Mixmenu to blend the sound of an unamplified acoustic guitarwith the sound of an acoustic guitar through a piezo pickup;rotate fully counter-clockwise for 100% unamplified, rotatefully clockwise for 100% piezo. 4The GAIN menu will change to PIEZO MIX only whenone of the four Acoustic amplifier types is selected in theAMP TYPE menu, to provide an amplifier feature moreappropriate for acoustic guitar playing styles.Use Timbre to apply a complete tone adjustment in onesimple step.Noise Gate—Use the Noise Gate menu to select one of foura noise gate levels. Use Noise Gate to reduce the background static that canbe especially annoying when playing softly.Import—Use the Import menu to copy the amplifier typeand all the amp settings from another preset to the currentpreset.fender.com
FX menusTouch WahFuzzUse the FX menus to select effects for the current preset and adjust all effect settings, or to import theeffects (with all settings) from another preset.G-DEC 3 effects are grouped into four categories, STOMPBOX,MODULATION, DELAY and REVERB. You can choose one effectfrom each category for a maximum of four active effects atany one time. An icon appears on screen when an effect iscurrently selected for each category:Fuzz Touch WahModulation—Use the Modulation menu to select one of thefollowing 13 effects:No Modulation effectSine ChorusTri ChorusSine FlangerTri FlangerIcons for each active effect categoryVibratoneVintage TremoloSine TremoloAlienatorResolverTo select effects and adjust effect settings, start by pressingthe FX soft-key. The first menu is Stompbox effects whereyou can select one of five stompbox type effects. The menusfollowing (4) the Stompbox menu are submenus of settingsfor the selected stompbox effect. Submenus will changedepending on the effect you select, to provide the appropriate settings for that effect. Ring ModulationStep FilterPhaserPitch ShiftDelay—Use the Delay menu to select one of the following 9effects:No Delay effectIf no stompbox effect is selected, the next menu (4) willtake you directly to the next category of effects (modulation).MonoEcho FilterStereo Echo FilterEffects SelectionMultitapPing PongTo select effects and adjust effect settings:Ducking1. Press the FX soft-key.Reverse2. The first menu is Stompbox. Here you can select one offive stompbox type effects or NO STOMPBOX by turningthe big knob.Tape3. Press the end soft-keys (3–or–4) to access other categories of effects and to adjust settings for the effects youhave selected.Stereo TapeReverb—Use the Reverb menu to select one of the following10 effects:No Reverb effectEffects MenusSmall HallStompbox—Use the Stompbox menu to select one of thefollowing 5 effects:Large HallSmall RoomLarge RoomNo Stompbox effectSmall PlateOverdrivePlateFixed WahAmbientfender.com5
2. Turn the big knob to select a target preset to save over. Ifyou do not turn the knob, the default selection is the current preset.Arena'63 Fender Spring'65 Fender SpringImport—Use the Import menu to copy the effects, includingall effect settings, from another preset to the current preset. Before you save over a preset, make a list of your leastfavorite presets to target as your new preset locations.3. Use the CURSOR soft-keys to highlight each character inthe preset name, then use the big knob to change thecharacter.Save ButtonUse the SAVE button when you want to save anychanges that you have made to the current preset.You can save over the current preset or you can saveover any other preset you choose.Select charactersChange case / add space Save button When you make any change to the current preset, such asselecting a different band track or a new effect, the SAVE button will turn red to indicate that you have altered the currentpreset. Your changes up to this point are still temporary. Tocancel your temporary changes, simply turn the big knob toselect a different preset and then back again.Save ProcedureTo save a preset requires two presses of the SAVE button, onepress to initiate the save process and then another press toconfirm the save. If you decide that you want to cancel thesave process after the first press of the SAVE button but beforethe second press, simply press the EXIT button to cancel thesave. Your temporary changes to the current preset will stillbe active and the preset will only be reset when you select adifferent preset.4. Use the two center soft-keys to change character case,select numbers and insert blank spaces.5. After you have the target preset selected and the title ofthe new preset finished, press the SAVE button to confirmthe save process. You can use the Save Procedure even if you have NOTmade any changes to the current preset (and the SAVEbutton is not red) if you want to simply change thename of the current preset or copy the current preset toanother location.Tap / TunerThe TAP / TUNER button has two functions. First, it can beused to quickly set the delay interval of delay effects andthe tempo of MIDI tracks. Secondly, it is used to activate theonboard instrument tuner.To save your changes to the current preset:1. Press the SAVE button once. Select target presetTap / Tuner button Tap ButtonChange preset name6If the current preset has a delay effect assigned to it, you canuse the TAP button to set the delay interval of the delay effectsimply by pressing the TAP button rhythmically in time withthe desired delay interval.fender.com
To set the delay interval of delay effects using TAP:4. Standard guitar tuning is as follows:1. Select a preset with a delay effect –or– select a delayeffect for the current preset using the FX menus. (See FXMenus on page 5.)2. Press the TAP button repeatedly (twice minimum) in syncwith the desired delay interval. If you press the TAP button only one time, the delayinterval will be set to the maximum length.5. Press any button on the G-DEC 3 to exit from the Tuner.To set the tempo of MIDI tracks using TAP:Band menus1. Select a preset with a MIDI band track –or– select a MIDIband track for the current preset using the Band menus.(See Band Menus on page 7.)2. Activate the Band Tempo menu. (See Band Menus on page7.)3. Press the TAP button repeatedly (twice minimum) in syncwith the desired tempo for the band track. If you press the TAP button only one time, the tempo setting of the MIDI band track will not be affected.preset.Use the Band menus to select a new band track for thecurrent preset and adjust all band track settings, or toimport the band track (will all settings) from anotherBand Track SelectionTo select a new band track:1. Press the BAND soft-key.Tuner ButtonThe G-DEC 3 has a built-in instrument tuner that you can useto tune your guitar.To use the tuner:2. The first menu is Band Type. Here you can select eitherMP3/WAV –or– MIDI as the band track file type. 1. Press and hold the TAP button for 2 seconds.2. Strike any single string on your guitar and watch the tunerscreen on the G-DEC 3. In the lower left corner you will seethe note of the string being tuned.Select MP3/WAV as the Band Type for the best results inmost instances. MIDI is more useful for specialized purposes such as generating metronome clicks.3. Press the FILE soft-key to access the band track File selection menu.4. Turn the big knob to select a new band track. Note of string playedTurning the big knob will scroll through all the bandtracks on the G-DEC 3 hard drive (HD) in alphanumerical order and then continue with all the band tracks onthe SD card (SD).5. Press EXIT.Tuning needle3. Turn the tuning peg on your guitar until the tuning needleon screen indicates the string is in tune, as shown above. You can also activate the Tuner from a Fender ULT-4footswitch. See Footswitch on page 12. The SAVE button will turn red to indicate a change tothe current preset. To reset the band track, simply turnthe big knob to a different preset and then back again.Advanced Band MenusRepeat—Use the Repeat menu to choose REPEAT for endlessloop playback of the band track or ONCE for once throughplayback.fender.com7
When REPEAT is selected, WAV and MIDI files providesmoother "gap free" loop playback than MP3 files.To record your guitar:Speed (Tempo)—Use the Speed menu to adjust the playback speed of the band track. You can use this feature to learnfast licks by reducing the Band Speed so that you can heareach note more slowly. This menu will become TEMPO if a MIDI file is selectedas the band track.Pitch (Transpose)—Use the Pitch menu to adjust the playback pitch of the band track. You can use this feature tochange the key signature of a song. This menu will become TRANSPOSE if a MIDI file isselected as the band track.Mix (Drum Solo/Count In)—Use the Band Mix menu tochoose STEREO, LEFT/RIGHT MIX, or CENTER CANCEL. STEREOis the normal setting. When LEFT/RIGHT MIX is selected, anadditional menu will appear after Band Mix that allows you toadjust the left/right channel mix. CENTER CANCEL is useful forremoving the lead guitar and vocal tracks from some songs. Phrase Recording and PlaybackThis menu will become DRUM SOLO/COUNT IN if a MIDIfile is selected as the band track.Import—Use the Import menu to import the band track withall of its settings from another preset.1. Press the(record) button.2. Play guitar.3. Press the(record) button to stop recording –or– youcan keep playing until the progress bar reaches the maximum phrase length. Maximum phrase length depends on the Phrase Qualitysetting. See Phrase Menus on page 9.To play back your phrase:1. Press theplays back.2. Press the (playback) button. Your recorded phrase(playback) button again to stop playback.You can set Phrase Playback to REPEAT to play phrasesin an endless loop, or to ONCE to play phrases throughjust one time when playback is pressed. See PhraseMenus on page 9.To record the band track and your guitar:1. Press the START-STOP button to start the band track playing.2. Press the(record) button immediately –or– wait forthe section of the song that you want to record and thenpress record.3. Play your guitar if you want to record it also.Phrase SamplerThe most basic function of the Phrase Sampler is to recordand play back phrases of G-DEC 3 audio. A recorded phrasecan be used as a short backing track or as a tool to practicetricky riffs by playing the phrase in an endless loop. A morepowerful function of the Phrase Sampler allows you to "overdub" (record in layers, over a previous phrase) so that you canhear yourself playing the rhythm AND lead guitars together inone phrase!The following step-by-step instructions start with the basicrecord and playback functions of the Phrase Sampler, thenprogress to overdubbing and the many other amazing features of the Phrase Sampler found in the Phrase Menus. You can set the Phrase Sampler to record GUITAR, BANDor ALL in the Phrase Source menu. See Phrase Menus onpage 9.Phrase OverdubbingThe(dub) button gives the Phrase Sampler an overdubfunction which allows you to create multi-track phrases thatfeature you playing two or more guitars simultaneously!Every overdub must start with an original phrase, so firstrecord something with the Phrase Sampler, such a simplechord progression (see "To record your guitar" above). Thiswill be your "rhythm track." Now you can dub a "lead track"over the rhythm track.Phrase Sampler keys PLAY / RECORD / DUB 4. Press the(record) button to stop recording –or– youcan keep playing until the progress bar reaches the maximum phrase length. 8 fender.com
To dub over an existing phrase:1. Press the(dub) button. You will hear the originalphrase start to play back.2. Play guitar along with the original phrase.3. Press the(dub) button to stop recording – or – you cankeep going until the progress bar reaches the end of thephrase.To play back your overdubbed phrase:1. Press the(playback) button. You will hear the originalphrase and your overdub play back together. If you press the(record) button accidentally, it willerase your overdub and start recording a new phrase.Overdubbing multiple layersYou don't have to stop with one layer of overdubbing. Youcan add as many layers to your phrase as you want. Every timeyou press(dub) you can play a different section or instrument until you are playing every part in the band! You can adjust the Dub Feedback setting so that everytime you overdub another layer onto a phrase, theprevious overdub layers will become quieter or fade outcompletely, making the newest overdub layers moreaudible. See Phrase Menus below.Phrase MenusUse the phrase menus to save, load or delete phrasesamples and adjust all phrase sampler settings, or towork with the dub track options.Dub Commit—Use the Dub Commit menu when you wantto make the overdub track "permanent" by mixing it togetherwith the original phrase. The advantage of Dub Commit isthat you can erase new overdub layers without erasing thepreviously "committed" overdub layer (See Dub Undo below).Dub Undo—Use the Dub Undo menu when you want toerase an overdub track and start over. Any overdub tracks thathave been "committed" will not be affected (see Dub Commitabove).Save Phrase—Use the Save Phrase menu to save the currently active phrase (all overdubbed layers are automaticallycommitted). Turn the big knob to select the G-DEC 3 harddrive (HD) or a flash card (SD) as the save destination, thenpress either SAVE PHRASE soft-key. Phrases are saved as .wav files with consecutively numbered filenames in the format: GDEC0000.wavLoad Phrase—Use the Load Phrase menu to load any phrasefile on the G-DEC 3 hard drive (HD) or SD card (SD). Turn thebig knob to select a file, then press either LOAD PHRASE softkey.Phrase Level—Use the Phrase Level menu to adjust the volume level of phrase playback.Dub Feedback—Use the Dub Feedback to make previousoverdub layers fade out as new overdub layers are recorded.When Dub Feedback is set to "10" the previous overdub layers will remain at their original volume levels. Lower DubFeedback settings will decrease the volume level of previousoverdub layers and a setting of "1" will cause previous overdubs to fade out completely.Phrase Mode—Phrase Mode only applies if you are usinga MIDI file as a phrase. Select SYNCHRONOUS to have thephrase neatly trimmed to the nearest measure during playback. Select FREEFORM to disable this feature.Phrase Source—Use Phrase Source to select exactly whatthe Phrase Sampler records. You can choose to record justyour GUITAR or just the BAND track or you can select ALL (normal setting) to record everything. Try setting Phrase Source to GUITAR then record alongwith a band track. When you play the phrase back youcan hear how good you sound without the band!Phrase Speed—Use the Phrase Speed menu to adjust theplayback speed of the Phrase Sampler from 50% to 150%. Youcan use this feature to learn fast licks by recording a section ofa song, then reducing the Phrase Speed so that you can heareach of the notes more slowly. The Phrase DUB function is disabled if Phrase Speed isset to anything other than 100%.Phrase Pitch—Use the Phrase Pitch menu to adjust the playback pitch of the Phrase Sampler 5 half steps. You can usethis feature to change the key signature of a song. The Phrase DUB function is disabled if Phrase Pitch is setto anything other than NO SHIFT.Phrase Playback—Use the Playback menu to choose REPEATfor endless loop phrase playback or ONCE for once throughphrase playback.Phrase Quality—Select HI RES for maximum quality phraserecording with a total phrase length of 35 seconds or selectLOW RES for normal quality phrase recording with a totalphrase length of 2 min, 20 sec.fender.com9
Phrase Delete—Use the Delete menu to erase any phrasefile. Select a file by turning the big knob, then press either ofthe DELETE soft-keys.2. Use the soft-keys (3–or–4) to access the Import menu. 4. Press SAVE.Memory Lock must be disabled in the Utility Menus todelete phrase files. See Utility Menus on page 10.Utility MenusUse the Utility menus for a variety of amplifier software and hardware settings. Press and hold the EXITbutton for 2 seconds to activate the Utility menus.QA1 / QA2 / QA3—Use the first four Utility menus to assignQuick Access presets. See Quick Access on page 3.Memory Lock—Use the Memory Lock menu to preventaccidental preset modifications. You will still be able to maketemporary changes to presets with Memory Lock ON, but youwon't be able to save those changes until Memory Lock isswitched OFF.Line Level—(G-DEC 3 THIRTY, ONLY) Use the Line Levelmenu to adjust the output level of the rear panel LINE OUTjacks to accommodate the input sensitivity of external audioequipment.Line Out— (G-DEC 3 THIRTY, ONLY) Use the Line Out menuto select the audio content sent out through the rear panelLINE OUT jacks. Choose ALL to send all G-DEC 3 audio to theLINE OUT jacks (normal setting) or choose BAND to send onlythe band track to the LINE OUT jacks. For the most intense one-man band experience possiblewith the G-DEC 3 Thirty and a PA system: Connect theLINE OUT jacks to a PA sound system. Set the Line Outmenu to BAND and the Speaker menu to GUITAR. Nowthe band track audio will play in stereo through the PAspeakers and your guitar will play through the G-DEC 3speaker, creating a realistic band simulation!Speaker— (G-DEC 3 THIRTY, ONLY) Use the Speaker menu toselect the audio content sent to the G-DEC 3 internal speaker.Choose ALL to send all G-DEC 3 audio to the speaker (normalsetting) or choose GUITAR to send only your guitar audio tothe G-DEC 3 speaker. See the Line Out note above.Import One Preset—Use the Import menu to import anyone preset from an SD card inserted into the G-DEC 3.To import one preset from the SD card to the G-DEC 3:1. Press and hold the EXIT button to activate the Utilitymenus.103. Turn the big knob and select the preset you want toimport.5. Turn the big knob to select the preset you want to overwrite.6. Press SAVE again to confirm and finalize the preset import. Any band track associated with the imported preset willonly play if an SD card with the band track file (media) isplugged into the G-DEC 3. See ! note on page 11.Export One Preset—Use the Export One menu to export asingle preset to an SD card inserted into the G-DEC 3.To export one preset from the G-DEC 3 to the SD card:1. Press and hold the EXIT button to activate the Utilitymenus.2. Use the soft-keys (3–or–4) to access the Export Onemenu.3. Turn the big knob and select the preset you want toexport.4. Press either one of the EXPORT ONE soft-keys to exportthe selected preset.5. Turn the big knob to select the preset you want to saveover.6. Press SAVE again to confirm and finalize the preset export. Exporting a preset will overwrite any preset on the SDcard with the same name! See ! note on page 11.Export All Presets—Use the Export All menu to export ALLpresets to an SD card inserted into the G-DEC 3.To export all presets from the G-DEC 3 to the SD card:1. Press and hold the EXIT button to activate the Utilitymenus.2. Use the soft-keys (3–or–4) to access the Export All menu.3. Press either one of the EXPORT ALL soft-keys to export allpresets. Exporting presets will overwrite any presets on the SDcard with the same names! See ! note on page 11.Restore All Presets—Use the Preset Restore menu to restoreall presets on the G-DEC 3 to their original factory settings.Preset Restore will NOT restore any media (band tracks) if theyhave been deleted from the G-DEC 3 hard drive (HD), whichcan only be done using the Fender FUSE software interface orthrough the USB Drive menu.fender.com
! The IMPORT, EXPORT and RESTORE menus above doNOT transfer the band track files (media) associatedwith the presets. However, you CAN move appropriatelylicensed media files to and from the G-DEC 3 using theFender FUSE software included on the G-DEC 3 DVD, orthrough the USB Drive menu (below).The Fender FUSE software included with your G-DEC 3has backup and restore functions that DO transfer themedia files (band tracks) along with the preset files.Format SD Card—Use the Format SD menu to format yourSD card as “FAT32” if the pre-existing format is not recognizedby the G-DEC 3. Warning: All files on your SD card will beerased by the formatting process.USB Drive—Use the USB Drive menu to connect the G-DEC 3to your computer to enable direct access to all media files onthe G-DEC 3 hard drive (HD). You will find three folders on theG-DEC 3 HD:FOLDER NAMEUSED FORFILE TYPESAudioBand Tracks.wav / .mp3MidiBand Tracks (MIDI).midPhrasePhrase Sampler files.wav There is no menu function on the G-DEC 3 that allowsyou to copy media files (band tracks) directly betweenan SD card and the G-DEC 3 hard drive. However, youcan accomplish this from your computer when theG-DEC 3 is connected as a USB drive.Memory Free Space—Use the Memory menu to see howmuch free space is available on the G-DEC 3 hard drive (HD)and on the SD card, if one is present.SD Card Slotples) so you may find it more convenient to carry the majorityof your media on SD cards. The G-DEC 3 is compatible with SDand SDHC cards up to 8 GB. Poor quality SD cards may be unreliable or cause choppy audio playback. For a list of recommended SD cards,log on to: www.fender.com/support/gdec3/faq/sdcard.phpTo prepare a pre-formatted SD card for use with yourG-DEC 3:1. Insert an empty SD card into the SD slot on the front of theG-DEC 3. The G-DEC will automatically create the following folders on the SD card:FOLDER NAME USED FORFILE TYPESAudioBand Tracks.wav / .mp3MidiBand Tracks (MIDI).midPhrasePhrase Sampler files.wavPresetsPreset files.fuse2. The SD card is ready to use! You can fill the Audio and Midifolders with songs from your computer and then use themas backing tracks for presets on the G-DEC 3, or simplyaudition them from Quick Access mode.To import / export presets using an SD card:1. Insert your SD card in the SD slot.2. Use the Import Preset and Export Preset menus to performthe desired action (see Utility Menus on page 10).USB PortUse the USB port to connect the G-DEC 3 to your computer totake your music to the next level: Connect to the (included) Fender FUSE software to control your G-DEC 3 from your computer and access bonusamp features not available from the G-DEC 3 alone. Please see the Fender FUSE manual on the G-DEC 3 DVDfor details. Record and edit G-DEC 3 audio using the (included)Ableton Live Lite 8 Fender Edition software.Using SD flash memory cards with the G-DEC 3 will enhanceyour musical capabilities by providing storage for: Thousands of Band tracks and Phrase samples (media). Virtually unlimited number of presets that you canimport/export or share with other G-DEC 3 player
Advanced Manual Introduction This manual is your step-by-step guide to all the advanced features found on your G-DEC 3 amplifier. For information on using Fender FUSE , Ableton Live or Amplitube , please see . . 9 Overdub menus and advanced phrase sampler settings


