Transcription
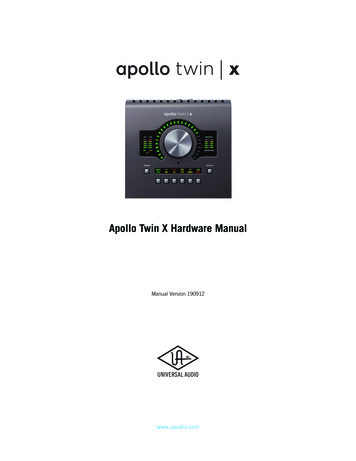
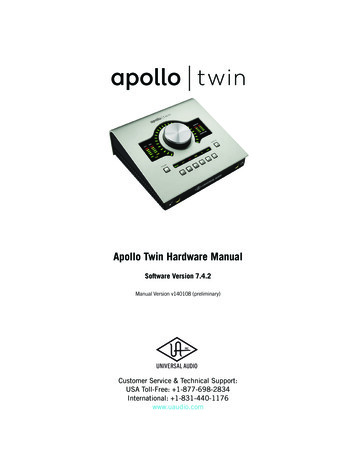
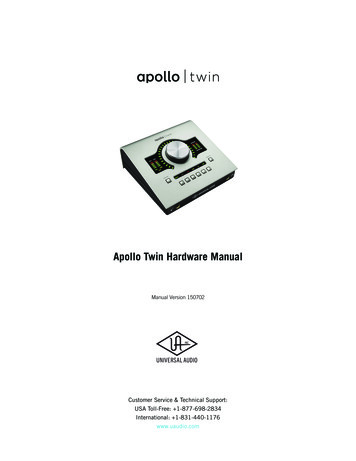
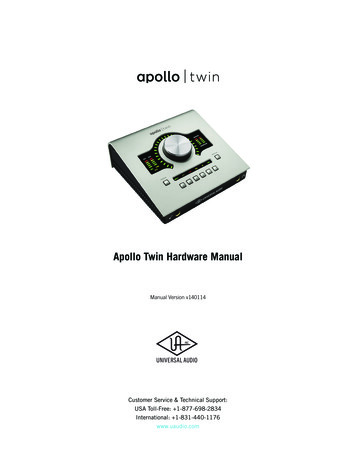
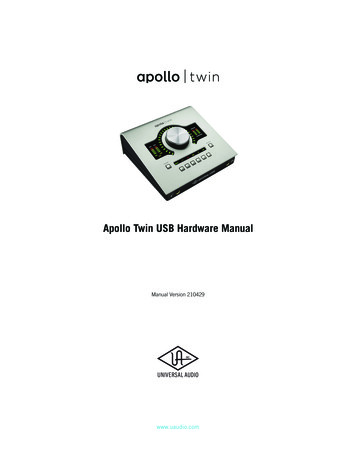
Apollo Twin USB Hardware ManualManual Version 210429www.uaudio.com
A Letter from Bill Putnam Jr.Thank you for deciding to make the Apollo Twin High-Resolution Interface part of yourmusic making experience. We know that any new piece of gear requires an investmentof time and money — and our goal is to make your investment pay off. The fact that weget to play a part in your creative process is what makes our efforts meaningful, and wethank you for this.In many ways, the Apollo family of audio interface products represent the best examplesof what Universal Audio has stood for over its long history; from UA’s original founding inthe 1950s by my father, through our current vision of delivering the best of both analogand digital audio technologies.Starting with its high-quality analog I/O, Apollo Twin’s superior sonic performance servesas its foundation. This is just the beginning however, as Apollo Twin is the only desktopaudio interface that allows you to run UAD plug-ins in real time. Want to monitor yourselfthrough a Neve console channel strip while tracking bass through a classic Fairchild orLA-2A compressor? Or how about tracking vocals through a Studer tape machine withsome added Lexicon reverb?* With our growing library of more than 90 UAD plug-ins,the choices are limitless.At UA, we are dedicated to the idea that this powerful technology should ultimately servethe creative process — not be a barrier. These are the very ideals my father embodiedas he invented audio equipment to solve problems in the studio. So as you begin toincorporate Apollo Twin into your creative process, we hope that the excitement andpride that we’ve built into it comes through. We believe Apollo Twin will earn its way intoyour creative workflow by providing stunning fidelity, great ease-of-use, and rock-solidreliability for years to come.As always, please feel free to reach out to us via our website www.uaudio.com, and viaour social media channels. We look forward to hearing from you, and thank you onceagain for choosing Universal Audio.Sincerely,Bill Putnam Jr.*All trademarks are recognized as property of their respective owners. Individual UAD Powered Plug-Ins sold separately.Apollo Twin USB Hardware Manual2Welcome
Table Of ContentsTip: Click any section or page numberto jump directly to that page.A Letter from Bill Putnam Jr. 2Introduction. 4Welcome to Apollo Twin USB!. 4Apollo Twin USB Features. 6Operational Overview. 8About Apollo Twin USB Documentation. 10Additional Resources. 11Quick Start. 12Quick Start Overview. 12Hardware Setup. 13Software Setup. 14Connect to Input Sources and Monitor System. 15Setting Hardware I/O Levels. 16Controls & Connectors. 17Controls Overview. 17Top Panel. 19Front Panel. 22Side Panel. 22Rear Panel. 23Specifications. 25Specification Tables. 25Hardware Block Diagram. 29Troubleshooting. 30Notices. 31Important Safety Information. 31Warranty. 32Maintenance. 32Repair Service. 32Technical Support. 34UA Website & Knowledge Base. 34YouTube Support Channel. 34UAD Community Forums. 34Contact UA Support. 34Apollo Twin USB Hardware Manual3Table Of Contents
IntroductionWelcome to Apollo!High-Resolution Desktop Music Production with Classic Analog SoundWith the highest dynamic range and lowest noiseof any desktop interface, Apollo Twin USB givesyou stellar 24-bit/192 kHz sound and breathtakingclarity.Its premium mic preamps and class-leadingconversion translate into rich three-dimensionalrecordings with exceptional depth and punch.Digitally controlled analog monitor outputs providefull resolution audio at all listening levels — lettingyou create better mixes in real-world environments.A Complete Analog Studio with RealtimeUAD Plug-In ProcessingImagine having access to a classic analog recordingstudio, right on your desktop. Apollo Twin USBlets you record and mix through the full range ofUAD Powered Plug-Ins — including vintage EQs,compressors, reverbs, tape machines and more — atnear-zero latency, regardless of your audio softwarebuffer size.USB 3LINE OUT3MONITORL4ROPTICAL INPOWEROFFMIC/LINE 2MIC/LINE 1ON 12VDCThe key to its analog magic is onboard UAD-2 DUODSP Processing, which powers the UAD plug-inswhile reducing the strain on your host CPU. ApolloTwin USB includes the “Realtime Analog Classics”plug-in bundle.Track Through Classic Preamps Using Unison TechnologyUnison technology allows Apollo’sTwin USB’s mic preamps and front-panel DI to soundand behave like the world’s most sought-after tube and solid state preamps, guitaramps, and stompboxes — including their all-important impedance, gain stage “sweetspots,” and circuit behaviors. Based on breakthrough integration between Apollo’s analoginputs and its onboard UAD processing, Unison lets you track through a range of colorfulemulations from Neve, API, and Marshall with amazing tone.Apollo Twin USB Hardware Manual4Introduction
Professional I/O ConnectionsApollo Twin USB is a 2-in/6-out interface with two class-leading mic/line preamps, twoanalog line outputs, two digitally controlled analog monitor outputs, and up to eightadditional channels of digital inputs via Optical connection. Its conveniently located Hi-Zinstrument input and headphone jack allow you to capture inspiration the moment itstrikes.A Sleek New AppConsole 2.0 is Apollo Twin USB’s software control interface. Its intuitive, analog consolestyle design provides realtime tracking and monitoring with UAD Powered Plug-Ins,Channel Strip presets, Drag & Drop functionality, dynamically resizable windows, andmore.Easy to Use with Any DAWApollo Twin USB is compatible with major DAWs, including Pro Tools, Cubase, AbletonLive, and more — allowing seamless integration no matter what recording software youuse.All trademarks are recognized as property of their respective owners. Individual UAD Powered Plug-Ins sold separately.Apollo Twin USB Hardware Manual5Introduction
Apollo Twin USB FeaturesKey Features World-class 24-bit/192 kHz audio conversionRealtime UAD Processing - track through vintage Compressors, EQs, TapeMachines, and Guitar Amp plug-ins with near-zero latencyUSB 3 connectivity for Windows-based systemsUnison technology for stunning models of classic mic preamps and stompboxesIncludes UAD-2 DUO DSP Processing onboard2 premium mic/line preamps; 2 line outs; front-panel Hi-Z instrument input andheadphone outputDigitally controlled analog monitor outputs for full resolution at all listening levelsUncompromising analog design, superior components, and premium build qualitythroughoutIncludes “Realtime Analog Classics” UAD plug-in bundleRuns UAD Powered Plug-Ins via VST, RTAS & AAX64 in all major DAWsAll FeaturesAudio Interface Sample rates up to 192 kHz* at 24-bit word lengthUp to 10 x 6 simultaneous input/output channels Two channels of analog-to-digital conversion via: Two balanced mic/line inputs One Hi-Z instrument input Six channels of digital-to-analog conversion via: Digitally-controlled stereo monitor outputs Stereo headphone outputs Line outputs 3-4 Up to eight channels of digital input via: Eight channels ADAT optical with S/MUX for high sample rates, or Two channels S/PDIF optical with sample rate conversionMicrophone Preamplifiers Two high-resolution, ultra-transparent, digitally-controlled analog mic preampsFront panel and software control of all preamp parametersLow cut filter, 48V phantom power, 20 dB pad, polarity inversion, and stereolinking*96 kHz maximum on S/PDIF digital inputsApollo Twin USB Hardware Manual6Introduction
Monitoring Digitally-controlled analog monitor outputs maintains highest fidelityIndependently-addressable stereo headphone outputsIndependently-addressable line outputs 3-4 can be used for additional cue mixFront panel control of monitor levels and mutingUAD-2 Inside Two (DUO) SHARC DSP processorsRealtime UAD Processing on all analog and digital inputsSame features and functionality as other UAD-2 devices when used with DAWIncludes UAD Powered Plug-Ins “Realtime Analog Classics” bundleComplete UAD Powered Plug-Ins library is available onlineSoftwareConsole application: Enables tracking and/or monitoring with Realtime UAD ProcessingRemote control of Apollo Twin USB features and functionalityVirtual I/O for routing DAW tracks through ConsoleTwo independent stereo Auxiliary bussesConsole Recall plug-in: Saves Apollo Twin USB configurations inside DAW sessions for easy recallFacilitates control of Apollo Twin USB monitoring features from within the DAWVST, RTAS, and AAX 64 plug-in formatsUAD Meter & Control Panel application: Configures global UAD settings and monitors system usageOther Attractive and durable desktop form factorLocking power supply prevents accidental disconnectionEasy firmware updatesOne year warranty includes parts and laborPackage Contents Apollo Twin USB unitPower supply with (4) AC connectors(Changeable AC connectors for USA, Europe, UK, Australia, and China)USB 3 SuperSpeed cableGetting Started URL cardApollo Twin USB Hardware Manual7Introduction
Operational OverviewAudio InterfaceFirst and foremost, Apollo Twin USB is a premium 2x6 USB 3 audio interface withworld-class 24-bit/192 kHz audio conversion. Apollo Twin USB connects to the outputsand inputs of other audio gear, and performs analog-to-digital (A/D) and digital-to-analog(D/A) audio conversions on the gear’s signals. The digital audio signals are routed intoand out of the host computer via the high-speed USB 3 protocol, which is carried on asingle USB 3 SuperSpeed cable.Apollo Twin USB leverages Universal Audio’s expertise in DSP acceleration, UADPowered Plug-Ins, and analog hardware design by integrating the latest cutting edgetechnologies in high-performance A/D-D/A conversion, DSP signal reconstruction, andhost connectivity. Apollo Twin USB acts as both an audio interface with integrated DSPeffects for tracking and monitoring as well as a fully integrated UAD-2 DSP acceleratorfor mixing and mastering.About Realtime UAD ProcessingApollo Twin USB has the ability to run UAD Powered Plug-Ins in realtime. ApolloTwin USB’s groundbreaking DSP FPGA technology enable UAD plug-ins to run withlatencies in the sub-2ms range, and multiple UAD plug-ins can be stacked in serieswithout additional latency.Realtime UAD Processing facilitates the ultimate sonic experience while monitoring and/or tracking.Note: Apollo Twin USB, like other UAD-2 devices, can only load UAD PoweredPlug-Ins, which are specifically designed to run on UAD-2 DSP accelerators.Native (host-based) plug-ins cannot run on the UAD-2 DSP.Console SoftwareThe Console software application runs on the host computer and is used to controlApollo Twin USB mixing and monitoring with Realtime UAD Processing, access the audiointerface I/O settings, and more. Console’s analog-style workflow is designed to providequick access to the most commonly needed features in a familiar, easy-to-use mixerinterface.Realtime UAD Processing is a special function that is available only within Console. Allof Apollo Twin USB’s analog and digital inputs can perform Realtime UAD processingsimultaneously, and Console inputs with (or without) Realtime UAD Processing can berouted into the DAW for recording.Console controls Apollo Twin USB’s digital mixer so you can monitor Apollo Twin USB’sinputs (with or without Realtime UAD Processing) without using any other audio softwaresuch as a DAW.Console is integral to unleashing the power of Apollo Twin USB. For complete detailsabout how to use Console and Realtime UAD Processing, refer to the Apollo SoftwareManual.Apollo Twin USB Hardware Manual8Introduction
UAD Powered Plug-Ins in a DAWApollo Twin USB and UAD plug-ins can also be used within a DAW without the use ofConsole. UAD plug-ins loaded within the DAW operate like other (non-UAD) plug-ins,except the processing occurs on the Apollo Twin USB DSP instead of the host computer’sprocessor. In this scenario, UAD plug-ins are subject to the latencies incurred by I/Ohardware buffering.For details about using UAD Powered Plug-Ins in a DAW, see the UAD System Manual.Standalone UseAlthough the Console application is required to utilize all Apollo Twin USB features, thehardware unit can be used as a digital mixer with limited functionality without a USB 3connection to a host computer.All currently active I/O assignments, signal routings, and monitor settings are saved tointernal firmware when Apollo Twin USB is powered down and persist when power is reapplied. Therefore the last-used settings are always available even when a host computeris not connected.Note that UAD plug-in instantiations are not retained on power down, because the plugin files reside on the host computer. However, if UAD plug-ins are active when ApolloTwin USB’s connection to the host system is lost (if the USB 3 cable is unplugged), thecurrent UAD plug-in configurations remain active for processing until Apollo Twin USB ispowered down.Apollo Twin USB Hardware Manual9Introduction
About Apollo Twin USB DocumentationDocumentation for Apollo Twin and UAD Powered Plug-Ins are separated by areas offunctionality, as described below. The user manuals are placed on the system driveduring software installation, and they can be downloaded at www.uaudio.com.Apollo Manual FilesNote: All manual files are in PDF format. PDF files require a free PDF readerapplication such as Adobe Acrobat Reader.Apollo Hardware ManualsEach Apollo model has a unique hardware manual. The Apollo hardware manuals containcomplete hardware-related details about one specific Apollo model. Included are detaileddescriptions of all hardware features, controls, connectors, and specifications.Note: Each hardware manual contains the unique Apollo model in the file name.Apollo Software ManualThe Apollo Software Manual is the companion guide to the Apollo hardware manuals. Itcontains detailed information about how to configure and control all software features forApollo Twin USB using the Console application, Console Settings window, and ConsoleRecall plug-in. Refer to the Apollo Software Manual to learn how to operate the softwaretools and integrate Apollo Twin USB’s functionality into the DAW environment.Note: Each Apollo connection protocol (Thunderbolt, FireWire, USB) has a uniquesoftware manual.UAD System ManualThe UAD System Manual is the complete operation manual for Apollo’s UAD-2functionality and applies to the entire UAD-2 product family. It contains detailedinformation about installing and configuring UAD devices, the UAD Meter & ControlPanel application, buying optional plug-ins at the UA online store, and more. It includeseverything about UAD except Apollo-specific information and individual UAD plug-indescriptions.UAD Plug-Ins ManualThe features and functionality of all individual UAD Powered Plug-Ins is detailed in theUAD Plug-Ins Manual. Refer to this document to learn about the operation, controls, anduser interface of each UAD plug-in that is developed by Universal Audio.Direct Developer Plug-InsUAD Powered Plug-Ins includes plug-in titles created by our Direct Developer partners.Documentation for these 3rd-party plug-ins are separate files written and provided by theplug-in developers. The file names for these plug-in manuals are the same as the plug-intitles.Apollo Twin USB Hardware Manual10Introduction
Accessing Installed DocumentationAny of these methods can be used to access installed documentation: Click the Product Manuals button in the Help panel within theUAD Meter & Control Panel applicationChoose Documentation from the Help menu within the Console applicationWindows Start Menu: Start All Programs UAD Powered Plug-Ins DocumentationManuals are also available online at help.uaudio.comAdditional ResourcesFor additional resources, or if you need to contact Universal Audio for assistance, see theTechnical Support page.Apollo Twin USB Hardware Manual11Introduction
Quick StartQuick Start OverviewApollo Twin USB hardware and software installation and setup consists of the main stepsbelow, which are detailed in this chapter:1.2.3.4.Hardware Setup: Connect and power the Apollo Twin USB hardwareSoftware Setup: Download and install the Apollo Twin USB softwareConnect to Input Sources and Monitor SystemSetting Hardware I/O Levels: Learn how to adjust input and output levelsApollo Twin USB Hardware Manual12Quick Start
Hardware SetupSelect a Suitable Location Locate Apollo Twin USB on a flat surface so its feet will maintain airflow beneath theunit.The location should be sturdy enough to securely hold its weight and withstandthe pressure of operating the top panel controls.Leave enough room behind the unit for connected cabling.Do not block the cooling vents on the bottom or sides of the unit.USB 3 Cable LengthApollo Twin USB is designed for use with a USB 3 SuperSpeed cable length of twometers or less (approximately six feet or less). Using longer USB 3 cables can haveadverse effects on system performance.Important: Connect Apollo Twin USB to the computer with a USB 3 SuperSpeedcable that is no longer than two meters in length.Connect to Computer and PowerCaution: Before powering Apollo Twin USB on or off, lower the volume of themonitor speakers (if connected) and remove headphones from your ears.1. Connect the included USB 3 SuperSpeed cable between Apollo Twin USB and aUSB 3 port on the host computer. Ensure the cable is fully inserted at both ends.2. Connect the included power supply to an AC outlet (Apollo Twin USB cannot bebus powered).3. Connect the power supply cable's locking barrel plug to Apollo Twin USB's rearpanel power input jack:a) Align the tabs on the power cable's barrel connector to the notches on the jackb) Rotate the barrel connector clockwise to prevent accidental disconnection.Important: After ensuring the locking barrel tabs are aligned with the chassis slotsand the barrel is fully inserted, rotate the barrel clockwise to secure the connector.2. Rotate to Lock1. Align Tabs12VDC4. Apply power to Apollo Twin USB using the rear panel's power switch.5. Proceed with software installation and setup (see next page).Apollo Twin USB Hardware Manual13Quick Start
Software SetupNote: Items on this page are detailed in the Apollo Software Manual. See AboutApollo Twin USB Documentation for related information.System RequirementsAll system requirements must be met for Apollo Twin USB to operate properly. Beforeproceeding with installation, see the system requirements in the Apollo Software Manual.Software InstallationThe software must be installed to use the hardware and UAD plug-ins. The UAD PoweredPlug-Ins software installer contains the Apollo Twin USB software and drivers.Important: For optimum results, connect and power on Apollo Twin USB beforeinstalling the software.To obtain the latest UAD Powered Plug-Ins software installer, visit: www.uaudio.com/downloadsRegistration and AuthorizationApollo Twin USB must be registered and authorized to unlock UAD plug-ins that arebundled with the product. Registration and authorization via a web browser is triggeredautomatically by the UAD software the first time the device is recognized.System ConfigurationComplete details about setting up the Apollo Twin USB system, including how tointegrate with a DAW and related information, are included in the Apollo SoftwareManual.Console ApplicationThe included Console application is the software interface for the Apollo Twin USBhardware. Console controls Apollo Twin USB and its digital mixing, monitoring, andRealtime UAD Processing features. Console is also used to configure Apollo Twin USB’sI/O settings such as sample rate, clock source, reference levels, and DAW I/O buffer size.For complete details about how to operate Console, refer to the Apollo Software Manual.UA Support VideosInformational videos are available online to help you get started with Apollo Twin USB: help.uaudio.comApollo Twin USB Hardware Manual14Quick Start
Connect to Input Sources and Monitor SystemOne typical Apollo Twin USB setup is illustrated below. For complete details about all ofApollo Twin USB's connectors and controls, see Controls & Connectors.Typical Apollo Twin USB setup connectionsApollo Twin USB Hardware Manual15Quick Start
Setting Hardware I/O LevelsThis section explains how to set input gain levels for the hardware inputs (mic, line, andHi-Z) and adjust volume levels for the hardware outputs (monitors and headphones).Refer to the top panel illustration for control names and numbers mentioned below.Important: Before proceeding, lower the volume of the monitor speakers andremove headphones from your ears.Set Input Gains1. Select the input channel to be adjusted by pressing the Preamp button (9) untilthe Channel Selection Indicator (3) displays the channel (CH1 or CH2).2. Select the input type (mic or line) by pressing the Input Select button (11a) untilthe Input Type indicator (5) displays the desired input jack* (see note below).3. When the input signal is present, adjust the channel's gain by increasing the Levelknob (1) until the input meter for the channel (4) approaches maximum, but doesnot reach the red clip LED. If the level is too high to avoid clipping (when the red“C” LED illuminates), enable the pad (11).4. To set the input gain for the other input channel, repeat steps 1 – 3.Adjust Output Volumes1. Select the output volume to be adjusted (monitor or headphone) by pressing theMonitor button (10) until the Monitor Selected (6) or Headphone Selected (8)indicator is lit.2. Set the volume level by carefully increasing the Level knob until the desiredvolume is reached (you may need to adjust the volume of the speakers).3. To set the other output volume (monitor or headphone), repeat steps 1 – 2.Mute (and Unmute) Monitor Outputs1. Select the Monitor outputs by pressing the Monitor button (10) until the MonitorSelected (6) indicator is lit.2. Press the Level knob (1) to mute the monitor outputs. The Volume Level IndicatorLEDs (2) are red when the monitors are muted and Monitor is selected (6).3. To toggle the monitor mute state, press the Level knob (1) whenever Monitor (6) isselected.Notes: *Hi-Z input is automatically selected, overriding the channel 1 Mic and Lineinputs, when a ¼” mono TS (tip-sleeve) plug is connected to the Hi-Z Instrumentjack (12) on the front panel.To control both channels simultaneously when a stereo source is connected, pressthe Link button (11) when an input is selected (9).Line outputs 3 & 4 are accessed and controlled via software only (Console or DAW).What Next?Refer to the Apollo Software Manual to learn how to configure the audio interfacesettings, use the Console application and Realtime UAD Processing, and more.Apollo Twin USB Hardware Manual16Quick Start
Controls & ConnectorsComplete details about the Apollo Twin USB hardware controls and all connector jackson the front and rear panels are provided in this chapter.Note: To learn how to set input gain levels (mic, line, and Hi-Z) and outputvolumes (monitors and headphones), see Setting Hardware I/O Levels in the QuickStart chapter.Controls OverviewSome Apollo Twin USB controls have multiple functions. The function of each controldepends on the current operating mode and the current settings within that mode. Tocontrol a particular setting, the control must be activated for the function.Operating ModesApollo Twin USB’s top panel has two operating modes: Preamp and Monitor. Thefunction and availability of the top panel controls vary depending on the active operatingmode. The active mode is selected with the PREAMP and MONITOR buttons. Press thebutton to activate the mode. Each mode is explained in greater detail below.Note: All top panel functions can be operated concurrently (without switchingmodes) from within the companion Console software application. See the ApolloSoftware Manual for details.PREAMP ModeWhen Apollo Twin USB is in Preamp mode, all top panel controls are related toinput functions only. To adjust any input function, press the PREAMP button toenter Preamp mode and activate the input channel controls.Note: Monitor and headphone functions cannot be performed in Preampmode.Preamp ChannelsApollo Twin USB has two analog input channels and one set of input channel controls.The channel controls adjust all channel functions for the currently selected channel.After switching the selected channel, the other channel can be adjusted.Channel SelectionThe currently selected channel is shown by the CH1 and CH2 indicatorsat the upper left of the main display panel, above the input meters. Thetop panel controls only adjust the functions for the currently selectedchannel.When in Preamp mode, press the PREAMP button or the LEVEL knob tochange the selected channel. Press again to switch back to the other channel.Apollo Twin USB Hardware Manual17Controls & ConnectorsUSB 3OPTICAL INLINE
Input TypeEach input channel has one preamplifier. The input source used by the preamp canbe the mic input or the line input. The input source is determined by the pressingthe INPUT button when the channel is selected. The input type is shown by theindicators below the input meters.On channel 1 only, the Hi-Z instrument can be used as the input type. The Hi-Zinput is selected automatically when an instrument cable is plugged into the frontpanel Hi-Z input.Preamp OptionsThe two input channels each have a set ofvarious preamp options that can be activatedfor the input with the row of six buttons at thebottom of the top panel.The current state of the preamp options are indicated in the display panel above the preampoption buttons. Available options are dim when inactive and bright when enabled.Not all preamp options are available with all input types. For specific details, see the Top PanelControls section later in this chapter.MONITOR ModeWhen Apollo Twin USB is in Monitor mode, all top panel controls are related tooutput functions only. To adjust any output function, press the MONITOR button toenter Monitor mode and activate the monitor controls.Note: Input functions cannot be performed in Monitor mode.Important: Apollo Twin USB must be in Monitor mode to change the volume of themonitor or headphone outputs.Output TypesUSB 3LINE OUT3MONITORLMIC/LINE 2Apollo Twin USB has two main* stereooutputtypes: Monitor and Headphone. The Level knobOPTICALINis used to set the volume level independently for both output types. The Level knob adjusts theUSB 3volume for the currently selected output. After switching the selected output, theotherOPTICALIN outputvolume can be adjusted.4RPOWERNote: *Line outputs 3 and 4 are controlled with software only.POWERMonitor SelectionOFFON 12VDCThe currently selected output typeis shownby the MONITOR and HEADPHONEindicators at the right of the main display, above and below the output meters. TheOFFLevel knob adjusts volume for the currently selected output.When in Monitor mode, press the MONITOR buttonto changethe selected output.LINE OUTMONITORUSB33LPress again to switch to the other output.MIC/LINE 2Monitor MuteOPTICAL INON 12VDCMIC/LINE 1When MONITOR is selected, press the
Apollo Twin USB is compatible with major DAWs, including Pro Tools, Cubase, Ableton Live, and more — allowing seamless integration no matter what recording software you use. All trademarks are recognized as property of their respective owners. . Apollo Twin USB Hardware Manual 7 Introduction Monitoring Digitally-controlled analog .