Transcription
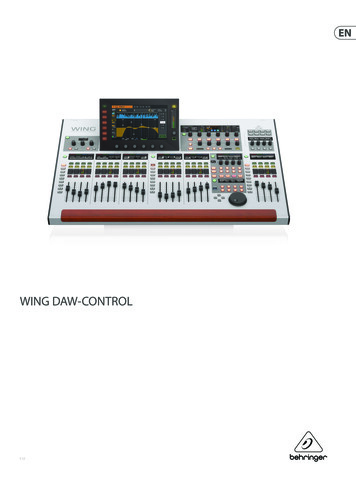
WING DAW-CONTROLV 1.0
2WING DAW-CONTROLTable of ContentsDAW-Setup. 3Settings WING. 3Settings DAW. 3CUBASE/NUENDO. 4ABLETON LIVE. 5LOGIC. 5STUDIO ONE. 6REAPER. 7PRO TOOLS. 8Custom Control Section. 9Overview. 9Assign Function to CC-Section. 9Store Preset . 10Share Preset. 10MCU – Implementation. 11Layer Buttons. 11Upper CC-Section. 11HUI- Implementation. 12Layer Buttons. 12Upper CC-Section. 12
3WING DAW-CONTROLDAW-SetupThe WING console uses the commonly used Mackie MCU- and Mackie HUI-Protocol. These protocols are supported over a wide range of DAWs which allows for instantsupport. Nevertheless, the implementation is dependent on a predefined transmission protocol and the scope of possibilities is limited.For DAW remote control there are settings to be made on both, the hardware and software side.Settings WINGTo enter the DAW-Setup navigate to SETUP DAW. The left side of the screen provides access to all DAW-Settings on the console. To configure which surfacecomponents will be used for DAW-Control the remote setup provides different modes.DAW ENABLECONNECTIONEMULATIONUSE UPPER CC FOR DAWCONFIGURATIONPRESETIf set to ON - activates DAW function and enables DAW button on the surface.Switch between DIN and USB Connection (USB required for multiple devices)Decide which protocol to use - Mackie HUI or Mackie MCUIf set to ON – include Upper Custom Control Section for DAW Control.(otherwise the Upper CC-Section will offer controls detached from the DAW mode)Dropdown to select which Parts of the surface should be used for DAW-ControlDropdown to load DAW specific preset for lower portion of the Custom Control SectionOnce set up, activate DAW-Control with the DAW-Button in the lower portion of the custom section. According to the remote settings this will change the CC- and theFader-Section to DAW-Mode.Settings DAWWING can be connected to the DAW either using standard DIN- or USB-Connection. The USB-Connection is providing 4 Midi-Connections at a time. To use the entiresurface for DAW control please use the USB connection. When connecting to the computer, WING emulates four virtual hardware devices. These emulations correspondto the Midi-Ports as follows:Port: MIDI DAW 1 (macOS: WING 1) – Master unit (Mackie MCU/HUI)Port: MIDI DAW 2 (macOS: WING 2) – Extender 1 (MCU/HUI-Extender)Port: MIDI DAW 3 (macOS: WING 3) – Extender 2 (MCU/HUI-Extender)Port: MIDI Control (macOS: WING 4) – General Midi-ConnectionTo ensure the correct channel order, please ensure correct setup on DAW-Side. Depending on the DAW, the arrangement of the controllers can be made from top tobottom, left to right or vice versa. See setup for some DAWs below.
4WING DAW-CONTROLCUBASE/NUENDO*Music Tribe recommends Mackie MCU for the use with Cubase/Nuendo1. Navigate to Studio Studio Setup2. Select the Folder Remote Devices and add device ( )3. Select Mackie Control from the dropdown4. If you want to use the complete surface set up 3 devices in totalIMPORTANT: Cubase lists the devices from top to bottom and from right to left. Having this in mind the port assignment needs to be:Mackie Control 1: WING Port 3 (In/Out)Mackie Control 2: WING Port 2 (In/Out)Mackie Control 3: WING Port 1 (In/Out)5. To prevent interference with other MIDI messages deselect the ‘ALL MIDI’ checkbox for WING PORT 1-3 under MIDI Port Setup
5WING DAW-CONTROLABLETON LIVE*Music Tribe recommends Mackie MCU for the use with Ableton Live1. Navigate to Preferences Link Midi2. Select Mackie Control for the first device from the dropdown3. Assign WING (Port 1) as Input and Output4. If you want to use the whole surface, please select Mackie ControlXT for second and third device from the dropdown5. Assign WING (Port 2) & WING (Port3) as Input and Output6. For bidirectional Midi-Transmission switch Track and Remote for the respective Inputs and Outputs to ONLOGIC*Music Tribe recommends Mackie MCU for the use with Logic1. Navigate to Preferences Control Surfaces Setup 2. Go to New Install 3. Select Mackie Designs I MCU Pro I Logic Control from the List4. Create one device and assign WING Port 1 as Input- and Output-Port5. Select Mackie Designs I Mackie Control Extender Pro I Logic Control from the List6. Create two devices and assign WING Port 2 & 3 as Input- and Output-Port7. Order devices as shown in screenshot below
6WING DAW-CONTROLSTUDIO ONE*Music Tribe recommends Mackie MCU for the use with Studio One1. Navigate to Options External Device2. Select Add Mackie Control from the list3. Choose WING MIDI DAW 1 under Receive From and Send To4. Select Add Mackie Control Extender from the list5. Create two devices and choose WING MIDI DAW 2 & 3 under Receive From and Send To6. Select Placement and drag the devices to Group 1 as shown below
7WING DAW-CONTROLREAPER*Music Tribe recommends Mackie MCU for the use with Reaper1. Navigate to Options Preferences Control/OSC/web2. Select Add Mackie Control Universal3. Choose WING MIDI DAW 1 under MIDI Input and MIDI Output4. Select Add Mackie Control Extender5. Choose WING MIDI DAW 2 under MIDI Input and MIDI Output, set Surface offset (tracks) to 8.6. Select Add Mackie Control Extender7. Choose WING MIDI DAW 3 under MIDI Input and MIDI Output, set Surface offset (tracks) to 16.8. Navigate to Options Preference Audio/MIDI Devices9. Make sure that MIDI inputs and outputs WING MIDI DAW 1 . 3 are disabled
8WING DAW-CONTROLPRO TOOLS*To use DAW-Control with Pro Tools please use Mackie HUI1. Navigate to Setup Peripherals2. Select the MIDI Controllers tab3. Select HUI in #1 and assign WING (port 1) as Recieve From and Send To, set #Ch’s to 84. If you want to use the whole surface, please setup #2 and #3 for second and third device5. Assign WING (Port 2) & WING (Port3) as Receive From and Send To, set #Ch’s to 8
9WING DAW-CONTROLCustom Control SectionThe SETUP DAW page provides an additional switch to include the upper part of the Custom Control Section. Since the usage of the upper CC-Section is ProtocolSpecific (MCU/HUI) further explanation can be found in the respective Chapters.OverviewUse the DAW-Button to activate DAW-Control. Depending on the DAW the jog wheel and arrow keys can be used for navigation and zoom functionality.When in DAW-Mode, the buttons labeled “2-TRACK TRANP”, “MULTI TRANSP”, “MUTE GROUPS” and “SHOW CONTROL” correspond to four dedicated DAW CC-Layers.All DAW layers can be freely assigned with functions, however we recommend using one of the presets for a quick start.Layer-Button forCC-Layers in DAW-ModeOpen screen to assign functionalityto the CC-Layers in DAW-ModeActivate DAW-Timeline Navigation / Zoom OriginalAssign Function to CC-SectionAssigning functionality to one of the four DAW layers works in the same way as for the general Custom Control Section. This means you can assign any command andadopt the displayed name to your needs.Use the VIEW-Button of the lower portion to enter the CC configuration screen. Select DAW BUTTONS or DAW V-POTS in the functions list and add MCU-Commands toany control you like. Depending on the respective DAW function, please use the Edit-Name button to adjust the label in the display.IMPORTANT:The listed MCU Commands are the standard assignment of the original Mackie MCU Hardware unit. The name of the MCU command and the function in therespective DAW do not necessarily match. To create your own presets for different DAWs, we recommend to lookup the function for different MCU commands inthe DAW you are using. For a quick start, please have a look at the translation table in the appendix. This document compares MCU commands to their function indifferent DAWs.*This list was NOT created in cooperation with the respective DAW manufacturers(no warranty for correctness or completeness)Beside casual surface buttons of the original hardware it is also possible to assign buttons to the CC-Section that are originally tied to a channel. Those functions areindicated with square bracket. To activate the function the CC-Button and a button in the channel need to be pressed at the same time.NameFadertouch [MUTE]TypeLATCHProtocolMCU HUIV-POT CTRL [SEL/SOLO]LATCHMCU HUIV-POT CTRL [SEL/SOLO]LATCHMCU HUIRECRDY CTRL [SEL]AUTO [SEL]V-SEL [SEL]INS [SEL]PUSHPUSHPUSHPUSHMCU HUIHUI (only)HUI (only)HUI (only)Function1.Activate CC2.Press MUTE of channel to activate fader touch (X32 like)1.Activate CC2.Hold SELECT and use jog wheel to turn virtual encoder1.Activate CC2.Press SOLO to push virtual encoderPress SELECT while holding CC to activate RECORD in channelPress SELECT while holding CC to press AUTO* in channelPress SELECT while holding CC to press V-SEL* in channelPress SELECT while holding CC to press INS* in channel* Button of original Mackie HUI hardwareIn addition to explicit DAW-Functions, console functions can be stored in the DAW-Layers as well. Depending on the selected protocol functions are greyed out on theassign page and hidden on the CC LCDs.
10WING DAW-CONTROLStore PresetAs soon as the surface is adapted to ones needs, a preset can be stored. The DAW layers are part of the CC Section and can be saved within a snapshot providing acorresponding recall scope. To do so navigate to the Library and store a Snapshot. To limit the snapshot to the parameters of the CC Section, select CUSTOM in the recallscope only.Share PresetThe presets provided on the Setup Page are intended to be a starting point for different DAWs. We really want to improve these and would like to encourage allcustomers to exchange ideas and presets in our community.Please visit: musictribe.com
11WING DAW-CONTROLMCU – ImplementationThe MCU implementation offers support for up to 24 faders and is different from other protocols in terms of additional functions that can be accessed via the layerbuttons and the upper part of the CC section.Layer ButtonsThe former layer buttons are assigned to virtual buttons of the original Mackie MCU-Hardware:LEFTVIEW NAME/VALUE*CH1-12 TRACK*CH13-24 PAN*CH25-40 SEND*AUX/FX EQ*BUS/MASTER PLUGIN*USER1/USER2[navigate faders in banks of 8] 4 / 4 [navigate faders by single channel]MIDVIEW NAME/VALUE*SOF FLIP FLIP*DCA PAN*MAIN/MATRIX SEND*AUX/FX EQ*BUS/MASTER PLUGIN *USER1/USER2[navigate faders in banks of 8] 4 / 4 [navigate faders by single channel]RIGHTVIEW NAME/VALUE*MAIN/MATRIX TRACK*DCA PAN*CH1-40 SEND*AUX/FX EQ*BUS/MASTER PLUGIN *USER1/USER2[navigate faders in banks of 8] 4 / 4 [navigate faders by single channel]* Button of original Mackie MCU HardwareUpper CC-SectionWhen using the MCU-Protocol, there are two modes for the upper portion of the CC-Section.If the USER-Layers is selected in the lower portion it is completely customizable. If one of the DAW-Layers is selected the assignment is preconfigured with PushEncoder functions in blocks of 4:The display is showing the information ofthe corresponding 4 ChannelsThis section is representing 4 channels of thevirtual hardware controller. There are twoways to navigate channels:1. SELECT a channel and the section jumps tothe corresponding 4CH-Goup2. Navigate through channels in clocks of 4using the UP- and DOWN-ButtonThe encoder is used in conjunction with thebutton underneath as the Push-Encoder ofthe original hardware.Upper-Button Push-FunctionThe Lower-Buttons act as the RecordButton of the corresponding channel
12WING DAW-CONTROLHUI- ImplementationThe HUI implementation offers support for up to 24 faders and is different from other protocols in terms of additional functions that can be accessed via the layerbuttons and the upper part of the CC section.Layer ButtonsThe former layer buttons are assigned to virtual buttons of the original Mackie HUI-Hardware:LEFTVIEW PAN*CH1-12 SEND A*CH13-24 SEND B*CH25-40 SEND C*AUX/FX SEND D*BUS/MASTER SEND E*USER1/USER2[navigate faders in banks of 8] 4 / 4 [navigate faders by single channel]MIDVIEW PAN*SOF FLIP SEND A*DCA SEND B*MAIN/MATRIX SEND C*AUX/FX SEND D*BUS/MASTER SEND E*USER1/USER2[navigate faders in banks of 8] 4 / 4 [navigate faders by single channel]RIGHTVIEW PAN*MAIN/MATRIX SEND A*DCA SEND B*CH1-40 SEND C*AUX/FX SEND D*BUS/MASTER SEND E*USER1/USER2[navigate faders in banks of 8] 4 / 4 [navigate faders by single channel]* Button of original Mackie HUI HardwareUpper CC-SectionIn addition to the preassigned Push-Encoder function (see MCU) for the upper section. Mackie HUI has an additional encoder section that can be activated by pressingthe VIEW-Button of the upper part while using one of the DAW-Layers.Encoder Button [1-4]Button [5]Hold Jogwheel Encoder [5]
We Hear You
5 WING DAW-CONTROL ABLETON LIVE *Music Tribe recommends Mackie MCU for the use with Ableton Live 1. Navigate to Preferences Link Midi 2. Select Mackie Control for the first device from the dropdown 3. Assign WING (Port 1) as Input and Output 4. If you want to use the whole surface, please select Mackie ControlXT for second and third device from the dropdown