Transcription
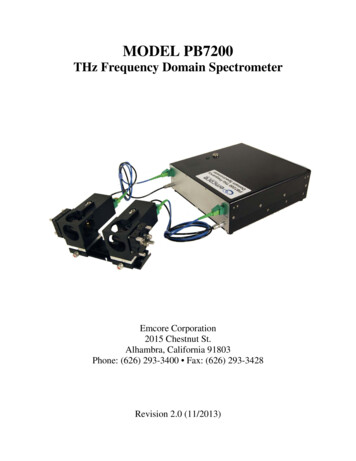
MODEL PB7200THz Frequency Domain SpectrometerEmcore Corporation2015 Chestnut St.Alhambra, California 91803Phone: (626) 293-3400 Fax: (626) 293-3428Revision 2.0 (11/2013)
SAFETY AND PREPARATION FOR USEWARNINGDangerous voltages, capable of causing injury or death, are present in this instrument. Use extremecaution whenever the instrument covers are removed. Do not remove the covers while the unit is pluggedinto a live outlet.WARNINGThis is a Class IIIb laser product. Laser light (up to 50 mW of 783nm or 855nm) is emitted from theoptical ports of the PB7200 chassis during operation. Normally, a fiber is connected to the port or thesafety cover is in place. If the fiber is removed and the safety cover lifted while the system in operating,the beam from the port could cause serious damage or even complete blindness to the unprotected eyes.WARNINGAttempting to make adjustments to the instrument without first reading and understanding this manualcompletely could result in damage to the instrument and void the warranty.
TABLE OF CONTENTS123SYSTEM DESCRIPTION . 41.1THEORY OF OPERATION . 41.2PHOTOMIXER CHIRALITY. 9SYSTEM ASSEMBLY. 122.1SETUP . 122.2THZ OPTICS ALIGNMENT . 222. PB7200 SOFTWARE . 273.1INSTALLATION . 273.2FIRST OPERATION. 283.3USB DRIVER INSTALLATION . 293.4DWELL TAB (ALIGMENT) . 303.5SCANNING TAB . 343.6TOOLS MENU . 393.7SETTINGS TAB. 403.8MONITOR TAB . 414DATA, FORMAT AND FILE LOCATIONS . 425APPENDIX A: FIBER INSPECTION . 456APPENDIX B: NOISE LEVEL. 477APPENDIX C: WATER VAPOR TRANSITIONS . 488APPENDIX D: DC THZ SOURCE BIAS. 50
1SYSTEM DESCRIPTIONThe sub‐millimeter (sub‐mm) and Terahertz (THz) regime of the electromagnetic spectrum hashistorically been employed to measure the frequencies of rotational transitions in molecular gasesfor applications involving compounds of atmospheric importance. Recently, there has been aninterest in employing THz radiation for the measurement of low energy vibrational transitions insolid materials as well. Some of the compounds of significant interest include: illicit drugs, paintingsand artwork, explosives and biologically important compounds like sugars and hormones.The EMCORE PB7200 represents the latest advancement in THz technology. It employs preciselytuned fiber coupled, butterfly packaged semiconductor DFB (distributed feed‐back) lasers,advanced fiber‐coupled, photo‐mixing source and detector, and sophisticated digital controlhardware and software to provide a fully turnkey laboratory THz spectrometer that is highlycompact, versatile and economic. The system employs an extremely sensitive room temperaturecoherent detection technique that eliminates the need for cryogenics. Further, the highly efficientCW (constant wave) nature of the photo‐mixing source puts all the THz power at the frequency ofinterest, yielding excellent signal‐to‐noise ratios (SNR) across the scan range of up to 70 dB‐Hz.Unlike time‐domain systems requiring complicated mode‐locked lasers, the tunable semiconductorlaser diodes in the PB7200 allow the system to stay at one specific THz frequency, scan across theentire bandwidth or even ‘frequency hop’ between frequencies of interest to scan specific regions ofthe spectrum with varying degrees of resolution.The fiber‐optically‐coupled source and detector heads are mounted on a rail system and configuredfor transmission or reflection measurements or both simultaneously. They may also be detachedfrom the processor unit and used with extended fiber‐optic cables to provide maximummeasurement flexibility in a wide range of applications. The software is intuitive and easy to useand the data is recorded as in simple comma separated file that may be imported into any analysissoftware.1.1 THEORY OF OPERATIONThe PB7200 employs high frequency photomixing to generate and detect THz radiation. This isachieved through combining the output of two single frequency diode lasers in a low‐temperaturegrown Gallium Arsenide photomixer (also referred to as a Photo‐Conductive Switch or PCS). An
antenna is an integral part of the PCS and is used to couple the THz radiation from the device intofree space. For the THz source, a bias is applied to the PCS and when the optical beams modulatethe conductivity of the semiconductor material of the PCS, a matching current flows through theantenna.Figure 1.1.2: Schematic diagram of the source photomixing processThe wavelength of one (or both) of the lasers is temperature tuned to vary the THz outputfrequency. For instance, as shown in Figure 1.1.1 above, if a laser at a wavelength of 782 nm ismixed with another laser at a wavelength of 783 nm, a beat frequency of 480 GHz will result (thisfrequency corresponds to 1 nm at these wavelengths.) The mixing product is then radiated by theantenna and partially collimated with a Silicon lens.In many spectroscopic applications of photomixing to date, the THz output beam from the PCS iscoupled to a sensitive broadband thermal detector (e.g., LHe bolometer or Golay cell), making theoverall signal processing incoherent and phase insensitive. Coherent detection can be achieved atroom temperature by mixing the same optical radiation from the diode lasers in a detector PCS ontowhich the THz signal is also incident (Figure 1.1.2).
Figure 1.1.2: Schematic diagram of room temperature coherent detectionThis is referred to homodyne detection and it provides greater sensitivity and faster dataacquisition than incoherent techniques. It also preserves phase information. Figure 1.1.3 illustrateshow the PB7200 employs a standard 2 X 2 polarization maintaining fiber coupled opticalsplitter/combiner to both equally combine and split the output of each of the lasers onto the sourceand detector PCS.Figure 1.1.3: Laser output is combined and split equallyA simple way to increase the SNR of a homodyne system is to employ a lock‐in amplifier and "lock"to an amplitude or frequency modulated signal. In the PB7200 this is achieved by biasing the sourcePCS with a 6 kHz square wave modulated voltage (amplitude modulation). A lock‐in amplifier isthen employed on the detection circuit and only amplifies signals at the lock‐in frequency to within
a bandwidth set by the time constant of the lock‐in. More information about the theory and theoperation of the lock‐in amplifier may be found in the literature.One of the challenges with building a coherent frequency domain THz spectrometer is balancing thelengths of the optical and THz paths of what is principally an interferometer with two differentlength arms (Figure 1.1.4). The path length difference between A and B will result in aninterference pattern with frequency periodicity proportional to the delay. With a fiber‐basedsystem this may be achieved by increasing the length of the detector PCS fiber relative to the lengthof the source PCS fiber and thereby balance the arms of the interferometer.Figure 1.1.4: Illustration of the optical and THz paths that make up the arms of theinterferometer.In order to effectively control the resolution required to properly record a scan, it is necessary tocarefully balance the path lengths of the arms of the interferometer. The most appropriate spacingof the pattern is dependent upon the sample characteristics, the desired spectral resolution and theneed for recording dispersion characteristics. For instance, Figure 1.5 illustrates a scan where theseparation of the source and detector heads is chosen to result in a fringe spacing of approximately5 GHz.
Figure 1.1.5: A single scan of laboratory air using the PB7200 portable THz spectrometer.Source‐to‐detector head spacing resulted in an interference pattern with a roughly 5 GHzperiod. Bottom trace is the noise levelA resolution of 500 MHz is then chosen to accurately record the interference fringes. A scan from200 GHz to 1500 GHz with 500 MHz resolution records 2600 data points. If the integration time is 1second for each point, the scan will take roughly 45 minutes to complete. If a sixty point smoothingis performed on the data (Figure 1.1.6), the interference pattern is removed and absorptions arevisible (in this case atmospheric water vapor).Figure 1.1.6: The data from the previous scan with a 60 point smoothing functionapplied to remove the interference pattern and more clearly show the absorptionfeatures.
By adjusting the distance between the source and detection heads, different interference fringefrequency spacing is obtained. Figure 1.1.7 shows the same scan conditions as Figure 1.1.6, butwith the path length imbalance reduced by adjusting the spacing between the THz source anddetector heads.Figure 1.1.7: The same scan as performed for Figure 1.1.6, but the distance between thesource and detector heads was adjusted to increase the fringe spacing.Further adjustment of the physical separation of the source and detector heads may be performedto completely balance the optical and THz arms of the interferometer. However, in practice, perfectbalance at all frequencies is impossible to achieve due to antenna and device dispersion.1.2 PHOTOMIXER CHIRALITYThe data illustrated in the previous section was recorded with a PB7200 configured fortransmission measurements. Operating the system in reflection mode will also produce aninterference pattern, however, there are requirements on the chirality of the antenna structures forboth transmission and reflection and this requirement changes. Photomixers are available in bothclock‐wise (CW), counter clock‐wise (CCW) and bowtie (BOW) configurations (Figure 1.2.1).
Figure 1.2.1: The different types of photomixers and the chiralityThe square spiral antennas (and log spiral antennas – not shown) produce circularly polarized THzradiation while the bowtie antennas produce linearly polarized radiation. At extremely highfrequencies the polarization of the spiral antennas also becomes linearly polarized. For a systemconfigured for recording the transmission of the THz radiation through the sample (transmission),the chirality of the source and the detector photomixing antenna must be the same. For a systemconfigured for recording the reflection of the THz radiation from a sample, the chirality of thesource and detector photomixers must flip (reflection). Figure 1.2.2 illustrates a system configuredfor simultaneous transmission and reflection measurements. Note the chirality of the variousphotomixer heads. Failure to do this will result in a 50 dB‐Hz degradation to system dynamic range.Because the bowtie antennas produce linearly polarized THz radiation, there isn’t an issue withchirality and the same style photomixer may be used for transmission and reflectionmeasurements.
THz Rx(Transmission)Counter ClockwiseSAPB7200EPLMTHz Rx(Reflection)ClockwiseTHz TxCounter ClockwiseFigure 1.2.2: A system configured for simultaneous reflection and transmissionmeasurements.The chirality or type of the photomixer is labeled on the photomixer body and can be easilydetermined by looking at the THz head unit. In Figure 1.2.3 the THz head on the left has a counterclockwise spiral antenna (CCW) while the head on the right is labeled and has a clockwise spiralantenna (CW). A bowtie or log spiral antenna would be similarly labeled.Figure 1.2.3: The THz heads illustrating how the CCW and CW photomixers areclearly labeled.
2SYSTEM ASSEMBLY2.1 SETUPThe PB7200 consists of four basic components (Figure 2.1.1):1.The control unit which houses the lasers, fiber optics and control circuitry;2.The THz source head with an off‐axis parabolic mirror;3.The THz detector head with an off‐axis parabolic mirror;4.The rail system for phase delay adjustment.Figure 2.1.1: PB7200 (1) with source head (2) and detector head (3) heads attached andmounted on the rail system (4)The PB7200 arrives disassembled and needs to be assembled before operation. Please read theassembly instructions completely before attempting to assemble and operate the system. It isadvisable to find a clean and clutter free bench or table to assemble the PB7200. The only tool thatis required for assembly is a high quality fiber optic cleaning tool (included).
First, remove all of the items from the case and set them aside. Please pay particular attention to thecables making sure they are not pinched or kinked. It may be necessary to remove the first layer offoam from the case to find all of the components. Set the rail on the bench and position the THzoptics stages next to the rail in the orientation shown (Figure 2.1.2).Figure 2.1.2: The THz optics and rail system laid out and ready for assemblyThe first thing to note is the differences between the THz source head and the THz detector head.Besides the labels, the electrical cables are different. This difference is evidenced in the connectorkeying. Figure 2.1.3 illustrates the differences.Figure 2.1.3: An end view of the source cable with a single keyed connector(left) and the detector cable with a double keyed connector (right)
The electrical cables can be snapped into their respective heads (Figure 2.1.4). They should “click”into place and can be removed by gently pulling on the barrel of the connector.Figure 2.1.4: A picture of the electrical connector correctly inserted into the THz head.NOTE: Do not attempt to disconnect the electrical cable by pulling on the cable itself, but alwayspull on the barrel of the connector.The next step is to insert the optical connectors into their respective heads. As with the electricalconnectors the optical cable for the source and the detector are different. Unlike with the electricalconnectors, however, the optical connector is not different, but the length of the optical patchcables are different. The optical connectors are keyed and may only be inserted one way (Figure2.1.5)
Figure 2.1.5 illustrates how the SC/APC connector is keyed and inserted into theTHz head.Figure 2.1.6: A picture of the optical connector inserted into the THz head. Notice the depthto which the connector is seated into the bulkhead.NOTE: The optical connector should snap into the bulkhead connector with an audible “click.” Ifyou don’t hear the “click,” pull the connector out slightly and repeat the procedure.
NOTE: The longer fiber optic patch cord attaches to the THz detector head.NOTE: Maintaining fiber tip cleanliness is critical for the proper operation of the PB7200 and thefiber tips should always be cleaned with the one‐step cleaner that was included with the systembefore inserting them into the bulkhead connections.NOTE: Do not attempt to disconnect the optical fiber by pulling on the fiber itself, but always pullon the connector body.Figure 2.1.7: The optical and electrical connections to the THz head unitAfter connecting the cables to their respective THz heads, they may then be connected to thecontrol unit (Figure 2.1.8). The same procedures should be employed when connecting ordisconnecting the cables from the control unit.
Figure 2.1.8: The optical and electrical connections to the control unit mirror thoseon the THz heads.NOTE: The PB7200 control unit should always be “OFF” when the optical and electricalconnections are made or broken.After the THz heads are connected to the control box, it is necessary to assemble the rail unit. Likethe THz heads, everything on the rail unit snaps or slides into place. Before assembling the rail unithowever, it is best to first inspect the off‐axis parabolic mirror assembly to make sure that nothinghas moved during transportation. Compare the distances of the different components to those inFigures 2.1.9 and 2.1.10.NOTE: Extreme care should be taken not to touch the gold surface of the off‐axis parabolic mirrorsin the mirror assembly and the Silicon lens on the source/detector heads.
Figure 2.1.9: A side view of the off‐axis parabolic mirror assembly illustrating thedistances of the separate components relative to each other.Figure 2.1.10: A top view of the off‐axis parabolic mirror assembly illustrating thedistances of the separate components relative to each other.If the optical components have moved significantly or slipped off during transportation, pleaserestore them to the positions shown in the figures before continuing.After inspection, the off‐axis parabolic mirror mounts may be attached to the rail system so thatboth of the locking screws are on the side with the ruler (Figure 2.1.11). Move the heads until they
are separated by the distance indicated on the calibration sheet at the back of the user manual. Thisseparation is typically 4 to 7 cm.Figure 2.1.11: The rail system with the off‐axis parabolic mirror mounts in attachedand at the proper separation.The stages may be locked in this position by turning the locking screws on the base of the stages.After the stages are locked in place, the heads may be attached by simply sliding the clip over the lipand allowing the magnets to seat them in position (Figure 2.1.12).Figure 2.1.12: Installing the THz head units to the off‐axis parabolic mirror mounts.
Figure 2.1.13: The PB7200 with the THz heads attached to the control bodyConnecting the power and USB control cable to the back panel is fairly straightforward becausethey are common connectors (Figure 2.1.13).Figure 2.1.13: The rear plate of the PB7200 illustrating the power and USB connections.As noted on the back panel the PB7200 operates on 19 V, 3 Amp DC supply with a positive centerelectrode. Use the one that was shipped with the system (Figure 2.1.14).
Figure 2.1.14: The PB7200 with the power cord and the USB cable connectedAfter the cables are connected and the power is switched on (the I is depressed) it is necessary toturn the key on the top of the unit to enable laser operation (Figure 2.1.15).Figure 2.1.15: The PB7200 with the laser enable key switched to the on position and theLED indicating that the lasers are enabled is litWhen the lasers are enabled, the LED over the key switch will illuminate.
NOTE: The PB7200 contains two Class IIIb lasers. Laser light (780 0r 855nm, 50mW) is emittedfrom the optical ports of the PB7200 chassis during operation. Do not look into the port the beamemitted could cause serious damage or even complete blindness to the unprotected eye.NOTE: The PB7200 is battery operated! Unplugging the unit does not necessarily mean that thelasers are disabled. You must make sure the unit is powered off and the enable key is in the offposition before inspecting any fibers.2.2 THZ OPTICS ALIGNMENTOne of the greatest challenges with operating a THz spectrometer is in achieving the properalignment between the source and the detector. The process is difficult because there are sixdifferent degrees of freedom on each off‐axis parabolic mirror and a seemingly infinite number oflocal maxima and minima. Further, the beam is invisible and very difficult to detect with anythingother than the detector to which it needs to be aligned! The only fortunate situation occurs becausethe source and detector photomixers are exactly the same and the relative positions of the THzoptics should therefore be the same (i.e. symmetric). That is to say, one off‐axis parabolic mirrorshould not be positioned differently, with respect to its Silicon lens, than the other off‐axis parabolicmirror to its Silicon lens. We have included this section with tips and suggestions on how to alignthe THz optics should they become misaligned. However, obtaining the optimal alignment of a THzoptical system requires experience and patience.
NOTE: The first, and most important, step in testing the alignment is to assemble the system asshipped and measure the detected power levels for the given frequencies that are recorded in thecalibration sheet at the back of this manual. This testing is described in Section 3.4.Typically, the off‐axis parabolic mirrors will have shifted slightly and will need to be realigned. Thismay be achieved by manually adjusting the two knobs on each of the mirror mounts (Figure 2.2.1)while monitoring the power level (Section 3.4)Figure 2.2.1: The tip and tilt adjustments found on the back of the off‐axis parabolic mirrormounts.As you adjust the tip and tilt settings the power will change dramatically. Unfortunately, there arean infinite number of local maximums and minimums and therefore you sometimes need to adjustthrough a maximum to find a higher maximum.The suggested approach is to coarsely tune one axis and find the highest maximum and thencontinue onto the next axis. Continue to adjust each axis. If the power recorded in the calibrationsheet is not achieved, adjust one of the axis to a new position and readjust the remaining axis tomaximize the power in this position.
As previously mentioned, the system characteristic that makes this possible is that the opticsshould be symmetric from side to side (Figure 2.2.2 and Figure 2.2.3).Figure 2.2.2: A side view of the rail system illustrating how the off axis parabolicmirrors are horizontal and not at significant angles to the optical axis.Figure 2.2.3: A top view of the rail system illustrating how the off axis parabolicmirrors are aligned. Note that the left one is slightly tilted. More asymmetry thanthis is not typically required.If for some reason, the off axis parabolic mirror assembly should come off during shipping, or if themounting plate should somehow move, then it may be necessary to start the alignment processfrom scratch. To do this, first use the previous images to set the distance of the mounting plate fromthe mounting cube (Figure 2.1.9 and 2.1.10) or approximately 1 cm. Then check that the Si lens iscentered and fills the off axis parabolic mirror when viewed along the THz optical axis (Figure2.2.4)
Figure 2.2.4: Viewing down the THz optical axis to check off‐axis parabolicalignment. Note that the Si lens is in the center of the off‐axis parabolic mirror.If the Si lens is not centered on the off‐axis parabolic mirror, the adjust mounting plate, the rotationand the tip and tilt until it is.Figure 2.2.5: If the mountain plate moved significantly during shipping return it tothe following distance ( 1 cm) or until the Si lens is aligned as illustrated in Figure2.2.4.
Figure 2.2.6: If the off‐axis parabolic mirror has rotated, the set screw may beloosened and the mirror rotated to achieve the alignment illustrated in Figure 2.2.4.NOTE: The THz optics alignment is not a trivial procedure and can be very time consuming.
32. PB7200 SOFTWARE3.1 INSTALLATIONThe PB7200 software will work on PCs operating Windows XP SP3, Vista, Windows 7 or Windows 8 only.It is unlikely that the software will run on machines other than a PC even if a Window Kernel is running.To install the software first make sure that the computer is connected to the internet and has access tothe World Wide Web. Insert the USB flash drive into the computer. If the installer does notautomatically start, please navigate to the top directory on the USB flash drive. Double click on theSetup.exe file and follow the prompts. This will install the PB7200 Software to the local hard drive of thecomputer. This should take under 1 minute.You may be prompted to download Microsoft .Net. These files are required to run the Visual Basicsoftware and if they are not already installed on the computer, the installer should download themautomatically from the internet. If you do not have access to the internet or have trouble downloadingthe .Net files, they are included on USB flash drive in a folder labeled Microsoft .Net 4.0.After the software has been installed there will be a shortcut created on the desktop and the startmenu. A link to the data directory is also created.Figure 3.1.1: The shortcut locations for the PB7200 control software
3.2 FIRST OPERATIONDouble‐clicking the program shortcut will start the program. If this is the first time the spectrometer hasbeen connected to the computer the following window may pop up and inform you that communicationwith the PB7200 has failed (Figure 3.2.1).Figure 3.2.1: When the software is started the first time or if there is an issue with theCOM port an error message will alert the user.If this occurs, simply click on the “OK” button. This will bring up a window that will allow you to selectthe com port that the PB7200 is attached to (Figure 3.2.2). In this case, it is attached to COM PORT 3 buteach computer may be different.Figure 3.2.2: The port selection widow allows the user to connect to the PB7200Choose the port that the PB7200 is connected to and click on “Okay.” The system will then transfer thecalibration files from the spectrometer to the computer and the following window will appear (Figure3.2.3).
Figure 3.2.3: The progress of the transfer of the calibration files to the computerTransferring the calibration files will require about 90 seconds and will only occur the first time that thePB7200 is connected. After the calibration file has been downloaded from the PB7200 the scanninginterface should appear.Figure 3.2.4: The PB7200 GUI that greets the user after the software has been correctlyinstalled and the calibration files are set up.NOTE: In Windows XP, themes must be disabled in order to see the tabs. This is a bug in Windows XP,not with the PB7200 software.3.3 USB DRIVER INSTALLATIONIf the port that the PB7200 is connected to is not visible, it will be necessary to install the drivers thatsupport the USB port. This may be accomplished by clicking on the button that button that states “InstallDrivers (As Administrator)” (Figure 3.3.1).Figure 3.3.1: Installing the USB drivers if the PB7200 is not showing up attached to a COM port.
This will bring up the USB driver installation interface.Figure 3.3.2: The USB driver installation window that will guide the installation of theUSB drivers required for Windows to communicate with the PB7200Simply follow the instructions presented by the installation program to install the drivers. After thedrivers are installed it may be necessary to restart software and repeat Section 3.1.3.4 DWELL TAB (ALIGMENT)Switching on the power for the PB7200 and then starting the software program will bring up thegraphical user interface. This interface defaults to the scanning tab when it is started. If the system hasjust been assembled it is necessary to make sure that the system has been properly assembled and theoptics are properly aligned. In order to do this, select the “Dwell” tab that is on the left‐hand side of theinterface (Figure 3.4.1).Figure 3.4.1: Selecting the Dwell or Alignment tab in the software interface.
Clicking the dwell tab brings up the dwell control with a strip chart display in the center and a power baron the right (Figure 3.4.2). The user can enter a dwell frequency and a time constant (red box). Thesystem will remember the last setting that was entered by the user, but will default to 200 GHz the firsttime the software is operated.Figure 3.4.2: The Dwell interface with the Frequency and Time Constant inputs.Clicking the “START” button will operate the system at the frequency and time constant entered. It willrequire a minute or two for the lasers to stabilize to the proper frequency. During this time the powerwill fluctuate (Figure 3.4.3). After the system has stabilized the chart will produce a constant andsmooth line and the bar graph on the right will display the power.Figure 3.4.3: When the Dwell function starts, the power will fluctuate as the systemstabilizes.
If the system has just been assembled and/or the THz optics are being adjusted, refer to the last page ofthe manual for the power that should be achieved for each frequency setting and follow the processdetailed in Section 2.2.After adjustment has b
Alhambra, California 91803 Phone: (626) 293-3400 Fax: (626) 293-3428 . caution whenever the instrument covers are removed. Do not remove the covers while the unit is plugged into a live outlet. WARNING This is a Class IIIb laser product. Laser light (up to 50 mW of 783nm or 855nm) is emitted from th