Transcription
Lesson PlansAll Grade Levels
Preschool Art IdeasChildren of preschool age and younger can make colorful pictures of their own that look great on all Art toRemember products. Here are several examples that have worked well with past customers. See more atwww.ArttoRemember.com!Handprint and footprint art can be used to make anything from fun bugs, tame or wild animals and funnyfrogs and fish!
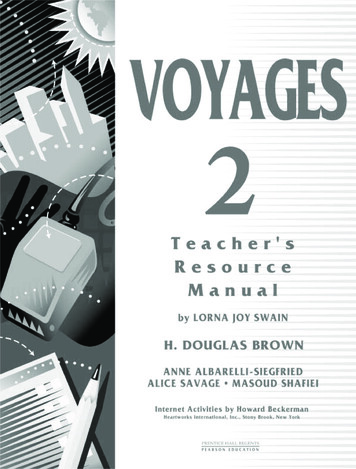
Hand Stamp Flower PaintingPreschoolObjectiveChildren will learn about colors, textures, and different art mediums.Textured BackgroundSponged BackgroundRequired Materials Pictures of flowers from seed catalogues, calendars, fresh flowers, silk flowers, and artists floralpaintings 8" x 10.5" art paper provided by Art to Remember Washable paint, (tempera or poster paint but not fluorescent), crayons (large), texture boards orany material that has a texture on it, paint brushes, Styrofoam trays or cookie sheetsInstructions1. Prepare background. Place paper over textured surface and rub surface lightly with broad side ofcolor crayons that have had paper removed. You may overlap several colors for a different effect.Sponge painting the background is another option.2. Painting process. Pour small amounts of paint in trays in a variety of colors. Press child’s hand indesired color and carefully print on an area of paper where flower is to be placed. Add one ormore flowers to complete stamping. Using paint brushes, have the children add leaves anddetails to complete their paintings.3. Print name legibly at least an inch from the edge of the paper so the name will not be lost inprinting.
BugmaniaElementaryObjectiveWhat do BUGS do? Fly, creep, swim and climb! What environment do they live in? Let yourstudents use their imagination and create a wild and colorful world for one or more buggycreatures. Have them use various shapes to create the bugs and their surroundings.Required Materials 8" x 10" art paper provided by Art to Remember Markers Pictures of different bugsInstructions1. Draw your composition lightly in pencil. Make sure students use most of the space on the paper. Drawlarge! Geometric shapes can be used to draw a bug, such as a beetle. A circle for the head and eyes, anoval for the thorax, and a larger or longer oval shape for the abdomen. Add additional lines and shapesfor patterns. Remember to draw the antennae and the six legs for your insect! Have fun! Use yourimagination! Give the bug a plant or two to make the background more interesting!2. Add color. Use colors that are vibrant and that contrast. Do not use metallic or neon colors because theydo not reprint well.3. Outline in black markers for emphasis.4. Print student’s name legibly at least an inch from the edge of the paper so the name will not be lost inprinting.
Color Texture DrawingsElementaryObjectiveStudents will discover new ways to add color and style to their drawings. Color and Texture are two ofthe elements being reinforced in this lesson.Required Materials Artwork previously completed by teacher and/or students. Lots of resource pictures thatstudents can reference when they begin their preliminary sketch. If the students are usingstuffed animals as subject matter, they could bring their favorite animal from home to make theproduct more personal to them. 8" x 10" art paper provided by Art to Remember Pencils, erasers, colored fine point markers.Instructions1. The student will sketch his or her animal or other subject matter on the white paper drawinglarge enough to fill the paper.2. After sketching the picture with pencil, the student will use fine point markers to “color” thepicture using small circles next to and touching each other. Do not begin randomly. Work insmall sections. Don’t forget the background!3. Print student’s name legibly at least an inch from the edge of the paper so the name will not belost in printing.
Flower PowerElementaryObjective:Students will learn to paint or draw realistic flowers using complimentary colors and utilize the entirepage.Required Materials 8" x 10" art paper provided by Art to Remember Paint (semi-moist watercolor or tempera paint), markers Flowers, silk flowers, calendars and artists floral paintings such as Georgia O’Keefe.Instructions1. Choose a flower shape and draw it very large to the edge of the paper in pencil.2. Using bright colors fill in the flower image. Hint: be creative - they don’t have to be the realflower color. Make your flower your favorite color.3. Carefully color in the background with a contrasting color.4. Optional – outline the flower image in a dark color.5. Print student’s name legibly at least an inch from the edge of the paper so the name will not belost in printing.
How My Garden Grows!ElementaryObjectiveTo learn how to use geometric shapes to draw flowers and insects.Required Materials Pictures of flowers and insects from publications such as Better Homes and Garden Magazine 8" x 10" art paper provided by Art to Remember Pencils, markers or crayons.Instructions1. Ask students to name different kinds of flowers: daisies, roses, sunflowers, tulips, lilies,dandelions, etc. Show students how to use basic geometric shapes to draw flowers. Ask studentshow old they are. They will draw the same number of flowers as their age. The flowers should befairly large.2. Ask students what insects or bugs like flowers: butterflies, bees, caterpillars, etc. They caninclude these in their picture. As a part of a science aspect, discuss the body parts of an insect.3. Draw a circle for the butterfly head, and oval shape for the thorax, and a longer skinnier oval forthe abdomen. Next add the eyes and antennae. Butterflies have two sets of wings on each side oftheir bodies. Draw a large circular shape on each side of the thorax. Under that shape draw alarge U-shape that touches the bottom of the body and curves around to the edge of the firstwing shape. The wings need to be symmetrical, another vocabulary term that students can beintroduced to.4. Color the pictures with crayons. If time or extra room allows, students could add a sun, clouds, ora rainbow in the sky. Finally, for extra pizzazz, trace the drawings with a black crayon afterfinished coloring.5. Print student’s name legibly at least an inch from the edge of the paper so the name will not belost in printing.
oLayeredLandscapeElementaryObjectiveStudents will identify the layers in a landscape picture and recognize which is progressively at a furtherdistance away.Required Materials 8" x 10" art paper provided by Art to Remember Pencils, colors of choice (oil pastel outlines with watercolor work very well)Instructions1. Discuss with students which is closer in this picture: the tree or the green hills?2. There are three rules of distance to observe:a. Size of Objects- Generally, the closer the object, the larger it appearsb. Distance to the bottom of the page- Generally, closer objects begin further down.c. Detail- The closer the object, the greater detail that it might have (blades of grass can beseen close up)3. With a pencil, sketch in layers you would like to have. Ideas: grass, bushes, trees, mountains,body of water horizontally, hills, sky with clouds)4. Outline the important parts, then color or paint in with a thin paint5. Print child’s name legibly at least an inch from the edge of the paper so the name will not be lostin printing.
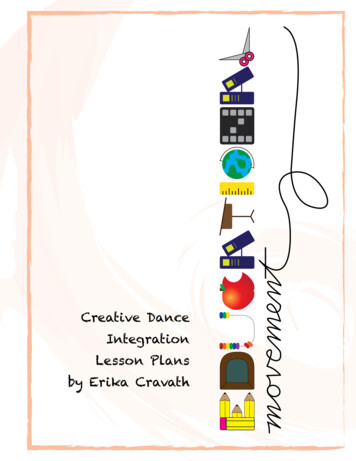
Lighthouse DrawingsElementaryObjectiveTo learn how to use shapes to create a lighthouse and how to use art materials effectively to add colorand form to the shapes.Colored with crayonsPainted with tempera cake paintsRequired Materials Examples of lighthouse pictures for students to see. Use old calendars, the Internet or artwebsites. American artist Edward Hopper painted a number of lighthouse paintings. 8" x 10" art paper provided by Art to Remember Pencils, markers, paint; semi-moist watercolor or tempera paint (basic watercolors notrecommended)Instructions1. Draw a horizon line near the center of their paper. Next draw two almost vertical lines thatintersect with the horizon line to make the sides of the lighthouse. The lines will be closertogether at the beginning and gradually move farther apart. Leave a couple of inches at the topand bottom of the paper for the roof and cliff.2. Connect the top of the lines together with a line that curves up in the middle, and then curvesback down to the other line (like a frown). This will be the top of the lighthouse without the roof.To make the bottom of the lighthouse, draw a line that curves down in the middle and thencurves back up (like a smile).3. Draw a triangle or half circle to make the roof for the lighthouse. On top of the roof add adecorative finale.
4. Add stripes or diamonds on the lighthouse. Any horizontal lines on the lighthouse that are abovethe horizon line will curve up slightly in the middle (like a frown). Any horizontal lines below thehorizon line will curve down (like a smile).5. Add a small house on the side of the lighthouse for the lighthouse keeper. Draw a cliff aroundthe lighthouse.6. Make sure to leave a space at the top of the lighthouse next to the roof for the light to shine outover the water. Large boulder shapes can be added at the bottom of the paper.7. Color with crayons, colored pencils, or markers. Students could trace drawings with thinpermanent markers and paint with watercolors or tempera paint cakes. Try to add darkershades of color on one side of the lighthouse to make it look rounder. Use yellows and orangesto make the light look like it is glowing at the top of the lighthouse.8. Print student’s name legibly at least an inch from the edge of the paper so the name will not belost in printing.
My Favorite PetElementaryObjectiveStudents will learn to draw from pictures and add their own creative touches utilizing the entire pageand a variety of colors.Required Materials 8" x 10" art paper provided by Art to Remember Crayons or markers Pictures of student’s pets from home or examplesInstructions1. Discuss with students their favorite pet or animal; ask them to bring in a picture if possible.2. Observe the shape of your pet and draw lightly in pencil. Pay attention to your pet’ssurroundings. Is he running, playing or doing a trick!3. Color with markers, crayons or a combination using a variety of lights and darks.4. Optional outline in black markers for emphasis.5. Create an interesting background. Is your pet inside or outside? Be sure to fill in the entirebackground in color.6. Print child’s name legibly at least an inch from the edge of the paper so the name will not be lostin printing.
Mystery Pattern PictureElementaryObjectiveStudents will learn how to incorporate patterns into their artwork and utilize shapes and colors.Required Materials Artwork by Henri Matisse.Wallpaper or fabric sample books.8" x 10" art paper provided by Art to RememberPencils, markers, crayons, paint; semi-moist watercolor or tempera paint. Paintbrushes, waterbowls.Instructions1. Choose a geometric shape such as a circle, rectangle, square or triangle. Draw it very large onyour paper in pencil, leaving at least an inch margin on top and bottom.2. Draw your first name or initials within the geometric shape.3. Decide what you want your shape to be about. Be creative! A rectangle could be a van, house orbillboard. A circle could be a fish, a planet in outer space or a ball. Create an interestingbackground for your shape.4. Create repeat patterns and draw them in the spaces between your name or initials.5. Color with markers or colored pencil. Outline areas you would like to emphasize.6. Print student’s name legibly at least an inch from the edge of the paper so the name will not belost in printing.
Sailboat PaintingsElementaryObjectiveTo learn about American Artist Winslow Homer, and to use watercolor paints to create a painting. Usingshapes, lines and contrasting colors is also important for this project.Required Materials If possible, find pictures of American artist Winslow Homer’s paintings of sailboats. He paintedthem while he was in the Bahamas. If his work is not available, any pictures of sailboats and palmtrees would work. 8" x 10" art paper provided by Art to Remember Pencils, markers, crayons, paint; semi-moist watercolor or tempera paint (basic watercolors notrecommended), markers. Paintbrushes, water bowls.Instructions1. Demonstrate how to draw the boat by drawing an upside down trapezoid for the bottom of theboat, and smaller right side up one for the cabin of the boat.2. Draw a vertical line above the cabin for the mast of the boat. On each side of the line draw atriangle for the sails. They are more interesting if they are not the same size. Students can addstripes on the sails and on the boat. They can also add windows and doors to the cabin.3. Behind the boat, which should be located near the center of the paper, show students how todraw a horizon line. Near the bottom of their paper, they can draw another line for the beach.
4. On each side of their paper, students can draw palm trees or tropical plants. To draw a palmtree, draw a very skinny tall trunk. At the top of each trunk, draw five or six lines coming out likespokes on a wheel. On each side of the line draw a curved or zigzag line for the edges of the palmleaves.5. Optional outline in black markers for emphasis.6. Next students will be either coloring their art with crayons or markers or painting with temperapaint cakes or watercolors. Paintings will be more successful if students paint the boat, sand andtrees one day, and the water and sky on another day. Remind students to use contrasting colors.Warm colors-pink, yellow, orange, and red in the sky, blue, purple, and a little green in the water.Avoid making the boat a color that matches the water or sky too closely.7. Print student’s name legibly at least an inch from the edge of the paper so the name will not belost in printing.
SilhouetteElementaryObjectiveStudents will recognize foreground and background using a colorful background and a black silhouetteforeground.Required Materials 8" x 10.5" art paper provided by Art to Remember Paint, Pencils, Sharpie Markers (optional)Instructions1. Discuss with students which is closer in this picture: the palm tree or the sky.2. Observe the background (colorful) and discuss painting with watercolor washes or fading colorstogether.3. Paint the background first and let dry.4. While paint is drying, students can begin sketching ideas for the foreground.5. On the Background, students can pencil in the silhouette image. (Another option is cutting outthe design on another paper and allowing students to trace it onto the background.) Then tracein black permanent marker for a crisp edge, and paint in the foreground shape black.6. Print child’s name legibly at least an inch from the edge of the paper so the name will not be lostin printing.
Still Life a La PatternElementaryObjectiveStudents will learn about still life art, artists and the use of patterns in art.Required Materials Pieces by Paul Cezanne, Henri Matisse, and Pablo Picasso. Objects that could be included in a still life picture – musical instruments, fruit, flowers andbooks. Wallpaper and fabric sample books that have repeat patterns. 8" x 10" art paper provided by Art to Remember Markers or crayonsInstructions1. Draw one or more objects for your picture lightly in pencil. Overlap shapes that are in front orback to show depth.2. Create repeat patterns in several areas of your picture. This can be on one or more of the objectsor the background.3. Color with markers or crayons using contrasting colors so that your still life will be the center ofinterest.4. Optional outline in black markers for emphasis.5. Print child’s name legibly at least an inch from the edge of the paper so the name will not be lostin printing.
Tropical Feathered FriendsElementaryObjective:To learn about endangered birds and create a picture that incorporates their environmentutilizing bright, vivid colors and create effects using contrasting colors.Required Materials Books about tropical and exotic birds and the rainforest, photography books, NationalGeographic. 8" x 10" art paper provided by Art to Remember Markers or tempera paintsInstructions1. Draw lightly in pencil your exotic bird or birds in a tropical environment surrounded by colorfulflowers, plants and trees. Draw your bird large so that it is the focal point or center of interest.2. Color your picture using yummy, lush, exotic colors such as bright orange, lemon yellow, hot pink,lime green and peacock blue. Contrast light against dark for emphasis.3. Outline in black markers for emphasis.4. Print child’s name legibly at least an inch from the edge of the paper so the name will not be lostin printing.
Underwater SceneElementaryObjectiveStudents will learn to map out the ocean, floor and sea creatures, leaving no white space.Required Materials 8" x 10" art paper provided by Art to Remember Crayons or markers Pictures of underwater scenes and underwater animals and plantsInstructions1. Have students divide paper into three sections – ocean floor, water and sky in pencil. Make thewater the largest space!2. Discuss different types of sea animals they might like to include in their picture and draw lightly inpencil. Add details of sea grasses and coral or shipwrecks.3. Color with crayons or markers. Outline for emphasis. Use colors that contrast with the sky andwater.4. Optional outline in black markers for emphasis.5. Print child’s name legibly at least an inch from the edge of the paper so the name will not be lostin printing.
Van Gogh Starry NightsElementaryObjectiveStudents will learn about Vincent van Gogh and his art. To learn to use crayons and watercolor painteffectively to create his swirly sky. (Or use watercolor crayons and brush with water lightly!)Required Materials A picture of Vincent van Gogh’s painting, “The Starry Night.” 8" x 10" art paper provided by Art to Remember Pencils, markers, crayons, crayons or water-soluble crayons, paint; semi-moist watercolor ortempera paint (basic watercolors not recommended). Paintbrushes, water bowls.Instructions1. Have students look at the painting, “The Starry Night.” Notice how swirly the stars and sky are.What are the main colors in his painting? Students will draw a landscape picture of someplacethey have visited. It could be a beach, a big city, someplace with mountains and lakes, anamusement park, or even just their back yard!2. After students draw their picture, they can trace over the lines with water-soluble or just crayons.In the sky, use dots of yellow or white for the stars. Remember to add the moon! Use white andyellow oil pastels around the stars with short dash lines. Fill the spaces in between the stars withdash lines of light and dark blue, and purples. Try to make the sky look wavy and swirly! Leavespace in between the lines for the paint.3. The spaces can be painted with watercolor paint, or simply colored lightly with the crayons ifpaints are not available. Paint yellow over the circular stars and blue and purple paint in the restof the sky.4. Set paintings in a safe area to dry.5. Print student’s name legibly at least an inch from the edge of the paper so the name will not belost in printing.
Fanciful Pet Portraits (Becca Fischer Inspired Art)ElementaryObjectiveStudents will explore optical illusions and practice using line and color to create their own!Required Materials 8" x 10" art paper provided by Art to Remember Pencils, erasures, your choice of colors (paint, pencils, markers), pictures of animals to look at Pictures of the pet portrait gallery by Becca Fischer, artist known for fanciful and colorful petportraits. http://beccavision.com/Instructions1. Discuss with students what makes Becca Fischer’s artwork exciting and original.2. Have students choose an animal or choose one for them to look at before drawing. Becca Fischerlooks at a photo to create her work.3. First sketch in pencil.4. Next, you may want to trace designs in a Sharpie marker.5. Fit colors and interesting shapes into your animal.6. Paint some colorful outlines around your animal, and create background7. Print child’s name legibly at least an inch from the edge of the paper so the name will not be lostin printing.
Sumi-e Ink AnimalsElementaryObjectiveStudents will explore sumi-e inkAbove image from “Super Simple Sumi-e” by Yvonne Palka (http://yvonnepalka.com/)Required Materials 8" x 10" art paper provided by Art to Remember Pencils, erasures, water, brushes, black ink or black watercolor Book “Super Simple Sumi-e” by Yvonne Palka (recommended)Instructions1. Intrigue students by showing them the first step of an animal—the gray reduction that is not yetrecognizable. Then show the next steps until they say “It’s a !”2. Sumi-e uses only watered black reduction (gray) and black ink. It is hard for younger students tothink about leaving white spaces for a purpose, so this works best as a step-by-step project as agroup.3. First sketch in pencil very lightly the parts of your animal. Then have kiddos stop.4. Discuss painting in gray with the tippy toe of your brush for thin lines. Paint the outline.5. As a class, use black to do each appropriate limb, eyes, etc. It is fast!6. The most important part is to stop when it is done! Students might like to freely paint the framearound their picture to look like a design, bamboo, fish, etc. for the end of class.7. Print child’s name legibly at least an inch from the edge of the paper so the name will not be lostin printing.
Optical Illusion HandElementaryObjectiveStudents will explore optical illusions and practice using line and color to create their own!Required Materials 8" x 10" art paper provided by Art to Remember Pencils, erasures, rulers, Black Sharpie Markers (fine) and water based markers with a wide tip(Crayola are best) Optical Illusion prints, a variety by M.C. EscherInstructions1. Discuss with students what they see in different optical illusions. What is the purpose of anillusion? Observe how the artist is trying to achieve tricking the eye.2. Have students trace their hand in pencil with outstretched fingers on their paper. It does notneed to be in the middle, but that is easiest.3. Use rulers to create 1” stripes horizontally across the paper. Demonstrate how to make theseeven. Skip over the hand area without drawing in it.4. Next, Show how to gently curve lines to connect over the hand creating a “bulge.”5. Trace all lines in black Sharpie marker. (Using waterbased black marker will bleed as you usemore colors and look smudgy.)6. Have students pick two marker colors that are either both hot (red, orange, yellow, peach, pink)or both cold (blue, green, turquoise, purple, violet) and color in the stripes NOT including thehand shape, alternating colors. Then be sure to alternate colors opposite on the hand, aspictured in the example. Happy Optics!
pticTellinga Story with GamesElementaryObjectiveStudents will get the chance to express their excitement with favorite games by drawing their story!Required Materials 8" x 10" art paper provided by Art to Remember Pencils, erasures, markersInstructions1. Students use art to communicate emotion and tell their story. Games are an exciting andreoccurring part of their story to tell, from football to checkers to video games! First, askstudents to brainstorm games with you.2. Once students pick a game, ask them to draw it out in pencil. They can either map the game as awhole, how it works, or they can pick a favorite part to show, such as catching a football. Seenabove is a lego video game, with sound shown in bubbles and even showing what the character isthinking about: a green brick. (NOTE: Please have students color in the background for the bestresults!)3. Students may want to trace in permanent Sharpie marker before coloring in.4. Color the background and details in bright, bold colors.5. Print child’s name legibly at least an inch from the edge of the paper so the name will not be lostin printing.
pticTintsand ShadesElementaryObjectiveStudents will mix paint with white to make tints and black to make shades in a gradual succession!Required Materials 8" x 10" art paper provided by Art to Remember Paint in a starting color of choice, white, and black; pallets to mix paint on, brushes, waterInstructions1. Tell students to turn the paper sideways to do the background first. Fold paper in half and openso you have a vertical line (you are looking at the picture sideways!)2. Students will begin with one brush stroke of the solid color (pink in the example above) on thefold line—then stop.3. Explain that mixing white with a color makes it lighter. This is called a tint! Mix a bit of white inyour pink, and do another stroke up next to your first one on the left side.4. Next, add a bit more white, and continue tinting each stroke a little more.5. When students are ready for black, ration them a TINY bit of black paint and warn that it ispowerful.6. Mix your original color (not the tint) with a bit of black and continue in a similar fashion.7. When you’re all finished with the background, paint a foreground silhouette in black.8. Print child’s name legibly at least an inch from the edge of the paper so the name will not be lostin printing.
Hot Colors DesertElementaryObjectiveStudents will learn about the HOT colors on the color wheel!Required Materials 8" x 10" art paper provided by Art to Remember Pencils, RED, ORANGE, and YELLOW crayons and watercolor paint, and black crayons for outliningInstructions1. Discuss with students the colors on the color wheel. Which ones feel warm to see? Which colorsare in fire? Fan yourself as though you are very warm when talking about red, yellow, andorange. (Shiver and be cold is they mention blue, purple or green)2. Encourage students to draw something they would see in a desert with the hot colors.3. To fill up the entire paper, provide a watercolor wash to paint over the crayon in orange oryellow.4. Print child’s name legibly at least an inch from the edge of the paper so the name will not be lostin printing.
Animals in the WildMiddle SchoolObjectiveStudents will learn about creating a focal point in a picture and creating a background around it.Required Materials Books on animals in their natural habitats, National Geographic and nature magazines. 8" x 10" art paper provided by Art to Remember Pencils, markers, paint; semi-moist watercolor or tempera paint (basic watercolors notrecommended)Instructions1. Discuss with students categories of animals from various geographical areas including localhabitats. Have them choose animals that are protected, extinct animals, arctic animals orwhatever animals they are interested in.2. Draw lightly in pencil the animal or animals you want to feature as the focal point of your picture.Create an interesting background.3. Wash the sky and land in very light watercolor. Use several shades for each area.4. Using oil pastels, color animals and areas you want to highlight. Add details such as grass, cloudsand trees.
Fauve FlowersMiddle SchoolObjectiveStudents will learn about the artist Henri Matisse and his style of art, drawing and creating large flowersutilizing vivid and contrasting colors and specific detail.Required Materials Botanical garden books, silk flowers, garden flowers. Artwork by artists such as Georgia O’Keefe.Artwork by fauve artists such as Andre Derain and Henri Matisse. 8" x 10" art paper provided by Art to Remember Pencils, markers, crayons, paint; semi-moist watercolor or tempera paint (basic watercolors notrecommended), paintbrushes, water bowls.Instructions1. Study the flower you have selected for your fauve flower study. Draw lightly in pencil your floweroutline filling the entire page. Your flower can go off the edge of the paper. Sketch in the detailsof the flower, petals, stamen and leaves.2. Wash in watercolor carefully the lightest flower color and leaves.3. When your painting is completely dry, highlight areas in overlapping shades in colored pencil.Hint: the colors can be imaginary like the fauves.4. Paint in watercolor around your flower in a contrasting color. You can emphasize area withcontrasting colored pencil or fine line black marker.5. Print student’s name legibly at least an inch from the edge of the paper so the name will not belost in printing.
Making an “Impression”Middle SchoolObjectiveStudents will learn about impressionism and pointillism, the use of the color wheel to create light anddark areas in a piece.Required Materials Paintings of the Impressionist Claude Monet and Post Impressionist Georges Seurat. 8" x 10" art paper provided by Art to Remember pencils, crayons or watercolor pencils, paint brushes and water bowls Instructions1. Explain the terms impressionism and pointillism. Show students how patches of colors closetogether are blended by the eye to look like another. Yellow next to blue green.2. Decide on the composition that you would like to do in the impressionist style and sketch inguidelines lightly in pencil. You can choose from still life, portrait, landscape, or a floral.3. Working from light to dark create the background. Use several colors in a variety of shades.4. Use a variety of contrasting colors to emphasize your focal point or center of interest.5. Print student’s name legibly at least an inch from the edge of the paper so the name will not belost in printing.
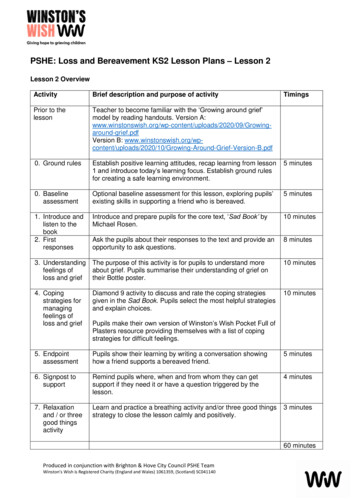
Important Art Guidelines!YESNOUse bright bold colorsDon’t use construction paperFill the entire page with colorDon’t do scratch artCreate horizontal OR verticalartworkDon’t use photographs orcopyrighted imagesPlace labels on the back, in theupper left corner AFTER artworkis completeDon’t write on the back of thepaper (it may show through)Don’t put label on the front ofcompleted artw
Students will learn to paint or draw realistic flowers using complimentary colors and utilize the entire page. Required Materials 8" x 10" art paper provided by Art to Remember Paint (semi-moist watercolor or tempera paint), markers Flowers, silk flowers, calend