Transcription
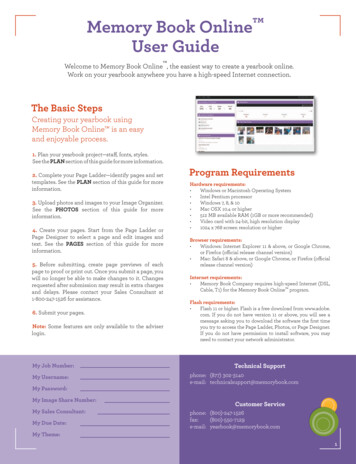
Memory Book Online User GuideWelcome to Memory Book Online , the easiest way to create a yearbook online.Work on your yearbook anywhere you have a high-speed Internet connection.The Basic StepsCreating your yearbook usingMemory Book Online is an easyand enjoyable process.1. Plan your yearbook project—staff, fonts, styles.See the PLAN section of this guide for more information.2. Complete your Page Ladder—identify pages and settemplates. See the PLAN section of this guide for moreinformation.3. Upload photos and images to your Image Organizer.See the PHOTOS section of this guide for moreinformation.4. Create your pages. Start from the Page Ladder orPage Designer to select a page and edit images andtext. See the PAGES section of this guide for moreinformation.5. Before submitting, create page previews of eachpage to proof or print out. Once you submit a page, youwill no longer be able to make changes to it. Changesrequested after submission may result in extra chargesand delays. Please contact your Sales Consultant at1-800-247-1526 for assistance.6. Submit your pages.Note: Some features are only available to the adviserlogin.My Job Number:My Username:My Password:My Image Share Number:My Sales Consultant:My Due Date:My Theme:Program RequirementsHardware requirements: Windows or Macintosh Operating System Intel Pentium processor Windows 7, 8, & 10 Mac OSX 10.4 or higher 512 MB available RAM (1GB or more recommended) Video card with 24-bit, high resolution display 1024 x 768 screen resolution or higherBrowser requirements: Windows: Internet Explorer 11 & above, or Google Chrome,or Firefox (official release channel version) Mac: Safari 8 & above, or Google Chrome, or Firefox (officialrelease channel version)Internet requirements: Memory Book Company requires high-speed Internet (DSL,Cable, T1) for the Memory Book Online program.Flash requirements: Flash 11 or higher. Flash is a free download from www.adobe.com. If you do not have version 11 or above, you will see amessage asking you to download the software the first timeyou try to access the Page Ladder, Photos, or Page Designer.If you do not have permission to install software, you mayneed to contact your network administrator.Technical Supportphone: (877) 302-3140e-mail: technicalsupport@memorybook.comCustomer Servicephone: (800)-247-1526fax:(800)-550-7129e-mail: yearbook@memorybook.com1
Memory Book Online Top 15 TipsMBO TipsSortingSend your photographer’s PSPA-compliant CD to Memory Book Company. Let Memory Book Company knowhow you would like your portraits sorted (by grade or by teacher).TeacherPortraitsLet Memory Book Company know if you want to place teacher portraits on both the Staff/Faculty Page ANDClass Pages.ResolutionImagesUploadingSelect the digital images you will use in the yearbook and organize those images on your computer.Send your digital images on a disk/removable USB drive to Memory Book Company for uploading. You mayalso send hard copies of your images sorted in separate envelopes by category to Memory Book Company forscanning and uploading. You will have the opportunity to submit candid images for Memory Book Companyuploading up to two times.Copy ImagesKeep a copy of all images sent to Memory Book Company or uploaded to Memory Book Online .Page LadderCreate a Page Ladder BEFORE you start building your yearbook.ProofPrint a proof of your portraits BEFORE you flow class pages. Make any changes to portraits BEFORE you flowthe class pages. See the Class Pages section of this manual for more information.SubmitSubmit all your pages AND send all your forms/payment by your deadline in order to get your yearbook ontime.Color CorrectColor correct images before uploading to Memory Book Online . Make sure that images, especially classportraits, are not too dark, too light, or color cast.TextWatch out for text that may be difficult to read. Use light-colored text on dark backgrounds and dark-coloredtext on light backgrounds. You may also lighten elements used as backgrounds using the Tint tool under theFormat tab.PortraitsSpell Check2Set your digital camera to take high resolution photos. If scanning photos, set the resolution at 300 DPI.Double check the following when creating your class portrait pages: There are no duplicate or missing portraits. Each portrait has a first name and a last name. Names and portraits match. Portrait sizes are consistent and are lined up and spaced evenly. Teachers are not flowed in with the students Each class portrait page’s grade is identified and is placed in the proper order in the yearbook.Use the Memory Book Online spelling checker.MarginsWatch out for faces and text placed outside of the margins because these may get trimmed off. If you areunsure of where the margins are located, please contact technical support at 1-877-302-3140.DuplicatesTo avoid unwanted duplicate candid images, look at the bottom left corner of an image’s thumbnail under theImages tab before placing on a page. If the book icon is green, this means that this image has already beenplaced on one or more pages.
Logging InLogging In11Select the job year for your account.22Enter your job number.33Enter your username.44Enter your password.5Click Continue to go into your account.6Forgot Password Link: Clicking on thislink will send an email to the email onfile for your username.56If you attempt tolog in with incorrectinformation more thanthree times in a row,you will be locked outof your account. If thishappens, please callyour customer servicerepresentative to haveyour password reset.Resetting Your Password121Click on the Forgot Your Password link.2A form will appear to fill out. Enter current jobyear, job number and username. Click Continue.3An email will be sent to the email entered for thisusername.4Click on the link in the email.5A screen will appear to type your new passwordand confirm the password. Click Continue.6The login screen will now appear. Login usingyour new password.56343
Security and PermissionsLogging InThe three levels of access to the Memory Book Online site are Adviser, Editor and Staff. Each role has differentlevels of access. The adviser login has the highest level of access. Below is an overview of the permissionsavailable at each level:Because theAdviser loginhas a high levelof access, it isimportant to keep itsecure. In addition,please close yourInternet browserwhen you leaveyour computer soothers will not beable to access youraccount.AdviserEditorThe adviser login has the highest level of security.This login has access to do everything the editorand staff logins can do, along with the following:The editor login has access to do everything the stafflogin can do, along with the following: Submit pages Edit/Delete custom templates Change Section and Description information Create and manage staff information Download Images from Image Library Move photos from Image Share and staffinboxes to the Image Library Lock and unlock pages Select fonts for your bookStaff Edit custom templates Upload images into image category folders Control Image Share settings Lock pages Move / Arrange pages Assign pages to staff members Use Virtual Book Use the coverage report to editstudent data. Access page history Share proof via emailThe staff login has access to do the following: Create and Edit pages Create portrait pages (autoflow) Set templates for pages Create Index Change Section and Description information Upload images into image category folders Move photos from staff inbox to the Image Library Lock pages View Page LadderMy StaffName:For help disablingpop-up blockersin web browsers,please contactMemory BookCompany TechnicalSupport by phoneat 1-877-302-3140or by email attechnicalsupport@memorybook.com.4Username / Password:Role:Email Address:Pop-Up BlockersTurn off any pop-up blocker you may use. Pop-ups must be allowed in order for Memory Book Online tooperate fully.
Welcome PageWelcome Page14253Countdown To Due Date ModuleThis countdown helps remind you how much timeyou have left to finish your book before your duedate.1Page Status ModuleThis section provides a breakdown of thestatus of your yearbook pages.4Important Deadlines ModuleHere you will find important due dates to helpkeep your yearbook on track.2Tag Images ModuleTag recently uploaded images within thissection.5Announcements Module3Check this section for important announcementsmade by the Memory Book Team.5
Using the Page LadderPlanUse the Memory Book Online Page Ladder as a tool to help you create and organize your yearbook.The MBO PageLadder is a wonderfultool to help youorganize youryearbook.11To access the Page Ladder, click on 1)Plan andchoose Templates.2 The color of the shadow behind each page will giveyou the status of each of your pages.Access the PageLadder under the Planmenu.234A page becomeslocked when itis completed orsubmitted. To unlocka completed page,click the Returnbutton. Noticethe color code forthe page changesfrom Light Green(Completed) to Yellow(In Progress). Thisoption is availableonly to Advisers.See the Completing/Submitting Pagessection of this manualfor more information.53 To see a proof of one of your pages, click on thePrinter icon next to that page. The PDF will open ina new window for viewing and can be printed fromthat screen.Keep in mind this PDF will be a low-resolution proof,and images may appear fuzzy. Your images willprint with the highest resolution possible when sentto Memory Book Company. If you have any questionsabout the quality of your photos, please contactMemory Book Company Technical Support.4 To help you identify and organize your pages, enterthe Section and Description information next toeach listed page. Click on the blank area next to thewords Section or Description and wait for two boxesto appear. Click either box and begin typing yourinformation.5 Next to each page, you can also view when the pagewas last edited and whether the page will be Coloror Black and White. Note: Please make sure youspeak with your sales consultant about pricingoptions before switching a page from Black andWhite to Color.66 Click on the Save All button to save all changesmade to your Page Ladder.Using the Page Ladder Filters1 Filter the pages you view by clicking on the dropdown menus under the Filter tab.123452 Click on the top drop-down to sort your pages byAll Page Types, Black and White, or Color.3 Click on the middle drop-down to sort your pagesby All Page Statuses, Completed, In Progress, NotStarted, or Submitted.4 Click on the bottom drop-down to sort your pagesby All Lock Statuses, Locked, or Unlocked.65 Click on the Apply button to view your pages sortedvia the filters you have chosen.
Copying Last Year’s PageContents to Current BookWant to carry over page contents and descriptions from last year’s Memory Book Online account?Now advisers can apply page contents and descriptions from the page ladder upon logging into a new account.Click Load Page Designs to applylayouts from the previous account.Click Load Descriptions to apply section anddescription information from the previousaccount’s page ladder.PlanThis feature for loadingpage layouts anddescriptions into thecurrent page ladderaims to make theyearbook creationprocess more timeefficient for adviserswho are wanting tocontinue layouts andthemes from previousyearbooks.Click Clear Page Designs or ClearDescriptions if you decide not to uselast year’s layouts or descriptions afterthey have been loaded. A promptwill then appear to confirm clearingthe layouts or canceling to continueusing the layouts.Print Page Ladder Option To print a hard copy of the page ladder, clickon 1)Plan. Click on Print Ladder button. Click on Print Ladder.7
Managing StaffPlanMultiple Logins11Choose Staff from the Plan menu to accessyour Adviser and Staff information.2To add a New Staff member, click on theAdd Staff button to enter their information.3Once you have finished, click on the Savebutton.4To view the activity history of any staffmember, click View by their name.5Click Edit next to an Adviser or Staff entryto make changes.6Click Delete button to remove a staffmember.7Clicking the Active button will allow anadviser to give or take away access to theprogram.8Click View Activity to view the actionhistory of all users.2There are three levelsof access to thesite: adviser, editor andstaff. Each accesslevel has a differentlevel of security.3Advisers can updatetheir contactinformation andchange the passwordfor themselves ortheir staff membersat any time.We recommendperiodically changingpasswords to helpmaintain site security.4576989 Click Email All to send a message to allusers working on the yearbook.10 Forgot your password? No worries. Wenow have a link for this on the login screen.Click on the link to fill out a simple form.An email with your new password will besent to the email address entered in theStaff logins screen.48810
Assigning Pages123Plan1To Assign certain pages to specific logins,click on 1)Plan.2Click on the drop-down menu beside theStaff field and choose the person’s loginthat is going to be working on that specificpage.3You may assign more than one person to apage by selecting another person’s login inthe second Staff field.4Only the user(s) assigned to a page can editthe contents of that page.5Unassigned pages are open to be edited byall users on the account.6In 3)Pages, users can choose to view theirpages by choosing My Assigned from thedrop-down menu on the Pages tab645Note: Pages assignedto a user can be viewedby all other users butcannot be edited byusers with a Staff login.9
Selecting Fonts for Your YearbookPlanMemory BookCompanyrecommends youchoose no morethan 20 fontsfor consistencythroughout youryearbook. You maycome back to theSelect Fonts screen atany time to edit yourchoices.Adding Fonts From Plan Section11 Click on Fonts in 1)Plan to access the Fontspage.2 Click on the drop-down to view all FontCategories. As an example, select Body inFont Categories.3 Click on the drop-down for Available Fonts.A list of all available fonts for the chosenfont category will be displayed.Use the Plan menuon your headerbar to access theFonts page.4 Click on a font name to see a preview of thefont in the Font Preview section.23545 Click the Add button to add the selected fontto your collection. Note: Only fonts addedto your font collection will be available foruse in your yearbook.6 Click the Delete button to delete a fontfrom your collection. Note: If you delete afont that was already used on a page, nochanges will be made to the page(s) usingthe font. However, the font will not beavailable for selection on new text boxesor pages.6Adding Fonts From Pages SectionYou can also accessAdd Fonts from theFormat screen in thePage Designer whentext is selected.With a text box selected on a page, go to the Format tab and click the ADD FONTS button.1Note: If you delete afont that was alreadyused on a page, nochanges will be madeto the page(s) usingthe font. However,the font will not beavailable for selectionon new text boxes orpages. 31 Click on the drop-down to view all FontCategories.2652 As an example, select Body in FontCategories.3 A list of all available fonts for the chosenfont category will be displayed underAvailable Fonts.4 Click on a font name to see a preview of thefont in the Font Preview section.45 Click the right arrow button to add theselected font to your collection. Note: Onlyfonts added to your font collection will beavailable for use in your yearbook.6 Click the left arrow button to remove a fontfrom your collection.10
Decorative FontsPlanMemory BookCompanyrecommends youchoose no morethan 20 fontsfor consistencythroughout youryearbook. You maycome back to theSelect Fonts screen atany time to edit yourchoices.Sans Serif Body FontsSerif Body FontsNOTE: Many of theBody fonts haveBold, Italic, Light andCondensed versionsthat can be added toyour font collection foruse on your pages.Ornament FontsScript Fonts11
Image SharePlanNOTE: Rememberto click on the Savebutton wheneveryou change the startdate, end date, andmaximum number ofimages.Setting up a Community Photo Site will allow parents and members of your community to submit their photosfor your use in the yearbook. To set up your site, use the Image Share link under 1)Plan.Enabling the Photo Sharing Site12 341 Go to 1)Plan, and click on the Image Share link.2 Check the box next to “Do you want to have a web site for parents.?” Then, enter a startdate, end date, and maximum number of images in the spaces provided.3 Check the box next to “Do you want the site enabled?”4 Click on the Save button. A User ID and link for your web site will then be automaticallygenerated in the blank spaces shown above.5 Text will appear below the Save button that you may copy and paste into an email tosend to parents or students. This letter contains a link to the web site along with theusername and end date information.540000011112
PlanUsing the Photo Sharing Site1 Go to http://images.memoryebooks.com/login.2 Type the User ID in the space provided, andthen click on Submit.23 To upload images, click the Choose Filesbutton.4 Navigate to the folder containing theimage(s) you want to upload. Double-clickan image to upload a single image or holdthe Ctrl key on your keyboard to selectmultiple images to upload.2016201635 A new screen will appear for you totype in Contact Information and ImageInformation. All fields are required exceptfor Current Grade or Description underImage Information.Under Contact Information, type in youremail address, first name, and last name inthe spaces provided.4201620165Under Image Information, type in the firstname and last name associated with eachimage uploaded in the spaces provided.If there is more than one person in theimage, type in each person’s name underDescription in the space provided. UnderGrade, use the drop down to choose theappropriate grade information. A thumbnailpreview is provided to help you identify theimage(s).If you do not finish filling in ContactInformation and Image Information, anyimage(s) uploaded will not appear in theInbox Image Share folder.6 When you are ready to upload, check thebox next to “I have read and understoodthe terms and conditions for image usage.”Then, click on the Upload Chosen Imagesbutton. Do not leave the screen during theupload process which may take severalminutes. Uploading time will depend on thesize and number of files and your Internetconnection speed.62016NOTE: You may usecomplete sentencesor phrases whentyping in descriptioninformation.77 A new screen will appear with the followingmessage: “Thank you for submitting yourimages for the yearbook!” If you have moreimages to upload, please log back into thesite again.13
Uploading Digital ImagesPhotosYou may uploadmore than oneimage at a time.However, keep inmind that uploadingtime will dependon the number andsize of the files youare uploading andyour Internet speedconnection.1 Click on the 2)Photos link at the top of your page tobegin uploading images.12 2 Click on the Activity category, then the New buttonto add a category to upload images into. A promptwill appear. Type a name for the category, then clickOK. The new category will then appear in a folderunder the Activity category.3 Click on the category you will upload images into.Then click on the Upload button in the top toolbar.3 4 An upload screen will appear. Click on Add Files tochoose the images you would like to upload toMemory Book Online .4 5 Browse to the folder where your images are stored,and select the image you would like to upload. Shiftclick if you would like to select more than one imageat a time.To deselect or to select images that are notconsecutive, hold down the Ctrl key while choosingthe image.56When you are ready, click Open.6 Your images will begin to upload into the category.DO NOT close out of your browser or go to anotherweb page until the files are finished uploading.If you would like to continue working on youryearbook, open a new tab or browser window.Images that have successfully uploaded will behighlighted in light green on your screen and can beseen in the category behind the upload screen oncethe process is complete.Your images will now be available to organize andplace on your pages. NOTE: If you uploaded to theStaff Inbox, you will need to place the images in acategory before they can be placed on your pages.14
NotesPhotos15
PhotosTIP: In order todelete an unwantedcategory, all theimages within thatcategory first need toeither be moved toanother category ordeleted.Using Your Image OrganizerOrganizing your images will allow you to save time when creating your yearbook because you will be able tofind your images more efficiently. You may use the Image Organizer to edit portrait information, move photosin their appropriate categories, and assign keywords and names to expedite the search process. See the ClassPages section of this manual for more information on editing portrait information.1 To access the Image Organizer, click onthe 2)Photos link at the top of your page.12 If you did not choose a specific categoryduring the uploading process, you mayview the photos you just uploaded byclicking on the Inbox Staff category.23 Your most recently uploaded photos inthe Inbox Staff category will appear inalphabetical order in the main window ofyour screen.34 To add categories, select Portrait orActivity and then click the New buttonfrom the row of buttons on the top leftside of your screen.545 An Add Category window will appear.Enter the name of the category, and clickOK. Ex: 4th Grade CandidsYour new category is now in the list onthe left side of the screen.6 Click on a photo you would like to move,and drag it to one of the categories listedon the left. To select and move multiplephotos, do a Shift click. Choose the newcategory to view all the photos placedthere.6Image Organizer Toolbar Close-upEdit categorypreferencesAdd anew photocategory16Carry imagesover to next yearDeletea photocategoryCreate aPDF proofof categoryimagesRotateimageDownload copyof imageAdd tags toimageUpload newimagesDeleteimage
PhotosImage TaggingTag images with the names of those in the photo to allow for easy searching.1.Select the photo and click on the “TagNames” button.2.Under the “People” tab, click the Addbutton.3.As you type the name in the spaceprovided, Memory Book Online willsearch the list of current studentsuploaded to the portrait section of theprogram. Click on the name of thestudent to associate it with that photo.Clicking this iconwill allow you to viewinformation about thefile, including Max Size,pixel dimensions, andfile name.A green tag on yourphoto indicates theimage has a name ornames associated withthe image. This willhelp you track usagein the Coverage Reportand building an Index .A gray tag on yourphoto indicates theimage has not beentagged. This will helpyou determine whichimages you need to tagnames to.Download Images from the Image OrganizerNeed to download a photo from the Memory Book Online site? Now advisers can use the “Download”button in the Image Organizer to quickly and easily download a needed photo onto their hard drive.1.In the Image Organizer, select theimage you would like to download.2.Click the “Download” button. Whenthe prompt appears, click “Save” andchoose a place on your computer tosave the image.17
PhotosUsing Your Image OrganizerEditing Portrait Information:21Note: The namewill appear inthe yearbook asit appears in theimage’s name tag.1To select a class/grade, click on the nameof the class/grade on the left side of thescreen.2To change data for an individual, doubleclick on their thumbnail picture on theright of the screen. The picture will nowappear in an image preview window alongwith its information. There are 2 tabs toutilize, the People tab and the Details tab.Editing Portrait Name - People tab :1 Double-click the portrait image so it appearsin the image preview window (as shown onthe left).12 In the image preview, click on the People tabso you can see the name tag attached to theimage. Click the pencil icon in the top rightof the tag. An edit name prompt will appear.Note: After changingthe name on animage, it will showcorrectly in the imagepreview but not in thecollection area untilthis area is refreshed.To do this, click toanother category andthen click back tothe category you areworking with.23 Edit the name as you would like it to appearin the yearbook. Only First and Last namerequired. Click OK to save changes.3Change Portrait Type / Flow Order - Details tab:This will determine the order pictures will appear on the page. All students/staff in one portrait type willbe sorted alphabetically. Portraits are sorted in the following hierarchical order: Teacher, Assistant Teacher,Student, and Other.1 Double-click the portrait image so it12appears in the image preview window.2 In the image preview, click on the Details3418tab.3 Click the drop-down by Type in order tochange the Flow/hierarchy order of theimage.4 Click Apply Changes to save the orderchange.
PhotosUse / Don’t Use Portrait Image - Details tab:If a student/staff is not to appear in the yearbook, change the “Use Portrait” to “Don’t Use Portrait.” It isbest not to delete the portraits.2131 Double-click the portrait image so itappears in the image preview window.Note: Marking animage as Don’t UsePortrait also tells ourFlow feature to skipthat image whenflowing class photosonto a page.2 In the image preview, click on the Detailstab.3 Click the drop-down by Use Portrait toselect an image as “Don’t Use Portrait”.The image will then become shaded withDon’t Use on it.44 Click Apply Changes to save changes.Change Class/Grade:1 Move students/staff by dragging theirpicture from the right to another grade/class folder on the left.1Add a New Person/Student:1 Select the Portrait category that the newperson is to be uploaded to.2 Click the Upload button. A white screenTip: You canuse a “No PhotoAvailable” image asa placeholder on apage for a studentuntil you have areplacement image.You can then dragand drop the newimage over the “nophoto” to replace it.will appear. Click Add Files. A browsernavigation window will appear. Navigateto the image, select it, click Open. Theimage will now upload to the category.13 Click the Tag Names button to add aname to the new person or student. Oncethe image is tagged, the new student willbe in alphabetical order with the otherportrait images in the category.23Add a No Photo Available image:Need more “NoPhoto Available”images? Just callTechnical Support @877-302-3140 to havemore added to youraccount.1 Drag and Drop a “No Photo” image fromthe No Photo category to the categorymissing a student.122 Double-click the portrait image so itappears in the image preview window.3 In the image preview, click on the People34tab so you can see the name tag attachedto the image. Click the X on the tagto remove it. This will break the linkbetween this tag and the other(s) withthe same name.4 Click the ADD button. A prompt willappear to add a name to the “no photo”image. Click OK to save changes. Thenew name will now appear with theimage.Note: Afterchanging the nameon an image, it willshow correctly in theimage preview butnot in the collectionarea until this areais refreshed. To dothis, click to anothercategory and thenclick back to thecategory you areworking with.19
PhotosAccessing Image Share ImagesBefore you can placean image uploaded toImage Share, it needsto be assigned to acategory.1Go to 2)Photos. This will take you to the ImageOrganizer.2Under Categories in the left pane, choose InboxImage Share. Thumbnails of all images in thiscategory will show to the right. The number ofimages available under this category will appearin parentheses next to the top right pane header.Depending on the number of images and previewsize, you may have more than one page.3To view the information for the file, point to animage, and click on the blue “i” icon.4Click on the Details tab to see image informationincluding the Upload Date, Source Info, and MaxSize.1234The Source Info is the information typed in duringthe upload process under Contact Information.The Source Info may also include the Gradeinformation associated with the image. The MaxSize is the biggest size you can make the image inthe Page Editor.5520To move an image to an existing category, clickon the thumbnail on the bottom right pane anddrag it to one of the categories listed on the leftpane. The category you are dropping the imageinto will be highlighted.
Photos6To create a new category, Select Activity andthen click on New on the left pane.7A New Category window will appear. Type in thecategory name in the space provided, and clickon OK.6The new category will be placed in alphabeticalorder after Portrait. You are now ready to moveimages to this category.8Go to 3)Pages. This will take you to the PageDesigner. Go to the Images tab on the right sideof the screen. Using the drop down, click onthe category to browse through thumbnails ofavailable images.To place an image on a page, click and drag theimage’s thumbnail on a photobox or a blank areaon the page.See the Creating Your Yearbook section of thismanual for more information.7821
PhotosCombined with theCoverage Report, itwill be easier to meetyour goal of makingsure everyone is inthe yearbook.22Facial RecognitionFacial Recognition Immediately after you upload photos MBO willplace boxes over areas in your photos that itrecognizes as faces. You will see a list of faceswith a box that says “Unknown” to the right of thephoto. Click each box to select a name for eachface - matches will appear at the top of the list andwill be highlighted. You may also choose to typein a name, and the list will filter to names matchingyour typed text. You will not be able to resize, moveor delete the boxes that are placed automaticallyover faces by MBO. You can add boxes to faces that were not detec
Memory Book Online Top 15 Tips Send your photographer’s PSPA-compliant CD to Memory Book Company. Let Memory Book Company know how you would like your portraits sorted (by grade or by teacher). Let Memory Book Company know if you want to place teacher p
