Transcription
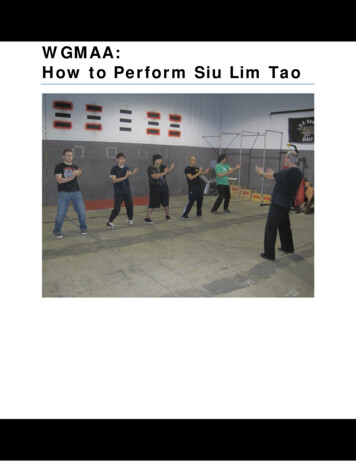
WGMAA:How to Perform Siu Lim Tao
Table of ContentsiiiTable of ContentsTable of Contents. iiiIntroduction to Siu Lim Tau . vChapter 1: Learning the Stance . 3Movements . 3Forming the Stance . 3Chapter 2: The First Component . 11Movements . 11Punching . 11Tan Sau. 12Huen Sau . 13Fook Sau . 15Jut Sau. 16Wu Sau .17Pak Sau . 18Putting Them Together . 19Chapter 3: The Second Component . 27Movements. 27Palm Strikes . 27Gum Sau . 29Dan Sau . 29Behind The Back Grab . 30Lan Sau. 31Double Jum Sau . 31Fuun Sau . 32Outside Jut Sau . 33Gaan Sau . 34Bong Sau . 34Putting Them Together . 36Chapter 4: The Final Component. 49Movements . 49Joon Mah . 49
ivHow to Perform Siu Lim TauKwan Sau. 50Mun Sau And Wu Sau . 50Clearing Hands . 50Putting Them Together . 51
IntroductionvIntroduction to Siu Lim TauToo often, students watch a martial arts film such as Ip Man (2008) and want to learnWing Chun to learn the cool hand movements. Even older students neglect practicingthe first form of Wing Chun even though it contains some of our most preciousprinciples.I am writing this manual to help prepare the younger students of the Wu Gung MartialArts Association (WGMAA) to study the moves they learn in class and use this manualas a guide to help them learn the correct angles and postures. I have divided the manualinto four chapters Forming Your Stance The First Component The Second Component The Third ComponentThe reason I have done so is because the Siu Lim Tau, which translates to “little idea”will prove tiring on a beginner’s lower body muscles.Within each chapter I will explain each of the movements used in the guide (unlessthey’re movements solely for transitioning phases or already covered in a previouschapter). I will then at the end of each chapter walk you through each component of SiuLim Tau and how to tie in the movements you just learned. Whether you’re looking tolearn how to progress each movement or form, or looking for a review, hopefully youwill find everything you need to learn to perfect your personal Siu Lim Tau.Note: All of my information comes from my Sifu (teacher) David Lott. Spelling anddefinitions vary, but mine are based off the .php?n WCP.WingChunGlossary
Chapter 1:Forming Your Stance
Chapter 13Chapter 1:Forming Your StanceThe Center-Line TheoryIn this chapter, I will be covering both the center line theory and why it is important innot only in forming the correct stance, but for the entirety of Siu Lim Tau.The centerline is the founding principle of Wing Chun. In Wing Chun, we visualize animaginary line that starts from the top of our skulls that extends between our legs to theground. We stress the importance of the centerline because our vital organs vary up anddown the center line. We also keep our elbows in Siu Lim Tau because the majority ofour hand movements are designed to protect our vital or while effectively creating awedge to access our opponent’s center line.By sinking, keeping your elbows in, and your shoulders square, you can gain leverageover your opponent, particularly those larger than you. If you were to extend your fistvertically (keeping your elbows inward and shoulders down), and your opponentgradually applies pressure to your fist, you should feel his or her energy transfer to yourheels. By the end of this chapter, you should form the perfect stance to build up yourstructure, which is vital to all things Wing Chun.MovementsThis chapter doesn’t feature any hand movements that will be reoccurring. The onlyhand movements are used to simply help you establish your center line.Forming the StanceNow I will take the principles learned above and show you how to apply them to yourstance.1. Stand up straight facing forward and with your shoulders squared.a. Your feet should be close to touching, but only an inch apart.b. Your eyes will face forward and your chin slightly lowered to cover yourthroat.2. Extend your arms in front of your body.a. Make sure your arms and palms are at shoulder height.b. Have your arms and palms parallel to the ground with your fingerspointing directly in front of you (see figure 1 below).
4How to Perform Siu Lim TauFigure 1: Beginning the stance3. Sink through your knees and simultaneously bring your arms to your sidesa. Bend your knees until you can no longer see your feet while keeping yourback straight.b. Keep your shoulders down and your hands clenched in a fist an inch apartfrom the side of your body, and facing upwards toward the ceiling.Figure 2: Demonstrating the next step.4. Move the tip of your feet apart while keeping your heels together.a. You should see your feet form a triangle.
Chapter 1b. The tips of your feet will form the base and the heels will from the tip ofthe triangle.Figure 3: Notice the triangle shape5. Move your heels outward, and then the tip of your feet inward.a. You will reverse the triangle you previously created.b. The tip of your feet will now form the tip of the triangle and the heels willform the base.Figure 4: The triangle is reversed.5
6How to Perform Siu Lim Tau6. Flex your hips forward as far as you can without leaning backward or forwardand simultaneously form an X with your arms diagonally downwards fromyour torso.Figure 5: Using the arms to find the center.7. Raise your arms upwards so that they still form an X and at a 45 degree angleaway from your body.a. Your palm will be facing towards you with about 5 inches of space inbetweenb. You can use this space to help imagine your center line.
Chapter 17Figure 6: Arms are raise but still aligned with the center.8. Return your fists to your sides as previously seen in step 3B.You can check your stance in the mirror with the front and side view. Practice in front ofthe mirror often; you’ll need to build up the muscles used in this stance if you hope tocomplete the entire form of Siu Lim Tau.
Chapter 2:The First Component
Chapter 211Chapter 2:The First ComponentIntroductionThe original Siu Lim Tau was taught all at once and even led into the second form. WingChun instructors, including Wu Gung Kung Fu’s David Lott have since broken the formdown into four smaller modules, which students will eventually combine into one; theirreason is that learning the form provides a workout for your legs.In this chapter, I will first provide lessons for individual hand movements in this firstpart of the form. I will teach you some of the fundamental Wing Chun hand movementsand then show you how to put them together.MovementsThe following movements will be covered in this chapter: Punching Tan Sau Huen Sau Fook Sau Jut Sau Wu Sau Pak SauPunchingIn Wing Chun, we practice an unorthodox method for punching which is translatedas Chain Punching. Chain Punching is simply punching hand over hand in a rotationmotion similar to a bicycle wheel. To achieve this, we make sure our shoulders aredown, bring our elbow to our center, and relax both our arms and fists. We also keepour fists vertical, hitting with the last two knuckles (pinkie and ring finger) ratherthan use a horizontal fist. We do this so that we can achieve the most economicalpunch in all of the martial arts. The punch also derives its power from both hipmovements and the elbow. Because of this, we can achieve much power at a shorterdistance without compromising our balance. The rotational punching can be used tofirst parry an attack, with the elbow force of the first punch collapsing an opponent’sattack which is then immediately followed by the other punch.1. Get into the horse stance that was established in the previous chapter.2. Bring your left elbow and fist to your center line.
12How to Perform Siu Lim TauFigure 7: Note how the fist is aligned with the center.3. Keep your shoulders down and punch forward (straight).Figure 8: Note how the man’s shoulders are relaxed and the fist vertical.a. If you raise your shoulders when punching, you won’t punch throughyour target and you will lose power.b. Keep your fists relaxed as if you were holding a grape.4. Bring your left elbow back to your left side and repeat steps 1-4 with yourright side.By now you should be able to perform a simple straight punch. When you want toinclude more punches, punch hand over hand. You may now move on to learning thenext part: Tan Sau.Tan SauThe Tan Sau is one of the twelve hand movements a Wing Chun practitioner canlearn. The Tan Sau is a parry that can be used to defend against inside and outsideattacks away from your center.
Chapter 2131. Start off in your horse stance.2. Bring your left or right elbow to your center.a. Make sure your elbow is a few inches in front of your torso and nottouching.Figure 9: The Sifu is in the process of bringing the elbow to the center before making the Tan Sau.3. Turn your arm so that the under part of your arm and palm is facing upwards.4. Have your arm form a 45 degree angle from your torso.5. Bend your palm forward with your fingers pointing forward and touchingeach other.Figure 10: Demonstrating a proper Tan Sau.6. Repeat for the other arm.Huen SauThe Huen Sau is roughly translated to circular hand movement. Wing Chunpractitioners use it to go around your opponents arm to gain access to the centerwhen he or she applies excessive force. The Huen Sau is simply turning the wrist and
14How to Perform Siu Lim TauHand in a counter-clockwise movement, but for this section we will cover how youwill use it for the majority of Siu Lim Tao.Note: This entire movement will be repeated throughout Siu Nin Tau. Whenreferencing this movement in later chapters, I will make a reference like this: HuenSau (Ch. 2)1. Get into your stance.2. Hold out your arm straight out with the palm facing the sky.Figure 11: The beginning of the Huen Sau.3. Rotate your hand counter-clockwise.a. We rotate counter clockwise to keep our opponent’s attack away fromour center.Figure 12: Huen Sau in mid turn.4. Keep going until your palm is at the twelve-o’clock positiona. The palm will be facing straight out and the fingers pointing toward thesky.
Chapter 215Figure 13: How you will end before closing the fist.5. Close your palm into a grab and return your elbow to the side.6. Repeat for the other arm.Fook SauWing Chun practitioners use the Fook Sau as a parry. The angle is similar to a TanSau; however, we also use is to cover the opponents arm. By covering our opponent’sarm, we can open up possible traps and throws.1. Get into your stance.2. Form a Tan Sau as a frame of reference.3. Turn your hand counter clockwise4. Stop when your fingers are facing diagonally to the left.
16How to Perform Siu Lim TauFigure 14: Demonstrating a proper Fook Sau.Jut SauThe Jut Sau is a snapping-hand parry with the thumb side of the wrist. You can alsouse it to parry an attack on top of your opponent’s arm in case you mess up the PakSau. For this chapter, you will do the Jut Sau after certain Huen Sau movements.1. Start off in your stance.2. Bring your elbow and arm to your center.a. Keep your arm at the same angle as your Tan Sau.3. Open up your palm with the palm vertically facing towards your right.4. Keep the thumb and fingers pointing toward the sky.a. Keep your tip of the fingers only at the bottom of your neck.
Chapter 217Figure 14: Demonstrating a proper Jut Sau.Wu SauThe Wu Sau is one part of the actual combative Wing Chun stance. Practitioners pairit with the Mun Sau (which we will cover in a later chapter). The Mun Sau is thehand that is at the front, and the Wu Sau is positioned at the rear, ready to defendagainst any attack. Forming your Wu Sau is easy: face your palm towards the widthof your shoulders. Position the heel of your palm at mid-chest level. Hold it a fewinches in front of your chest. This is one of the few instances your elbow will befacing out.
18How to Perform Siu Lim TauFigure 15: DeMunstrating the Wu Sau.Pak SauPak Sau is used to intercept your opponent’s attack with your palm. For Siu Lim Tao,Wing Chun practitioners practice two kinds: A straight Pak Sau and a side Pak Sau.The straight Pak Sau is almost like the punch, except your palm will be open insteadof a fist. The idea is the collapse your opponent’s arm against his torso so he can’t useit again.Figure 16: Demonstrating the straight Pak Sau.The side Pak Sau will be used to block attacks coming from outside attacks. Startingfrom the Wu Sau, move your Pak Sau in the direction your palm is facing, going nofurther than your shoulder width.
Chapter 219Figure 17: Demonstrating the side Pak Sau.Putting Them TogetherYou should now know the crucial hand movements used to perform the first part ofSiu Lim Tau. You may use some of these movements a little differently than theprevious modules describe, and you will use some of these movements again in laterchapters. When doing the following movements, you must go slowly as you arebuilding on your structure which provides an excellent workout for your legs.1. Begin by getting into your stance.2. Bring your left elbow towards your center.Figure 18: Beginning the next part of Siu Lim Tau.3. Punch straight with your left hand.
20How to Perform Siu Lim TauFigure 19: Performing the straight punch.4. Open up your palm vertically.a. Keep your fingers pointing straight out.Figure 20: The man opens up the fist.5. Turn your palm to the left until the palm is horizontal.
Chapter 221Figure 21: The Sifu is readying to perform the Huen Sau.6. Perform the Huen Sau.7. Close your fist and return your left arm to the side.a. Repeat Steps 1-7 for the right arm.8. Take a deep breath from your stomach.9. Open up your left palm and slowly bring your elbow to your center, forming aTan Sau.a. As you do this, excel slowly until you’ve formed the Tan Sau.Figure 22: The Sifu finishes making the Tan and readies his Huen Sau.10. From the Tan Sau position, make a Huen Sau.a. Instead of a fist, form a Jut Sau.b. Position the tip of your fingers just below your throat.
22How to Perform Siu Lim TauFigure 23: After the Huen Sau, the Sifu snaps his hand into Jut Sau.11. Inhale slowly and at the same time bring your Jut Sau towards your chest tothe Wu Sau position.12. Lower your Wu Sau until the tip of your fingers is at the bottom of your neck.13. Repeat steps 8-9, except you will replace the Tan Sau with a Fook Sau.a. The Fook Sau should be at the same angle as your Tan Sau.b. Perform these steps three more times and then end with your hand inWu Sau Position.Figure 24: The Sifu returns with a Fook Sau instead of a Tan Sau.14. Pak Sau to the right shoulder.
Chapter 223Figure 25: The Sifu makes a Pak Sau to the right shoulder.15. Return to Wu Sau position.16. Pak Straight out.Figure 26: The Sifu makes a straight Pak Sau.17. Perform the Huen Sau (Ch. 2).18. Repeat for the opposite side.By now, you should know how to perform the first part of Wu Gung Kung Fu’s version ofSiu Lim Tao. Remember to practice these slowly and use a mirror to compare yourstance to the photos within this manual. You are trying to improve your breathing andlower body muscles. When you and your instructor think you are ready, move onto thenext chapter.
24How to Perform Siu Lim Tau
Chapter 3Chapter 3:The Second Component25
Chapter 327Chapter 3:The Second ComponentIntroductionIn this chapter, we will cover the second part of Siu Lim Tau which you will learn forWGMAA. This will be the longest chapter, as we will cover a notable number of handmovements. You will learn more movements because you don’t have to practice asslowly. We will cover some hand movements from the last chapter, and some of thehand movements are not necessarily actual techniques, but rather placements ortransitions. Even though you don’t have to perform these actions slowly, you may wantto consider doing so anyway to perfect the movements.MovementsThe following hand movements will be covered in this chapter: Palm Strikes Gum Sau Dan Sau Behind The Back Grab Lan Sau Fuun Sau Double Jum Sau Outside Jut Sau Gaan Sau Bong SauPalm StrikesIn this part of Siu Lim Tau, you will use three open-handed palm strikes. The first iswhat you learned from chapter 2, which can double as a Pak Sau.
28How to Perform Siu Lim TauFigure 27: Note how similar the straight palm strike is to the straight Pak Sau.The Second is the corner palm strike. You perform this by turning your fingers out tothe side (for instance, the left hand’s fingers will be pointing towards the left), butessentially works the same as the first palm strike. You will also use this to strike theribs in the form.Figure 28: Demonstrating the corner palm strike.The third is the underhanded palm strike, which can only be used from a Tan Sau.From the Tan Sau, you will strike upwards towards the jaw with the heel of yourpalm.
Chapter 329Figure 29: Demonstrating the underhanded palm strike.Gum SauThe Gum Sau is similar to the Pak Sau, except the pressure is forcing the armdownward. It is also used to cover an attack aimed at your lower torso. You will usethe Gum Sau in front of your facing downwards (keep your palm facing parallel tothe ground and pointing to the tip of your triangle, which you established whenmaking the horse stance).Figure 30: Demonstrating Gum Sau with both arms.Dan SauThe Dan Sau looks similar to the Gum Sau; the difference is the position of the palm.Place your arm to the side of your torso and keep your palm parallel to the ground.
30How to Perform Siu Lim TauFigure 31: Demonstrating a Dan Sau.Behind The Back GrabYou will use this for when an opponent attacks you from behind.1. Place your hands behind your back, with the wrist at the top of your tail bone.Figure 32: Getting ready to grab.2. Grab the air with clenched fists and pull upwards, which simulate grabbingthe attacker’s genitals.
Chapter 331Figure 33: Finishing the grabbing action.Lan SauThe Lan Sau is a two-armed parry that is barred in front of your body at the samelevel as your torso. It can be used to protect your upper body and head and lead intodifferent joint locks and throws. When forming the Lan Sau,1. Bring your left arm and right arm up to should level simultaneously.2. Finish with the left arm placed on top of the right arm.a. Both sets of fingers will touch below and above the elbows.b. When doing the form, you will start off in this position and thenreverse the order of the arms.Figure 34: Demonstrating a proper Lan Sau.Double Jum SauThe Double Jum Sau is also a two-armed parry used at the same angle of the upperTan Sau. When in a situation where your arms are at chest level or above, you use itto apply downward force to cover the attack, starting with the elbows until both armsare at the upper Tan Sau angle. Your hands and fingers will also be pointing at the
32How to Perform Siu Lim Tausame direction as your arm, with the bottom of the arm and palm facing towardsyour right and left respectively.Figure 35: Demonstrating a proper double Jum SauFuun SauThe Fuun Sau is the first attack you will learn that isn’t a straight attack or with yourelbow lined up to your center. Wing Chun practitioners use it to chop the opponentin the throat and neck area. The Fuun Sau is one simple movement; yet it actuallycontains three movements.1. Start off in the Lan Sau position for a frame of reference.a. You may remove the bottom (right) arm just for the purpose of thisdrill. Otherwise the following pictures will feature both arms.2. Throw your elbow(s) to the side so that it is lined up with your shoulders.Figure 36: Demonstrating the first part of Fuun Sau.3. Allow the arm to follow so that it too is on the same plane as your shoulder.
Chapter 333Figure 37: The arms are in the proper position, but the hands are not.4. Flick your hand outwards, so that the fingers are bent as far as they canbehind the arm.Figure 38: Demonstrating the full Fuun Sau.Outside Jut SauThe outside Jut Sau is used to either parry inside or outside attacks with the edge ofyour wrist. The difference with the outside Jut Sau and a regular Jut Saw is the shapeof the hand and placement of the hand. To form this, start off in a regular Jut Sau.Then, move your forearm and hand to the left or right (depending on which arm)until it is shoulder width. Curve your hand so that the fingers are pointing towardsyour center, and keep the thumb attached to the side of the hand.
34How to Perform Siu Lim TauFigure 39: Demonstrating an outside Jut Sau.Gaan SauThe Gaan Sau is another move that doesn’t require your elbow to align with yourcenter. It is a low slicing motion used to deflect upper cuts and other attacks aimedtowards the lower torso.1. Drop the elbow first and let the forearm follow.2. Make sure your forearm is slightly curved.Figure 40: Demonstrating a proper Gaan Sau.Bong SauThe Bong Sau, which is translated to flanking arm, is a parry that can be used to rollattacks off the arm to set up traps. Setting up the Bong Sau is essentially the BongSau except the elbow won’t align with your center.1. Start off with your Tan Sau with either hand.2. Take the tip of your hand and rotate the hand as you would a screw towardsthe inside of your torso.
Chapter 3Figure 41: Beginning the turn into Bong Sau.3. Stop when your palm is facing directly in front of you (towards youropponent).a. Make sure your elbow is at shoulder level and your palm should beslightly lower.Figure 42: Demonstrating a proper Bong Sau.35
36How to Perform Siu Lim TauPutting Them TogetherNow that you have learned the above hand movements, you are ready to take on thenext part of Siu Lim Tau.1. Start off up to the final point from Chapter 2.2. Take the left arm and form a Dan Sau next to your left side3. Do the same for the right arm on the right side.Figure 43: Both hands have finished forming Dan Sau.4. Move your hands so that they are behind your back with the wrist at the baseof your tail-bone.a. Make sure the hands are connected side by side.5. Make a grasping motion with both hands and pull up to the lower back.6. Bring your hands back to the front with a circular motion going in front of you(around your torso).a. Your hands should be at chest level.Figure 44: The hands are in position to perform Gum Sau.
Chapter 3377. Then, push downwards to make a gum Sau with both hands.Figure 45: Demonstrating Gum Sau.8. Bring both hands up at the same time, forming the Lan Sau as I showed youabove.Figure 46: Sifu brings his arms up to Lan Sau.9. Make both arms simultaneously perform Fuun Sau.a. Both arms will end at the same level of height.
38How to Perform Siu Lim TauFigure 47: Sifu performs the Fuun Sau with both arms.10. Return your arms back to Lan Da, this time with the right arm on top of theleft.Figure 48: Sifu returns to Lan Sau except he reverses the placement of the arms.11. Drop both arms into a double Jum Sau.
Chapter 3Figure 49: Demonstrating double Jum Sau.12. Make a small semi-circle going the direction of your shoulder’swidth until both hands are touching side by side, palms up.a. The circular motion will require the palms to the width ofthe body no further than shoulder width.b. Your arms will actually form two Tan Saus at the end.Figure 50: Sifu is in the process of the circular movement.13. From the palms up position, make another small semi-circle,this time going outwards from your torso.a. Your hands will return to the same position from thestart.14. Make one final semi-circle side to side so that your palms arefacing the ground.39
40How to Perform Siu Lim TauFigure 51: Sifu is in position to thrust his fingers.15. Thrust your fingers outwards so that your hands are at thestarting position of making the stance.Figure 52: Sifu finished thrusting his fingers.16. Lower your hands straight down until they are about as low asyour hips.a. Your arms will be angled diagonally downwards.b. Make sure your arms are bent upwards.
Chapter 3Figure 53: Sifu has his hands lowered similar to Gum Sau.17. Raise your hands again, back to the same level as step 14.a. Bend your hands so that the fingers are pointing straighttowards the ground.Figure 54: Sifu keeps his hands bent forward.18. Return your arms to the side just like in the final step of makingthe stance.19. Make a Wu Sau with your left hand and then Pak Sau to theright side.41
42How to Perform Siu Lim TauFigure 55: Sifu makes a Pak Sau to the side.20. Make an outside Jut Sau to your left sideFigure 56: Sifu demonstrates the outside Jut Sau.21. Make a corner palm strike aimed directly in front of you aboutchin level.
Chapter 3Figure 57: Sifu demonstrates a corner palm strike.22. Do the Huen Sau (Ch. 2) movements and then return your handto the side of your torso.23. Repeat steps 18-23 with your right side.24. Form a Tan Sau with fingers at neck level.25. Make a Gaan Sau.Figure 58: Sifu demonstrates a proper Gaan Sau.26. Return to Tan Sau except with the fingers now as high as yourchest.43
44How to Perform Siu Lim TauFigure 59: Notice how the Tan Sau is slightly lower.27. Perform the Huen Sau and end with a corner palm strike to theribs.Figure 60: Notice how the corner palm strike is aimed at the ribs.28. Perform another Huen Sau and then return your hand to theside.29. Repeat 24-27 with the right side.30. Make a Bong Sau with your left arm.
Chapter 3Figure 61: The Sifu demonstrates a Bong Sau.31. With the same arm, drop back into a Tan Sau at neck level.Figure 62: The Sifu rolls back to Tan Sau.32. From the Tan Sau position, make an underhanded palm striketowards the chin level.45
46How to Perform Siu Lim TauFigure 63: The Sifu strikes with the heel of his palm.33. Perform the Huen Sau (Ch. 2) and return to the side.34. Repeat with the right side and close up your stanceYou have now completed the next step of Siu Lim Tau. The next chapter will be shorterbut trickier. When you and your Sifu think you are ready, feel free to move onto the nextchapter.
Chapter 3Chapter 4:The Final Component47
Chapter 449Chapter 4: Final ComponentIntroductionYou are now ready to take on the last portion of the Siu Nin Tau form. This chapter willbe shorter than the last; however, we will cover one of the trickiest parts for most Win
The centerline is the founding principle of Wing Chun. In Wing Chun, we visualize an imaginary line that starts from the top of our skulls that extends between our legs to the ground. We stress the importance of the centerline because our vital organs vary up and down the center line. We al