Transcription
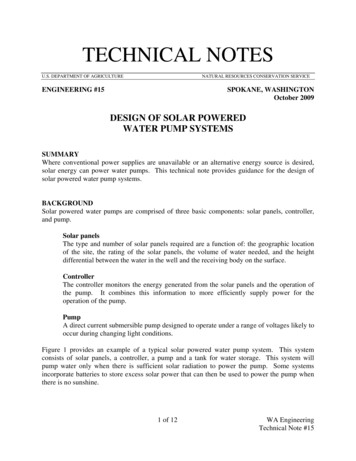
10SOLAR WATER HEATINGSite-built air-heating collectors that aretilted are a natural for domestic water heatingin addition to their primary space heatingfunction. Installation of the subsystem and itscontrols is simple, and since the collectors canbe used throughout the year, the payback onmoney invested in a water-heating system willbe rapid. It is important to note that liquidmedium collectors do perform better forheating water than do air heaters per squarefoot of collector. But air-heating systems thatare sized for space heating neverthelessperform admirably for summertime waterheating because they incorporate a largecollector area. If you have limited spaceavailable for a collector and no plans for solarspace heating, a liquid-based collector systemwill probably be the better selection. But ating installations, a large, air-basedcollector system is the best choice. We havealso found that a smaller (75 to 100 squarefeet), tilted air-heating collector can in someregions be used cost-effectively to heat wateryear-round with no space-heating mode. But,again, their cost-effectiveness is not universal;in some cases liquid heating systems will be thebest choice. The following design guidelinesrefer to both space/domestic hot watercombinations and domestic hot water onlysystems.Design Guidelines forAir-to- Water SystemsCollectors for hot water systems need todeliver higher temperatures than when thecollectors are used for space heating. Air that is100 to 120 F is adequate for heating a room, butusable hot water temperatures are 120 F andabove. It is a good idea to use a selectivesurface absorber in an air system that includeswater heating, especially in the hot half closestto the outlet. Double glazing can be more costeffective than single glazing, especially whereoutside temperatures are low. Double glazing isa good idea if you can't build as large acollector array as you would like, because ofspace limitations or whatever. A smaller,double-glazed collector will perform better thana single-glazed unit of the same size, especiallyin colder climates. More insulation behind thecollector and around ductwork is helpful inminimizing heat losses from the airstream. Theairflow rate in the water-heating mode shouldbe lower than it is in the space-heating mode.The blower should be sized to deliver 2 cfm persquare foot of collector (at sea level) rather than2 ½ cfm, so there will be a higher temperature risethrough the collector.Most importantly, there needs to be a goodexchange of heat at the air-to-water heat239Made available with generous permission of the authorswww.BuildItSolar.comDIY Solar Projects
240THE COMPLETE HANDBOOK OF SOLAR AIR HEATING SYSTEMSsystems used with air heaters, one with an induct coil-type heat exchanger and one with atank-type heat exchanger. Both exchangers aretypes of air-to-water heater exchangers.Since a storage tank is necessary in allwater-heating systems, it makes sense to exchange the heat at the tank itself. Tank-typeexchangers can offer as much transfer surfaceas in-duct exchangers; they are easier to buildexchanger so that a maximum amount of heatis taken out of the moving airstream and the airreturned to the collector is as cool as possible.Since a collector's efficiency decreases when itoperates at high temperatures, it is usuallymost cost-effective to use solar air to preheat atank of water to 100 to 120 F and to feed awell-insulated water heater with this preheatedwater. Figure 10-1 shows two110 v AC blowerdifferential thermostatpressure-andtemperaturerelief valvesmixing valvehot to houseexisting water heaterbackdraft damper(tightly sealing)----- cold supplydraingate valvedifferential thermostatin-duct heat exchanger pressure-andtemperature relief valveshot to houseexisting water heatermotorized damperstank sensorcold supplyFigure 10-1: Systems that heat water with solar-heated air use an air-to-water heat exchanger. Two types ofexchangers are shown: the finned-tank type and the in-duct type. We prefer tank types because they are easierto build and install and because they are simpler, less expensive and more trouble-free than in-ductexchangers. This illustration shows simple valving and plumbing arrangements for both types of systems. Atightly sealing damper is necessary with an in-duct exchanger to prevent cold air from trickling through theductwork and possibly causing the exchanger to freeze and burst. Never locate an in-duct exchanger directlybelow collectors; the preferred location is at the top of a vertical duct run.Made available with generous permission of the authorswww.BuildItSolar.comDIY Solar Projects
242THE COMPLETE HANDBOOK OF SOLAR AIR HEATING SYSTEMSis large. The collector can be small if the solarheater is located in a sunny, warm area and thetank is small. Larger collectors (or those withselective surface absorbers) will provide agreater annual percentage of hot water smallercollectors a smaller percentage. As a rule ofthumb, figure that 1 to 11/2 square feet ofcollector will heat 1 gallon of storage. (Seechapter 3 for information on sizing a hot watersystem for your site.)120 square feet) can provide nearly all of afamily's summertime hot water needs. Theback-up water heater can in some cases bebypassed and turned off for the summer. It isalso possible to tie a hot water preheat systeminto a solar system with storage.Using a Large Collectorfor Heating WaterIf your installation has a large, tiltedspace-heating collector, it can be used veryeffectively for preheating water in summer,which means shortening the payback period ofthe system. The low speed on a two-speedblower can be used, or a second, smaller blowercan be installed, or a light-dimmer switch canbe used to slow the blower speed. Any of theseoptions will provide a slower, highertemperature flow of air to the air-to-water heatexchanger. If your space-heating collector issmaller than 1 1/2 to 2 square feet of collectorper gallon of water in the preheat tank, aproperly sized exchanger should be able to takeenough heat out of your collector to keep itadequately cool in summer, and the air can bemoved in a closed loop with no need forventing to the atmosphere. If the collector islarger than this, it should be fed with outside airand the air coming off the exchanger exhaustedto the outside after it heats the water. This willprevent the collector from reaching undesirablyhigh temperatures while still providing plentyof hot water. It doesn't mean that the heatexchanger is inadequate; a large space-heatingcollector can truly overwhelm (and overheat)the storage tank, and it must be vented to theatmosphere.In many cases larger collectors (at leastMade available with generous permission of the authorswww.BuildItSolar.comDIY Solar Projects
SOLAR WATER HEATINGand are less expensive. No pump is required, asit is with an in-duct exchanger. Plumbing issimplified, and there is little danger of freezingproblems.In-duct exchangers do have their applications, however, especially in cases where it isdesirable to exchange heat in a small spacenear the collector or storage. Well-insulatedpipes are run to the storage tank, and there isno need to cut large holes and install ductworkto the tank.241Isolating the ExchangerIt is important to isolate the heat exchangerfrom the collector at night to prevent heat loss.This is especially important when using an induct exchanger. Water won't be movingthrough the exchanger coils at night, and even atiny trickle of very cold air from the collectorcan freeze the stagnant water and possibly burstthe exchanger. These exchangers should belocated high in the system or at the top of a heattrap to prevent this. A tightly sealing motorizeddamper is also a must.Tank-type exchangers won't freeze up, butthey can lose a lot of heat at night if they aren'tproperly isolated. A well-built backdraftdamper is usually sufficient, but your systemmay require a motorized damper if there is noheat trap on the ductwork from the collector.SizingThe amount of hot water needed by afamily will vary somewhat, but a good rule ofthumb is 20 gallons per person per day foraverage use habits. Thus an average family offour would use about 80 gallons of hot waterevery day. The solar preheat tank for thissystem should be sized at 80 gallons to providethe existing water heater with all the preheatedwater the family will need. Families that arevery energy conscious (10 to 15 gallons perperson per day) can get by with a tank systemthat is considerably smaller than this. In anycase, the tank should be glass or epoxy-glasslined and should last at least as long as thewater-heater tank (a new one lasts 10 to 15years).A collector for a hot water system needs tobe sized for the tank and for the climate. Itneeds to be large if the installation is in acloudy, cold location or if the preheat tank.Made available with generous permission of the authorswww.BuildItSolar.comDIY Solar Projects
242THE COMPLETE HANDBOOK OF SOLAR AIR HEATING SYSTEMSis large. The collector can be small if the solarheater is located in a sunny, warm area and thetank is small. Larger collectors (or those withselective surface absorbers) will provide agreater annual percentage of hot water smallercollectors a smaller percentage. As a rule ofthumb, figure that 1 to 11/2 square feet ofcollector will heat 1 gallon of storage. (Seechapter 3 for information on sizing a hot watersystem for your site.)120 square feet) can provide nearly all of afamily's summertime hot water needs. Theback-up water heater can in some cases bebypassed and turned off for the summer. It isalso possible to tie a hot water preheat systeminto a solar system with storage.Using a Large Collectorfor Heating WaterIf your installation has a large, tiltedspace-heating collector, it can be used veryeffectively for preheating water in summer,which means shortening the payback period ofthe system. The low speed on a two-speedblower can be used, or a second, smaller blowercan be installed, or a light-dimmer switch canbe used to slow the blower speed. Any of theseoptions will provide a slower, highertemperature flow of air to the air-to-water heatexchanger. If your space-heating collector issmaller than 11/2 to 2 square feet of collector pergallon of water in the preheat tank, a properlysized exchanger should be able to take enoughheat out of your collector to keep it adequatelycool in summer, and the air can be moved in aclosed loop with no need for venting to theatmosphere. If the collector is larger than this, itshould be fed with outside air and the aircoming off the exchanger exhausted to theoutside after it heats the water. This will preventthe collector from reaching undesirably hightemperatures while still providing plenty of hotwater. It doesn't mean that the heat exchanger isinadequate; a large space-heating collector cantruly overwhelm (and overheat) the storagetank, and it must be vented to the atmosphere.In many cases larger collectors (at leastFigure 10-2: When a large collector that is built forspace heating is used for heating water in thesummer, it is important to prevent collectoroverheating. This is accomplished by adjustingmanual dampers so that the collector is fed withoutside air. Wiring is also modified so that a smallerblower operates off a thermostat sensor on theexchange tank. If the collector is small relative tothe heat exchange tank, the air can run in a closedloop without overheating the collector. Ideally thissystem will also have a slower airflow through itduring the summer, by changing speeds on theblower. A slower flow rate gives a higher outlettemperature needed for domestic hot water.Made available with generous permission of the authorswww.BuildItSolar.comDIY Solar Projects
SOLAR WATER HEATINGOne- Tank SystemsMost electric water heaters and hot waterstorage tanks have top and bottom heatingelements, or fittings to allow for them. If thetank-type heat exchanger is made with this typeof tank, the solar exchanger is placed on thelower portion of the tank and the bottomheating element can be disconnected. The topelectrode remains operable to bring the water toa usable temperature if there isn't enough solarinput.If your existing water heater is wearing outand you want to install a solar water heater, youcan replace it with a larger, single tank. Thiswill save space over a two-tank system. Therewill be less tank surface area to insulate andless heat loss.Most residences could benefit from a 120gallon tank unless both the collector and consumption of hot water is small (less than 20gallons per person). The collector for a singletank system with a 120-gallon tank should besized to heat between 80 and 120 gallons ofwater. Since large gas-fired tanks tend to bepretty expensive, this system requires anelectric backup. Two-tank systems are a betterchoice if your existing gas water heater is ingood shape or if your hot water consumption ishigh (the construction of a one-tank system isdiscussed later in this chapter).Tank PlacementThe ideal place for a tank is next to theexisting water heater, and if you have a largeutility room/washroom or basement, you're inbusiness. Plumbing can be kept to a minimumand there will be easy access to control valvesand drains. Another good choice is a closet orother storage area near the existing waterheater.If you don't have room in your living area,a well-insulated preheat tank can be243placed in a crawl space or attic. Getting a largetank into these locations can be difficult, soplan ahead. A tank in the attic must be placedso that its weight is spread over three to fourceiling joists. Placing it over an interior loadbearing wall is also a good idea. Along withstrong supports an attic tank needs a drip pan incase of leaks. The pan has a hose that is run to adrain or outside the house. Don't hesitate toconsult a structural engineer if you are in doubtabout an attic installation. When it's located in acrawl space, a tank can sit horizontally in awooden cradle on top of cinder block supports,although it is usually necessary to pour a smallconcrete pad to support this arrangement sinceany settling of the tank can cause plumbingleaks. You'll need at least 2 1/2 feet of verticalclearance for the tank and its cradle.There is a slight advantage in placing thesolar tank vertically rather than horizontally,because hotter water can be taken off the top ofa vertical tank due to heat stratification in thetank. A horizontal mount can provide preheatedwater of nearly the same temperature, however,if you use a side port on the tank to take waterfrom the top of the tank.Thermostatic ControlsA differential thermostat (DT) is the key togetting hot water from your preheat tank. A DTturns on the blower and sends solar heat to theheat exchanger (in-duct or tank type) only whenthe collector is warmer than the tank. In the lateafternoon, when the tank is hot and the collectoris warm, some usable heat will be lost from thecollector, but a DT will ensure that the collectorisn't delivering air that would cool the tank atthis time. An 18 F on differential and a 5 F offdifferential thermostat is about right for thisthermostat.There are differential sensors available.Made available with generous permission of the authorswww.BuildItSolar.comDIY Solar Projects
244THE COMPLETE HANDBOOK OF SOLAR AIR HEATING SYSTEMSthat screw directly into a plumbing fitting onthe bottom of a tank. If you use a tank-typeexchanger, a standard sensor can be used. Itshould be put in an immersion well low on thetank, or be attached to the outside of the bottomof the tank (cold end) with a glob of silicone, ina location that is easy to reach should the sensorfail. The silicone must not insulate the sensorfrom the tank, and the sensor must be insulatedfrom the airflow cavity so that it reads the tanktemperature, not the air temperature.More complicated systems, such as a twomode system, will require an additional thermostat to act as a shutoff when the tank reachesa desired temperature. This is typically a remote bulb thermostat called an aquastat(Grainger's no. 2E146). The sensing bulb isplaced inside an immersion well that extendsinto the tank, allowing the thermostat to bereplaced without draining the system. Thethermostat should be mounted so that it sensesthe tank temperature near the bottom of thetank. In a two-mode system where waterheating is the first priority, this aquastat willtrip a relay when the tank is heated up, andsolar air will be diverted to another point ofuse. If water heating is the second priority, thisadditional thermostat may not be required, butas a safety measure all systems that have waterheating as the last priority should have anaquastat installed to turn off the blower if thetank ever reaches 180 F (see Appendix 2 for awiring schematic for a two-mode water-heatingsystem).Demand-Type Water HeatersThe best back-up tank for a solar waterheating system may be no tank at all. Tanklessor demand-type water heaters are becomingmore popular for back-up water heat-ing. Widely used in Europe and Japan, theseelectric and gas-fired units heat water onlywhen a hot water tap is opened. They candeliver as much hot water as a conventionaltank-type water heater with as little as one halfthe fuel consumption.Demand-type water heaters operate in oneof two ways. The type suitable for a solarbackup heats water to a preset temperature. Ifthe solar tank is delivering water that's hotenough, this type won't turn on. If the solarpreheat tank is cool, the water from it will beraised to the preset temperature with acorresponding fuel savings from the solar input.The type that isn't suitable for solar backupproduces a set temperature rise in the waterflowing through it. This is fine if the heater isalways being fed water from the water main at aconstant temperature, but it's not effective whendealing with the wide range of temperaturesencountered in water from a solar storage tank.Using a demand-type water heater for solarbackup not only saves fuel, but it alsosimplifies the solar plumbing. There is no needto include the possibility of bypassing andturning off the back-up heater when solar issupplying all the hot water needs. If the propertype of tankless heater is used, it won't come onif the solar is hot enough.Demand-type water heaters cost abouttwice as much as conventional water heaters,but fuel savings, especially when used inconjunction with a solar system, can make thisfigure look insignificant. One factor contributing to the present high cost of these unitsis the fact that most brands are manufacturedoverseas and have limited distribution in NorthAmerica. In the next few years look for moreunits to be manufactured domestically and soldat lower prices. A plumbing schematic appearslater in this chapter.Made available with generous permission of the authorswww.BuildItSolar.comDIY Solar Projects
SOLAR WATER HEATINGBuilding an Air-to- Water HeatExchange TankA satisfactory and inexpensive air-towaterheat exchanger can be built using an 80- or 82gallon hot water storage tank. This is a simpleproject even for those of you who are new toplumbing. A storage tank has much in commonwith a conventional water heater. It is aninsulated tank enclosed in a sheetmetal jacket.To build the exchanger, first remove the jacketand the insulation. The jacket is replaced aroundthe tank, and solar-heated air is blown into thespace between the jacket and tank. The airreturns to the collector in a closed loop.Efficiency can be increased if fins are attachedto the outside of the tank to increase its surfacearea and promote better heat transfer. In themost effective tank design these fins are formedby attaching bands to the tank and bending outtabs to create a porcupine tank.Materials82-gal glass-lined water storage tank (withoutheating elements)plumbing fittings for the tank12 to 17 sheet-metal bands, 4" wide and equalin length to the tank circumference 361/2" *8 sheet-metal screws12 to 17 1 %" * 10 bolts with 2 washers eachsilicone (2 tubes)pressure-and-temperature relief valve (20,000Btu/hr)Labor2 people @ 3 or 4 hoursConstruction Steps 300) without heating elements. A smallersystem with less than 80 square feet of collectorcan utilize a smaller tank. A tall tank will havemore surface area for heat transfer than a short,squat tank, so buy the tallest tank available. Wesuggest buying a new tank rather than using arecycled water heater because you never knowhow much life an old water-heater tank has leftin it. Do not use a galvanized tank; it'll have amuch shorter usable life.Consult the plumbing schematics in thissection to plan your fittings. Most storage tankshave plenty of ports to choose from. Removethe jacket and loosen all of the fittings on thetank. (They will be difficult to loosen after thefin bands are attached.) Remove the screws (ordrill out the pop rivets) that hold the roundjacket end caps on both ends of the tank. Set thetank on its side and pull off the ends. If the tankis insulated with fiberglass batts, pull these outand remove the jacket in one piece. If the tank isinsulated with foam, as most new ones are, slitthe jacket lengthways using a saber saw with ashort (1-inch), metal cutting blade. Dig out theinsulation as you peel the jacket off. If foaminsulation is stuck to the jacket, tank or endcaps, scrape it off with a chisel and use a wirebrush to clean the surface.Before attaching the bands to the tank, liftit up and set it vertically onto the bottom endcap with insulation under the concave bottom ofthe tank. Center the tank over the end cap, andrun a large bead of silicone around the bottomof the tank to seal off any perforations in theend cap. Let the silicone cure for a day or twobefore moving the tank or putting the jacketback in place. Later, when moving the tankaround, don't rest the tank on the edge of thebottom end cap, to avoid disturbing this seal.Prepare the TankLocate and purchase a new 82-gallon,glass-lined hot water storage tank ( 270 toMade available with generous permission of the authorswww.BuildItSolar.com245DIY Solar Projects
246THE COMPLETE HANDBOOK OF SOLAR AIR HEATING SYSTEMSPrepare and Install the BandsIf, for example, the tank has 2 inches ofinsulation between the tank and the jacket, thefin bands required for it should be 4 incheswide. The tabs are cut to extend 1 1/2 inches fromthe tank. If your tank had thicker originalinsulation, use wider bands, but be sure andleave a 1/2-inch gap between the jacket and thetab ends, or the tank will have excessively highstatic pressure. The bands should be as long asthe circumference of the tank plus 2 inches forfastening the ends together at the attachmenttabs (see figure 10-3).Install the first band before making the restso you will get a feel for things. Wrap it aroundthe tank and bend up both ends 1 1/4 inches at agO-degree angle to form the attachment tabs.When the band is held tightly around the tank,these tabs should be about 1/2 inch apart. This isa critical measurement. Remove the band anddrill 1/4-inch holes in both tabs. The edge of thehole should be about 1/8 inch from the bend inthe tab. Cut 11/2-inch-deep slits in both sides ofthe band every inch. Try to make the slitsopposite each other. Don't bend out the heatexchange tabs yet. Run a 1/4-inch bead ofsilicone down the center of the band that will beattached to the tank. The silicone eliminates anyair gaps between the tank and the bands.With help from an assistant carefully position the first band on the lower portion of thetank. Pull it tight and have your helper hold it inposition while you bolt the two attachment tabstogether. Use l1/4-inch *10 bolts with a washeron both sides. Bolt the band on very tight, andthen bend up the tabs at alternate 50-degreeangles (see figure 10-3). If you have used theproper amount of silicone, a small amountshould ooze out around most of the edges. Thissilicone at-tachment should be as thin as possible, and thereshould be no air gaps between the band and thetank. Silicone is not a great heat conductor, butit is the best material (at a reasonable price) forattaching the fins. We have attached bands usingheat-conducting compounds such as ThermonCement but have found that it is more difficultto work with. These compounds also don'tcompress as well as silicone when the bands aretightened, so there is more material between theband and the tank, which results in poor transferof heat.Plan ahead when placing bands near tankports, and cut off or bend over tabs wherenecessary. Place the bands as closely together aspossible (the more the better) while stillallowing yourself room to bend up the tabs.If your system requires an aquastat thermostat, install the "well" for it to a fitting highon the tank. If you are using a plug-type sensor(thermistor) for a DT, install it in a low port onthe tank. A regular surface-mount thermistorcan be put in an immersion well on the tank orbonded to the tank, near the bottom.Install the Jacket and BootsWrestle the jacket back onto the lower endcap and secure it in one or two places withsheet-metal screws. If you had to split thejacket, cover the joint with a strip of sheet metalor join the two edges with S-clips. Finishattaching the jacket to the bottom cap withscrews about every 8 inches.Cut an 8-inch-round hole near one edge ofthe top end cap and another in the jacket nearthe bottom side of the tank. Install short sectionsof 8-inch duct to these holes, with four tabsoutside the jacket and screwed to it and theother tabs bent over the inside. The tabs will bedifferent lengths on the lowerMade available with generous permission of the authorswww.BuildItSolar.comDIY Solar Projects
SOLAR WATER HEATINGboot since you are attaching a round boot to around tank. Slide the boot through the 8inchhole on the side of the tank, and mark it with afelt-tipped pen before snipping thetabs so they will fit snugly together.Place the top end cap on the jacket so thatthe 8-inch hot inlet extension is more or lessopposite the lower, outlet extension. Se-Made available with generous permission of the authorswww.BuildItSolar.com247DIY Solar Projects
248THE COMPLETE HANDBOOK OF SOLAR AIR HEATING SYSTEMScure the top end cap to the jacket with screwsabout every 8 inches. Don't silicone-seal seamsat this point.If you are using an air sensor probe foryour differential thermostat, put it in the immersion well, or attach it to the tank with a globof silicone at this point. There should be anaccess hole through the jacket around a fittingat the bottom of the tank.be fabricated on a flat surface from litho platesor galvanized sheet metal. Allow for a 2-inchoverlap on the sides, and build the lid by cuttingtabs in a round, flat sheet. Another possibilityfor covering the insulation is to wrap it inaluminized Mylar or polyethylene. Hold this inplace with wire, and silicone or staple theseams together.Horizontal TanksPressure- Test, Seal and Insulate the TankSet the tank on some bricks where it willbe finally located. Plumb the tank to a watersupply and fill the tank. As the storage tankfills, the air in it will force its way into theexisting water heater. The air will bubble upfrom the bottom of the water heater and blowout an open hot tap in the house. This may stirup the sediment in the bottom of the waterheater so your hot water will be brown for acouple of hours until the sediment settles. Thiscan be avoided if a fitting at the top of thestorage tank can be opened while filling, tobleed off the air.Once the tank is filled and pressurized,check for water leaks. Then silicone-seal theseams at both end caps and the vertical seam inthe jacket, if it was split. Cut sheet-metal coversfor all unused holes through the jacket, andsilicone and screw these into place. Seal aroundall plumbing penetrations. The jacket must becompletely airtight. The tank must also be verywell insulated. Wrap 6-inch insulation aroundand on top of the tank and secure with wires.Also insulate around the bricks under the tank.Make sure the pressure-and-temperature reliefvalve is long enough so that an overflow ofwater won't soak the insulation.After the tank is insulated, it may be desirable (but not necessary, for appearance only)to place a jacket over the insulation. This canIf your tank will lie horizontally, leave thetabs against the tank in two vertical rows 18inches apart. Securely silicone six shortMade available with generous permission of the authorswww.BuildItSolar.comDIY Solar Projects
SOLAR WATER HEATINGsections of 2-by-2-by-1/8-inch channel over thetabs and to the tank after all of the tabs areinstalled. Use duct tape to hold the channel inplace until the silicone cures. These sectionswill rest on the cradle that supports the tank soplan their placement carefully.To mount a horizontal tank, build awooden cradle from 2 x Bs or 2 x 10s thatsupports the tank in three places and thatextends halfway around the circumference ofthe tank. Set the tank in the cradle, and fill anygaps between the tank and cradle with siliconebefore filling the tank with water. If the tankand cradle are placed in the attic, locate themso their weight (80 gallons equals 700 pounds)is distributed evenly over a load bearing wall orseveral joists. When placing249the tank in the crawl space, set the cradle on a3-inch reinforced concrete pad.DribblersWhen building a horizontal tank, it is agood idea to build a dribbler for the cold incoming line. This is a capped, 3-foot section ofcopper pipe with holes drilled in one side. Itconnects with the incoming cold line located atthe bottom of the tank. The holes in thisextension are pointed at the bottom of the tankwhen installed so that cold water entering thetank doesn't stir up the entire tank and reducetemperature stratification. The dribbler is madeby reaming out the ridge on a 1/2- to 3/4-inchcopper flush bushing so a 1/2-inch pipe willslide through it. This
do-it-yourself combination space-heating/ water-heating installations, a large, air-based collector system is the best choice. We have also found that a smaller (75 to 100 square feet), tilted air-heating collector can in some . www.BuildItSolar.com DIY Solar ProjectsFile Size: 1MBPage Count: 17

