Transcription
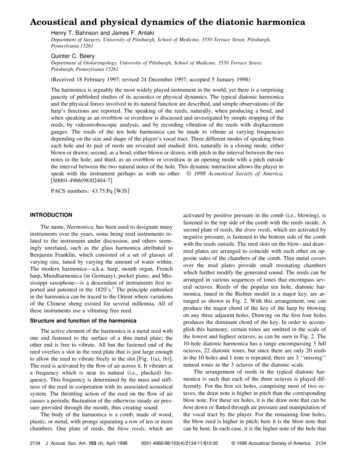
123Homemade HarmonicaMaterials: two large popsicle sticks, two rubber bands, one toothpick,paper, scissorsPreparation: Gather all materials needed.Instructions:1. Cut out a piece of paper so that it is the same length and width asyour craft stick.2. Place the paper onto one of the craft sticks.3. Place the other craft stick on top and wrap one rubber band aroundan end.4. Cut the toothpick using your scissors to match the width of the craftstick. You will need two pieces the same size.5. Put your cut toothpick between one of the craft sticks and the pieceof paper, run it down until it is next to the rubber band and then pushit in so that none of it is sticking out.6. Put the other toothpick in the same position at the other end and thenfinally wrap the final loom band around the other end.1Your harmonica is ready to go! Try is out. How does it sound? Try playingdifferent tunes!Cooking: America Flag Snack*CAUTION: Wash hands for 20 seconds before and after this activityMaterials: graham crackers, cool whip, blueberries, strawberries,butter knife, platePreparation: Make sure your fruit has been washed before eating.Instructions:1. Using your butter knife, cut your strawberries into smaller pieces.2. Place your graham cracker on your plate.3. Spread a layer of cool whip or whip cream on your graham cracker.4. Using your blueberries to represent the star section of the Americanflag, place a few of them in a square in the top corner of yourcracker.5. Using the strawberries to represent the red lines on the flag, placethem in rows across your cracker. Leave space between each linefor your cool whip to represent the white lines on the flag.Make enough to share with your family! Enjoy your refreshing anddelicious treat rmonica/
223Virtual Field Trip: Air Force OneMaterials: internet access, paper, pencil, marker, website:https://www.youtube.com/watch?v IIrTmJCFIr8Preparation: Preview video.Instructions:Have you heard the term “Air Force One” before? If not, what do you think it refers too? Let’s learn moreabout it!141. Before you take a virtual tour of a retired Air Force One airplane, visit the link above. Watch the shortvideo that explains the term Air Force One and its history.2. As you watch the video listen for the following:- How and why the term “Aire Force One” came into existence.- What other terms do they refer to for when the president fly’s in other various aircrafts?- What lettering do they use on the outside of the aircraft? What other features are on the outside ofthe aircraft? What colors are included on the outside?3. When you finish watching the video, take the 3D tour of a retired Air Force One aircraft here:https://my.matterport.com/show/?m Tua6JBtMwjP4. As you take the virtual tour think about the following:- What do you see that is unique to this airplane on the inside?- If you have been on a plane before, what is similar? What is different?- What did you find the most interesting?In the video, they talk about key features on the airplane like lettering and symbols (American flag,presidential seal) and where they are located. Draw your own Air Force One and include the markings theydiscuss in the video.
323Dinosaur National MonumentMaterials: internet access, website: https://youtu.be/PoCN4Lo9LkkPreparation: An adult will help with the internet. Preview the video.Instructions:Go to the website for the Dinosaur National Monument virtual tour.1As you listen to the video, listen for answers to these questions: When was the monument established? Who was the president responsible for it? Where is it located? What states does it span? What is the most popular attraction? What is your opinion of why this is? What are some other attractions that are accessible from theUtah entrance? What does the Colorado side feature for attractions? What created the massive canyon that can be reached by the trailleading from Echo park? Why do you think this area is called Echo Park? What is a popular activity in the canyon? How could you plan a trip to this area?4Google Earth: Dinosaur National MonumentMaterials: paper, pencil, printer, internet access, website: https://www.google.com/earth/Preparation: An adult will help with the internet. Preview website.Instructions:Go to the website and click “Launch Earth.” What location does the page open to? What do you see when youzoom in closer? Do you recognize anything?Look on the toolbar to the left of the screen. What button should you click to search for another location? You aregoing to the Dinosaur National Monument, so what should you type into the search? What do you think mayhappen if you don’t include the full name of the location correctly?Now that you have checked you have the location name correct, enter the search, and watch what happens. Canyou describe what happens to the image? What do you see on the top right of the screen? What do you see onthe bottom right of the screen? What can you explore using these tools?Can you locate the Yampa River and the Green River that are mentioned in the video? What else can you findnearby?Describe what you would like to do if you were to go visit this area. Write a short story, illustrate a picture, createa sculpture, or make a video about it and share it with friends and family.More information About Utah Dinosaurs:National Geographic - https://youtu.be/IYjx8oacID8 Discover Dinosaur Utopia: Utah - https://youtu.be/qKsTk34qVCkInformation for the Junior Ranger Program: ranger.htmFor more fun activities, download and print - Junior Ranger Dinosaur pload/DINO-Junior-Ranger-2016-for-web.pdf
423PARA-‘SHOE’-TEMaterials: 2 shoes, plastic shopping bag per pair of shoes, 4 towels, open spacePreparation: Place 4 towels in a row about a foot apart. Start with the first towel about 5 – 7 feet away.The distance used should depend on ability. Make it far enough to be a challenge, but not so far that it istoo frustrating. Knot the plastic shopping bag handles to the top and bottom of the shoe lace area of oneshoe.Instructions:The goal is to toss a shoe towards the target and see how quickly you can capture all four towels.The second shoe is the starting marker. Use an underhanded throw to launch the shoe with the parachutetowards a towel. If it lands on the towel, run and grab the towel, return to the starting point, and try againfor the next towel. Repeat until you have all four towels.14Discuss: What effect does the shopping bag have on how the shoe travelsthrough the air?Variations: Compete in a relay manner with multiple family members. Findnew ways to tie the shopping bag onto the shoe to make it fly better.Credit: from Project Phys Ed. – Drew Burris PE TeacherShoe tying tutorial in under a ter WalkMaterials: 2 pairs of shoes per player, place markers for starting and ending points, optional: timerPreparation: Set up a starting point and a goal.Instructions:The goal of this game is to race while walking on your hands and feet, bear crawl-style. It is extra silly whenthere are shoes on your hands!Set up a starting point and a goal. Gather as many people as possible. Race to the finish!Switch it up by switching shoes and wearing the wrong size on your feet.Variations - 10 Different Animal Walk Exercises: https://safeshare.tv/x/ss5ef37285deafb#
523Science: Bright Farms Virtual TourMaterials: internet access, website:https://vimeo.com/410603232?utm campaign 5370367&utm source affiliate&utm channel affiliate&cjevent 519c3b7db7e811ea81db018f0a24060bPreparation: Preview video.Instructions:1. Watch the video at the link above. Listen carefully as he shows you aroundBright Farms and explains their process for growing produce.2. Listen for the following information: How many pounds of produce can they grow in a year? What gear do they wear when working at the farm? What is a foot bath? What is step 1 in the growing process? What is Hydroponics? What do they use to plant their seeds? What is the largest seed they plant? What is germination? Where do they transplant plants after germination happens? How often do they ship to grocery stores? What touches the plants while they are growing? Where is this Bright Farms located?1Cardboard Roll AnimalsMaterials: cardboard rolls, paints, paintbrush, thick paper, markersPreparation: Prepare a space to paint.Instructions:This fun craft will have you make animals out of cardboard rolls! Followthe steps below and get creative as you make your own animals!1. Paint your cardboard roll to represent the animal you choose to make!You will begin by painting the base for your animal. This could be thecolors to represent their fur or feathers.2. After the paint dries, add eyes and any other details to your animal!3. Lastly, fold down the top of your cardboard roll. This will create thelook of ears for your animal!4. If your animal has a tail, use the thick paper to cut out a tail shapeand glue it to your cardboard roll.If you have extra cardboard rolls, you can make multiple animals!This Photo by Unknown Author islicensed under CC BY‐NC‐ND
Homemade Harmonica Materials: two large popsicle sticks, two rubber bands, one toothpick, paper, scissors Preparation: Gather all materials needed. Instructions: 1. Cut out a piece of paper so that
