Transcription
The Crafted ClassroomThe Crafted Classroom, the Museum’s Teacher Training Institute, is supported bygenerous grants from Citigroup Foundation and the Rose M. Badgeley ResiduaryCharitable Trust.Craft DiscoverySupported by generous grants from New York City Department of Cultural Affairs, RoseM. Badgeley Residuary Charitable Trust, and ConEdison.
Museum of Arts & Design40 West 53 Street New York, NY 10019Ph: 212.956.3535Fax: 212.459.0926www.madmuseum.orgDear Educator,We are delighted that you have scheduled a visit to Radical Lace & SubversiveKnitting. When you and your students visit the Museum of Arts and Design, you willbe given an informative tour of the exhibition with a museum educator, followed by aninspiring hands-on project, which students can then take home with them. To makeyour museum experience more enriching and meaningful, we strongly encourage youto use this packet as a resource and work with your students in the classroom beforeand after your museum visit.This packet includes topics for discussion and activities intended to introduce the keythemes and concepts of the exhibition. Writing, storytelling and art projects have beensuggested so that you can explore ideas about the exhibition in ways that relate directlyto students’ lives and experiences. Please feel free to adapt and build on thesematerials and to use this packet in any way that you wish.We look forward to welcoming you and your students to the Museum of Arts andDesign.Sincerely,Aliza BoyerSenior Manager ofSchool, Youth &Family ProgramsLisa LitwinEducation DepartmentAssistantRachel Farmer andZack DavisArtist Educators
Table of ContentsIntroduction The Museum of Arts and Design3 Helpful Hints for your Museum Visit4 Radical Lace & Subversive Knitting5 History of Lace & Knitting6 Pre-Visit Activities8Featured Works Barbara Zucker: Lillian’s Face FlowingLiz Collins: Illuminated VeinsAlthea Merback: Ancient Greek PulloverDave Cole: Knit Lead Teddy BearBennett Battaile: HistoryHenk Wolvers: Material StudiesCat Mazza: KnitoscopeScreen Shot IIShane Waltener: Auntie Peggy Has DepartedElena Herzog: UntitledCal Lane: UntitiledHilal Sami Hilal: Untitled (detail)Edward Mayer: Drawing In131415161718192021222324Classroom Activities Activity 1, Grades K-2: Small-scale/Large-scale Line SculptureActivity 2, Grades 3-5: Deconstruct, Reconstruct:An Adventure in Lace and KnittingActivity 3, Grades 6-8: Re-inventing Shape with Knitting and LaceActivity 4, Grades 9-12: Lace-like InstallationsGlossarySelected BibliographyWebsites for Radical Lace & Subversive Knitting Artists26293134374243
Museum of Arts & DesignThe Museum of Arts and Design has been functioning as an internationalresource center for craft, arts and design since 1956. Through itscollections, exhibitions, programs and publications, the Museum serves asa forum for critical debate concerning the nature of craftsmanship and theengagement with the process that links materials, techniques, forms,patterns and concepts in all creative works.How does a museum work? Administration: The team led by the Director of the Museum determines the programs,plans and philosophy of the Museum. It also raises funds to realize the Museum’sgoals and works directly with the Board of Governors, which guides the Museum’sfunctions. Education: This team provides the interactive interpretation of the objects on viewthrough the educational programs designed for children, adults and families who visitthe Museum. This team also creates and disperses written educational materials oncurrent and upcoming exhibitions and provides tours for diverse audiences. Curatorial: This is the team, led by the Chief Curator, that works together to decidewhich exhibits will be shown, how they will look, what artwork is to be included, and howthey are to be interpreted. Registration: Led by the Registrar, this team arranges the safe handling of art to beplaced in an exhibition and maintains the permanent collections acquired by a museum. Development: This team collects the financial resources for the Museum fromindependent donors, foundations and corporations. Public Relations/Marketing: This team publicizes the Museum’s exhibitions andprogramming with advertisements and media exposure. The Store/Retail: This team is responsible for maintaining, protecting and selling themerchandise in the Museum’s store. Facility Maintenance: This is the team that allows the day-to-day operations of amuseum to continue: from the lights being turned on, to the safety of all who enter thebuilding. Security Guards: This is the team most often seen in a museum, because its maintask is to protect the artwork from harm so that in the future people will be able to seethe same objects as seen in a museum today. They also are helpful to visitors whohave a variety of questions.
Museums are places where we can learn about the past, present, andfuture of the world around us. The diversity of knowledge is endlesswhen the habit of museum exploration is formed at an early age.We look forward to welcoming your group into our galleries.Helpful Hints for your Museum VisitWhile visiting the exhibition try to use all your senses. Notice the way the pieces aredisplayed. Are there any specific groupings of pieces you can distinguish? If you enjoylooking at one piece more than others can you explain why?Here are some questions and suggestions to think about as you move around theexhibition:I.What can be objectively observed?a. What is the physical description? Measurement, weight, materials used,articulation of materials b. What iconography, if any, is used? Designs, words, diagrams c. What are the object’s formal design characteristics? Lines, shapes, forms,color, texture II.What would it be like to interact with this piece of art? How would you handle,lift, display it?a. How would the piece of art feel, move, and sound?b. What does the piece do? Does the piece have a function? How would thefigures move if they were alive?c. What is our emotional response to this beaded figure? Fear, joy,indifference, curiosity, revulsion, excitement III.What is in the mind of the artist? What are the viewers thinking and feeling?Use creative imagining and free association.a. Review all of the above information and consider what was going on inthe world when the work was produced to develop possibleinterpretations of the piece. (i.e. theories and hypotheses)b. Do the figures tell a story? Does the piece have underlying political orsocial meaning? (i.e. understanding and visual thinking)c. Develop a program to investigate the questions posed by the materialevidence. (i.e. researching)“I try, when I go to museums, to do two things. One, to appreciate what I'm looking at, just tosee it, but then to isolate a few pieces that I really look at in detail. I study and I draw not withany purpose in mind. I mean, I don't go looking for specific things. I just try to be open-mindedand keep my eyes open. It's interesting that every time I go back to the same place, I seesomething different.” Arline M. Fisch (1931- ) Brooklyn, New York
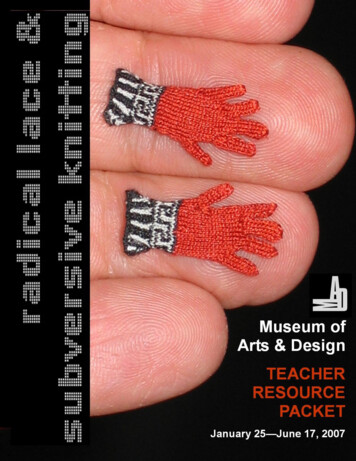
Radical Lace & Subversive KnittingJanuary 25, 2007 through June 17, 2007Radical Lace & Subversive Knitting explores the phenomenal rise to prominence ofknitting, crocheting and lace making in the work of contemporary artists from aroundthe world. Blow torches, fiber optics, digital technology, shredded currency, video,chocolate, and even knitting needles the size of telephone poles are hallmarks in thework of these artists, who have reinvented traditional handcrafts through theirintroduction of new materials and unorthodox techniques.Radical Lace & Subversive Knitting showcases approximately 40 works, ranging fromobsessive miniatures to architectural interventions, video installations, and performanceand participatory pieces—nearly half of which were created especially for theexhibition.“These are not your grandmother’s crocheted doilies and knitted legwarmers,” saidChief Curator David McFadden. “The traditions that have defined both knitting and lacemaking for centuries are suspended in this exhibition. Each piece bears a political orpersonal message, invites public participation, and encourages the viewer toreconsider how fiber functions on a tangible, spiritual and aesthetic level.”The works selected for Radical Lace & Subversive Knitting do not readily accept neatclassification within the traditional triad of art, craft and design, nor do they fulfillstereotypical expectations of either knitting or lace making. The 27 featured artists areboth male and female, of various ages and nationalities. What brings them together is avision that uses fiber to explore line and space, marrying traditional methods, such asknitting needles and crochet hooks, with new technologies and materials that includerubber, lead, glass, industrial wire shelving and found objects. For many of theseartists, Radical Lace & Subversive Knitting will be their first major New Yorkpresentation.Radical Lace & Subversive Knitting reveals affinities in content and structure amongthe works on view, which are subdivided into six thematic groupings: Corporeal Constructions explores works that reference the human body, bothindirectly through imagery or content and directly through costume and dress.Matters of Scale examines the way in which size and scale can influence the viewer’sunderstanding of the work.Light Constructions features works that explore the transmission of light as an integralelement in the work, or consider “lightness” in materials and visual effects.Interconnections highlights the work of artists who extend their engagement withmaterials and process to the public, either through performance or participatory artmaking.Creative Deconstructions presents the work of artists who use subtractive rather thanadditive processes to arrive at their final work.Beauty of Complexity presents the work of artists who use fiber in ways that resonatewith the connections between making art and writing texts.
KnittingKnitting is the act of forming a fabric by looping a continuous fiber.It is one of several techniques that can be used to turn thread into cloth.History of KnittingThe exact geographical origin cannot be specified but the craft is believed to have beendeveloped B.C. The oldest remnants of seemingly knitted pieces are socks. Theseearly pieces were produced by a technique similar to knitting called Nålebinding.The first references to true knitting in Europe were in the early 14th century. The purlstitch was unknown at this time and it was necessary to knit in the round and then cut itopen. The first reference to the purl stitch dates from the mid-16th century.Men were the first to knit as an occupation. The first knitting trade guild was started inParis in 1527, establishing the occupation as male dominated for centuries to come.1With the invention of the knitting machine, knitting by hand became a useful but not anessential craft, and its practitioners were increasingly female.With the industrial revolution most wool spinning and cloth manufacture was done infactories. More women were employed to operate the machinery, rather than producetheir home spun and knitted items.During WWII, wool was in short supply. The British wartime government encouragedwomen to unpick any old, unwearable, woolen items in order to reuse the wool. Theyalso issued knitting patterns for people to make items for the Army and Navy to wearduring the winter.After the war years, knitting had a huge boost as greater colors and styles of yarn wereintroduced. Many thousand of patterns fed a hungry market for fashionable designs inbright colors. Girls were taught to knit in schools, as it was thought to be a useful skillnot just a hobby.The popularity of knitting slowed in the 1980’s. The craft was seen as old fashion andchildren were rarely taught to knit in schools. This was partly due to the increasedavailability and low cost of machine knitted items that meant that consumers couldhave a sweater at the same cost as purchasing the wool and pattern themselves oroften for far less.The 21st century has seen a knitting revival. This is part due to the internet phenomenaof blogging and internet groups and lists, fueling the development of an internationalknitting community. Manufacturers and designers have looked for new ways tostimulate interest in knitting. They have created novelty yarns. There has also beenresurgence in popularity of natural-fiber yarns, replacing acrylic yarns which have longdominated the market, and also aided in the decline in the popularity of knitting.(From http://en.wikipedia.org/wiki/History of knitting)1www.en.wikipedia.org/wiki/knitting, p.2.
LaceWhat makes lace so different from other textiles? Its most striking characteristic is thatit is full of holes. These holes are formed as the lace is made and not cut outafterwards. For this exhibition the definition of lace is a structure made out of somesort of fiber that allows light to pass through it.History of Lace“Of many Arts, one surpasses all. For the maiden seated at her work flashes thesmooth balls and thousand threads into the circle, and from this, her amusement,makes as much profit as a man earns by the sweat of his brow, and no maiden evercomplains, at even, of the length of the day. The issue is a fine web, which feeds thepride of the whole globe; which surrounds with its fine border cloaks and tuckers, andshows grandly round the throats and hands of Kings.” – Jacob Van Eyck, 1651.The birthplace of lace making is generally recognized as Flanders and Italy. Lacemaking is an ancient craft but true lace was used very little until the time of Elizabeth.A true lace is created when a thread is looped, twisted or braided to other threadsindependently from a backing fiber. All lace was handmade and very, very expensive.As an example, to manage to buy enough lace for a large ruff a man might have to sella few acres of land to raise enough money. Lace was treasured and passed down infamilies. It was a symbol of wealth and status.Lace was developed from whitework where threads of the ground were either pulledout or cut away from between the embroidered parts. The embroidery became everfiner until hardly anything was left of the ground fabric.One of the reasons that lace became popular was due to fashion. Lace was designedto replace embroidery in a manner that could with ease transform dresses to follow thedifferent styles of fashion. Unlike needlepoint, lace could be sewn and unsown fromone material to be replaced on another. The constant drive to make clothing moreattractive is responsible for the creation of the finest and most costly trimming now callclassic lace. By the time of Charles I lace was used extravagantly for both costumeand interior decorating. By the mid-17th century, lace making had become anestablished industry.With the advent of the industrial revolution and the invention of machines to make lace,the price and prestige of lace dropped. By the 20th century, lace has lost its status andis mainly used to make and decorate lingerie.Today both knitting and lace take on new meanings. They are not necessarilyfunctional objects anymore and not necessarily just a female activity.
Pre-VisitClassroom Activities
Pre-Visit Activity 1: Finger KnittingSuggested level: All agesObjectives:a) Introduce students to fiber arts.b) Introduce students to finger knitting. Finger knitting is knitting with one’s ownfingers in place of traditional knitting needles.Vocabulary: Casting StitchesMaterials: Yarn (preferably a thick yarn) ScissorsFinger Knitting Step by Step Instructions (These easy to follow instructions are byJanelle Masters from the www.knitty.com website):Casting OnBegin with your left hand facing you (assuming you are right handed. For lefties, beginwith the right hand facing you). The tail of your yarn(s) should be placed in the areabetween your left thumb and index finger. Begin casting on by wrapping the workingyarn over the index finger, behind the middle finger, over the ring finger, etc. Once youwrap around the pinkie, continue back the other direction until your reach the indexfinger once again. Go around the index finger a second time and wrap all fingers in thesame manner slightly above the wraps from the first pass. Try to maintain loose wraps.You not only need to be able to work the stitches, you also don't want your lovelyfingers to turn blue.
The First RowBeginning at the pinkie, lift the wrapped yarn on the bottom (nearest your palm) up andover the tip of the finger, keeping the top wrap on the finger as you pass the lower wrapover and off. Remember that in these photos, I'm using two strands held together asone. Continue this process along the hand until your reach the index finger. Be carefulas you lift the stitch on the index finger since the bottom wrap is actually the tail of youryarn. (Just don't let it get away from you!)All Following RowsFor the next row, and every other row, begin by once again wrapping the working yarnaround all four fingers as in step one. Next, each lower stitch is passed over the upperstitch and lifted off the finger as in step two. This two-step process continues until thework is the desired length. When making scarves, I like to knit about eight to ten feet offinger knitting and double-up the strips around the neck. Should you need to put downyour finger knitting sometime during construction, I recommend sliding the workingstitches onto a ballpoint pen and hooking them under the paper-clippie thing at the top.(This is a needle-free area, remember?) When ready to begin again, place the workingstitches back onto the fingers with the stockinette side of the work facing the back ofyour hand.
Binding OffOnce the chosen length is reached, the knitter must bind off the working stitches. Onthis last row, do not wrap the fingers. Each finger should have only one loop on it. Liftoff the loop on the pinkie finger and place it onto the ring finger. On the ring finger, liftthe bottom loop up and over the top loop and off the finger. Next, place the remainingloop from the ring finger onto the middle finger and repeat the lifting off/moving overstep until one loop remains on the index finger. To finish, simply cut a tail and pass itthrough the remaining loop, pulling it tight.These easy to follow instructions by Janelle Masters from the www.knitty.com website.
Featured Works
Post-VisitClassroom Activities
Activity 1: Small-scale/Large-scale Line SculptureSuggested Level: Grades K-2Time: 1-2 sessionsObjectives: Students will understand that sculptures can be both large-scale and small-scale. Students will understand that paper can be changed in a variety of ways to makethree-dimensional sculpture. Students will understand that materials such as paper can be connected in avariety of ways to create a sculpture. Students will understand that sculptures can be composed using a wide varietyof lines. Students will be able to create both an individual small-scale sculpture and agroup large-scale sculpture and understand that scale makes a difference both inthe art-making process and in the viewing of the sculpture.Materials:For large group sculpture - Paper cut into wide strips Large cardboard base Scissors GlueFor small individual sculptures - Paper cut into very thin strips Small cardboard (or thick paper) bases Scissors GlueVocabulary: Sculpture Three-dimensional Large-scale Small-scale Miniature Fold Bend Curl Twist CrumplePart One:Review your visit to the Museum. Did you see any art objects that were made out of lines? What kinds of lines didyou see? What materials were these lines made out of? What was the largest work of art that you saw? What was it made out of andhow was it connected together? How did it make you feel to be next to it? What was the smallest work of art that you saw? What was it made out of andhow was it connected together? How did it make you feel to be next to it?
Part Two:Introduce materials they will be using to create a sculpture: paper How can we change this paper to make it three-dimensional? (fold, bend, curl,twist, crumple) How can the paper be joined together without the use of glue or staples?Part Three:Introduce two concurrent projects:1. Create a small-scale individual sculpture using very thin paper strips.2. Create a large-scale group sculpture using wide paper strips (a few students at atime can be pulled over to work on this – with eventually all students having aturn to add to the sculpture).Alternative (time permitting): Another option would be to break the art making into two sessions. One sessioncould be focused on creating a small-scale sculpture. The following sessioncould be focused on creating a large-scale group sculpture. Referring back to knitting -- the process of using a single fiber (or line) to createa structure. Challenge students (in either the individual or group sculpture), to first connectall of their paper strips into one long line, then create their sculpture using thissingle line. Or they could first change their individual paper strips (by folding,curling, twisting, etc.) then connect them into one long line, turning this into acollaborative sculpture. The cardboard bases can be used to attached sculptures (or parts of thesculptures) to. Another option—space permitted—is to connect sculptures to thewall or floor. (Watch the shadows as they develop!) Students could then compare and contrast their experience working individuallyand as a group, and discuss the resulting sculptures made by using severalshorter lines versus one long line.Part Four:Place all sculptures on one table (you can break this into two parts if the large-scalesculpture got very large) and gather students around for a reflection. Discussionquestions could include: What kinds of lines do you see? How did people change the paper? Did you have any surprises while you were working or now while you arelooking? How was your experience working small-scale different than your experienceworking large-scale? Did you use your body differently? Which scale do youprefer? How is your experience of looking at a small-scale sculpture different thanlooking at a large-scale sculpture? Do any of these sculptures remind you of sculptures you saw during yourmuseum visit? If so, how? How was your experience working on a group sculpture different from workingon your individual sculpture? Did you get any new ideas from working with otherpeople? Do you prefer to work individually or as part of a group?
Suggestions for Further Investigation: Have students write about their sculptures. This could be as simple as comingup with a title for their work, or could consist of a longer written description, ahow-to, or a personal narrative account. Lines and shapes are the building blocks of art. A discussion of line can just aseasily be carried over to drawing, painting, printmaking and collage. Linesconnect together to make shapes. You could talk about the shapes that werecreated in students’ sculptures through inter-connecting lines. A discussion oflines and shapes can also be applied to learning handwriting skills (i.e. thealphabet is made up of simple lines and shapes). Notice the scale of things in your classroom. What is large-scale, what is smallscale and why? For instance, how are students’ desks different than teachers’desks and why?Artist work that can be used as a reference from this TRP are Bennett Battaile: History(p. 17), Edward Mayer: Drawing In (p. 24), and Hilal Sami Hilal: Material Studies (p. 23)
Activity 2: Deconstruct, Reconstruct: An Adventure in Lace and KnittingSuggested Level: Grades 3-5Time: One to two class periodsObjectives: To explore the possibilities of object making by dismantling and rebuilding toachieve or invent lace. To begin to identify with creative and expressive values of Lace and Knitting. To understand the value of working as a community. To apply the principles of repetition, pattern, and unity, in order to makereference to something else.Materials: Small cardboard boxes Scissors Hole punches Balls of yarnVocabulary: Lace Knit Deconstruct Scale Reference Social Community Repetition Unity Sequence CollaborationPart One:Lace can be thought of as a fiber that allows light to pass through it. Considering thisdefinition, just about anything could be transformed into a lace-like material. Knitting isaccomplished by interlocking loops as members or parts. What are some examples of lace you see in everyday life? What are some new possibilities of using lace? How can we combine the use of lace with the process of knitting? What are some possible results?Part Two:Provide each student with a small cardboard box. Using scissors, and/or their hands,orchestrate a session where students are deconstructing the box by cutting andshredding. Students should wind up with several pieces of cardboard of variousshapes and sizes. Instruct students to also use hole punches to pierce holes in eachindividual shape.Part Three:Divide students into small groups of three or four. Distribute a ball of yarn to eachgroup. Instruct students to create a new structure out of the cardboard using only theyarn as a mending agent. Let the groups work out creative solutions. Remember: Trynot to interfere with suggestions of what they should make.
Part Four:Bring groups together to present their final objects. The results should very drastically. What were some of the problems that occurred and how were they solved? How did the overall scale change? What type of object resulted from our collective “knitting” with the yarn? How would you display your new object? How does light affect your object? Did any accidents occur that changed the final outcome? What would you change about it?Suggests for Further Investigation:Students could continue this project by assembling all of their individual group projectsinto one large-scale piece or the process of deconstruction and reconstruction could berepeated with each individual project. This would allow students to explore the infinitepossibilities of this process.Artist works that can be used as a reference from this TRP are Liz Collins: IlluminatedVeins (p. 14), Althea Merback: Ancient Greek Pullover (p. 15), Bennett Battaile: History(p. 17), and Elena Herzog: Untitled (p. 21)
Activity 3: Re-inventing Shape with Knitting and LaceSuggested Level: Grades 6-8Time: One to Two class periodsObjectives: To create and apply a cross disciplinary method to art making by usingcontemporary lace and knitting works of art as inspiration. To explore various elements and principles of design through collage, payingattention to the qualities of knitting and lace work (open, flowing, translucent,pattern, etc.). To use unconventional methods such as tearing, ripping and scribbling to inventboth 2- and 3-dimensional shapes. To follow directions for creating symmetrical geometric shapes. To understand and apply the use of organic and geometric shapes. To learn to improvise and use spontaneity while creating.Materials: Collage materials such as magazines, wallpaper, fabric, etc. Cardboard Pencils Rulers Scissors Glue sticks Colored construction paper (include white) Markers of various colors and sizesVocabulary: Positive and negative space Composition Geometric shapes Organic shapes Pattern Symmetrical Asymmetrical Spontaneous Cross-disciplinaryPart One:Have students use spontaneous actions to create a wide variety of shapes using paper.This can be accomplished by making random marks and lines on paper, tearing orcutting the paper along those marks, and piecing them back together. This results invarying areas of positive and negative space, which become highly inventive shapesand patterns that can be both organic and geometric.Procedure: Distribute cardboard to students. See to it that each student has a 12” x 12”sheet of cardboard. Use a ruler and measure out the dimensions that canaccomplish this. Use a pencil and a ruler to divide the square up into 12 1”squares. Once all the squares have been outlined, divide each squarediagonally from the upper left corner to the lower right. Instruct students to setthe cardboard aside.
Students will use markers to create random lines on their white sheet of paper.Encourage them to fill the paper with lines by scribbling, and using the ruler.Including the white paper, students will begin by tearing construction paper intovarious shapes and sizes. They will then compose a collage on the cardboardsquare (be sure to use the unmarked side) using the torn shapes and the gluesticks.Once the collage is complete, have students cut along the lines drawn on thebackside of their cardboard. The result should be 24 equilateral triangles.Collect all of the pieces from the students in one container.Part Two:Students will be given 24 randomly selected triangles from the source. They will thenbe asked to compose a new image within the guidelines of a 12” x 12” square.Part Three:Students should display their work as a group and discuss the different ideas behindthe compositions. How many different types of shapes can you point out? Which shapes read positive and which negative? Which shapes are organic? Which shapes are geometric? Is there any indication of texture? How does your composition resemble lace? How did we use mathematics? Point out some areas where accidents or random acts created interestingcompositions?Suggestions for Further Investigation: Combine all of the individual projects to form one mural in the classroom (orpublic space in the school). Consider having the students glue their shapes down to an additional 12”x12”inch board and experiment with new geometric divisions by repeating theprocess. This will allow them to experiment not only with mathe
Writing, storytelling and art projects have been suggested so that you can explore ideas about the exhibition in ways that relate directly to students’ lives and experiences. Please feel free to adapt and build on these . also issued knitting patterns for people to ma