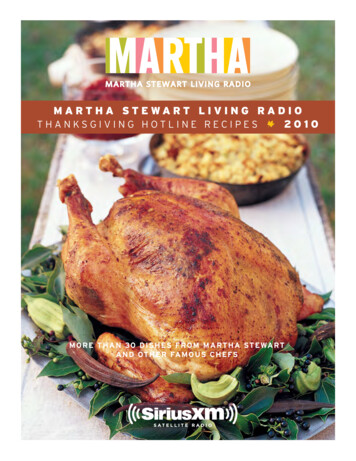
Transcription
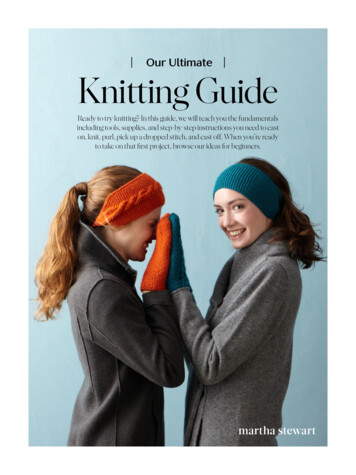
Our Ultimate Knitting GuideReady to try knitting? In this guide, we will teach you the fundamentalsincluding tools, supplies, and step-by-step instructions you need to caston, knit, purl, pick up a dropped stitch, and cast off. When you’re readyto take on that first project, browse our ideas for beginners.
What You NeedTo start knitting, you will need a few basic tools, some yarn, and a pattern. Always c onsult your pattern before purchasingtools and yarn. This is important because the instructions will r ecommend the ideal yarn weight and amount, size of needles,and any additional notions such as buttons or trims.Your knitting stash should include a pair of needles and a skein or two of yarn (as d ictated by your pattern), small s cissors, anda yarn needle for finishing. As you progress in skill, you will have the opportunity to equip your knitting box with additionalsupplies such as row counters, stitch markers, a ball winder, and specialty needles.How to Read a KnittingPatternNeedle SizeConversionsAs a novice knitter, it will take time and experience to decode pattern language withU.S. SIZERANGEMILLIMETERRANGEmeasurements needed.0001.5 mmKnitting patterns may have a series of steps001.7502 mm12.25 mm22.75 mm33.25 mm43.5 mm53.75 mm64 mm74.5 mm85 mm95.5 mmto grasp and stitches won’t slide off as easily.106 mmNeedles are sized by thickness and length.10 1/26.5 mm118 mm139 mm1510 mm1712.75 mmconfidence. Read the pattern thoroughly before you begin knitting, marking sizes andthat are repeated several times across a row.Rather than writing out these steps time after time, symbols such as asterisks (*) andabbreviations are used to save space when indicating repeats or specific stitches. (Referto our glossary at the back of this guide forcommon abbreviations and terminology.)Knitting NeedlesThere are three basic types: straight,When you pause in your knitting project, circular, and double-pointed. Your first pair always make a note of where you are in theof needles will likely be straight — these havepattern so that you don’t lose track of yourstoppers at the ends and are used in flatstitches.knitting. (This is the most fundamental technique that you will learn in this guide:Flat knitting is done by turning your work atthe end of each row, so that the right side andwrong side rows are worked alternatively.)Needles are available in different materials:metal, plastic, wood, and bamboo. If you area beginner, we recommend bamboo needlesas they are less slippery, making them easierThe choice of length is ultimately your preference and choice of pattern — you willfind it easier to handle needles that arenot too long or too short for the numberof stitches required. Needles are sizedby thickness according to the U.S. sizing system or metric system. Refer to the chartbelow for a comparison of both.Our Ultimate Knitting Guide 2
Gauge SwatchesWhat is a gauge swatch? This step ensures that the dimensions of your finished projectwill be correct. A gauge is the number of stitches to be worked over 1 inch of knittingusing a particular stitch, weight of yarn, and needle size. Follow our instructionsto knit a square swatch that measures 6 by 6 inches. To determine the number of stitches you need to cast on for 6 inches of knitting length, multiply the number ofstitches in 1 inch of knitting (specified by your instructions) by 6. Bind off loosely, andlay the swatch flat.Check your gauge by measuring the swatch. Since stitches at the edges tend to curlinward or become misshapen, measure just the inner 4 inches of the swatch. Place atape measure parallel to a row of stitches, and count how many stitches (how manyVs) fall within these inner 4 inches, including half stitches. Divide this number by 4,and compare it with the specified gauge (4 stitches to 1 inch). If there are fewer than4 stitches per inch, your knitting is too loose; use needles a size smaller. If there aremore than 4 stitches per inch, you are knitting too tightly; use needles a size larger.Knitting YarnSkeins of yarn come in all colors, shapes, and sizes. Sohow do you decide which one is perfect for your nextproject? First, refer to the label: this states everythingyou need to know including the yarn’s fiber content,weight, amount, care instructions, suggested needlesize, gauge, and dye-lot number.Yarn is made of interlocked fibers (animal, plant, orsynthetic), and these fibers (referred to as plies) arespun together into thicker strands. The number of plieswill affect the drape, stitch definition, and general feelof the yarn.Fiber content: This is the material of yarn, often inpercentages. (For example, 90% merino wool, 5% alpaca, and 5% cashmere.)Weight: This is the total thickness of yarn, often measured in wraps per inch (WPI). The ply count alsofactors into this and ranges from the finest to theheaviest weights (usually between 1-ply and 14-ply).Amount: This is the total length of yarn, measured inyards and ounces.Care instructions: This provides the necessary information on how to wash and dry your knitted garment.Suggested needle size and gauge: Yarn gauge isspecified by the number of stitches and rows.Dye-lot number: This refers to the color of yarn.When buying in multiples, be sure that the numbersmatch. Even when two balls of yarn appear to be thesame shade, the subtle difference can become clear inthe results.Needles and Yarn WeightThe size of knitting needles used will depend on yarn weight. This is because fine yarns require smaller stitches while bulky yarns requirelarger stitches. An oversized needle for sock weight, for example, willproduce a loose stitch and make the fabric appear transparent. In anyknitting project, the stitches should form a solid yet m alleable f abric (thisis referred to as “stitch fill”).YARN CATEGORY (COMMON TYPES)U.S. NEEDLE SIZEMETRIC NEEDLE SIZELace000-11.5 - 2.25 mmSuper fine (sock, fingering, baby)1-32.25 - 3.25 mmFine (sport, baby)3-53.25 - 3.75 mmLight (double-knitting / light worsted)5-73.75 - 4.5 mmMedium (worsted / afghan / aran)7-94.5 - 5.5 mmBulky (chunky, craft, rug)9-115.5 - 8 mmSuper-bulky (super bulky, roving)11-178 - 12.75 mmJumbo (jumbo, roving)17 12.75 mm Our Ultimate Knitting Guide 3
How to Cast OnTo begin knitting, you will need to create a foundation row of stitches on your needle by casting on.1Make a slipknot by looping yarn intoa pretzel shape, leaving a tail end at2Drape tail of yarn over left thumband working yarn (ball end) over left3With needle, catch the workingyarn that’s on your index finger,least three times the width of whatindex finger. Use your other fingersand pull it through the loop onyou are knitting. Slip knitting needleto catch yarn lengths in left palm.your thumb. Remove thumb fromthrough pretzel shape as shown,Insert needle upward through looploop. Keeping yarn ends securedand pull yarn ends to tighten.on thumb.in palm, reposition thumb, andtighten new stitch on right-handneedle. Repeat these steps until you’ve cast on the required numberof stitches.How to Knit a StitchTo make your first stitch, hold the needle with cast-on stitches in your left hand. Wrap the working yarn around your left indexfinger, and hold it in back of the left-hand needle.1Insert point of right-hand needlefrom front to back into the first caston stitch on the left-hand needle,opening up a stitch.2Catch working yarn with right-hand3Pull yarn through opened stitch.4Slip cast-on stitch off left-hand1234needle.needle while holding middle fingeragainst second cast-on stitch toensure it does not also slip off. Thestitch on the right-hand needleis the newly formed knit stitch. Continue knitting across the cast-onrow. When you have emptied thelast stitch from the left-hand needle(completing a row), exchange needles, returning the needle withstitching to your left hand.Our Ultimate Knitting Guide 4
How to Pick up aDropped StitchIf you drop a stitch while knitting,don’t panic! This is a common mistake.It’s simple to retrieve it with a crochethook.How to PurlThe purl stitch differs from the knit stitch in two fundamental ways: The working yarn is held in the front of the project instead of the back, and theneedle is inserted from the back to the front instead of from front to back.Hold the needle with cast-on stitches in your left hand. Wrap the workingyarn (ball end) around your left index finger, and hold it in front of the work.1Insert point of right-hand needle,from back to front, into the firstcast-on stitch on the left-handneedle, opening up a stitch.1With the knit side facing you, insertcrochet hook, front to back, into loopof dropped stitch.2Lay working yarn over needlefrom front to back by moving leftindex finger downward.2Use hook to catch the first h orizontal“ladder,” and pull it through loop tothe front.3Push working yarn from front toback through cast-on stitch. Slipcast-on stitch off left-hand needle while holding middle fingeragainst second cast-on stitch toensure it does not also slip off.The stitch on right-hand needleis the newly formed purl stitch.As a purl stitch faces you, it lookslike a grain of rice; its reverse sidelooks like a V.3Repeat until all ladders have beenpulled through loop. Place the stitchback onto left-hand needle, with theright side of the loop on the front ofthe needle.To pick up a stitch dropped on a purlrow, turn your work around, and follow the directions for picking upa dropped knit stitch.Our Ultimate Knitting Guide 5
How to Cast OffAlso referred to as “binding off,” thesenecessary steps keep stitches from unraveling once they’re removedfrom the needle.1Knit two stitches. Insert left-handneedle into first stitch; lift stitch upover second stitch and 2Off the needle. Continue knittingstitches in this manner until allstitches have been cast off. Cutworking yarn, leaving a 6-inch-longtail. Pull tail through last stitch tosecure.ProjectsYou have everything you need to take on a new knitting project: a pair ofneedles, several skeins of yarn, and the techniques to pull it off. Now allyou need is a brilliant idea! Start with our favorite projects and patterns forbeginners:3Use a yarn needle to weave tailends of yarn through backs of several stitches, picking up only surface loops.MITTENSHEADBANDNECK SCARFPOUCHESBLANKETOur Ultimate Knitting Guide 6
Stitch Visual DictionaryOur Ultimate Knitting Guide 7
Glossary of Terms* indicates that you repeat directions following and between asterisks as many times as instructed() or [ ] indicates a group of stitches that are repeated as many times as instructedalt an abbreviation for alternateapprox is an abbreviation for approximatelybeg is an abbreviation for begin orbeginningfoll is an abbreviation for f ollow(s)(ing)frogging is the act of unravelingor tearing out knittingbet is an abbreviation for betweeng st is an abbreviation for garterstitch (created from knittingevery single row, resultingin a ridged surface)BO is an abbreviation for bind offinc is an for increase(s)(ing)CC is an abbreviation for contrastcolorcm is an abbreviation for centimeter(s)cn is an abbreviation for cableneedleCO is an abbreviation for cast oncont is an abbreviation for continuedec is an abbreviation for decrease(s)DKdouble knitdpn & dpns are abbreviations for doublepoint(ed) needle or needlesfl is an abbreviation for frontloop or front loopsK or k is an abbreviation for knitk2tog is an abbreviation for knit twotogetherktbl is an abbreviation for knitthrough back loopkwise is an abbreviation for knitwise(which indicates the sidefrom which you will hold yourneedle)LH is an abbreviation for left handor lefthandlp or lps are abbreviations for loop(s)m is an abbreviation for meterM1 & m1 are abbreviations for makeone stitchMC is an abbreviation for maincolorndl or ndl(s) are abbreviations for needle(s)P up is an abbreviation for pick upand purlP and p are abbreviations for purlp2tog is an abbreviation for purltwo together (which indicates purling two stitches togetheras though they were onestitch)pat & patt are abbreviations for patternpm is an abbreviation for placemarkerpr is an abbreviation for p reviousrow or previous roundprev is an abbreviation for previouspsso is an abbreviation for passslipped stitch over (which indicates that you slippeda stitch and then worked oneor more stitches following thatslipped stitch)ptbl is an abbreviation for purlthrough back loop (whichindicates that you pass yourright needle through the backside of the next stitch from leftto right)pwise is an abbreviation for purlwiseR&r are abbreviations for rowOur Ultimate Knitting Guide 8
Glossary of Terms* indicates that you repeat directions following and between asterisks as many times as instructed() or [ ] indicates a group of stitches that are repeated as many times as instructedrem is an abbreviation for remain(ing)rep is an abbreviation for repeatRev st st is an abbreviation for reverse stockinette stitch (which is createdby beginning with a purl row andthen alternating knit and purl rows)RH is an abbreviation for right handor righthandrnd & rnds are abbreviations for round(s)RS is an abbreviation for right sidesk is an abbreviation for skipsk2p is an abbreviation for skip next twostitchesskp is an abbreviation for slip, knit, passslipped stitch oversl is an abbreviation for slipsl st is an abbreviation for slip(ped)stitch (which means to move it fromthe left needle to the right withoutworking it)sl1k is an abbreviation for slip one knitwisesl1p is an abbreviation for slip one purlwisessk is an abbreviation for slip, slip, knitsssk is an abbreviation for slip, slip, slip,knitSt st is shorthand for Stockinette stitchst & sts are abbreviations for stitch(es)tbl is an abbreviation for through backlooptfl is an abbreviation for through frontlooptog is an abbreviation for togetherWS is an abbreviation for wrong side(which indicates the side of theproject that will face inward or maynot be seen)yo2 is an abbreviation for yarn overtwiceyon is an abbreviation for yarn over needle (which indicates to passthe yarn from the back of the workto the front — or from the front tothe back — and laying it across thetop of the needle as opposed tobetween/under needle tips as in ayarn forward.)yrn is an abbreviation for yarn roundneedle (which indicates the sameinstruction as yarn over)wyib is an abbreviation for with yarnin back (which indicates that working yarn should hang down the backside of your knitting)wyif is an abbreviation for with yarnin frontybk is an abbreviation for yarn back(which indicates that working yarnshould be brought from the front ofthe work to the back, passing underneedle tips)yfwd is an abbreviation for yarn forward(which indicates that working yarnshould be brought from the back ofthe work to the front, passing underthe needle tips)yo is an abbreviation for yarn over(which indicates to bring youryarn from back to front — if it was initially in the back — or from frontto back — if it was initially in thefront — under needle tips. Afterdoing so, continue to knit as thepattern indicates)Our Ultimate Knitting Guide 9
Knitting patterns may have a series of steps that are repeated several times across a row. Rather than writing out these steps time after time, symbols such as asterisks (*) and abbreviations are used to save s