Transcription
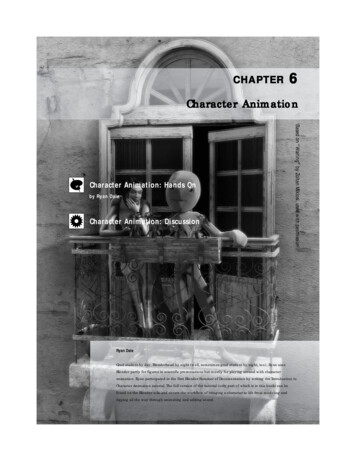
CHAPTER6Character Animationby Ryan DaleCharacter Animation: Discussion‘Based on “Waiting” by Zoltan Miklosi, used with permission’Character Animation: Hands OnRyan DaleGrad student by day, Blenderhead by night (well, sometimes grad student by night, too), Ryan usesBlender partly for figures in scientific presentations but mostly for playing around with characteranimation. Ryan participated in the first Blender Summer of Documentation by writing the Introduction toCharacter Animation tutorial. The full version of the tutorial (only part of which is in this book) can befound on the Blender wiki and covers the workflow of bringing a character to life from modeling andrigging all the way through animating and adding sound.
CHAPTERCharacter Animation: Hands OnIntroductionIn this tutorial, you’ll use some of Blender’s animation tools to create an action: a wave of the arm. This verysimple action will be blended later with a more complex animation.The Action Editor is where you create individual actions: blinking the eyes, nodding the head, a walkcycle, andso on. Later, you can mix the actions in another window called the NLA Editor. While complex “acting” for themain characters in an animation should probably be done in a single Action, the NLA is excellent for buildingvariety in characters that do not hold the main focus of scene.In the “examples” folder on the included disk, find the file called “characteranimation.blend” and open it withBlender.The file contains a fully rigged and skinned character. He’s a little goofy looking and rather dynamic. Let’s callhim Hank.Setting Up Your WorkspaceWhen you first open the file with Hank, you are in the "1-Animation" screen. This is the default animation screenthat comes with Blender, and as it works fairly well, you can use it with some minor adjustments.Default screen layout when opening characteranimation.blendThe Ipo window on the right, which you’ve seen before in Chapter 3, won’t be needed right now. Replace it with anAction Editor window. An Ipo window can only show the keys for one object or bone at a time. When working withcharacter animation, you need to see keys for many bones at once so you can easily adjust and align their timing130From The Essential Blender.Copyright 2007, by The Blender Foundation.Introduction
CHARACTER ANIMATION:relative to one another. This is the Action Editor’s job. As you animate yourcharacter, each bone that receives even a single keyframe appears in the ActionEditor.Creating a WaveChanging the Ipo view to an Action Editor.RMB click on the armature to select it. The first thing you will notice is thatyou can’t see the armature when it is inside Hank’s mesh. How can you workwith it if you can’t see it? One solution would be to just work in wireframemode. That could be handicapping, though, as character animation relies onvisual feedback from the character itself. The better the visualizations of acharacter’s poses are, the better the final animation will be.With the armature selected, check out the Armaturepanel in the Edit buttons (F9). Enable the X-Ray option. Now, the armature is visibleregardless of whether it is inside or outside the mesh.To pose and animate an armature, you need to enter Pose Mode. This can be selectedfrom the main modes pop-up menu on the 3D view header, or with Ctrl-Tab. As thefrequently-used Edit mode is the Tab-key, this is a pretty easy one to remember.Enable X-Ray on theArmature panel.When you enter pose mode, many of the bones of the armature turn gray, while some are yellow. The yellowbones have constraints on them, which you can learn about in Chapter 7.Bone transformations work much like object transformations, using the same methods and hotkeys: manipulators, mouse gestures, and G/S/R. Onedifference you will notice is that sometimes asking for a translation (grab move, G-key), results in a bone rotating instead. Some bones, like the onesin the middle of Hank’s arms and spine, are parts of longer chains of bones. They are not free to translate in space. Instead of simply havingtranslation controls for these bones do nothing, they trigger a rotation instead.Before you begin animating, let’s make the job a little easier. In the Timeline window in the middle of the screen arethe animation playback controls that were covered in Chapter 3. You’ll make use of another one of those controlsnow. Enable the button with the red dot, commonly seen in audio/video devices as the Record button.The Record button to enable automatic keyframing.You have just enabled automatic keyframing, meaning that any bone that moves or rotates will automatically have akeyframe set on the current frame. This will prevent the unfortunately common occurrence of setting a complexpose, then accidentally advancing the frame number and losing it.Creating a WaveFrom The Essential Blender.Copyright 2007, by The Blender Foundation.131
CHAPTERIf you have been changing your user preferences and have enabled the “Avail” option for keying, you will have to set initial keyframes manually withthe I-key. If you haven’t changed the keyframing preferences, then you don’t need to worry about it for now.How to PoseFor the wave, you want to raise the hand and arm into the air, tilting the hand outward a bit. By selecting eacharm bone and applying rotations, you could achieve such a pose, but it would be difficult and rather unintuitive.If you like, try to use RMB selection and R-key rotation on the arm and hand bones to get something like thispose:Very difficult, no? One thing you may have noticed when rotating the bones was thatas soon as you moved them, they turned a bright blue. The blue color is an indication that a bone has at least one keyframe set. Because of the automatic keyframingyou enabled a moment ago, each rotation resulted in a keyframe.RMB select all of the now-blue bones and use Alt-R to clear any rotations you mayhave set.The arm raised to wave.Now RMB on the bone called “hand.l” to select it. It is the first bone of the left handimmediately following the two longer arm bones. On the Armature panel in the Editbuttons, enable the Auto IK option.Auto IK enabled.Use Grab mode (G-key) to move the hand. This time, translating the hand bone pulls therest of the arm around with it, letting you create the pose much more intuitively. Whenyou have the hand close to what looks like a decent pose for the beginning of a wave motion, disable Auto IK.Inverse and forward kinematics are covered in Chapter 7: Rigging and Skinning. If you’ve not worked through that chapter and do not plan to, it’senough to say that IK, Inverse Kinematics, lets you pull an entire chain of bones by moving a target bone, instead of posing each bone individually.You need to adjust the hand a little so it tilts away from the body. Many Blenderanimators prefer to use the manipulators for bone rotations like this, as they giveexcellent visual feedback. If the Transformation Manipulator isn’t showing, enableit on the 3D header, or with Ctrl-Space. When the manipulator is visible, set it toRotation mode.The hand with the rotationmanipulator.With the manipulator set to the default Global mode on the header, it’s not veryuseful. Change it to Normal, which will cause the manipulator to align itself withthe active bone. Now, LMB clicking on any of the manipulator’s orbits andmoving the mouse will rotate the bone along that axis.Although you don’t have to use the manipulators for bone rotations, they certainly can help. If you prefer,continue to use the R-key. When working with hotkeys and bones, you will probably find it most useful to rotatewith the R-key R-key combination to enter trackball mode, or the R-key followed by XX, YY, or ZZ to enter local132From The Essential Blender.Copyright 2007, by The Blender Foundation.How to Pose
CHARACTER ANIMATION:rotation mode with the Alternate Transformation Space set to “Normal”on the 3D header. However, the illustrations in the rest of this chapterwill show the manipulator.Work with the hand in Auto IK mode and bydirectly rotating it until it looks somethinglike the earlier illustration.Now, take a look at the Action Editor. It hasseveral rows, or channels, and each has aname that corresponds to a bone in theThe manipulator set to Rotate Normal mode.active armature. When you select a bone inthe 3D view, the corresponding channel in the Action Editor is selected. Just thesame, RMB clicking a channel name in the Action Editor selects that bone in the 3Dview. In the illustration, the lower arm.l channel is selected.The Action Editor.Notice that some yellow diamonds have appeared within the Action Editor’s timeline. These represent thebones’ keyframes. They are aligned with the vertical green frame indicator that functions like the ones in thetimeline and Ipo windows. Currently you’re on Frame 1, and the animation keys were all added there.Finishing the WaveAdvance to Frame 5, either by LMB clicking in the Action Editor or Timeline, or by pressing the Right Arrow keyfour times.The pose from Frame 1.The new pose on Frame 5.The pose on Frame 5 was created by RMB selecting the middlearm bone and rotating it slightly on its X axis (the redmanipulator orbit).After rotating the bone, look at the Action Editor and notethe following:- Keys were automatically inserted for the arm bones thatwere moved. In this case, only the “lower arm.l” bone wasmoved.Finishing the WaveThe Action Editor after moving the arm bone on Frame 5.From The Essential Blender.Copyright 2007, by The Blender Foundation.133
CHAPTER- No key was inserted for the other arm bones, since they weren’t altered in this frame. It is true that they changedposition, but they were not directly manipulated, and maintain their position and rotation relative to their parentbone further up the chain.- The Frame 1 key for “lower arm.l” is deselected (white) and the new Frame 5 key is now selected (yellow).The keys from Frame 1 for the other bones are still selected, as they didn’t receive new keys. .Bones remain where they are until you tell them otherwise. Since you did not set another key for the “hand.l” bone in frame 5, it will stay in the sameposition as it was in frame 1.LMB scrub the timeline back and forth between Frames 1 and 5 to see the animation. It’s rather basic, and if thatbothers you, feel free to wave with your own hand and arm a couple of times. Watch it in a mirror. Observe howmuch of the motion comes from the shoulder, the elbow and the wrist. Try to see what the extreme positions of theactual motion are. Then, try to use those positions and your other observations to set new keys on Hank to make amore believable motion.Completing the Wave ActionAdvance to Frame 9.You’ll perform the next bit of animation in the Action Editor itself. Like most Blender window types, the ActionEditor uses a common set of selection, transformation, duplication and deletion tools.- A-key to select/deselect all keys;- RMB and Shift-RMB to build selections; and- B-key followed by LMB drag to select an area.You’re going to duplicate the keys from Frame 1 and move the duplicates to Frame 9, copying Frame 1’s pose toFrame 10. Doing so will cause the Wave action to start and end in the same position. To get a better view ofwhat you’re doing, use the mouse’s scroll wheel and MMB-drag to zoom into and position the view of the keys.Perform the following actions:- Deselect all keyframes by pressing the A-key;- Use the B-key to bounding-box select all the keys on Frame 1;- Duplicate the selected keys with Shift-D; and- This should seem familiar — the duplicate keys begin their life in Grab mode.Move the duplicated keys to Frame 9. Don’t worry if you hit Frame 9 exactly or not.The key Snap menu.134With the new keys still selected, press Shift-S, which,as you may remember from Chapter 3, brings up theSnap menu. Choose “Current Frame” from the pop-upmenu, and the keys are snapped to Frame 9. Of course,if you are in the habit of holding down the Ctrl-keywhile moving key markers, your keyframes will neverfall between frames, and you won’t need to adjustthem afterward like this.From The Essential Blender.Copyright 2007, by The Blender Foundation.The pose keys from Frame 1duplicated and positioned nearFrame 9.Completing the Wave Action
CHARACTER ANIMATION:Scrub back and forth between Frames 1 and 9 to make sure you are happy with your animation.On the Action Editor’s header, change the name of this set of keyframes tosomething useful, like “Wave.”You have now created your first character animation Action.Creating a WalkcycleA walkcycle is an Action that includes one full stride of a characterwalking, both with the left and right feet, that, when played over and over(cycled), gives the appearance that the character is walking.Naming the Action.Click the “X” next to the name of the Wave action on the header tounlink it. LMB click on the selector and choose “ADD NEW” tocreate a new, blank Action. If you wanted to work with the Waveaction again, it could be accessed by selecting “Wave” from this samemenu.The Action selector.An armature can have many different Actions, but only one active Action, which is displayed in the Action Editor. This active Action is the one that willreceive any new keys you insert, and whose keys you can directly edit.Set the frame counter to Frame 1.In the 3D view, use the A-key to select all the bones in the armature, and use Alt-R and Alt-G to remove allrotations and translations, returning the armature to its rest position. Notice that even though the “Record”button is still pressed, keys were not added when you cleared rotation and location. Automatic key insertiondoes not recognize clearing location or rotation as actual movement.The Contact PoseIn a walkcycle, the contact pose is the point whenthe leading foot just touches the ground in front ofthe character. It’s generally the first pose to animatein a walkcycle.In the 3D view, switch to a side view (Numpad-3).Make sure Auto IK is off. The legs are set to alreadyuse IK, and Auto IK will cause them to malfunction.Move the lowest bone in the spine, “spine1,” down alittle along the Z axis so the legs bend a bit.Where we’re headed.Creating a WalkcycleMove the spine down.From The Essential Blender.Copyright 2007, by The Blender Foundation.135
CHAPTERRMB select “leg.l.”You may have to MMB rotate the view to see and select itaccurately, and return to side view after making the selection. Notice that you arenot selecting one of the actual leg bones, but the bone that extends below the leftfoot. This bone is the IK target of the left leg. Move this bone back and up tomatch the illustration.With “leg.l” still selected, rotate it counterclockwise so the toe of the foot passes throughthe “floor.” In this case, it might be simpler to usethe R-key, as the rotation you want correspondsexactly to the side view.Move the left leg controller backand up.RMB select the toe bone, called “toe.l,” and rotateit clockwise so that it appears to be bent up tomeet the floor. Be aware that you may have toalternate between tweaking the foot and toepositions to get this just right.The foot rotated.RMB select the controller bone for the right leg:“leg.r.” Move it forward and rotate it clockwise totry to match the illustration.The goal here is to get the heel of the mesh’s rightfoot to appear to contact the ground at the samelevel as the toe of the left foot. The right footshould not be so far out in front of the body thatthe knee becomes completely straight which cancause the foot bones to detach from the leg.The toe bone rotated clockwise.Make the mesh hit an imaginaryfloor.136Now pose the arms (illustrations on the nextpage). Once again, an easy way to do this is toturn on Auto IK and drag the hands into position,bringing the arms along for the ride. Afterward,disable Auto IK and finely adjust the rotations ofthe arm and hand bones with the rotationmanipulator set to Normal mode.The right leg moved forward and theleg controller rotated.You may have to rotate or change the view several times to get the arms to gowhere you want them to. Keep in mind that when people walk, the legs and armshave opposing motion: right leg forward means right arm back. It might take awhile to get things just right, but be patient — learning to create poses does nothappen in an instant. If you can do so without feeling silly, you should trywalking naturally around your work area, observing how your arms and handsswing and twist to give yourself a reference. Of course, if you have a videocamera available and record reference motion to play back frame by frame, itcan be an even bigger help.From The Essential Blender.Copyright 2007, by The Blender Foundation.Creating a Walkcycle
CHARACTER ANIMATION:Here are front, side, and top views of the posed arms:Making a good walkcycle requires more than just arm and foot positioning.An off-angle perspective view ofthe pose.Spend some time on the spine. When walking, theleading hand twists the top of the spine toward it,and the trailing arm twists the lower spine towardit. Be aware, though, that by rotating the lowerspine bones, the upper spine, arms, neck, and headwill rotate as well. You may have to compensate byrotating the upper spine bones back the oppositeway. Rotations of the spine during a walkcycleshould be subtle: they add hints to the overallmotion. Over-rotating will produce animation thatlooks wild and unnatural.The same perspective view, withthe noted spine adjustmentsadded. The differences in a stillframe are almost unnoticeable, butwill have a good effect whenanimated.Flipping the PoseSelect all bones in the armature with the A-key. Click the “Copy Pose” button atthe bottom of the 3D Window. This copies any existing keys (location,rotation, and scale) from all selected bones.Copy PoseYou may have to use MMB Drag to pan the header of the 3D Window back and forth in order to find these buttons.Flipping the PoseFrom The Essential Blender.Copyright 2007, by The Blender Foundation.137
CHAPTERPress the Up Arrow key to advance ten frames to Frame 11. Click the “Paste Flipped Pose”button.This pastes the pose as a mirror-image of the pose you just copied.Paste Flipped PoseThis is one reason to strictly follow the naming instructions when creating a rig in Chapter 7. Because they end in “.l” and “.r,” Blender recognizesthat the bones are on the opposite side of the body and does the calculations to automatically insert the mirrored pose for you.Advance to Frame 21, and this time press the normal Paste Pose button (not Paste Flipped Pose). The effect issimilar to when you used Shift-D to duplicate and reposition the keys in the Action Editor in the “Wave” action.In the Action Editor or the Timeline, scrub the frame slider back and forth between Frames 1 and 21 to see thecharacter walk. From the first contact pose to the opposite contact pose and back to the first again takes 21frames in this case. Everything else in the walkcycle is just filling in keys between those frames.Recoil PoseYou made a rough cut of a walkcycle with just one pose and a couple of mouse clicks! When played back asanimation, though, it’s clearly inadequate. You can improve the walk by adding poses in between the ones youjust created.The recoil pose is where the front foot takes the weight of the body. The forward foot flattens, and the bodysinks down a little. Here’s how to create it:Move to Frame 2. RMB select the right leg controller “leg.r.” Clear its rotation with Alt-R. You need to set a keywith this bone un-rotated, but if you recall from before, clearing a rotation does not set a new key. To do that,press the I-key and select “LocRot” from the keying menu that pops up.Grab the bone at the base of the spine(“spine1”) and move it down a little. A newway to approach a small move like this is topress the G-key, and then press the DownArrow key a couple of times. Pressing Enterconfirms the move.The recoil pose.138Now, select only the “spine1” and “leg.r”bones. This may be easier to do by RMBand Shift-RMB clicking on their names inthe Action Editor. Use the Copy Posebutton, and paste the flipped pose 10frames later into Frame 12.The Action Editor after pasting theflipped recoil pose. The order ofchannels in the Action Editor dependson the order in which keys wereadded, so your screen might show adifferent order than this.From The Essential Blender.Copyright 2007, by The Blender Foundation.Recoil Pose
CHARACTER ANIMATION:The Passing PoseMove to Frame 6 and adjust “leg.r” (the leg controller) and “toe.r” so that the foot is flat on the ground. If youare having trouble telling exactly where the ground should be, move to Frame 1 and LMB in the 3D view to setthe 3D cursor at the very bottom of the forward foot. When you move back to Frame 6, use the 3D cursor as aguide. Adjusting the right foot and toe rotations will most likely only involve clearing therotation with Alt-R, then setting a rotation key by pressing the I-key and choosing“LocRot.”Move “spine1” up until the right leg is mostly straight.Select only the bones moved in this step and copy and paste the flipped pose 10 frameslater into Frame 16.The Passing Pose.The High Point PoseMove to Frame 8. Move “spine1” upward a little, so that the right leg straightens completely and just begins tostretch. Fix that stretch by moving “leg.r” until it re-attaches to the bottom of the leg bones. Rotate “leg.r” so thetoe goes through the floor just a bit. Rotate “toe.r” so it is level with the floor again.Grab the controller for the left leg, “leg.l,” and move it forwardand up.After selecting the four bones that were changed in this step— leg.r, toe.r, leg.l and spine1 — copy the pose and paste theflipped version on Frame 18.The right foot and legadjusted.The left leg moved forwardand up.Looping the Animation for PlaybackIn the Timeline window, set the Start: frame to 1 and the End: frame to 21. Thiswill restrict animation playback to only that frame range, letting you watch yourwork in a continuous loop. In the 3D view, press Alt-A to start the playback.Pressing the Esc-key stops playback.The Action Editor after completingthe walkcycle.When looping an animation like this, there will be a slight “catch” as the frame counter returns to 1. This is normal behavior. Don’t be fooled intothinking that there is a glitch in your animation. In the next section on the NLA Editor, you will be able to get a better view of how well your Actioncycles.The Passing PoseFrom The Essential Blender.Copyright 2007, by The Blender Foundation.139
CHAPTEROn the Action Editor’s header, name this new Action something useful like “Walkcycle.”Also, in the timeline view orthe Scene buttons, change the overall animation end frame value back to something higher, like 250, so we nolonger loop from frame 1 to 21 on playback.The NLA EditorYou now have two separate actions: “Wave” and “Walkcycle”. There’s another window in Blender called the NLAEditor (Non-Linear Animation) where you can combine the two actions.Change the Action Editor window to an NLA Editor. This will be your primaryworkspace.You can also change the far left window to anew Action Editor, just to make somethings clearer in a bit.This is the NLA Editor. It may not look likemuch, but it’s quite powerful. Right nowthere are only two rows: “hankbones” andChoosing NLA Editor from the“Walkcycle.” “hankbones” refers to thewindow type menuarmature you have been working with,although any objects that have Actions associated with them would showThe NLA Editorup here as well. “Walkcycle” refers to the current action selected in theAction Editor. Just like the Action Editor, the diamonds in the right-hand portion of the window indicate thelocation of keyframes along the timeline. As opposed to the Action Editor, though, keyframe markers in theNLA view are present if a key exists at thatframe for any channel of the associated Action.If you still have an Action Editor windowavailable, use the header Action block selectorto switch to the “Wave” Action. If you can’t seethe Action block selector on the header, youmay have to MMB drag on the header to showit. In the NLA Editor, note how the row underArmature has changed, with three diamondsrepresenting the three keyed frames from the“Wave” action.The Wave Action in the Action Editor, also appearing in the NLA Editor.Converting an Action into an NLA StripSwitch back to the “Walkcycle” action by selecting it in the Action Editor.With the mouse over the NLA Editor, press the C-key to convert thisAction into an NLA strip.140“Walkcycle” converted into an NLA strip.From The Essential Blender.Copyright 2007, by The Blender Foundation.The NLA Editor
CHARACTER ANIMATION:By converting the Walkcycle Action into an NLA strip, you’ve created a “window” to the walkcycle, letting you seethe Action through the NLA Editor. This “window,” the Action strip, can be manipulated without affecting theoriginal action. Strips like this can be scaled and moved along the timeline, blended, stacked and set to repeat.Youcan create any number of strips that show you the same Action. A single strip represents the entire “Walkcycle”Action. You haven’t changed the original “Walkcycle”Action in any way, and none of the transformations you can doin the NLA Editor will affect the original.The NLA Editor can be bypassed by clicking on the icon to the left of an object’s name. Clicking toggles between NLA mode (a series of stacked strips)and Action mode (affectionately called the “shark-attack victim” icon). It doesn’t look like a button, but it is. NLA mode, with the strips, tells theobject to use the strips in the NLA Editor for its animation. Action mode, with the shark attack guy, tells the object to ignore the NLA Editor and usethe Action linked in the Action Editor instead. Before proceeding with this tutorial, make sure that Hank is set to NLA mode.The “Strips” icon, set to use NLA animation.The “Shark Attack” icon, set to bypass NLA and use theAction Editor.With the mouse over the 3D view, press Alt-A to play the currentanimation. Note that the character takes two steps and then stopsat frame 21, because, well that’s the end of the walkcycle. This isabout to change.In the NLA Editor, pressthe N-key. As in other window types, the N-key brings up a transformproperties panel. In the NLA Editor, this panel is used to work withstrip settings.Change the value of the Repeat control to 2. Notice that the NLA striprepresenting the walkcycle now has a faint line down its center,dividing it into two sections. Play the animation again with Alt-A inthe 3D view. The character takes four steps now, because the walkcycle The NLA Transform Properties panel.action plays twice. However, the walkcycle is almost too fast to see,because those four steps are being taken in only 21 frames. Twice the number of steps in the same amount offrames equals twice the speed.In the properties panel, change the Strip End control to 41. Play the animation again.There are still four steps, but they are now taking place over the course of forty-twoframes, which gives a better result.Repeat set to 2 and StripEnd set to 41.By changing the values in the strip properties panel, you can adjust the speed andnumber of steps of a walkcycle. Strips can also be scaled directly within the NLA Editorwith the S-key.Set the walkcycle to a Repeat value of 5. Make sure the frame counter is on Frame 1. Now, instead of typingnumbers into the panel controls, press the S-key to begin scaling.This is easier if you have the mouse cursor to the right of the end point of the current strip before scaling, otherwise the scaling gets reversed.The NLA EditorFrom The Essential Blender.Copyright 2007, by The Blender Foundation.141
CHAPTERScale the strip until its end point is near Frame 120. Now you have 120 frames of walking!You may have to zoom the NLA Editor out with the mouse’s scroll wheel and pan it with MMB dragging in order to show the range of frames from 1 to120.Mixing Actions in the NLA EditorWith the mouse over the main workspace of the NLAEditor, press Shift-A. Shift-A brings up a selector of allthe actions that are available to add to the selectedobject. Choose “Wave.” Adding an Action Strip can alsobe done through the Strip menu on the NLA Editor’sheader.Adding an Action to the NLA Editor withthe Shift-A popup.Repeat set to 5 andthe strip scaled toaround Frame 120.When it is added to the NLA like this, the new “Wave” strip is automaticallyselected, and its properties are shown in the Transform Properties panel.Using the panel, change the “Wave” Action’s Repeat value to 4. Change the“Strip End” value on the panel to 50.Press the G-key and slide the strip along the timeline until its beginning (its left most edge) is around Frame23. This is one of the reasons that the NLA Editor is so powerful: once actions are defined in the Action Editor,you can add, scale, move and even duplicate them along the timeline as a single entity.Press Alt-A in the 3D Window to view the animation. Not bad, eh? The wave andthe walkcycle happen simultaneously. Use the LMB to scrub the timeline over theend of the Wave strip, though. When the strip ends and the hand comes backdown, it’s a pretty abrupt motion.With the Wave action still selected, change the “Blendin:” and “Blendout:” valueson the panel to 7. The NLA strip reflects this change by putting “blending” rampsat the beginning and end of the strip. Now, LMB over the beginning and endingof the wave strip again. This time, the animation blends much more smoothly.Press Alt-A in the 3D window to see it play in time.The Wave strip set to blend in andout over seven frames.Changing the Stacking Order of NLA StripsThe stacking order of the strips in the NLA Editor is significant. In the example, the top-most strip is the“Walkcycle” action, and under it is the “Wave” action. Strips on the bottom override strips above them.In other words, the “Walkcycle” action has keys for all
Blender partly for figures in scientific presentations but mostly for playing around with character animation. Ryan participated in the first Blender Summer of Documentation by writing the Introduction to Character Animation tutorial. The full version of the tuto
