Transcription
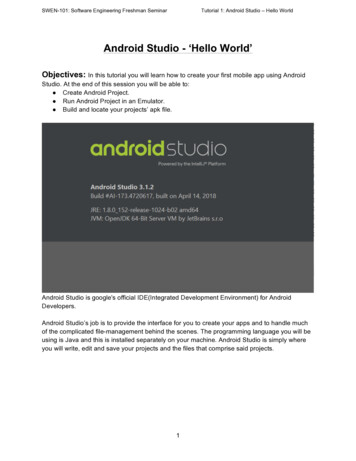
SWEN-101: Software Engineering Freshman SeminarTutorial 1: Android Studio – Hello WorldAndroid Studio - ‘Hello World’Objectives: In this tutorial you will learn how to create your first mobile app using AndroidStudio. At the end of this session you will be able to: Create Android Project. Run Android Project in an Emulator. Build and locate your projects’ apk file.Android Studio is google's official IDE(Integrated Development Environment) for AndroidDevelopers.Android Studio’s job is to provide the interface for you to create your apps and to handle muchof the complicated file-management behind the scenes. The programming language you will beusing is Java and this is installed separately on your machine. Android Studio is simply whereyou will write, edit and save your projects and the files that comprise said projects.1
SWEN-101: Software Engineering Freshman SeminarTutorial 1: Android Studio – Hello WorldPart 1: Create New ProjectTo create our first Android project, follow the below 4 steps:1. Go to ‘File’ - ‘New Project.’2
SWEN-101: Software Engineering Freshman SeminarTutorial 1: Android Studio – Hello World2. Give Application name e.g. ‘Hello World’ and click ‘Next’3
SWEN-101: Software Engineering Freshman SeminarTutorial 1: Android Studio – Hello World3. Select ‘Phone and Tablets’ and click next.4
SWEN-101: Software Engineering Freshman SeminarTutorial 1: Android Studio – Hello World4. Select ‘Next’ - select ‘Empty Activity’ - Select ‘Next’ - ‘Finish’#End of Part 15
SWEN-101: Software Engineering Freshman SeminarTutorial 1: Android Studio – Hello WorldPart 2: Running your applicationNow that we cretaed the Hello World application, let’s run it. Follow the below 4 steps:1. Click on the ‘run’ icon present in upper right section of IDE or press ‘Shift F10’keyboard shortcut.2. Now a pop-up window will appear titled ‘Select Deployment Target’. Click on ‘CreateNew Virtual Device’.6
SWEN-101: Software Engineering Freshman SeminarTutorial 1: Android Studio – Hello World3. Now you should see a screen that shows the list of available devices. Select thecategory as “Phone” and then choose the device “Nexus 5X”.4. After selecting the device, click on “Next”.7
SWEN-101: Software Engineering Freshman SeminarTutorial 1: Android Studio – Hello World5. Now you will see a window titled “Select a system image”. Select the one“Recommended” (API 28). Note that you are unbale to proceed further as the Nextbutton is greyed out. Click on the “download” option available next to the “API 28” option.6. You will be popped to a screen like shown below. Accept the “terms and conditions” andclick “Next”8
SWEN-101: Software Engineering Freshman SeminarTutorial 1: Android Studio – Hello World7. You’ll see a window that shows that the required files for setup are being downloaded.8. After the download is done, you’ll see a window as shown here. Click on “Finish”.9
SWEN-101: Software Engineering Freshman SeminarTutorial 1: Android Studio – Hello World9. Now you are taken back to the screen you have seen in step 5 and you’ll see that the“next” option is enabled. Click Next.10. You’ll see that you can give any name you like to the Android Virtual Device (AVD), butfor now we’ll leave it as is. Click “Finish” and you’ll see that the AVD you created is listednow under “Available Devices”.10
SWEN-101: Software Engineering Freshman SeminarTutorial 1: Android Studio – Hello World11. Select a virtual device from the ‘Available Virtual Devices’ by clicking on it. Click ‘OK’.12. Now you should see a virtual device appeared on the screen with the desired output.#End of Part 211
SWEN-101: Software Engineering Freshman SeminarTutorial 1: Android Studio – Hello WorldPart 3: Building your application (APK file):NOTE : The difference between running and building the project is when we run a project onlythe preview of our app is shown not the actual app is created whereas in the process of buildinga project, IDE produces the installable apk file for us.Now we are ready to create and locate ‘Hello World’ application’s apk file. Follow the below 5steps.1. Select ‘Build’ from the menu bar2. Select ‘Build APK(s)’3. Click on ‘locate’ from the pop up at bottom right corner.12
SWEN-101: Software Engineering Freshman SeminarTutorial 1: Android Studio – Hello World4. In case you missed the pop - up from the bottom right, go to Project window, select ‘Project’scope from the drop down menu5. Expand ‘Hello World’, then expand ‘app’ - ‘build’ - ‘outputs’ - ‘apk’ - ‘debug’ as shown inthe following image.#End of Part 3#End of Tutorial 113
Android Studio is google's official IDE(Integrated Development Environment) for Android Developers. Android Studio’s job is to provide the interface for you to create your apps and to handle much of the complicated file-management behind the scenes. The programming language you will be u