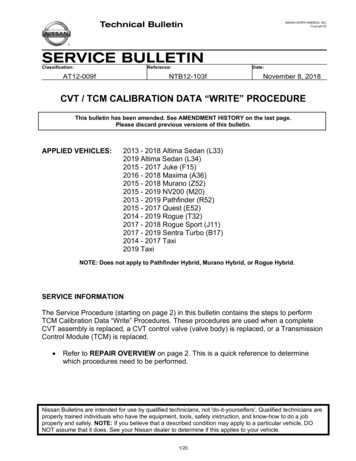
Transcription
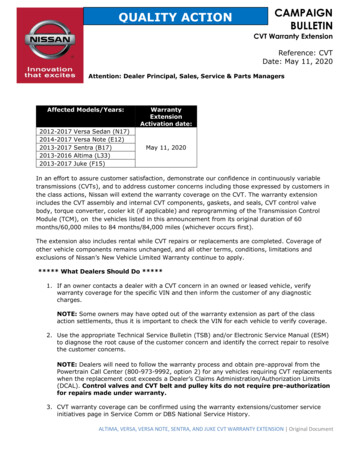
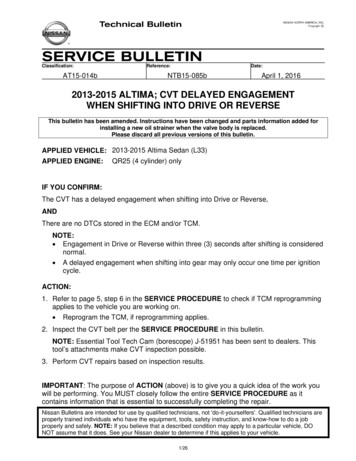
ovember 8, 2018CVT / TCM CALIBRATION DATA “WRITE” PROCEDUREThis bulletin has been amended. See AMENDMENT HISTORY on the last page.Please discard previous versions of this bulletin.APPLIED VEHICLES:2013 - 2018 Altima Sedan (L33)2019 Altima Sedan (L34)2015 - 2017 Juke (F15)2016 - 2018 Maxima (A36)2015 - 2018 Murano (Z52)2015 - 2019 NV200 (M20)2013 - 2019 Pathfinder (R52)2015 - 2017 Quest (E52)2014 - 2019 Rogue (T32)2017 - 2018 Rogue Sport (J11)2017 - 2019 Sentra Turbo (B17)2014 - 2017 Taxi2019 TaxiNOTE: Does not apply to Pathfinder Hybrid, Murano Hybrid, or Rogue Hybrid.SERVICE INFORMATIONThe Service Procedure (starting on page 2) in this bulletin contains the steps to performTCM Calibration Data “Write” Procedures. These procedures are used when a completeCVT assembly is replaced, a CVT control valve (valve body) is replaced, or a TransmissionControl Module (TCM) is replaced. Refer to REPAIR OVERVIEW on page 2. This is a quick reference to determinewhich procedures need to be performed.Nissan Bulletins are intended for use by qualified technicians, not 'do-it-yourselfers'. Qualified technicians areproperly trained individuals who have the equipment, tools, safety instruction, and know-how to do a jobproperly and safely. NOTE: If you believe that a described condition may apply to a particular vehicle, DONOT assume that it does. See your Nissan dealer to determine if this applies to your vehicle.1/20
REPAIR OVERVIEWPROCEDUREVALVE BODYREPLACEMENTTCMREPLACEMENTCVT ASSEMBLYREPLACEMENTErase/WriteCalibration DataRequiredNot neededRequiredSave/WriteCalibration DataNot neededRequiredNot neededNot neededRequired (except forJuke vehicles)Not neededRequiredRequiredNot ch PointLearningSelect LearningSERVICE PROCEDUREIMPORTANT: If replacing the TCM only, skip to page 14:SAVE / WRITE CALIBRATION DATA WHEN REPLACING THE TCM.ERASE / WRITE CALIBRATION DATA WHEN REPLACING CVT OR VALVE BODYNOTE: Use the following steps when a complete CVT assembly or valve body is replaced. Also use the following steps if the TCM was replaced with a complete CVT or valvebody.Before starting, make sure: ASIST on the CONSULT PC has been freshly synchronized to the current date. All C-III plus software updates (if any) have been installed.1. Obtain the calibration file disc (provided with the new CVT or valve body).2. Match the numbers on the disc with the new CVT or new valve body and QR label. See pages 3 and 4 for number matching examples.2/20NTB12-103f
If a complete CVT is being replaced, match the following number (calibration file):Example Disc (CD) provided with the newCVT.Figure AExample QR label on the new CVT.Figure BExample Calibration file number on the CVTcase or label.Skip twodigitsFigure CIMPORTANT: All three of the above numbers must be the same (they must match).3/20NTB12-103f
If a new valve body is being replaced, match the following number (calibration file):Example Disc (CD) provided with the newvalve body.Figure DExample QR label provided with the newvalve body.Figure EExample Calibration file number on thevalve body.Figure FIMPORTANT: All three of the above numbers must be the same (they must match).4/20NTB12-103f
3. Connect the external disk drive to the CONSULT PC.NOTE: Use the external disk drive provided with the C-III plus kit.4. Load the CD into the external disc drive.5. Connect the CONSULT PC to the vehicle with the plus VI and then open / startC-III plus. Make sure ASIST and other programs are closed.6. After the plus VI is recognized, select Diagnosis (All Systems).Step 6: plus VIis recognizedStep6Figure 17. Navigate C-III plus to TRANSMISSION Work Support.5/20NTB12-103f
8. Select the scroll arrow shown in Figure 2.Step 8Figure 29. Print a copy of the screen shown in Figure 3 and attach it to the repair order.NOTE: Make sure to print page 1 of 7 (1 / 7). This screen print is used for warranty documentation.10. Select scroll arrow shown in Figure 3.Step 10Screen print mustshow the VINExamplePrint page 1 of 7 (1 / 7)Figure 36/20NTB12-103f
11. Select WRITE IP CHARA – REPLACEMENT AT/CVT, and then select Start.Step 11Figure 4IMPORTANT: When starting the calibration “write” procedure in C-III plus, and afterselecting Start under Work Support, the C-III screen may only blink. If this occurs, confirm ASIST is closed and then perform step 11 above. If there is still no change: reboot the CONSULT PC, keep ASIST closed, andrestart this procedure from step 1. If error “STOPPED, no comm. with ECU” shows when trying to write calibrationdata, verify that the vehicle is in park (P).7/20NTB12-103f
12. Select OK.Step 12Figure 513. Select My Computer.Figure 68/20NTB12-103f
14. Select DVD/CD-RW Drive (F:)Step 14Figure 715. Highlight the file and then select Open.Figure 89/20NTB12-103f
16. Verify that the serial number (calibration file number) matches the numbers from step 2on page 2 (see Figures on pages 3 and 4). If the numbers do not match, contact TECH LINE.17. Select Next.NOTE: If error message “Stopped, No Comm with ECU” is displayed, confirm that thevehicle is in Park.Step 17Step 16Figure 918. Before selecting Start, follow the directions in Figure 10. Do not follow the directions on the C-III plus screen.First: IGN ON, ENG OFF PRESS BRAKE PEDAL SHIFT INTO REVERSE (R) DEPRESS THROTTLEPEDAL ½ WAY AND HOLDThen SELECT START on the C-IIIplus screenFigure1010/20NTB12-103f
19. Follow the on screen instructions.Figure 1120. Follow the on screen instructions.Make sure to put thetransmission in ParkNOTE: A slight delay will occurbefore “P” will display on theinstrument clusterTouch Start Touch WriteFigure 1211/20NTB12-103f
21. After Complete, select End.Step 21Figure 1322. Select Home to return to the screen shown in Figure 1 on page 5.23. Perform steps 6 – 9, starting on page 5.24. Attach the second screen print to the repair order.NOTE: Screen prints are used for warranty documentation.25. Clear any DTCs that may have set.NOTE: Any DTCs that will not clear are not covered by this bulletin. Refer to theappropriate Electronic Service Manual (ESM) for further diagnostic information.26. If the valve body was replaced, perform CLUTCH POINT LEARNING under“Transmission Work Support” in C-III plus. Follow the steps for CLUTCH POINT LEARNING exactly as presented in C-III plus. If the procedure is not performed correctly, the vehicle may not move when the CVTis placed in gear. If this condition occurs, cycle the ignition OFF/ON, and then perform CLUTCHPOINT LEARNING again.27. If the CVT assembly was replaced, do not perform CLUTCH POINT LEARNING.12/20NTB12-103f
28. Perform Select Learning (Drive / Reverse Learning).a. Set the parking brake.b. Start the engine, and then wait five (5) seconds.c. Move the shift selector to the N position and hold more than two (2) seconds, andthen move it to the D position and wait for transmission engagement.d. Repeat step 28c ten times.e. Move the shift selector to the N position and hold for more than 2 seconds, and thenmove it to the R position and wait for transmission engagement.f. Repeat step 28e ten times.g. Move the shift selector to the P position, and then turn the ignition OFF.29. Test drive the vehicle.END13/20NTB12-103f
SAVE / WRITE CALIBRATION DATA WHEN REPLACING THE TCMNOTE: The following steps are used if TCM only is replaced. If the CVT or valve body is being replaced, go back to page 2. Before starting, make sure: ASIST on the CONSULT PC has been freshly synchronized to the current date. All C-III plus software updates (if any) have been installed.Save Calibration Data Before TCM Replacement1. Connect the CONSULT PC to the vehicle.2. Open / start C-III plus. Make sure ASIST and other programs are closed.3. Wait for the plus VI to be recognized. The serial number will display when the plus VI is recognized.4. Select Diagnosis (One System).Step4Step 3: plus VIis recognizedFigure A15. Navigate C-III plus to TRANSMISSION Work Support.14/20NTB12-103f
6. Select READ IP CHARA – REPLACEMENT TCM, and then Start.Step 6Figure A27. Select Start.Step 7Figure A315/20NTB12-103f
8. When the calibration data has been saved to the CONSULT PC, the message “Datasaved successfully” will be displayed and Current status will indicate Completed(see Figure A4).9. Select End.Step 9Figure A410. Replace the TCM.11. After the TCM has been replaced, go to Write Calibration Data After TCM Replacementon the next page.16/20NTB12-103f
Write Calibration Data After TCM Replacement12. After the TCM has been replaced, select WRITE IP CHARA – REPLACEMENT TCM,and then select Start.Step 12Figure A5IMPORTANT: When starting the calibration “write” procedure in C-III plus, and afterselecting Start under Work Support, the C-III plus screen may only blink. If this occurs, confirm ASIST is closed, and then perform step 12 above. If there is still no change: reboot the CONSULT PC, keep ASIST closed, andrestart the procedure from the beginning. If error “STOPPED, no comm. with ECU” shows when trying to write calibrationdata, verify that the vehicle is in Park (P).17/20NTB12-103f
13. Select Start again.Step 13Figure A614. Select Yes.Figure A718/20NTB12-103f
15. When the calibration data has been written to the TCM, the message “Data writingcompleted successfully” will be displayed and Current status will indicate Complete(Figure A8).16. After Complete, select End to finish.Step 16Figure A817. Clear any DTCs that may have set.NOTE: Any DTCs that will not clear are not covered by this bulletin. Refer to theappropriate Service Manual for further diagnostic information.18. Perform G-Sensor Learning under “Transmission Work Support” in C-III plus.Juke vehicles: Skip to step 19. Do not perform G-Sensor learning on Juke vehicles.19. Perform CLUTCH POINT LEARNING under “Transmission Work Support” in C-III plus.NOTE: Skip this step if the CVT assembly was replaced. Follow the steps for CLUTCH POINT LEARNING exactly as presented in C-III plus. If the procedure is not performed correctly, the vehicle may not move when the CVTis placed in gear. If this condition occurs, cycle the ignition OFF/ON, and then perform CLUTCHPOINT LEARNING again.19/20NTB12-103f
20. Perform Select Learning (Drive / Reverse Learning):a. Set the parking brake.b. Start the engine, and then wait five (5) seconds.c. Move the shift selector to the N position and hold for more than two (2) seconds, andthen move it to the D position and wait for transmission engagement.d. Repeat step 20c ten times.e. Move the shift selector to the N position and hold for more than two (2) seconds, andthen move it to the R position and wait for transmission engagement.f. Repeat step 20e ten times.g. Move the shift selector to the P position, and then turn the ignition OFF.21. Test drive the vehicle.AMENDMENT HISTORYPUBLISHED DATEREFERENCENovember 14, 2012 NTB12-103March 22, 2013DESCRIPTIONOriginal bulletin published.NTB12-103aAPPLIED VEHICLES section revised.October 17, 2013NTB12-103bAPPLIED VEHICLES section revised, andchanges made throughout to accommodateupdated version of CONSULT-III plus.March 31, 2016NTB12-103cAPPLIED VEHICLES and SERVICEPROCEDURE sections revised.June 9, 2016NTB12-103dAPPLIED VEHICLES section revised.April 26, 2017NTB12-103eAPPLIED VEHICLES, SERVICEINFORMATION, SERVICE PROCEDUREsections revised, and REPAIR OVERVIEWadded.November 8, 2018NTB12-103fAPPLIED VEHICLES and SERVICEINFORMATION sections revised.20/20NTB12-103f
8. Select the scroll arrow shown in Figure 2. Figure 2 9. Print a copy of the screen shown in Figure 3 and attach it to the repair order. NOTE: Make sure to print page 1 of 7 (1 / 7). This screen print is used for warranty documentation. 10. Select scroll arrow shown in Figure 3. Figure
