Transcription
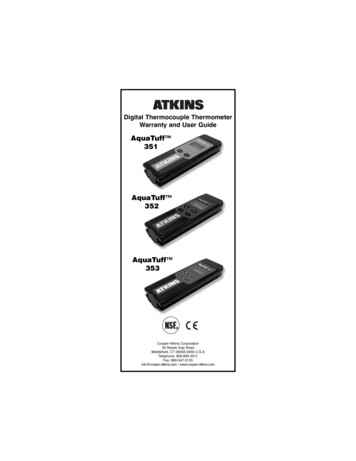
Digital Thermocouple ThermometerWarranty and User GuideAquaTuff 351AquaTuff 352AquaTuff 353 Cooper-Atkins Corporation33 Reeds Gap RoadMiddlefield, CT 06455-0450 U.S.ATelephone: 800-835-5011Fax: 860-347-5135info@cooper-atkins.com www.cooper-atkins.com
TABLE OF utsch. 26-33.34-40.41-47AquaTuff 351 THERMOMETERPress to turn instrument ON or OFF.Press to select Fahrenheit or Celsiustemperature scale.OPERATION:1) Observing correct polarity, insert Type Kthermocouple probe into connector on top ofinstrument.2) Presskey to turn instrument on.3) Default temperature scale is Fahrenheit. To changetemperature scale, presskey. (NOTE: Displaywill toggle between “F” and “C” icons on rightside of display with each press of thekey).4) The instrument has an auto-off feature that will turnoff unit after 10 minutes of non-keypad activity toconserve battery life. To manually turn instrument off,press and holdkey momentarily.AquaTuff 352 THERMOMETERPress to turn instrument ON or OFF. Whenused in combination with SHIFT key, enablesor disables AUTO-OFF feature.Press to select FAHRENHEIT or CELSIUStemperature scale. When used incombination with SHIFT key, selects tenthdegree or whole degree resolution.Press to “FREEZE” current temperaturereading on display. SHIFT function providessecondary user settings with other keys asnoted.Press to turn on BACKLIGHT for viewingtemperatures in low lighting conditions.When pressed, BACKLIGHT will remain onfor 5 seconds.OPERATION:Manufactured in the U.S.A. by Cooper-Atkins CorporationAn ISO 9001 Registered Facility33 Reeds Gap RoadMiddlefield, CT 06455-0450 U.S.ACUSTOMER SERVICE: 800-835-5011 FAX: 860-347-5135Email: info@cooper-atkins.com Website: www.cooper-atkins.com27-958550B21) Observing correct polarity, insert Type Kthermocouple probe into connector on top ofinstrument.2) Presskey to turn instrument on.3) Default temperature scale is Fahrenheit. To changetemperature scale, presskey. (NOTE: Displaywill toggle between “F” and “C” icons on right side ofdisplay with each press of thekey).3
AquaTuff 352 THERMOMETEROPERATION - Continued:AquaTuff 353 THERMOMETEROVERVIEW - Continued4) The instrument has an auto-off feature that will turnoff unit after 10 minutes of non-keypad activity toconserve battery life. To manually turn instrument off,press and holdkey momentarily. To disableAUTO-OFF feature, press and holdkey andthen presskey. (NOTE: “AUTO” icon at topof display will appear when AUTO-OFF feature isactive).5) The resolution default setting is tenth degree. Tochange resolution to whole degree, press and holdkey and then presskey.6) Presskey to turn on backlight. When pressed,the backlight will remain on for 5 seconds andautomatically turn off.NOTE: USE OF BACKLIGHT WILLSIGNIFICANTLY DECREASE BATTERYLIFE DUE TO INCREASED POWERREQUIRED FOR BACKLIGHT OPERATION7) The instrument has a “HOLD” feature to capture thecurrent temperature reading on the display. Toactivate the hold feature, press and release thekey. The current temperature reading will flash on thedisplay and the hold icon will appear at top of display.Press thekey again to return to STANDARDTEMPERATURE MODE.AquaTuff 353 THERMOMETERPress to turn instrument ON or OFF.Press to select Standard, ITS , or Memorymode of operation.In ITS Mode, press to store ITStemperature readings. In Memory Mode,press to scroll forward. In User Mode, pressto select temperature scale.In Memory Mode, press to scroll backward.In User mode, press to enable/disableAuto-Off feature.OPERATION OVERVIEW:There are 3 Main Modes of operation:1) Standard Temperature Mode2) Intelligent Temperature Stabilization (ITS ) Mode3) Memory Mode4In STANDARD TEMPERATURE MODE, the instrumentfunctions like a normal thermometer. In ITS Mode, theinstrument operates with the Intelligent TemperatureStabilization feature. The 353 series instrument has aunique feature to display temperature of item beingmeasured when the temperature has reached its finalstabilized temperature. The purpose of this feature is toassist the user in determining when the final stabilizedtemperature has been reached.The ITS feature isdynamic, in that it operates continuously in real time. Itcan be used in ITS Mode with the option of recordingstabilized temperature readings or simply as athermometer with ITS functionality. The MEMORY MODEis for viewing ITS temperature data stored in memoryand you can scroll in both directions. Thekeyeasily allows the user to select desired mode ofoperation.STANDARD TEMPERATURE MODE:1) Press ON/OFFkey to turn instrument ON/OFF.2) Default temperature scale is Fahrenheit. To changetemperature scale, with instrument turned OFF,press and holdkey and then presskeyto enter USER MODE (NOTE: Display will showkey to switch between“USEr”). PressFahrenheit and Celsius (NOTE: Display will togglebetween “F” and “C” icons on right side ofdisplay with each press of thekey). Presskey to exit USER MODE to use instrument inSTANDARD TEMPERATURE MODE.3) The instrument has an auto-off feature that will turnoff unit after 10 minutes of non-keypad activity toconserve battery life. To disable auto-off feature, withinstrument turned OFF, press and hold the MODEkey and then presskey to enter USERMODE. Presskey to enable or disable auto-offfeature. When active, the AUTO icon appears at thetop of LCD display. Presskey to exit USERMODE to use instrument in STANDARDTEMPERATURE MODE.ITS MODE (Intelligent Temperature Stabilization ):1) To use ITS MODE, press to turn instrument ON. Onpower up, the instrument is placed in STANDARDTEMPERATURE MODE. Press thekey toselect and activate the ITS function. The ITS icon willappear at the top of the LCD when ITS MODE isselected.5
AquaTuff 353 THERMOMETERITS MODE - Continued:AquaTuff 353 THERMOMETERMEMORY MODE - Continued:2) When ITS MODE is active, the display will show “- -”while the temperature is changing (stabilizationseek mode). The final stabilized temperature readingwill flash on the display when reached. The ITStemperature reading will remain flashing on thedisplay until the probe is removed or temperaturechanges by approximately 5 F(3 C). When thetemperature changes, the instrument will return toITS stabilization seek mode and “- -” will bedisplayed until the next stabilized temperature isreached and that temperature reading will flash onthe display.3) The user has the option of storing the ITStemperature reading in memory. To store ITStemperature reading, presskey to storereading. The display will show reading number“r001-r250” and store reading in memory. Up to 250readings can be stored in memory.4) To return to STANDARD TEMPERATURE MODE,turn unit OFF and back ON or repeatedly presskey until both ITS and MEM icons areturned off at top of display.MEMORY MODE:1) To view temperature readings stored in memory, turninstrument ON and presskey to selectMEMORY MODE. When active, MEM icon willappear at top of LCD. (NOTE: WITH NOTEMPERATURE DATA IN MEMORY, INSTRUMENTWILL NOT ENTER MEMORY MODE.)2) To view temperature data, presskey to scrollforward orkey to scroll backward throughtemperature data. The display will show readingnumber “r001-r250” followed by the temperaturerecorded. (NOTE: TO ACCESS FAST SCROLLMODE, PRESS AND HOLDKEY ORKEY AND DISPLAY WILL QUICKLY SEQUENCETHROUGH TEMPERATURE READINGS.)3) The temperature data is a cyclical data system.When scrolling through data, the temperaturereadings will cycle through all readings either forwardor backward and then repeat readings when eitherthe first or last reading in memory is reached.4) To clear temperature readings in memory, press andhold both theandkeys at the sametime until “CLr” is shown on display.5) To return to STANDARD TEMPERATURE MODE,turn unit OFF and back ON or repeatedly presskey until both ITS and MEM icons are turnedoff at top of LCD display.6USER TIPWhen temperature readings are clearedfrom memory, there is no facility torestore deleted temperature data.Ensure that temperature data is not neededbefore clearing memory contents.351 / 352 / 353 BATTERY REPLACEMENTBATTERY REPLACEMENT:1) Turn battery door knob counter-clockwise untilrotation stops. The arrow on battery door knob willpoint towards unlockicon.2) Pull battery door knob to remove battery doorassembly. Remove batteries.3) Referring to battery polarity drawing on rear label,install (2) AAA alkaline batteries as shown.4) To install battery door assembly, ensure that batterydoor knob is turned fully counter-clockwise andarrow on battery door is pointed towards unlockicon. Push upward on battery door assembly untilbattery door knob is seated against housing. Rotatebattery door knob clockwise until rotation stops.The arrow on battery door knob will point towardslockicon.TURN COUNTER-CLOCKWISE TO UNLOCKTURN CLOCKWISE TO LOCK7
351 / 352 / 353 SPECIFICATIONSTEMPERATURE RANGES:35100-K / 35200-K / 35300-K:-100 to 999 F (-73 to 537 C)35132 / 35135 / 35140 / 35141:35232 / 35235 / 35240 / 35241:35332 / 35335 / 35340 / 35341:-100 to 500 F (-73 to 260 C)ACCURACY:35100-K / 35200-K / 35300-K:With factory calibration, 0.5F ( 0.3C ) over entiremeasurement range at ambient temperaturesbetween 68 to 86 F (20 to 30 C)35132 / 35140 / 35141:35232 / 35240 / 35241:35332 / 35340 / 35341:With factory calibration, 0.9F ( 0.5C ) TotalSystem Accuracy over entire measurement rangeat ambient temperatures between 68 to 86 F(20 to 30 C)35135 / 35235 / 35335:Surface probe temperature errors for draft-free, flat,clean oiled surfaces with 2.2 lbs.(1 Kg) of pressureare typically within 2.7 F and –6.3 F ( 1.5 C and–3.5 C) without thermostat recycling.RESOLUTION:35100-K / 35300-K:35132 / 35135 / 35140 / 35141:35332 / 35335 / 35340 / 35341:Tenth degree (.1)35200-K / 35232 / 35235 / 35240 / 35241:Tenth degree / whole degree (.1/1), user selectableBATTERY LIFE:1800 Hours (2) AAA Alkaline batteries351 / 352 / 353 TROUBLESHOOTINGTROUBLESHOOTINGOur Customer Service Department is availableMonday through Friday 8:00 AM to 5:00 PM ESTat 800-835-5011.1) Unit Does Not Turn On:Batteries are installed incorrectly or dead.Check batteries are installed according to picture onrear label. Replace batteries.2) Display Shows “Prob”: Probe is broken (Openthermocouple see “Test for Broken Probe” below).3) Test for Broken Probe: Pull the probe connector outpartially to expose the blade contacts. Place a metalpaper clip across connector blades to short contacts. Ifinstrument displays temperature, the probe is broken.Replace Probe.4) Battery Icon Appears on Display: Low battery.Replace batteries.5) Display Shows “bAtt” and Instrument Shuts Off:Replace batteries.6) Display Shows “LO” or “HI”: Temperature measuredis outside measurement range of instrument.351 / 352 / 353 WARRANTYWARRANTY: Cooper-Atkins thermometers are backedby a 5-year Instrument Warranty and 1-year ProbeWarranty on defects in workmanship and materials.AMBIENT TEMPERATURE LIMITS:32 TO 122 F (0 TO 50 C)TRACEABILITY:We certify that this instrument has been calibratedto temperature and/or electrical standards traceableto the U.S. Department of Commerce NationalInstitute of Standards and Technology.CALIBRATION:Under normal operating conditions, the unit shouldnot require re-calibration.89
TERMÓMETRO AquaTuff 352TERMÓMETRO AquaTuff 351[ON]Oprima para Prender o Apagar el instrumento.OPERACIÓN - Continuación:[F/C]Oprima para seleccionar escala de temperaturaFahrenheit o Celsius.3)OPERACIÓN:1) Observando la polaridad correcta, inserta la sondadel termopar tipo K en la parte superior del instrumento.2) Oprima la tecla [ON] para prender el instrumento.3) La escala de temperatura por defecto es Fahrenheit.Para cambiar la escala de temperatura, oprima latecla [F/C] . (NOTA: Se intercambiará la pantallaentre los iconos “F” y “C” al lado derecho de lapantalla cada vez que se oprime la tecla).4) El instrumento tiene una función de apagadoautomático que apagará la unidad después de 10minutos sin actividad del teclado para conservar lavida de la pilas. Para apagar manualmente el instrumento, oprima y mantenga oprimida momentánemente la tecla.4)5)6)TERMÓMETRO AquaTuff 352Oprima para Prender o Apagar el instrumento.Cuando se utiliza en combinación con la tecla deMAYÚSCULAS, le permite activar o desactivar lafunción de APAGADO AUTOMÁTICOOprima para seleccionar la escala de temperaturaFAHRENHEIT o CELSIUS. Cuando se utiliza encombinación con la tecla de MAYÚSCULAS, seselecciona una resolución de décimas o de gradoentero.Oprima para “CONGELAR” la lectura detemperatura actual en la pantalla. La funciónMAYÚSCULAS proporciona ajustes secundariospara el usuario en combinación con otras teclas,como se indica a continuación.Oprima para prender LA ILUMINACIÓN DEFONDO para ver las temperaturas cuando no haymucha luz. Al oprimirla, ILUMINACIÓN DEFONDO se mantendrá prendida durante 5segundos.OPERACIÓN:1) Observando la polaridad correcta, inserte la sondadel termopar tipo K en la parte superior del instrumento.2) Oprima la teclapara prender el instrumento.107)La escala de temperatura por defecto es Fahrenheit.Para cambiar la escala de temperatura oprima latecla. (NOTA: Se intercambiará la pantallaentre los iconos “F” y “C” al lado derecho de lapantalla cada vez que se oprime la tecla).El instrumento tiene una función de apagadoautomático que apagará la unidad después de 10minutos sin actividad del teclado para conservar lavida de la pilas. Para apagar manualmente el instrumento, oprima y mantenga oprimida momentáneamente la tecla. Para desactivar la función deAPAGADO AUTOMÁTICO, oprima y mantengaoprimida la teclay luego oprima la tecla.(NOTA: El icono “AUTO” aparecerá en la partesuperior de la pantalla cuando está activada lafunción de APAGADO AUTOMÁTICO).La resolución por defecto es décimas de grado. Paracambiar la resolución a grado entero, oprima y mantenga oprimida la teclay luego oprima la tecla.Oprima la teclapara prender la iluminación de fondo. Al oprimirla, la iluminación defondo se mantendrá prendida durante 5 segundos yluego se apagará automáticamente.NOTA: USO DE LA ILUMINACIÓN DE NACIONFONDO PARA REDUCIRÁ REDUCIR LASENSIBILIDAD DE VIDA DE LA PILA PORLA ENERGÍA ADICIONAL QUE SEREQUIERE PARA LA OPERACIÓN DEILUMINACIÓN DE FONDO.El instrumento tiene la función de “HOLD” (MANTENER) para capturar la lectura de temperaturaactual en la pantalla. Para activar esta función, oprima y suelte la tecla. La lectura de temperatura actual parpadeará en la pantalla y el icono de“Hold” aparecerá en la parte superior de la pantalla.Oprima de nuevo la tecla [Hold para regresar alMODO DE TEMPERATURA ESTÁNDAR.TERMÓMETRO AquaTuff 353[ON]Oprima para Prender o Apagar el instrumento.[Mode Oprima para seleccionar el modo de operaciónEstándar, ITSMR o de Memoria.[Rec]En el modo ITS, oprima para almacenar lecturasde temperatura ITS. En el Modo de Memoria,oprima para desplazarse línea por línea haciadelante. En el Modo de Usuario, oprima paraseleccionar la escala de temperatura.11
TERMÓMETRO AquaTuff 353En Modo de Memoria, oprima para desplazarselínea por línea hacia atrás. En el Modo deUsuario, oprima para activar/desactivar la funciónde Apagado Automático.VISTAZO GENERAL DE LA OPERACIÓN:Tiene 3 Modos Principales de operación:1) Modo de Temperatura Estándar2) Modo de Estabilización Inteligente de Temperatura(ITS - Intelligent Temperature Stabilization )3) Modo de MemoriaEn el MODO DE TEMPERATURA ESTÁNDAR, el instrumento funciona como un termómetro normal. En el ModoITS, el instrumento funciona con la función deEstabilización Inteligente de TemperaturaTM. El instrumento de la serie 353 tiene una función exclusiva paramostrar la temperatura de la cosa que se está midiendocuando la temperatura haya llegado a la temperaturaestabilizada final. El propósito de esta función es paraayudar al usuario en determinar cuándo se ha alcanzadola temperatura estabilizada final. La función ITS esdinámica, o sea, opera continuamente en el tiempo real.Se puede utilizar el instrumento en el Modo ITS con laopción de grabar lecturas de temperatura estabilizadas osimplemente como termómetro con funcionalidad ITS. ElMODO DE MEMORIA es para ver los datos de temperatura ITS almacenados en la memoria, y usted podrádesplazarse en ambas direcciones. La teclapermite que el usuario seleccione fácilmente el modo deoperación deseado.MODO DE TEMPERATURA ESTÁNDAR1) Oprima la tecla [ON] para Prender o Apagar el instrumento.2) La escala de temperatura por defecto es Fahrenheit.Para cambiar la escala de temperatura, con el instrumento Apagado, oprima y mantenga oprimida la tecla[Mode y luego oprima la teclapara entrar enel MODO DE USUARIO. (NOTA: La pantallamostrará “USEr”). Oprima la teclapara intercambiar entre Fahrenheit y Celsius. (NOTA: Se intercambiará la pantalla entre los iconos “F” y “C” allado derecho de la pantalla cada vez que seoprime la tecla [Re ). Oprima la tecla [Modepara salir del MODO DE USUARIO para usar elinstrumento en MODO DE TEMPERATURAESTÁNDAR.3) El instrumento tiene una función de apagadoautomático que apagará la unidad después de 10minutos sin actividad del teclado para conservar lavida de la pilas. Para desactivar la función de apaga12TERMÓMETRO AquaTuff 353MODO DE TEMPERATURA ESTÁNDAR - Continuacióndo automático, con el instrumento APAGADO, oprimay mantenga oprimida la tecla de MODOyluego oprima la tecla [ON] para entrar en el MODODE USUARIO. Oprima la tecla [down]para activaro desactivar la función de apagado automático.Cuando está activada, el icono AUTO aparece en laparte superior de la pantalla. Oprima la tecla [Mopara salir del MODO DE USUARIO para usar elinstrumento en el MODO DE TEMPERATURAESTÁNDAR.MODO ITSTM Estabilización Inteligente de Temperatura.1) Para usar el MODO ITS, oprima la tecla para Prenderel instrumento. Al encenderse, se coloca el instrumento en el MODO DE TEMPERATURA ESTÁNDAR.Oprima la teclapara seleccionar y activar lafunción ITS. El icono ITS aparecerá en la parte superior de la pantalla cuando el MODO ITS está seleccionado.2) Cuando está activo el MODO ITS, la pantallamostrará “- -“ mientras la temperatura esté cambiando (modo de búsqueda de estabilización). La lecturade temperatura estabilizada final parpadeará en lapan talla al alcanzarse. La lectura de temperatura ITSseguirá parpadeando en la pantalla hasta que sequite la sonda o la temperatura cambie aproximadamente 5 F (3 C). Al cambiarse la temperatura, elinstrumento volverá al modo de búsqueda de estabilización ITS y se desplegará “- -“ en la pantalla hastaque se haya alcanzado la siguiente temperaturaestabilizada, en cuyo caso la lectura parpadeará enla pantalla.3) El usuario tiene la opción de almacenar la lectura detemperatura ITS en la memoria. Para almacenar lalectura de temperatura ITS, oprima la tecla [Rec] paraguardar la lectura. La pantalla mostrará el número delectura “r001- r250” y almacenará la lectura en lamemoria. Se pueden guardar hasta 250 lecturas en lamemoria.4) Para regresar al MODO DE TEMPERATURAESTÁNDAR, Apague la unidad y luego Préndala denuevo, u oprima repetidamente la tecla [Modhasta que se apaguen tanto el icono de ITS como elde MEM en la parte superior de la pantalla.13
TERMÓMETRO AquaTuff 353REEMPLAZO DE PILAS EN EL 351 / 352 / 353MODO DE MEMORIA:REEMPLAZO DE PILAS:1) Para ver las lecturas de temperatura almacenadas enla memoria, Prenda el instrumento y oprima la tecla[Mod para seleccionar el MODO DE MEMORIA.Cuando está activo, el icono MEM aparece en la partesuperior de la pantalla. (NOTA: SI NO HAY DATOSDE TEMPERATURA EN LA MEMORIA, EL INSTRUMENTO NO ENTRARÁ EN EL MODO DE MEMORIA).2) Para ver los datos de temperatura, oprima la tecla[Rec] para desplazarse adelante o la teclapara desplazarse hacia atrás a través de los datos detemperatura. La pantalla mostrará el número de lectura “r001- r250” y a continuación la temperaturagrabada. (NOTA: PARA ACCEDER AL MODO DEDESPLAZAMIENTO RÁPIDO, OPRIMA Y MANTENGA OPRIMIDA LA TECLA [R O LA TECLA[Do Y LA PANTALA REPASARÁ RÁPIDAMENTELAS LECTURAS DE TEMPERATURA.)3) Los datos de temperatura son un sistema de datoscíclico. Al desplazarse a través de las lecturas, o bienhacia delante o hacia atrás, se pasará a través detodas las lecturas y luego se repetirán al llegar a laprimera o la última lectura.4) Para borrar las lecturas de temperatura de la memoria, oprima y mantenga oprimidas al mismo tiempo lasteclas [Rec] y [dow hasta que aparezca “CLr” enla pantalla.5) Para regresar al MODO DE TEMPERATURAESTÁNDAR, Apague la unidad y luego Préndala denuevo, u oprima repetidamente la tecla [Mode hastaque se apaguen tanto el icono de ITS como el deMEM en la parte superior de la pantalla.1) Gire en sentido contrario al reloj la manija de la puertade pilas hasta que deje de girar. La flechita en lapuerta de pilas apuntará al cono de abierto [U .2) Jale la manija de la puerta de pilas para sacar elensamble de la puerta de pilas. Saque las pilas.3) Refiriéndose al dibujo de polaridad de pilas en la etiqueta de atrás, instale (2) pilas alcalinas AAA de lamanera indicada.4) Para instalar el ensamble de la puerta de pilas,asegúrese que la manija de la puerta de pilas se hayagirado completamente en sentido contrario al reloj y laflechita en la puerta de pilas apunte hacia el icono deabierto [U . Empuje hacia arriba el ensamble dela puerta de pilas hasta que la manija de la puerta depilas esté asentada en la cubierta. Gire la manija de lapuerta de pilas en el sentido del reloj hasta que dejede girar. La flechita en la manija de la puerta de pilasapuntará al icono de cerrado.AVISO AL USUARIOGIRE EN SENTIDODEL RELOJ PAR CERRARGIRE EN SENTIDO CONTRARIOAL RELOJ PARA ABRIRAl borrar las lecturas de temperaturade la memoria, no existe manera derestaurar los datos de temperaturaborrados. Asegúrese de que no senecesitan los datos de temperaturaantes de borrar el contenidode la memoria.1415
ESPECIFICACIONES DEL 351 / 352 / 353RANGOS DE TEMPERATURA:35100-K / 35200-K / 35300-K:-100 a 999 F (-73 a 537 C)35132 / 35135 / 35140 / 35141:35232 / 35235 / 35240 / 35241:35332 / 35335 / 35340 / 35341:-100 a 500 F (-73 a 260 C)PRECISIÓN:35100-K / 35200-K / 35300-K:Con calibración de fábrica, 0.5F ( 0.3C ) sobre todoel rango de medición a temperaturas ambientales de68 a 86 F (20 a 30 C).35132 / 35140 / 35141:35232 / 35240 / 35241:35332 / 35340 / 35341:Con calibración de fábrica, 0.9F ( 0.5C ) PrecisiónTotal de Sistema sobre todo el rango de medición atemperaturas ambientales de 68 a 86 F (20 a 30 C).35135 / 35235 / 35335:Al aplicar 2.2 libras (1 kg) de presión a la sonda desuperficies, los errores de temperatura en superficiesaceitadas, limpias y planas sin corrientes de aire sontípicamente entre 2.7 F y -6.3 F ( 1.5 C y -3.5 C),sin reciclar el termostatoRESOLUCIÓN:35100-K / 35300-K :35132 / 35135 / 35140 / 35141 :35332 / 35335 / 35340 / 35341 :Décima parte de un grado (.1)35200-K / 35232 / 35235 / 35240 / 35241 :Décimas de grado / grado entero (.1/1), lo puedeseleccionar el usuario.VIDA DE LAS PILAS:1800 horas, (2) pilas alcalinas AAALÍMITES DE TEMPERATURA AMBIENTAL32 A 122 F (0 A 50 C)LOCALIZACIÓN Y CORRECCIÓNDE FALLAS EN EL 351 / 352 / 353LOCALIZACIÓN Y CORRECCIÓN DE FALLASNuestro Departamento de Servicio al Cliente estádisponible de lunes a viernes de las 8:00 AM a las5:00 PM al 800-835-5011.1) No Se Prende la Unidad: Pilas agotadas o instaladaserróneamente. Asegúrese que las pilas estén instaladas de acuerdo con el dibujo en la etiqueta de atrás.Reemplace las pilas.2) “Prob” Aparece en la Pantalla: La sonda estádescompuesta. (Abra el termopar, véase “Prueba paraSonda Descompuesta” a continuación).3) Prueba para Sonda Defectuosa: Saque parcialmente el conector de la sonda para exponer los contactos. Coloque un clip de metal en los contactos paraponerlos en cortocircuito. Si el instrumento muestratemperatura, la sonda está descompuesta. Reemplacela sonda.4) El Icono de Pilas Aparece en la Pantalla: Pila baja.Reemplace las pilas.5) La Pantalla Muestra “bATT” y Se Apaga elInstrumento: Reemplace las pilas.6) La Pantalla Muestra “LO” o “HI”: La temperaturamedida se encuentra fuera del rango de medición delinstrumento.GARANTÍA DEL 351 / 352 / 353GARANTÍA: Los termopares Cooper-Atkins son respaldados por una Garantía del Instrumento de 5 años y unaGarantía de la Sonda de 1 año contra defectos en lamanufactura y materiales.POSIBILIDAD DE RASTREO:Certificamos que este instrumento se ha calibrado paranormas de temperatura y/o electricidad que puedenrastrearse hasta el Instituto Nacional de Normas yTecnología del Departamento de Comercio de EU.CALIBRACIÓN:Bajo condiciones normales de operación, la unidad norequiere recalibrarse.1617
THERMOMÈTRE AquaTuff 351Appuyez pour allumer (ON) ou éteindre (OFF)l’instrument.Appuyez pour choisir l’échelle de températureFahrenheit ou Celsius.FONCTIONNEMENT :1) Tout en observant une polarité correcte, insérez lasonde du thermocouple de Type K dans le connecteursur le dessus de l’instrument.2) Appuyer sur la touchepour allumer l’instrument.3) L’échelle de température par défaut est en Fahrenheit.Pour changer d’échelle de température, appuyez surla touche. (NOTE : L’affichage passe del’icône « F » à « C » sur le côté droit de l’écranchaque fois que l’on appuie sur la touche).4) L’instrument a une fonctionnalité d’auto-off qui éteintl’unité après dix minutes s’il n’y a eu aucune activitésur le clavier pour conserver la vie de la pile. Pouréteindre l’instrument à la main, appuyer et maintenir latoucheun moment.THERMOMÈTRE AquaTuff 352Appuyez pour allumer l’instrument ON ou pourl’éteindre OFF. Lorsqu’elle est utilisée de concert avec la touche MAJ, elle active ou désactive la fonction AUTO-OFF (ARRÊT AUTOMATIQUE).Appuyez pour choisir l’échelle de températureFAHREINHEIT ou CELSIUS. Lorsqu’elle estutilisée en combinaison avec la touche MAJ,elle sélectionne une résolution au dixième dedegré ou au degré entier.Appuyez pour “FIGER” le relevé de température présent sur l’écran. La fonction MAJ fournit des paramètres d’utilisation secondairesavec d’autres touches comme il est noté.THERMOMÈTRE AquaTuff 352FONCTIONNEMENT :1) Tout en observant une polarité correcte, insérez lasonde du thermocouple de Type K dans le connecteursur le dessus de l’instrument.2) Appuyez sur la touchepour allumer l’instrument.3) L’échelle de température par défaut est en Fahrenheit.Pour changer d’échelle de température appuyez sur latouche [auto . (NOTE : L’affichage passe de l’icône« F » à « C » sur le côté droit de l’écran chaquefois que l’on appuie sur la touche).4) L’instrument a une fonctionnalité d’auto-off qui éteintl’unité après dix minutes s’il n’y a eu aucune activitésur le clavier pour conserver la vie de la pile. Pouréteindre l’instrument manuellement, appuyer sur latoucheet maintenez-la enfoncée un moment.Pour désactiver la fonction AUTO-OFF, appuyez sur latouche [Ho et maintenez-la enfoncée puis appuyezsur la touche. (NOTE : l’icône “AUTO” en hautde l’écran apparaîtra lorsque la fonction AUTO-OFFest activée.)5) Le paramètre de résolution par défaut est au dixièmede degré. Pour changer la résolution à un degré entier,appuyez sur la touche [Het maintenez-lapuis appuyez sur la touche [auto .6) Appuyez sur la touche [Back pour allumer le panneau lumineux. Lorsqu’on appuie sur cette touche, lepanneau lumineux reste allumé pendant 5 secondespuis s’éteint automatiquement.NOTE : L’UTILISATION DU PANNEAULUMINEUX RÉDUIT DE BEAUCOUP LA VIEDE LA PILE A CAUSE DE L’AUGMENTATIONEN PUISSANCE NÉCESSAIRE POUR FAIREFONCTIONNER LE PANNEAU LUMINEUX.7) L’instrument a une fonctionnalité d’attente « HOLD »pour capturer la température actuelle sur l’écran. Pouractiver la fonction d’attente, appuyez sur la touche[Hold] puis relâchez-la. Le relevé de températureactuel clignotera sur l’écran et l’icône d’attente apparaîtra sur le haut de l’écran. Appuyez sur la touche[Hold] de nouveau pour revenir au MODE DETEMPÉRATURE STANDARD.Appuyez pour allumer le PANNEAULUMINEUX pour voir les températures dansdes conditions de pénombre. Lorsqu’on appuiesur PANNEAU LUMINEUX, il reste allumé pendant 5 secondes.1819
THERMOMÈTRE AquaTuff 353[ON]Appuyez pour allumer l’instrument ON ou pourl’éteindre OFF.[Mod]tion-Appuyez pour sélectionner le mode de foncnement Standard, ITS ou Mémoire.[Rec]En mode ITS, appuyez pour sauvegarder lesrelevés de température ITS. En mode Mémoire,appuyez pour dérouler en avant. En modeUtilisateur, appuyez pour sélectionner l’échellede température.[Dn]En mode Mémoire, appuyez pour dérouler versl’arrière. En mode Utilisateur, appuyez pouractiver ou désactiver la fonction Auto-Off.SURVOL DU FONCTIONNEMENT :Il y a 3 Modes principaux de fonctionnement :1) Le mode de température standard.2) Le mode de Stabilisation de ‘Température Intelligent(Intelligent Température Stabilization ou ITS .3) Le Mode MémoireDans le MODE DE TEMPÉRATURE STANDARD, l’instrument fonctionne comme un thermomètre normal. EnMode ITS , l’instrument fonctionne avec la fonction deStabilisation de température intelligente (ITS).L'instrument de série 353 a une fonctionnalité uniquepour afficher la température de l'élément qui est mesurélorsque cette température atteint sa température stabilisée définitive. L'objectif de cette fonctionnalité est depermettre à l'utilisateur de déterminer quand la température finale stabilisée a été atteinte. La fonction ITS estdynamique, en ce qu’elle fonctionne continuellement entemps réel. Elle peut être utilisée en Mode ITS avec l’option d’enregistrer des relevés de température stabiliséeou simplement comme un thermomètre avec sa fonctionnalité ITS. Le MODE MÉMOIRE sert à visionner les données de température ITS stockées en mémoire et vouspouvez dérouler dans les deux directions. La touche[Mod permet facilement à l’utilisateur de sélect
Cooper-Atkins Corporation 33 Reeds Gap Road Middlefield, CT 06455-0450 U.S.A Telephone: 800-835-5011 Fax: 860-347-5135 info@cooper-atkins.com www.cooper-atkins