Transcription
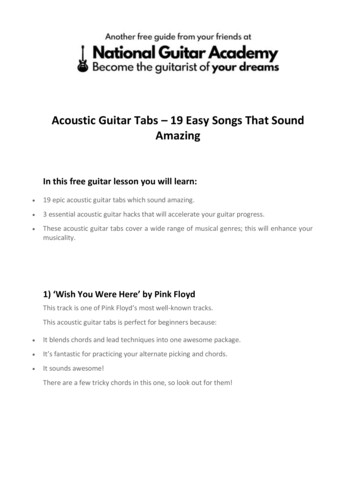
How To Make An Electric Guitar BodyIn the last article, before I started discussing thedifficult it might be to find a slab wide enough for theways to make a guitar neck, I mentioned a couple ofbody. For most guitars, you’ll need a piece at least 20”important items. I’d like to touch on these items oncelong, 14” wide and 1-3/4” thick. Length and thicknessagain before you fire up the power tools.usually aren’t a problem, but the width can be. I haveFirst, I can’t stress enough how important it is tofound it is hard to locate boards wider than 9 or 10.”follow not only a good plan, but also the correct orderTo solve this problem, it will be necessary toin which the project is completed. It’s very importantpickup a board around 40” in length and at least 7”to carefully think through each task and how it relates in width. That way, you can cut it in half and glueto the ones that will follow. For example, if I wantedthe two pieces together side-by-side. You can alsoto install decorative binding around the top edge of the triple the length if you are unable to find a board widebody, it would work best to do it before attaching theenough, just be aware you’ll have to glue up threeneck. Now some of you may be wondering what thepieces instead of two.heck I’m talking about. That just goes to show howIf you decide to go this route, you’ll need atcomplex the process can be. If you dive into a guitarleast three 24” bar or pipe clamps to ensure a properbuilding project without following a carefully planned bond. Also, I recommend high quality wood glue likeschedule, you’ll wind up with an expensive mistake.Titebond II.The second important item is safety. WoodworkingBefore going any further, you’ll need to decidecan be uncomfortable and even dangerous if you failif the guitar you’re building is going to have ato take the proper precautions. Always wear safetybookmatched, decorative top like quilted Maple orglasses and hearing protection. Avoid loose fittingsimilar. A bookmatched set consists of two figuredclothing, tie back long hair and get rid of anyjewelry that might get caught in a power tool.Read all of the manuals for the tools you’llbe using and follow the manufactures safetyrecommendations. Remember, like I said inthe last article, if you destroy your hearingor lop off a finger or two, that guitar you’rebuilding won’t be of much use!Okay, with that out of the way, we canfocus on carving out the body.This first step in making the body of anelectric guitar is preparing the blank. If youpurchased or are planning to purchase a readymade blank, just sit back and relax while Iexplain my method for making a blank tothose who’d rather save some money and do itthemselves.In the third article of this series, IIt may be necessary to glue two thick boards together todiscussed how to purchase wood for buildingget a blank big enough for a guitar body.an electric guitar. If you’ll recall, I stated howCOPYRIGHT 2009www.eguitarplans.com
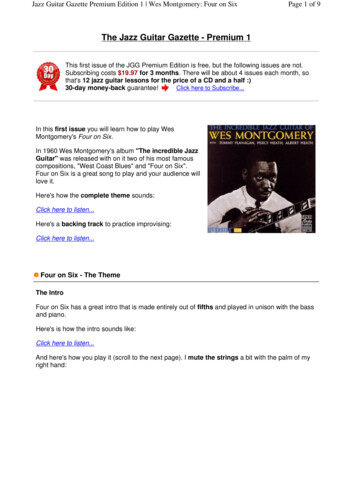
than the one before it. Try not to cut outtoo much with each pass, or you’ll risktearing out chunks of precious wood.Should either of these methods pose aproblem for you, another alternative is tohand plane the edges. Only attempt thisif you are confidant in your skills with ahand plane.Once you have the edges nice andsquare from one end of the board to theother, you’re ready to glue and clamp.Start by placing a long sheet of waxpaper on your workbench. This is doneto prevent any glue from contacting thebench. Next, place one of your boardsonto the wax paper and make sure theGluing on a decorative top.boards, which have been cut from the same board.When laid flat, side-by-side, the grain and figureappear to mirror one another. If that’s the case,you’ll need to glue the boards to the base wood sothat when you glue the blank together, the mirroreffect is preserved. Keep in mind that the edge ofeach blank will need to be squared before finalgluing. Don’t let too much of the bookmatchedtops overhang the gluing edge because the processof squaring up the edges will remove a smallamount of wood and that will likely impact themirror effect.Use a lot of clamps.After the base board, complete with thedecorative tops has been cut--a table saw worksedge you’ll be gluing is centered on the paper. Then,best for this--the edges to be glued will need to beapply a thick bead of glue along the squared edge ofaccurately squared. The best way to do this is with ajoiner. However, if you don’t have access to this piece the other board. Evenly spread the glue with an oldcredit card or similar. I like to use popsicle sticks. Setof equipment, you can do the job with a table saw, athe board with the glue next to the other on the waxrouter or a hand plane.If you use a table saw, make sure the blade is sharp paper and line them up. Make sure both boards areeven with each other across the seam. Finally, placeand positioned at a perfect 90 angle to the table. I’da clamp at each end and one in the center. Clamprecommend doing a couple of test cuts on some scraptightly and wipe away as much of the excess glue aswood to check how square and smooth the saw isyou can. Double-check the boards to make sure theycutting before running an expensive piece of woodare both even with each other across the seam. Adjustthrough it.if necessary, but do so quickly as the glue will set inIf you use a router to square the edge, use a longpattern bit with a bearing guide on the shaft above the about 10 minutes. Now comes the hard part; waitingfor the glue to dry. Let it cure for 24 hours.blades. That way you can clamp a straight board rightAfter the glue has cured, remove the clamp andto the edge of the body wood and use it as a guide forcheck the blank to make sure it’s square across thethe bit. Make several passes, each one slightly deeperCOPYRIGHT 2009www.eguitarplans.com
To cut out the body, start by making a templatefrom your plans.top and bottom seams. If itisn’t, the blank will need to berun through a surface planer.If you don’t have a surfaceplaner at your disposal, youcan accomplish nearly thesame thing with a portable beltsander, a hand plane, or if you’re a gluttonfor punishment, a block of wood wrappedin 80 grit sandpaper. That’s why Irecommend getting the boards level in thefirst place when you glue them together.Okay, so now we’re ready to cut outthe body, right? Wrong! First we need tomake a template of the body’s shape. Inthe last article I mentioned how making atemplate for the neck was only necessaryif you’re going to make more than onecopy of your guitar. The body, however,is a different story.Use 1/4” MDF board for the template.You’ll need atemplate to act as aguide for your routerwhen cleaning up thesides after cuttingout the body. Trustme, by the end ofthis article you’llunderstand why thebody template is soimportant.To make theCOPYRIGHT 2009template, start by making a full size copyof your plan, showing guitar’s body.You can do this easily by simply tracingyour plan with tracing paper. Or, if youpurchased a plan from eguitarplans.com,you can print out just the body pages andtape them together.Once you have a full size copy,carefully cut out the body’s shape usinga sharp hobby knife. Make sure youcut very smoothly and precisely. Anyerrors here will find their way onto thetemplate and eventually the body itself.After cutting out thepaper body shape, draw acenterline from where theneck joins the body all theway to the back edge. Nextyou’ll need to round up asheet of suitable material tomake the template. I like touse 1/4” thick MDF boardbecause it’s cheap, easyto find at your localhome improvement/lumberyard, and it’svery easy to workwith. Some peoplelike to use Plexiglas orplywood, but there’shigher cost associatedwith both.Place the papercut-out onto the boardand carefully trace itsoutline. And, don’tforget to mark thecenterline. Take theboard over to yourband saw or use ajig saw to cut out thetemplate. Cut very slowly andprecisely. It’s extremely importantto get the edges as perfect aspossible. To check your work, runyour fingers around the edge afteryou’ve finished cutting and beaware of any abnormalities such aslumps or dips. These can be fixed inmost cases with a fine tooth file andwww.eguitarplans.com
the blade starts to complain, back off and trycutting the curve in sections.If you have to use a jig saw, use a 4” longblade with 6 teeth per inch. Be aware thatsince the end of the blade isn’t secure likeit is on a band saw, it can angle in and outthrough the curves. The only way to avoidthis is to cut verrrrry slowly and do the tightcurves by cutting them in sections.Regardless of what tool you use, makethe cut following the outside line you drewon the body. That way if the blade wanders,you’ll have enough wood to compensate.And, don’t forget your safety glasses. Afterall, the worst time to getsawdust in your eyes iswhen you’re cutting thebody shape!some 220 grit sandpaper. In theCutting the body isend, what you want is an edgepretty straight forward.that looks and feels as if it wereMake sure you removecut by a computer controlledthe template before yourouter.start and set it aside.When you’re satisfied withGo slow and watch asthe accuracy of your template’swell as listen to yourshape and edges, you cansaw while you cut. Iposition it onto your body blank.like to take a break halfUseajigsaworabandsawtoBut, before you do this, drawway through to avoidcut out the body.a centerline on the blank sosloppiness.you can use it to help positionWhen you finish,the template. Then, grab a sharp pencil and trace thedon’t be dismayed by how rough the cut looks. In thetemplate’s outline onto the blank. With the templatenext step, you’ll smooth the edge out with a plungestill in place, draw a second outline, but this time, putrouter.the tip of your pencil into the center of a washer that’sGrab your guitar’s shape template and fasten it tobutted up against the template. Make sure you use athe body with either clamps or wood screws. If youwasher that’s wide enough to give you a line about ause the latter, be sure to place the screws where the1/4” outside the first line. This second line will be theholes won’t remain, like where the pickup pocketsone you follow when you cut out the body’s shape out will be located. That means you’ll need to have a goodof the blank.idea of where pickups will be positioned. I preferNow you’re ready to do some heavy-duty woodusing clamps since I am usually not sure, at this stage,cutting. But, before you fire up the saw, you’ll needexactly where the pickups will be located.to be aware of the limitations of your tools in order toNow you are ready to use your router to smoothavoid potential problems.the edge. The template will serve as a pattern, whichI always recommend the use of a band saw for the means you’ll need a pattern bit to do the routing. To betype of cutting you’ll do on an electric guitar project.more specific, I recommend using a plunge router withHowever, that doesn’t mean you’re guaranteed totwo different types of pattern bits. Both bits shouldmake perfect cuts. For one thing, it’s still possible tohave blades that are ½” in diameter and 1” in length.bind up the blade when cutting tight curves. To avoidOne of the bits needs to have a bearing on the shaftthis, cut slowly and listen to the sound the blade isabove the blades while the other will have the bearingmaking during the cut, especially through curves. Ifbelow them. Make sure you use a bit that fits yourTrace the template onto your guitar blank.Use a washer to draw the line a 1/4” largerthan the template.COPYRIGHT 2009www.eguitarplans.com
rout from the backside. Make sure the bit is setto a depth that will allow the bearing to contactthe newly routed edge. And don’t forget tobring the edge in gradually, just like you didwhen you worked from the template side.Once you’ve finished routing out the edge,carefully inspect your work to make sure therearen’t any gouges or rough spots. If there are,don’t panic. The next step should take care ofthem.I have found that even if you use a highquality router and super sharp bits, the edgeof the body will still need some additionalsmoothing. To do this,The finished top half of the routed edge.you’ll need to sand theedge with some 120-150grit sand paper. The easiestway to do this is with asanding drum that’s about3” long and an inch or soin diameter. If you haveaccess to an oscillatingspindle sander, you’ll getgreat results fast. But ifSmooth the sides with a router and a pattern bit.Use your template to guide the bit.router as they come witheither a ½” or ¼” shaft.When routing theedge, do so in smallincrements using the topbearing bit. What I meanis, don’t try to force yourrouter to hog out theedge in one pass. Instead,gradually bring the bitin toward the templateby carefully shaving thewood in multiple passes. Also be sure the bearing isset to a depth that will put it in contact with the edgeof the template. That way, the bearing will followthe template and prevent the bit from cutting into thebody’s final shape.Should you begin to notice chips of wood flyingaway from the bit, stop and change the direction ofyour router. Ideally, you want to turn the excess edgeinto sawdust, not chips. After all, if you’re not carefulThe finished edge.here, one of these chips might extend into the shape ofthe body and that could spell trouble!After you’ve routed the edge flush with theyou don’t, a drill press or even and hand drill will alsotemplate, you’ll notice that because the bit will onlywork very well. Keep in mind that drum sanding withrout about ¾ of an inch in depth there is still at leasta hand drill requires skill. So practice on some of thean inch or so left to rout all the way around. To godeeper, try setting the router lower as well as removing scrap pieces you cut away from the body earlier.When you’re satisfied with the edge, you can getthe template. At this stage you can use the new edgeready to rout the neck pocket. Start by placing theto guide the bearing. However, you probably won’tbody on a table long enough to support the guitar withbe able to rout all the way down to the bottom. Whenyou’ve gone as deep as you can safely go, you’ll need the neck dummied into place. Next, grab your finishedneck and clearly mark the fretboard’s center at bothto switch to the bit with the bearing below the blades.the nut and the heel. Then, mark the centerline on theBut first, you’ll need to flip the body over so you canCOPYRIGHT 2009 www.eguitarplans.com
to have the thread pass directly over the heel mark. Ifit doesn’t, adjust the neck until it does. Now you’reready to mark the outline of your neck pocket.Take a sharp pencil and closely trace the outline ofyour neck’s heel where it overlaps the body. Removethe neck and presto, you’ll have the neck pocket’sshape. Now you have to determine the pocket’s depth.Once you’ve determined the depth of the pocket,it’s time to start removing wood from this area. Startby drilling out the area with a Forstner bit in a drillpress. You could do it with a hand-held power drill,but a drill press is more accurate. If you have to use ahand-held drill, mark the depth on the bit with somemasking tape so you won’taccidentally drill too deep. do the same at the heel.Stay well with in the linesand drill down to the depthyou’ve calculated. In fact,you may want to pull backabout an eight of an inchfrom the bottom. Youcan rout out the rest in amoment.After drilling out theinside of the pocket, clampTo position the neck straight, first mark thecenter at the nut body as well. Now you canposition the neck on topof the body where it willultimately reside. Use atape measure to mark thescale length from the nutback to where you plan toinstall the bridge. You’llprobably have to check youplan to do this.In order to be surethe neck is straight, set a carpenter’s square againstthe rear of the body so the ruler portion is standingstraight up and even with the body’s centerline. Takea long length of thread and pull it tight between thecenter mark at the nut and the ruler. While holdingthe thread in this position, observe where it is inrelation the center mark at the heel. Ideally, you needThen, place a square on the centerline at theback of the body.Stretch a length of thread from the nut center to the square. If the neck isstraight, the thread will pass directly over the heel center mark.COPYRIGHT 2009www.eguitarplans.com
Carefully trace the outline of the heel where itoverlaps the body.Neck Pocket Depth.It’s All About The Angle.A simple jig is all you need to rout the neckpocket.the body to your workbench. Next, clamp two long,¾” thick, straight edged boards on each side of thepocket so they cover the lines. Then, clamp anotherboard with the same thickness to the body, betweenthe two parallel boards so that it just covers the heelline. The idea is to use these boards as a guide forrouting the edges of the pocket. I recommend youposition the boards so the pocket will be almosttoo tight for the neck’s heel to fit into. You can, andprobably will, need to sand the sides and back of theheel in order for it to squeeze tightly into the pocket.A tight fit will mean better tone and sustain.Now you can rout the sides and back of the pocketwith a top-bearing pattern bit like the one you used torout the top edge of your guitar’s body. Also be sureto set the router’s plunge depth to what will be neededfor the pocket. When doing this keep in mind therouter will be sitting on top of the ¾” thick boards, soyou’ll have to account for this added thickness whenyou set the depth.When you finish routing, you’ll notice where theCOPYRIGHT 2009There are two things to consider when determining theneck pocket’s depth. The first is how high off the body youneed the fretboard to be. The second is whether the neck willneed to sit flat in the pocket, or at a slight downward angle.Both of these factors can be decided by having an accurateplan that shows both the height of your bridge as well as thenut on the guitar’s side view. By drawing a line from the nut tothe bridge saddle, you can get a pretty good idea of the stringaction you’ll end up with. If the string is going to be too highoff the frets, you can raise the fretboard by decreasing the neckpocket’s depth. However, be aware that doing this may increasethe distance between the bottom of the strings and the pickups.An alternative would be to keep the fretboard low to the bodyand angling the neck a couple of degrees so the headstock isbelow level. In most cases, an angle of -2 to -3 is sufficient.The nice thing about modern bridges is the saddle height can beadjusted if the angle is too great or not enough.I have found that regardless of whether the neck will beflat or angled, the pocket is easier to cut if the bottom is keptflat. If you need to angle the neck down a bit, I feel it’s betterto plane or sand the bottom of the heel at an angle so that whenthe neck is inserted into the pocket, it will automatically assumethe correct downward slope. To do this, the angle you generateshould be in the opposite direction of what the neck willultimately need to be. In other words, the back of the heel willbe slightly thicker than the front where the neck exits the body.This will cause the neck to angle down toward the headstock.The reason I like to do it this way is because I cangradually plane or sand the heel—periodically test fitting it intothe pocket—until I get the angle I need. Other builders like tocut the angle as they rout the pocket, but if you don’t get perfecton the first try, you’ll have to adjust the angle by removingmore wood from the bottom of the pocket until you get it right.But if you have to shave the bottom of the pocket more than acouple of times to get the correct angle, you could end up witha pocket that’s too deep for your neck.An angled neck means low string action.A flat neck may result in excessively high string actionYou’ll need an accurate plan to determine neck angle.You could always guess based on the standard of between-1.5 and -3 , but if you’re wrong, it could be impossibleto fix.www.eguitarplans.com
Routing the neck pocket.Test fitting the neck.First of all, don’t wait until now to figure outwhere the cavities are going to be located. It’s veryimportant to layout the pickups and controls so thecavities won’t run into each other or interfere withthe installation of the bridge. Also you’ll need to planfor the depth of each cavity. For example, it’s a goodidea to make each pickup cavity conform to the shapeof the pickups themselves. Avoid making the cavitiesmore than 1/8 of an inch larger all the way aroundeach pickup. This is especially important if you’regoing to be mounting the pickups with trimA pattern bit.rings. If you make the pickup cavities toolarge, the trim rings won’t cover them up.With regards to the controls, if you planto rout the cavity into the back of the body,you’ll need to measure the height of the potand switch shafts to determine how deep thecavity can be routed. But, be very careful notto make the cavity excessively deep or thewood between the bottom of the cavity and the frontof the guitar may become too thin. For that reason, ifyou plan to rout the cavity into the back of the body,I recommend the use of long shaft controls just to besafe.On the other hand, if you plan to rout the controlcavity into the front of the body, you’ll need tocover the resulting hole with a plate or a pickguardthat holds the controls. In this case, before you startrouting, you’ll need to measure the distance fromthe back of the cover to the bottom of each control.The control, which extends down the furthest fromthe back of the cover, will determine the depth of thecavity.The method I use for making the cavities works forboth pickups and controls. Start by making a templateThat’s a tight fit!sides of the pocket meet the back, are rounded. Youcan either round the heel of your neck to match, orchisel out the rounded corners. The choice is purelyaesthetic, so it’s up to you.At this stage, the neck pocket is finished. All thatremains to be done is to sand the sides and back of theneck’s heel in order to get the tight fit that’s required.Next, you’ll move on to drilling and routing thepickup and control cavities.When it comes to the pickups and controls, thecavities they are installed in are made using the sametechnique. But, there are a few things to be aware ofwhen preparing to carve them out.COPYRIGHT 2009www.eguitarplans.comDummy up your hardware todetermine cavity placement.
This is a pickup cavity templatemade from 3/4” particle board.approach you used for the neck pocket. After markingtheir positions, drill out the cavities with a largeForstner bit. Then clamp the template into place androut the edges with a top bearing pattern bit. It’s thatsimple.At this point, you’ll need to drill or rout a spotfor your input jack. The shape of this hole will bedetermined by the style of mounting plate. Just makesure the hole is positioned so that the jack wires willenter the control cavity.If you are going to use a tune-o-matic or otherfixed-type bridge, you are done with cavity routing.Just sit back and relax for a few while I explain whatneeds to be done toinstall a tremolo bridge.Position the template and drawMore cavities tothe outline of the pocket.rout! That’s right, ifyou’ve opted for atremolo, you’re likegoing to have routsome more cavities inthe body to accountfor any return springsas well as the bridgefor each cavity out of ¾” thickMDF board. I like to use the¾” thick stuff because I canuse my 1” long, ½” diameter,top bearing pattern bit. If I usedanything thinner, the 1” long bitwould have to be plunged toodeep for the bearing to contactthe edge of the template.After you’ve made thetemplates, use them to markthe position of each cavity onthe body. Make sure you give the neck pocket and thebridge location enough room so as not to interfere witheither. Also, try and stay away from the body’s sidesespecially if you plan to round over the edges.Before we go any further, let me say a few wordsabout pickup placement.No matter what type of pickups you plan to use,there is always a question of exactly where to placethem in relation to the neck and the bridge. Myanswer is simple: Don’t worry too much about it. Fornow, just make sure the bridge pickup is in front ofthe bridge and the neck pickup is immediately afterAfter pre drilling, rout the edgesthe neck’s heel. You could spend hours studying theof the pocket.theory and science behind pickup placement, but in theend, you’ll discover it has very little impact since theitself. The size and shape of these cavities will dependvariables are too numerous and often uncontrollable.on the type of tremolo you plan on using. Hopefully,However, the one piece of advice I can give, thatthe bridge you purchased came with a schematic thatyou should follow, is to make sure the strings will bedirectly over the pickup poles. Bridge pickups usually shows both the dimensions and placement. If not,you’ll have to do some research. I hope you took carehave slightly wider pole spacing than the neck sincethe strings are converging as they head toward the nut. of this early on during the design phase of your guitar.After all, now wouldn’t be the time to discover youTo cut out the cavities, you’ll use much the sameCOPYRIGHT 2009 www.eguitarplans.com
The finished neck and pickup cavities.can’t use your intended bridge due to the placement ofthe control and pickup cavities. If you purchased yourplan from eguitarplans.com, you can relax as all of thecavities are clearly marked.Routing the tremolo cavities is accomplished inpretty much the same manner as the other ones I havealready described. Of course you’ll need accuratetemplates to do the job. You can make them yourself,or purchase ready made ones from stewmac.com. Justmake sure the template you choose will work withyour bridge.Regardless of whether you are going to use afixed bridge or a tremolo, you’ll need to connect allof your cavities so you can run your wires wherethey need to go. That means you’ll have to drill holesor cut channels to link the cavities together. You’llalso need to drill a hole or rout a cavity for youroutput jack. The choice here will depend on how theUse your plan to make the template(s) for yourcontrol cavity.Use two templates for the control cavity. One forthe cavity itself and one for the recessed shelfthat will support the cover.Predrill the cavity with a Forstner bit.Use the templates to guide your router whenfinishing the cavity.COPYRIGHT 2009www.eguitarplans.com
hole where it will contact the threaded insert when itsinstalled. For tremolos, I drill into the return springcavity and hook the wire to the bridge block. Whateveryou do, just make sure you have a wire making goodcontact to your bridge, or ZAP!If you drill holes, be very careful of the directionand angle. Also, you’ll need to use an extra long ¼”bit to do this. Any miscalculation (these calculationsare done by eye) could result in the bit missing itstarget.With all of the sawing, routing and drilling out ofthe way, you can now proceed with final shaping andsanding. Now is the time to carveany comfort contours or roundedUse a long bit to drill holes linkingedges. I normally do this with a raspthe cavities.file and follow up with a fine toothfile and some 120-150 grit sandpaper. Later on when you get readyto stain or paint your guitar you’lltreat the body to an even finer gritThe finished cavity with it’s recessed cover shelf.jack will be mounted.A Les Paul style jackwill require a hole 7/8of an inch in diameter,drilled into back edgeof the body and directlyCarefully angle the drill to connect theinto the control cavity.pickup cavities with the control cavity.A Stratocaster style jackwill need a oval shapeeither routed into the front of the guitar and into thecontrol cavity or cut into the pickguard.There are a couple of ways to route the wiringfor your guitar. If you rout the control cavity intothe front of your guitar and plan to cover it with apickguard, you can rout a ¼” wide by ¼” deep channelbetween the pickups and into the control cavity.However, make sure your pickguard design will covereverything. On the other hand if youDrilling the jack hole.plan to rout the control cavity into theback of your guitar or if your pickguardwon’t cover any channels, you’ll need toalong with a few other preppingdrill tunnels instead. Regardless of howtechniques. But that’s for a futureyou plan to proceed, be aware of how thearticle.wiring harness will be laid out. Usually,In the next article, I’ll discussthe wire starts in the neck pickup pockethow and why you’ll need to dummyand is run back to the bridge pickupup the guitar as well as how topocket. From there it heads to the controlmake the nut.cavity where it will be soldered to thepots and switch before connecting toFor more information about electric guitarthe jack. The last tunnel or channel you’ll need is onebuilding, be sure to visit my web site at eguitarplans.which leads from the control cavity to the bridge socom. There you find a selection of unique and originalyou can ground the strings For a tune-o-matic bridge,electric guitar plans available for download at a veryI drill from the control cavity into the post mountingreasonable price.hole. That way I can run the ground wire into the postCOPYRIGHT 2009www.eguitarplans.com
making during the cut, especially through curves. If the blade starts to complain, back off and try cutting the curve in sections. If you have to use a jig saw, use a 4” long blade with 6 teeth per inch. Be aware that since the end of the blade isn’t secure like it is on a band saw, it