Transcription
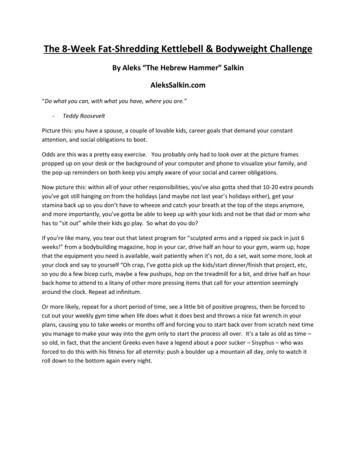
The 8-Week Fat-Shredding Kettlebell & Bodyweight ChallengeBy Aleks “The Hebrew Hammer” SalkinAleksSalkin.com“Do what you can, with what you have, where you are.”-Teddy RooseveltPicture this: you have a spouse, a couple of lovable kids, career goals that demand your constantattention, and social obligations to boot.Odds are this was a pretty easy exercise. You probably only had to look over at the picture framespropped up on your desk or the background of your computer and phone to visualize your family, andthe pop-up reminders on both keep you amply aware of your social and career obligations.Now picture this: within all of your other responsibilities, you’ve also gotta shed that 10-20 extra poundsyou’ve got still hanging on from the holidays (and maybe not last year’s holidays either), get yourstamina back up so you don’t have to wheeze and catch your breath at the top of the steps anymore,and more importantly, you’ve gotta be able to keep up with your kids and not be that dad or mom whohas to “sit out” while their kids go play. So what do you do?If you’re like many, you tear out that latest program for “sculpted arms and a ripped six pack in just 6weeks!” from a bodybuilding magazine, hop in your car, drive half an hour to your gym, warm up, hopethat the equipment you need is available, wait patiently when it’s not, do a set, wait some more, look atyour clock and say to yourself “Oh crap, I’ve gotta pick up the kids/start dinner/finish that project, etc,so you do a few bicep curls, maybe a few pushups, hop on the treadmill for a bit, and drive half an hourback home to attend to a litany of other more pressing items that call for your attention seeminglyaround the clock. Repeat ad infinitum.Or more likely, repeat for a short period of time, see a little bit of positive progress, then be forced tocut out your weekly gym time when life does what it does best and throws a nice fat wrench in yourplans, causing you to take weeks or months off and forcing you to start back over from scratch next timeyou manage to make your way into the gym only to start the process all over. It’s a tale as old as time –so old, in fact, that the ancient Greeks even have a legend about a poor sucker – Sisyphus – who wasforced to do this with his fitness for all eternity: push a boulder up a mountain all day, only to watch itroll down to the bottom again every night.
Sisyphus and his cursed boulder. On the plus side, he was pretty jacked, so he was clearly doingsomething right.There are few things more frustrating than watching your hard work tumble down that mountain ofprogress you’ve made – no matter its size. And the more often you have to go back to base camp tostart your ascent back toward the peak, the more hopeless the whole endeavor will seem and the easierit is to give up all together.I’m here to tell you that it doesn’t have to be that way.There is a much simpler, more effective, and more efficient path up to the peak of that same mountain,and it doesn’t involve endless hours of daily training, dozens of exercises for every body part, suspicioussupplements, or even a long trek to an out-of-the-way fitness facility. What’s more, it’s light yearsbetter than any gym-bound machine that locks you in place and forces you to move in an artificialpattern in an artificial environment. That way is by learning – and perfecting – the fundamentals of themost important of movements your body can do: move itself through free space, and move an objectthrough free space.Over the course of the last half decade that I’ve been training people, the majority of the work I’ve donehas been with busy professionals of all stripes: doctors, lawyers, nurses, psychologists, physicaltherapists, corporate executives, small business owners, and even a member of parliament in thecountry I live in. Almost without exception, there are a few common needs that each has in order toattain the level of fitness they’re after. They are:
The Inner Workings Of An Effective Workout1) Time efficiency- When your to-do list gets longer, your responsibilities get heavier, and your available free timegets slimmer, no one has time to spend an hour commuting to and from the gym and an hourworking out. The ability to get as much done in as short a time as possible is crucial for keepingyour fitness moving forward even as your time to work on it narrows.2) Energy inefficiency- While the idea is never to drain your energy for the hell of it (you’re gonna need it!) you needto do things that are going to work your body hard for a short period of time and allow you toburn as many calories as possible in as short a time as possible. An example of energyinefficiency would be sprinting from one end of a hallway to the other, versus walking from oneend of the hallway to another. Sprinting is more energy inefficient since it requires much, muchmore energy to cover the distance in a shorter period of time (this also makes it more timeefficient – see number 1 above) while walking is more energy efficient since it barely takes anyenergy to walk from one end of the hallway to the other, but it also takes a lot more time.3) Strength movements that recruit as much muscle as possible- Our bodies move in patterns, not in “muscles”. The example above – walking/sprinting – is anexample of the gait pattern. Your entire body gets involved: from your feet, legs, butt, core, andthe swing of your arms, everything moves all at once. In strength training, there are a greatmany movements that require that you work multiple muscle groups all at once (known ascompound movements). There are also isolation movements, which seek to work specificmuscle groups much harder (such as a bicep curl or a tricep extension). As great as thesemovements are, you can strengthen these muscles in movements that will also work your back,your core, your chest, your grip, your arms, your butt, your legs, your heart, and your lungs all atthe same time, so why bother wasting precious time on targeting these and letting the rest ofyour body kick back and relax when time is of the essence?4) Simplicity- The fewer moving parts something has, the more useful and usable it is. For our purposes, a“moving part” doesn’t have to be something with physical properties, but can be the details of aworkout as well. A workout with 2 or 3 exercises with one weight is far easier to follow andcomplete than one with 15 exercises and 30 different weights between sets.5) Clarity- A start time, an end time, a specific set and rep scheme, and an eye on long-term goals go along way in helping you stay the course and move forward.6) Safety- Nobody wants to get hurt doing something their body is not ready for. Be smart.7) Focus- Know what you are doing and why, and don’t get distracted by adding to or subtracting fromyour workout unnecessarily.
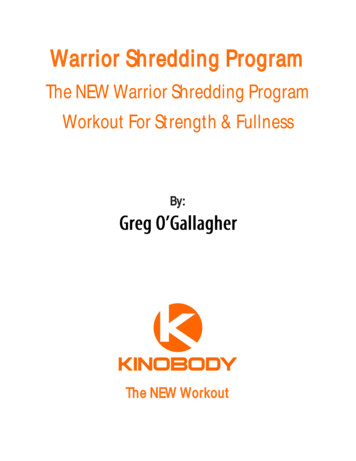
With all of the above in mind, this distills all of the variables down into the choicest few exercises andonly the most effective and readily available tools: a kettlebell and your bodyweight.If there’s one thing I love about kettlebell and bodyweight training – apart from their ability to chiselyour physique, blast body fat, and make you real-world strong faster and simpler than any other toolson the planet – it’s their user-friendly and convenient nature.In terms of pure convenience, these two can’t be beat. A kettlebell is quite literally a gym in one handthat allows you to do with one weight that would normally take an entire gym stocked to the rafterswith expensive machinery, rack after rack of free weights, and half an acre of space to fit it all into. Andbodyweight – well, this is a no-brainer. Where have you ever gone without bringing your body withyou? I rest my case. It’s the most convenient piece of exercise “equipment” around, and it won’t costyou a dang thing to use it.Welcome to the best gym in town! No lines, no crowds, and best of all, no thin coat of other people’ssweat on everything!Both of these tools are incredibly versatile and lend themselves to hundreds – maybe thousands – ofexercises and exercise variations. But despite this impressive selection, there are just two exercises ineach category that can’t be beat for working as much muscle as possible in as little time as possible.They are:The Turkish Get Up (left) and the swing (right)
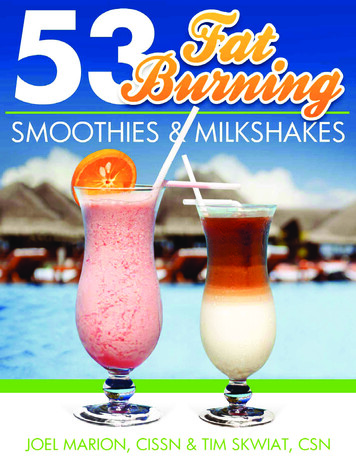
Pullups and crawling. I probably don’t need to tell you which is which.A list of exercises as lean as they body they will build. Everything you truly need for a fast, efficient, noBS workout that honors the 7 principles laid out earlier, and nothing you don’t. It was not easy to leaveout some of my favorites in each category (sorry pistol squats and kettlebell snatches!), but it was forthe greater good. The focus here is to distill down these two training tools into their most essential ofparts, and anything extra simply has no place here. At least not now. Later, when you have more freetime to train, you can start working on other movements as well. The good news is that if you’veworked the above four movements hard enough, everything else will become much, much easier. Toquote George and Ira Gershwin, “Who could ask for anything more?”As discussed previously the need to hit as many muscle groups as possible with big strength patterns ina time efficient and energy inefficient way is crucial for success. These exercises do exactly that, andthen some. Together these moves will hit darn near every muscle in your body. Combined, Turkish GetUps (a slow and steady grind) and swings (a fast, ballistic pull) will build your:* butt* core* legs* grip* arms* shoulders* upper and lower backWhile improving your:* flexibility* stability* posture
* coordination* stamina(And bonus: they will burn a barrel full of fat)On the bodyweight side of things, pullups and crawling together will chisel your:* core* upper back* chest* legs* grip* arms* shouldersAnd will likewise go a long way in developing your:* flexibility* stability* posture* coordination* stamina(2nd bonus: yes, these too will incinerate buckets of body fat)With the combined benefits of these four exercises, no muscle group will be left untouched, meaningyou can get in, out, and back to your daily life as soon as possible, only with much better energy andstrength to tackle and submit everything the day throws at you.For those of you who are already familiar with the kettlebell and bodyweight movements listed above,by all means, skip to the end for the programming details and get to work! If you’re new to kettlebellsand it’s maybe been a few years since you’ve gripped up with a pullup bar and maybe even a few moreyears since you’ve crawled, I *highly* recommend you hire a StrongFirst-certified instructor to teachyou the ins and outs of kettlebell and pullup technique, and an Original Strength-certified instructor tokeep an eye on your crawling. Until that point, we’re going to take an in-depth look at the simple – butcrucial – technique required for all of these movements.The SwingThe swing is the king of all kettlebell movements. It is also the one movement that expert instructorMark Reifkind has referred to as “The Center Of The Kettlebell Universe”. When it comes to maximumpower, speed, strength, and stamina, nothing else even comes close. The swing truly is king.But as Chief StrongFirst kettlebell instructor Brett Jones has aptly put it, “There is a difference betweenswinging a kettlebell and performing a kettlebell swing.” The technique is mercifully simple (ultimately,it’s just like a jumping motion: hips back, back flat, eyes forward, and “jump”!) but it also requires a fewdetails to make sure you’re getting the absolute most out of it without putting your body at risk.
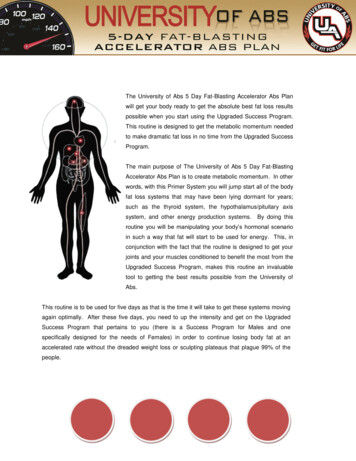
To quote one of my favorite childhood cartoon characters, Foghorn Leghorn, “you’ve gotta walk beforeyou can run!” And likewise with the kettlebell swing: you’ve gotta stand up before you can “jump”.To perform a swing properly, you’re first going to learn to deadlift (meaning pick the weight up off theground). And to do that properly, you’re gonna first need to know how to move your hips.Step 1: The hip hinge. This is the essence of the deadlift and the swing. The ability to move throughyour hips by pushing them backward and giving a powerful stretch to the biggest and strongest musclesin your body – your glutes – will teach you how to not only carve a strong and athletic rear end, but willalso help you do day-to-day tasks better, as strong glutes equal a strong person. Once again, this isbasically the same technique as a broad jump, so if you’ve done that a time or two in your life, you arealready ahead of schedule.A good hip hinge: butt back, back flat, eyes forward, feet flat on the ground, abs braced, as if for a punchThe Quasimodo deadlift: terrible for your back health, but great for back surgeons everywhere looking toupgrade their Mercedes to this year’s model. In short, don’t do it.
Nope! Do not try to overextend your back.Step 2: The plank. This seems like an odd step for a movement that doesn’t require you to get on theground, but it’s for a purpose. Done properly, the plank will teach you how to recruit all of your musclesat once to generate more strength, power, and perform all of the movements in this report safely andeffectively (with the exception of the crawling, which requires you to be as relaxed as possible). You willreplicate the feeling you get in the plank (particularly the tightly tensed abs and glutes) at the top ofeach deadlift and swing.The plank: abs tight, glutes squeezed, whole body tensed. Imagine trying to pull your elbows to yourtoes and your toes to your elbows without piking at the hips.
Step 3: The deadlift. With a kettlebell between your feet and applying that tensed feeling you got in theplank, you will press your hips back in exactly the same fashion as you did in step 1, making sure you’rekeeping your abs tight and your back flat along the way. Once you have the kettlebell in your grasp,stand up quickly without losing your tension. Be sure to stand ramrod straight without leaning back.Another plank variation – the wall plank – is very effective at instilling this feeling in your body. Standwith your body touching a wall from the heels to your head, and try to use your strength to make animprint of yourself against the wall. Then go try your deadlifts and notice the difference.Dip, grip, and let ‘er rip!Right: the wall plankStep 4: The hike. When you can deadlift with great ease (10 sets of 10 reps), you can start moving on tothe hike. The hike is exactly what it sounds like: you start off with the kettlebell a little bit in front ofyou, and you hike it between your legs like a football (for those of you not familiar with Americanfootball, shame on you!). You will remain in the hinged position, and only your arms will do the work.You will feel your back working hard as your back muscles – particularly your lats, or “armpit muscles” –help your arms launch the weight as if you are trying to throw it behind you. When it reaches its zenith,let it fall back and land in the exact same position as where you started.The hike: toss the kettlebell toward your zipper and let it float back to its starting point.
Step 5: The swing. After you’ve practiced your deadlifts and your hikes and can do either for 10 sets of10 reps, it’s time to put the two movements together! Get into the hike position, toss the kettlebellbetween your legs, and the moment it reaches its zenith, stand up tall and let the kettlebell float! Let itfall back on its own, and the moment it reaches your zipper area, powerfully push your hips back andstand back up. Repeat for as many quality reps as you can. (Note: this movement is done entirely withthe hips; the hands and arms do not consciously lift the bell, they are only there to put the bell throughthe path that your hips power has made. If you have a hard time doing this, grab a rope or a towel, feedit through the handle, grip the rope/towel close to where the handle is, and swing that way. This willhelp you to learn how to disengage your arms from your swing.)The Turkish Get UpNamed for the Turkish wrestlers who (allegedly) invented the exercise 200 years ago to help with theirgrappling skills, Turkish Get Ups were a movement as common in ages past amongst performingstrongmen who wowed crowds with their incredible strength as the bench press is in the modern era. Ithas come back into regular practice in the past decade and has become something of a rite of passageamong kettlebell trainers and trainees alike looking to build their upper body strength to legendary oldschool levels. Because it smoothly and efficiently links together multiple important body movements, itis as appropriate for the super athletic as it is for the raw beginner. After all, what could be moreimportant than the ability to get up off the ground?Here are the ins and outs of the Turkish Get Up, taught from the top down (In your practice you willbegin on your back , but to feel your way around the movement the first time you do it so that you canlearn it more quickly, you will start with a position you are much more familiar with: standing up).
Step 1: Put one hand over your head and balance a shoe on your fist. This serves two purposes: 1) toget you accustomed to controlling your movements by having to balance something that will fall if youmove sloppily, and 2) it will show you are ready for the full movement. Quite often, people need to takesome time to build up their shoulder mobility in order to do this portion of the movement, so if youcan’t put your hand over your head, elbow locked, shoulder packed (i.e. shoulder sucked into its socket),bicep near your ear without leaning back or to the side, you will simply wait to practice this portionmovement with weight until you can do that.Step 2: Take a step back with the leg opposite the hand in the air.
Step 3: Kneel down on that back leg.Step 4: Turn the kneeling leg inward.Step 5: Push your hips toward your turned-in heel and reach for the ground.
Step 6: With your weight evenly between your hand and your foot, lift your hip slightly and “kickthrough” until you’re sitting on your butt.Step 7: Lower yourself to your elbow.Step 8: Lower yourself backward until you’re on your back.Step 9: Put all of these movements in reverse order. Roll onto your elbow, press up onto your hand,lift your hip and bring your knee in line with your hand, get into the kneeling position, and stand backup.Notice how in each movement I am keeping my chest wide and my shoulders down away from my ears.No matter what position I am in, my shoulder never raises – it always stays down in a packed, safe
position. This is important, as you will need to do this with every movement you practice in thisworkout.In StrongFirst, we recommend that if you are brand new to this exercise your practice a total of 50 solidreps with a shoe before you try to add on weight. It might sound tedious, but it is for two reasons: 1) itwill allow you to build some skill in the movement before you try to navigate your way from the floor tostanding while balancing a weight, and 2) if this is your first time learning the Turkish Get Up, you willget a plenty good workout in just practicing getting up and down off the ground with a shoe. Trust me.Once you are ready to add weight, you will choose one that is challenging but doable. For the averageman, I’d recommend between 12 kg and 16 kg (26 to 35 lbs). For the average lady, the recommendationis between 8 kg and 12 kg (16 lbs to 26 lbs). As always, use your best judgement. You will get theweight into position by rolling over into the fetal position, rolling onto your back, and using both handsto press it to the lockout.When you start practicing with your kettlebell, your technique should look identical to the techniqueyou drilled with the shoe. The better honed your technique is, the easier the path is toward Turkish GetUp glory, which – naturally – means doing it as heavy as your preparation will allow. Here’s a video ofme performing a Turkish Get Up with a 48 kg (106 lb) kettlebell. Easy! https://youtu.be/kpVzpS4ce7gThe meaning of life: putting heavy things over your head!
The PullupIt’s been said that what biceps are to bodybuilders, backs are to weightlifters. And fortunately for you, ifyou work your pullups hard, you’ll have both a strong, shapely, chiseled back AND some impressivelooking biceps to show for your efforts! No matter who you are or where you are in your training orfitness goals, pullups are a worthy goal for anyone, and they will work wonders at building usable, realworld strength in your grip, forearms, biceps, back, and even your abs. Perhaps best of all, pullups areincredibly simple, though a few technique clarifications will come in handy to make sure that you’rerecruiting as much muscle as possible and getting as much work done as possible.Step 1: The hollow position. The hollow position is the posture that gymnasts derive all of their strengthfrom. It powerfully recruits every muscle from your head to your toes – abs, glutes, back, chest, legs,and anything else you could possibly hope for – and will turn your pullup strength from weak-ish tofreakish!Step 2: The active hang. The active hang is just what it sounds like: hanging from a pullup bar (in thehollow position, of course) with “active” shoulders – meaning shoulders pulled into their sockets like inthe Turkish Get Up. Unlike with the hollow position on the ground that lets you cave your chest in a bit,make sure that when you’re practicing your active hangs you keep your chest big and keep yourshoulder blades pulled down and back. This is crucial for shoulder health when you start practicingpullups.
Step 3: The flexed-arm hang. The flexed-arm hang is exactly like how it sounds: your arms are flexed(i.e. you’re in the top position of the pullup) and you are hanging out there. This will build sometremendous strength, but you may need to jump up there or step off of an elevation to get into position.Step 4: The negative (lowering portion of the pullup). From the flexed arm hang, lower yourself slowlyand under control until you reach the active hang position. Step 5: The pullup. Grip up with the bar, get your body tight, and pull your way into the flexed-armhang position. Lower yourself slowly and under control, and repeat!
CrawlingCrawling is far and away the most overlooked, underrated, and underused bodyweight movement forbuilding strength in every nook and cranny of your body, restoring and re-strengthening your most basicof movement patterns, and incinerating body fat while simultaneously filling you out with real, usablemuscle. Crawling serves as the basis for your gait pattern (walking) and is simultaneously so gentle andso powerful that anybody from athlete to desk jockey can – and will – get light years ahead in theirstrength and conditioning simply by adding it to their regular practice. If all you have is a few minutesand a little bit of floor space, you can still get in a dynamite workout with crawling alone.Crawling is easily the simplest of all the techniques discussed previously because it is without a doubtthe only one you’ve already done at some point in your life! There are only a few considerations tomake sure you’re doing it right.Step 1: Contra-lateral limb movement. In other words, move with the opposite sides of your body. Thisis exactly the same way that you walk: left foot forward, right arm forward/right foot forward, left armforward. The easiest way to do this is simply by tapping your opposite knee with your opposite handand then placing those limbs down one step ahead. Repeat on the other side. Step 2: Keep your head up. Good life advice in general, I’d say, but especially helpful in crawling sincekeeping your head up will activate the postural muscles of your back and strengthen them so that youwill be able to walk around like an exclamation point instead of a question mark.Step 3: Knees off the ground. The real magic of crawling as strength training comes when you are ableto crawl with your knees off the ground for an extended period of time (when the time comes – takeyour time getting there). It’s important that you keep your hips below your shoulders (easilyaccomplished by keeping your knees hovering just an inch or so above the ground) so that your abs getworked just as hard as everything else. For a real challenge, work up to doing these for 10 minuteswithout putting your knees down. You will have positively unreal strength and stamina by this point.
The ChallengeNow that we’ve got all of the technical stuff covered, let’s get to the fun part: the challenge!Unlike most workout challenges, this one is not designed to deplete you, crush you, knock you flat onyour you-know-what and leave you wondering “what the heck just happened?” On the contrary, thischallenge is designed to build you up, make you leaner, make you stronger, and make movement andfitness a part of your day-to-day life. As such, this challenge is about getting in the daily habit oftraining, and employing those previously discussed building blocks of an effective workout: namelyconsistency, efficiency, focus, and simplicity.The template of each workout will look like this:Total workout time: 20 minutes – 10 minutes for the first exercise, 10 minutes for the second exercise.Kettlebell size: 8-12 kg (18-26 lbs) for beginner women and 12-16 kg (26-35 lbs) for beginner men. Ifyou’re experienced in these movements, choose whichever weight you’d like, but use your head. Picksomething you can do with perfect form.Rest periods: rest as little as possible but as much as necessary to preserve good form.Simple. Focused. You will be on an alternating routine that will emphasize bodyweight training moreone week and kettlebell training more the next week.Week 1Monday: Pullups CrawlingTuesday: Turkish Get Ups SwingsWednesday: Pullups CrawlingThursday: Turkish Get Ups SwingsFriday: Pullups CrawlingWeek 2Monday: Turkish Get Ups SwingsTuesday: Pullups CrawlingWednesday: Turkish Get Ups SwingsThursday: Pullups CrawlingFriday: Turkish Get Ups SwingsOn week 3, you will repeat week 1, on week 4, you will repeat week 2, etc. Continue until you’ve hitweek 8. And from there, you can either decide to repeat for as many more weeks as you’d like, or moveon to a different program.“Wait, that’s it? There are no more details to the program?!”Just following the rules of “rest as little as possible but as much as necessary” along with “maintain goodform throughout” will take you remarkably far if you get out of your own head and stick to focusing onjust showing up, working hard, and leaving when the work is done.
However, I understand that the tyranny of choice and decision fatigue are real things, and as a busyprofessional the fewer decisions you have to make means the more likely you are to succeed. So I’ll laydown a few guidelines for you to help you keep your progress moving forward with as little guessworkas possible.How To Personalize Your ChallengeTo get the most out of this challenge, you need to first find out where you are in each of the movementsso that you can move boldly forward to greater leanness, strength, and resilience. The way that we’ll dothis is by finding your technical rep max (TRM).The TRM is the number of reps you can do flawlessly. That means no excessive struggle, no slowingdown of the movement, and no “ugly face” when the going gets tough. This runs counter toconventional wisdom that you’ve gotta “dig deep down, give it 110%, and squeeze out one more rep,bro! It’s all you!” There’s a time and place for that, but it’s not every single workout. This challenge is atest of your commitment, consistency, and tenacity to get in a workout every single business day. Whenyou complete the challenge, testing yourself and seeing how much you can do when you pull out all thestops will be much more valuable than trying to test yourself every day.Think of it this way: if you had to take a test every time you went to class, how much would you learn?Nothing, of course. You go to class to learn, and every once in a while – maybe 1-2 months – there’s atest to see what you’ve learned. Training is exactly the same way. We are in pursuit of body knowledge,and that pursuit takes time and consistent effort. Test yourself all the time and you’ll find that you’velearned nothing.So before you begin the challenge, perform the four moves – the swing, the Turkish Get Up, the pullup,and the crawl – and see how you do. For the swing and pullup, find your TRM as described above. For the Turkish Get Up and crawling, see how long you can perform them with good form(switch arms on each rep in the Get Up)Write these numbers down and compare them to your results on week 9, your testing week.A sample program, and how to progressLet’s say these were your numbers: Swings: 20 Pullups: 6 Get Up: 1/1 x 3 Crawling: 1 minute (knees off the ground)
A good rule of thumb is to do around 25-30% of your best effort in a set. This is for two reasons:1) It will allow you to keep the quality of your work high. High quality greater skill better workcapacity more work you can do more results. It’s as simple as that. The idea is to do morework, not get more fatigued. Remember that.2) You will have to work out the next day, so giving it everything you’ve got will make working outtomorrow much, much harder. Remember: we’re chasing strength and fitness, NOT fatigue!3) Bonus reason (I’m feeling generous today): It will allow you to nudge your body into doing morework over time, rather than trying to force it. This will reinforce consistency and turn regularshort bursts of exercise into a daily habit.So your first two weeks might look like this:Week 1Monday:- Pullups (8 sets of 2, 2 sets of 1)- Crawling (8 sets of 20 seconds, 2 sets of 10 seconds)Tuesday:- Turkish Get Up
Mar 08, 2020 · weeks!” from a bodybuilding magazine, hop in your car, drive half an hour to your gym, warm up, hope that the equipment you need is available, wait patiently when it’s not, do a set, wait some more, look at your clock and say to yourself “Oh crap, I’ve gott