Transcription
Making Cold Process Soap for the First Time:How to make soap & beginner soap recipes to get youstarted!By Rebecca D. Dillon, author Soap Deli News BlogWhether this will be your first attempt at making homemadecold process soaps or you're simply looking for new soap recipesto get your feet a little wetter, following is my collection ofbeginner cold process soap recipes that are relatively lessexpensive to make with ingredients that are also more easilysourced locally. After all everyone's not sure if soapmaking willbe for them. But I've found that most folks who givesoapmaking a shot are permanently hooked after creating their first successful batch.For those who are truly passionate about soapmaking, you'll likely find that purchasing ingredientsonline and in bulk to be the most economical. Soapmaking is not what one would think of as a “cheap”hobby as the initial cost is much greater than other hobbies such as scrapbooking or crocheting.However, if you have problem skin of any kind, you'll find that not only is soapmaking worth theinitial start up cost, but your skin – and your friends & family's - will also benefit from what couldbe your new passion.Without lye there is no soap.The scariest thing for me when I first started makingsoap was working with lye. Lye – also known as sodiumhydroxide – is a necessary part of making homemadesoaps. Without lye, there simply is no soap. You musthave a fat – your soapmaking oils and butters – and analkali – sodium hydroxide – to make soap. Whencombined they go through a chemical reaction calledsaponification. During this process, the lye is used tochemically change the fats into soap. If done correctly, there is never any lye left in the resultingsoap.The only way to avoid working with lye is to buy pre-made bases. However, as I quickly discovered,this limited the final outcome of the soaps I made. If you're looking for soaps that have specificproperties, the best way to get them is to design exactly the kind of soap you want by includingingredients with the properties you want into your cold process soap recipe.
Yes, lye is a little scary. However, once I finally dove in and made cold process soaps for the firsttime, I realized that it wasn't nearly as terrifying as I thought it would be. I've found that tutorialson soapmaking tend to have you be overly cautious about working with lye so it seems frightening. Thetruth of the matter is however, it isn't frightening as long as you have sound knowledge of whatyou're doing going in, and you take simply safety precautions – just like in high school chemistry class.So purchase some goggles, some gloves and for kicks you can also go with a fancy new rockabilly apronjust so you have some great photos to share on your social media.Your goggles and gloves can be purchased at your local hardware store. This is also likely where you'llfind the lye you need to get started. Many hardware stores have jacked their prices on lye doublewhat they were a few years ago AND started keeping it behind the counter. This is due the rise inmethamphetamine use as lye is one of the ingredients used to make meth. Naturally this can makesourcing lye a bit discouraging especially if your hardware store has chosen not to carry it at all.The most common brand of lye I've found locally, since grocery stores stopped carrying Red Devil Lye,is Roebic Heavy Duty Crystal Drain Opener. It's sold in 2 lb. Containers and contains 100% lye (sodiumhydroxide, caustic soda.) There are other brands out there as well and they will suit fine as long asthey are 99% or more pure. Another alternative would be to hunt down your local soapmakers – Inetworked with local soapmakers at my farmer's market – and see if they have any lye they can sellyou just to get started or can tell you where they source lye locally.Additionally, you can also purchase lye at various places online from chemical supply companies,soapmaking suppliers and Amazon. I buy my lye from a local chemical supply company. While it's muchcheaper for me to purchase lye this way it does require buying in bulk. The smallest size of sodiumhydroxide pellets they offer is 55lb. However, it costs less than 40 and I can pick it up at theirwarehouse. Unless you know you'll be going crazy making soap 24/7 though, I recommend paying alittle more and starting out with a much smaller quantity.Equipment you'll need for that first – and all those “I'm a soap addict!”subsequent soap batches.Now that you've sourced your lye, suited up with your goggles, gloves and that rockin' apron, you'llneed a few housewares. It's likely you already have a few of these things in your home so you're notsplurging all your funds on equipment. Because quite honestly you'll want to splurge on the ingredientsgoing into your soap. That's where all the fun is at. If you're off to a running start and plan to makeenough soap to wrap around the moon and back, then you might want to buy all new equipment tokeep your kitchen utensils and pots for actual food separate from the strictly soapmaking equipment.But it's not necessary to never use your soap pot for cooking spaghetti in again. Just wash it reallywell. Wash it again to ensure there's no residue and you're good to go.
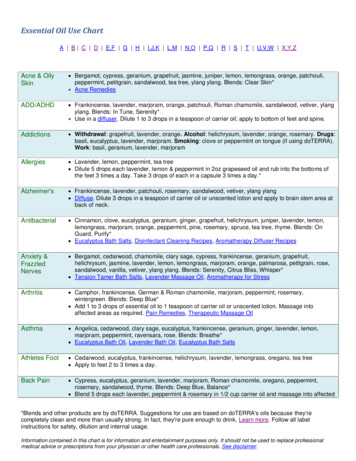
You can save some money of course by checking out second hand stores if necessary or simply desired.Or if you have the green light from your significant other to go crazy, then I recommend you just gocrazy.You will need without a doubt the following:A digital kitchen scale that weighs in grams and ounces andcan handle some more significant weight. I have used a Baker'sMath scale for years and highly recommend it over say ashipping scale from an office supply store as it will stay moreaccurate over time and last much longer.A stainless steel pot for mixing your soap. You NEVER want touse aluminum ANYTHING to make soap as this does somepretty crazy chemistry of its own when it reacts with lye.And it's not the chemistry we want for soapmaking. It's also pretty dangerous. Therefore if you aren't100% certain your pot isn't aluminum, then buy one that you know is most definitely not.A thermometer, such as a candy thermometer, so you can accurately judge the temperature of yourlye-water and oils before you mix them together.You'll also need a stick blender/hand blender/immersion blender. It's called many things, but it'sbasically the same tool. This takes the hardest physical part of soapmaking – the mixing – out of theequation. As a result your soap will trace faster, meaning less time you have to stand around mixing,and it also helps to ensure an evenly mixed batch of soap. I wouldn't say any one brand is better thananother as I've had cheap stick blenders last for ages and do just as well as the more expensive ones.Pitchers and measuring cups! You'll need a pitcher or large Pyrex measuring cup to mix your lye-waterin as well as to weigh out ingredients. Some soapers won't use glass Pyrex measuring cups to mix thelye-water in as it can etch the glass over time and inevitably lead to breakage. However I've had thesame thing happen with plastic pitchers over the years. So I'll leave that decision up to you. It's goodpractice is to inspect your containers regularly for any signs of wear or cracking as well as to mix yourlye-water in a sink or outside in case a container does break in the process.You'll also want to have some handy dandy utensils like large mixing spoons and a spatula. I use a longplastic spoon – like the wooden ones but plastic – to mix my lye water. I use a heavy duty metalspoon to scoop out semi-solid oils and butters, and a spatula to get all of the soap out of the pot intothe mold. Occasionally I even use a knife or a grater for hard oils and butters to get them down tosize. You'll find what works best for you and likely you already have all of these things hiding indrawers in your kitchen.
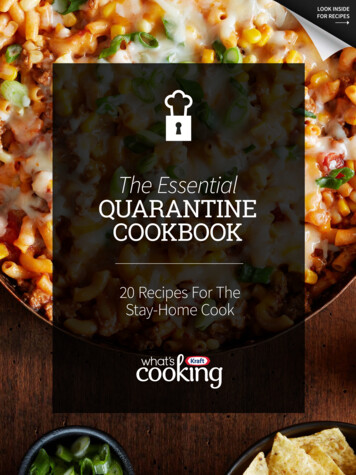
What about soap molds?Finally you will need a mold for your soap. You don't need to spend a lot of money on a fancysoapmaking mold. Your mold could be as simple as a cardboard box or a tupperware container that hasbeen lined with a trash bag. Alternately you could purchase a silicone loaf pan – the same kind usedin baking – or you can easily make your own wooden loaf soap mold with just a few materials from ahardware store for next to nothing.I've been using wooden loaf soap molds that mydad made me for well over a decade now. I likethe wooden molds because they are practicallyindestructible. Most of my homemade soaprecipes I develop contain 36 oz. in oils and fitperfectly inside these molds. If you'd like tomake your own wooden loaf molds you can findthe dimensions for this mold along withinstructions for making your own here.Keep in mind however that using a wooden soap mold does require some preparation before use. Whileyou can pour your soap directly into a silicone mold, you must line a wooden soap mold. (The same goesfor using a tupperware container or a cardboard box.) However, for round soaps you can use an emptyPringles can and simply peel the paper container off your soap once it's gone through the saponificationprocess.Not lining your wooden soap mold will cause your soap will get stuck and result in a lot of unnecessaryfrustration. When I first started making soap, I used to cut parchment paper to line my molds.Basically you fold the paper in a way that is similar to wrapping a present but with an open top. I'vealso seen contact paper used in the same way as demonstrated in this tutorial from Inner Earth Soapsblog. However, I found that both parchment paper and contact paper can get expensive over time. AndI also found the process for lining my soap molds this to be overly tedious and time consuming. Becauseof this, and due to the stiffness and occasional pain in my hands from the fibro, I use thin,commercial office trash bags to line my molds. (Theseare rather inexpensive to purchase at places like Sam'sClub and Costco. So if you lean towards more practicalthan perfect and don’t mind a few minor creases onthe sides and bottom of your soap, then this methodmay be the one for you. Plus, once you've unmoldedyour soap, the trash bag can still be used as an actualtrash bag.
To line my wooden soap mold using a trash bag, I simply unfold the bag – but don’t open it – press itinto the mold and then tape the outer edges with masking tape where the bag folds over the outsideof the mold to keep it in place. This method is gentle on hands and super quick especially if you arelining multiple soap molds at once. Of course, how you choose to line your molds is personalpreference. I recommend doing whatever works best for you. Once your soap has set you simply liftthe soap from the mold and peel off the liner, cut into bars and allow to cure. And, if you used afragrance in your soap, you know have a scented trash bag for the bathroom!Learning about soapmaking ingredients.Now that you have your soapmaking equipment, it's time to focus on the ingredients for your soaprecipe.For your first attempt at making cold process soap I recommend using a tried and true soap reciperather than creating your own. It is helpful to know some of the basic chemistry about youringredients so that you can create your own homemade soap recipes in the future. Your fats – orsoapmaking oils and butters – will very much determine what properties your soap will have. Forexample, three of the traditionally popular soapmaking oils, especially for beginners, are olive oil,coconut oil, and palm oil. Olive oil helps to create a moisturizing bar with a stable lather; coconut oilproduces a hard, cleansing bar with a fluffy lather; and palm oil makes for a hard bar with a stablelather. Each of these oils has its own SAP (or saponification) value which determines how much lyeshould be used in the soap recipe for saponification to occur in such a way that it makes soap. Toomuch lye and you have an unusable bar of soap. Not enough and you could end up with a really softsoap with excess oil.A great source for learning more about the saponification process and the properties of varioussoapmaking fats & oils is Susan Miller Cavitch’s book, The Soapmaker's Companion. Her book alsocontains a great troubleshooting section to help you figure out what might have gone wrong with asoap recipe as well as a nice collection of her own recipes.A little about how to create your own homemade soap recipes.When creating your own homemade soap recipes, there are also a lot of additional free resources tohelp you with this process. Lye calculators, for example, will automatically calculate the amount of lyeyou need in a recipe based on the amounts and types of oils you plan to incorporate into your recipe.You can find multiple links to lye calculators by conducting a google search. However, the lye calculatorat SoapCalc.net can help you to create a soap recipe that meets your expectations for the propertiesyou're looking for in your own soaps. It does this by giving recommended ranges for the various soapqualities and fatty acids and tells you where your soap recipe falls in regards to each of these ranges.
However, the soap calculator at SoapCalc.net is a bit more complex than some of the other soapcalculators available so you'll need a little more information to get started with this lye calculator.Certainly don't let that intimidate you though. You can discover some pretty fantastic soap recipesthrough trial and error.To use the lye calc at soapcalc.net you'll need to enter a little bit of information in addition to youringredients. Since you'll be making cold process soap you'll need to choose the radio button for NaOH(sodium hyroxide.) KOH or potassium hydroxide is used to make liquid soap.Next, choose which measurement you'll be using to weigh your oils. I recommend using either grams orounces. I typically weigh out my ingredients in ounces however for smaller recipes you'll find thatgrams will always be the most accurate as it's a smaller unit of measure.Third choose your water as % of oils or the water discount. I highly encourage you to set this at 33%.Otherwise you'll likely have a very soft soap to start out with which will not only take longer beforeit can be unmolded but will also take much, much longer to cure as there's so much more excess waterthat needs to evaporate. Occasionally I use less than 33% for soap recipes that are using a lot of oilsthat are know for creating a softer soap. For example, a 100% olive oil soap – or what is known as atraditional Castile soap - is going to start out as a much softer soap and requires a cure time of 4-6months rather than 4-6 weeks. In this case I typically use 30.5% as the water discount amount.Next choose a superfat amount. A soap with 0% superfat has no extra oils left over in the final soapbars once saponification is complete. To superfat a soap means you have extra fats (or oils) that areleft unsaponified in your final bars of soap. These unsaponified oils help to make soap moreconditioning. It is standard practice to use at least a 5% superfat unless you are making a laundrysoap. This saves your butt in case of small errors in measurements and keeps your soap from strippingtoo much excess oil from your skin when bathing. For a more conditioning soap you would use a highersuperfat of up to 8%. However, in some situations, you may choose to use an even higher superfatamount for personal reasons or simply because it's “good science.”
For example coconut oil has natural cleansing properties in soap. As such it's recommended you only useup to 30% coconut oil in your soap recipe to avoid an overly cleansing soap that will strip skin of itsnatural oils. (I typically only use 20% or less as I prefer soaps that are more conditioning thancleansing.) 100% coconut oil soaps are very cleansing which is great for making laundry soap.However, it's not so great for skin. You can overcome this in a 100% coconut oil soap however bysuperfatting your soap recipe at 20%.There are times however, or “bad science,” that a really high superfat doesn't make sense. Coconut oilhas a very long shelf life and therefore isn't prone to going rancid. Other oils, however, have a muchshorter shelf life. Because of the higher percentage of oils left unsaponified at a superfat percentageabove 8%, they can go rancid more quickly than you might like and cause what is commonly referredto as DOS. DOS or dreaded orange spots are basically unsaponified oils that have gone rancid. Shouldthis occur to any of your soaps, and sadly it sometimes does, you can salvage the soap by grating it andusing it as a laundry soap.Next, if you are using a fragrance for your soap recipe choose your fragrance amount. Typicallyfragrance oils are used at 1 oz. per pound or less and essential oils at half that amount or less.However, this can vary depending on the type of fragrance oil or essential oil you are using. Typicallyfragrance oils are used at a max of 5-6% of your recipe. Sometimes the maximum usage amount fora cold process soap recipe is lower. In this case you'd need to refer to the manufacturer's guidelines onthe maximum amount of fragrance oil that is safe to use. For essential oils, the usage rate is typciallybetween 1-3%.Now select your soapmaking oils, fats and waxes for your soap recipe. Click on the first oil, fat orwax you are using then click on the plus sign for the #1 spot on the Recipe Oil List. If you know thespecific oil weight you'll need for your soap recipe – say you have a 3 lb. mold – hit the lb radiobutton. Enter the amount of the first oil you plan to use.
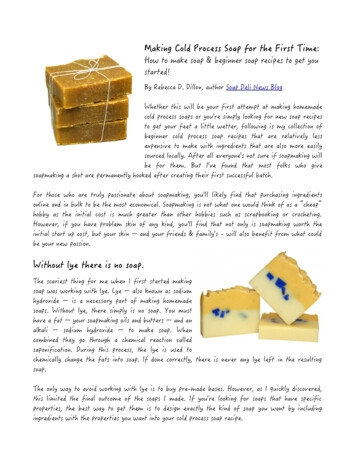
For example, if you are making a 3 lb. batch of soap and you want to use coconut oil at 20% of yourrecipe, multiply 48 ounces (if you chose the weight of the oils to be in ounces) times .2 for 9.6ounces. Enter 9.6 in the first box.Now repeat with all of the remaining oils until you've reached the total oil weight of your recipe.Click on Calculate Recipe then View or Print Recipe. Your recipe will open in a second window and giveyou the amount of lye and water you'll need based on the data you entered, the amount of fragranceoil to use and information on what the soap bar quality will yield. While it's not a hard and fast rulethat you fall within the recommended ranges of soap bar quality for hardness, cleansing, conditioning,bubbly, creamy, iodine and INS, it's safer to stay within these ranges if you're just starting out andlearning for more successful results until you learn more through experience and further research.
Pictured above is a test recipe I threw together as an example of what your final recipe will look likeafter inputting your information into SoapCalc. Pretty neat, huh? (This lye calc has actually taught methat both hemp seed oil and sunflower oil are high in iodine.)FYI It is good practice to always double check the amount of lye in a recipe with a lye calculator ifyou are unsure of its source.Resizing a soap recipe.Not using the lye calculator at SoapCalc? Other lye calculators, like the one at Brambleberryautomatically give you a more standard amount of water or liquid needed for your soap recipe. Thismakes it somewhat simpler to use if you're just getting started. While it doesn't offer as many oilchoices as SoapCalc and won't give you an idea of what properties your soap will have, Brambleberrydoes have a simple and easy tool to resize your soap recipe once you input it into the lye calculator.You can learn how to re-size a cold process soap calculator using Brambleberry's lye calculator here .Need a quick and easy way to learn to what properties the soapmaking oils you want to use have? It'sas easy as a google search! Properties and suggested amounts can be found on most soapmaking supplierwebsites. So typically you can visit the website of your favorite supplier and the product page of theingredients you are interested in buying will tell you what properties a particular ingredient will lendto the soap as well as the recommended amount. Alternately you can type into your search box phraseslike “properties of hemp seed oil in soap” or “recommended amount of hemp seed oil in soap” andyou'll find all kinds of valuable information.Summer Bee Meadow also has a simple chart for quick reference on their website that provides acollection of commonly used oils in soapmaking along with their fatty acids and resulting soapcharacteristics. Another website, Lovin' Soap Studio, has a chart with commonly used oils and therecommended usage rates. You should also be able to determine the shelf life of your ingredients fromthe manufacturer or soap supply company you purchase your ingredients from.Determining the amount of soap needed for your mold.Need to re-size a soap recipe to fit into a mold but aren't sure what to scale the recipe to? There's asimple formula for determining the weight of the soapmaking oils needed for your mold. About.comhas a formula and instructions for calculating the amount of soap needed to fill a mold here. Theygive the basic math equations for determining the correct soap recipe size for standard square ortraditional molds, round or tube molds and odd or irregularly shaped molds.(Note that for most of my soap recipes I use my easy DIY wooden loaf soap mold unless otherwisenoted.)
Getting down to business.Following are your basic step-by-step cold processsoapmaking instructions. However, keep in mindthese steps aren't always set in stone andtemperatures used in soapmaking can vary basedon the ingredients you've chosen for your recipe.1. Begin by preparing your soap mold so that it isready when your soap is ready to be mixed andpoured. For some recipes you will also also need tocut out a piece of cardboard to cover the top ofyour mold. The cardboard will be used to helpinsulate your soap after it is made, assuminginsulating your soaps is needed for the gel phase.2. Once your mold is prepared measure out the amount of distilled water (or other liquid) called forin your soap recipe in fluid ounces. (Or whatever measurement you are using for your recipe.)3. Pour your distilled water in a non-aluminum container. This may be a sturdy plastic pitcher or aglass Pyrex measuring cup. (If using glass be aware that lye-water can etch glass and so it should becheck periodically for cracks or excessive etching.)4. Next, while donning your safety gear, weigh out the lye using a digital scale. Place the containeryou’re using to measure the lye onto the scale, press tare to zero it out, then slowly pour the lye ontothe scale until you reach the amount needed.Now, in a well ventilated area, slowly pour your lye into the container of distilled water. (You neverwant to pour the water into the lye as it could result in a not so pleasant volcano effect.) Stir yourlye into the water with a plastic or wooden spoon until it dissolves thoroughly. Now set the lye-wateraside to cool. If you’re mixing the lye inside, keep it on the stove with the exhaust fan turned on andstep away. Or allow it to cool outside to avoid the nasty fumes. Be sure there are no children oranimals underfoot who could get hurt.It's also important to note that lye-water gets VERY hot and can cause chemical burns. If you aresplashed with the lye-water thoroughly flush the affected area with cold water. Then use vinegar toclean up any spills on hard surface areas.5. While the lye is cooling, use the digital scale to weigh out the soapmaking oils, butters and waxes aswell as any other ingredients. After weighing each of my soapmaking ingredients I combine them into
a large stainless steel pot then place them on the stove over medium heat. You can also melt your oilsseparately in canning jars within a water bath. This works well if you are planning to soap closer toroom temperature.Begin by weighing each of your soapmaking oils and butters individually. Set the container you areusing to weigh your oils onto the scale then hit tare to zero out the weight. Slowly add your first oilto the container until you’ve reached the weight the recipe calls for.Repeat this process for all oils and fats in your recipe. I usually start with the solids first so I amadding the liquids to the pot last, but that is just personal preference.Once all the soapmaking oils are combined in your pot, place on the stovetop at medium heat until theoils have all melted. Stir the oils and remove from heat, then set the pot of soapmaking oils aside tocool.6. Once your lye-water and soapmaking oils have cooled, you are ready to make soap! I find that mostsoap recipes work best when the lye-water and oils have cooled to between 90 F-100 F. However,the temperature of the oils can vary depending on the ingredients you are using or what temperaturesthe soap recipes you are using calls for. In addition, your oils should not be hotter than the lye-water.If you aren’t sure how a recipe will react at higher temps, then it's safe to hazard a guess and soapbetween 90 F-100 F. (Refer to The Soapmaker’s Companion for information on why temperaturesmatter.) With your handy stick blender ready to go, very slowly pour the lye-water into the oils.7. Begin stirring the soap ingredients with the stick blender on low. As the lye and oils begin toincorporate, you can switch to a higher speed. Mix thoroughly, moving the blender all through theentirety of the soap ingredients so it's evenly combined. You do not want to hold the stick blender injust one spot while you are mixing.Continue to stir the soap until you reach what is known as trace. You will know your soap has tracedwhen you can pull the blender through the soap and it leaves a line behind it. In addition, if you liftsome of the soap up with the blender and then drop it onto the surface of the soap, the soap should beable to support that drop.Should you not reach trace, within 15 minutes, you can rest for about 15 minutes, then start mixingagain. Some oils used in soapmaking are slower to trace. Virgin olive oil, for example, can take a muchlonger time to trace than other oils unless it is mixed with other oils whose properties promote a quicktrace. (Alternately, pomace olive oil is known for a much quicker trace.)8. If you are using any additives for your soap such as fragrance, herbs or colorants, you will want toadd these to your soap once has reached a light trace. A light trace just barely leaves a trail when
running the stick blender through it. (Alternately a heavier trace is much thicker and looks a little likepudding or custard.)After adding these additional ingredients use the stick blender to thoroughly mix them into the soap sothey are evenly incorporated throughout the soap. This is especially important for fragrance oils andessential oils as you do not want any “hot spots” in your soap. (Generally fragrance oils account for 36% of your soap and essential oils for 1-3%; but be sure to follow manufacturer’s recommendationsif they are available.)Tip: When choosing a fragrance oil or essential oil for your soap recipe, keep in mind that somefragrances and essential oils can accelerate trace or cause soap to seize. Your supplier should be ableto provide information on how their fragrances perform in cold process soap.Once your additives have been thoroughly incorporated, you’re ready to pour your soap into its mold!9. Slowly pour your soap into the prepared mold. You can use a spatula to help you get all of the soapout of the pot. Once you've poured all of the soap into the mold, you may find it helpful to drop themold onto the counter several times to help remove any air bubbles.If your soap needs to be insulated cover the mold with a piece of cardboard cut to fit. Then cover themold with a blanket or towel. This ensures that your soap goes through what is known as gel phase.However, soap doesn't necessarily have to go through gel phase to make a successful batch of soap.Some soapmakers choose to actually prevent gel phase and will freeze their soap after pouring it intothe mold. Soapqueen.com has some insightful information on the gel phase here.If you check your soap and notice it is starting to crack on the top your soap is overheating. In thiscase you will want to uncover the mold completely.Once your soap has been in the mold for 24 hours it is ready to be unmolded.10. Unmold your soap and, unless it is stillsoft, go ahead and cut it into bars. (You findinformation on how to make a simple loaf soapcutting guide here.) I generally discount theamount of water used so that my soap canimmediately be cut into bars. If you find thatyour soap is on the soft side, simply waitanother day or two before unmolding and/orcutting your soap loaf into bars.
Now place your soaps in a safe, dry location and allow your soap to complete the saponification process– this typically occurs within a day or two – and allow your soap to cure fully. This generally takes aperiod of 4-6 weeks.If you’re setting your soap to dry on a flat surface, be sure to set it on top of parchment or freezerpaper to keep any oils or moisture from seeping out of the soap into the surface of your drying space.You can also dry your soaps on a rack.Properly curing your soap will not only help your soap last longer, but it also makes the soap milder onskin and gives you a better lather.Once the soap has cured you can then package it to share with your friends and family! If you areplanning to sell your homemade soaps, you'll need to include the weight of the soap on each bar.Still have questions?Not everyone has a successful soapmaking experience the first go around. So if you’re still cautiousafter all of your research, then I recommend finding a friend who makes soap to teach you the processor try watcing a few YouTube videos on soapmaking.How about those soap recipes?Following are a few of my many homemade soap recipes. Most of these soap recipes require not only aminimal number of ingredients but also contain less expensive ingredients that are more easil
recipes I develop contain 36 oz. in oils and fit perfectly inside these molds. If you'd like to make your own wooden loaf molds you canfind the dimensions for this mold along with instructions for making your own here. Keep in mind however that using a wooden soap