Transcription
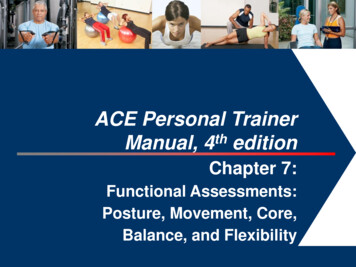
ACE Personal TrainerManual, 4th editionChapter 7:Functional Assessments:Posture, Movement, Core,Balance, and Flexibility1
Learning Objectives This session, which is based on Chapter 7 of the ACEPersonal Trainer Manual (4th ed.), explains theimportance of various functional assessments andoutlines how to properly perform each. After completing this session, you will have a betterunderstanding of:– How to set up a plumb line to conduct a basic posturalassessment.– How to identify five key postural deviations.– How to conduct various movement screens, including clearingtests.– How to conduct key flexibility (muscle-length) assessments.– How to evaluate balance and core function.
Introduction Sequencing a client’s assessments involvesconsideration of protocol selection and timing of theassessments. The physiological assessments must be consistent withthe client’s goals and desires, and with the discoveriesmade during the needs assessment. One primary objective of all training programs should beto improve functionality (movement efficiency).
Movement Efficiency Movement efficiency is the ability to generateappropriate levels of force and movement at desiredjoints while stabilizing the entire kinetic chain againstreactive and gravity-based forces.– All movement begins and ends from a static base, ideally aposition where all body segments are optimally aligned.– Since movement originates from this base, a posturalassessment should be conducted to evaluate body-segmentalignment.– Additionally, movement screens that evaluate how postureimpacts the ability to move should be incorporated.
Static Posture Static posture represents the alignment of the body’ssegments.– Holding a proper postural position involves the actions ofpostural muscles. Good posture is a state of musculoskeletal alignmentthat allows muscles, joints, and nerves to functionefficiently.– If a client exhibits poor static posture, this may reflect muscleendurance issues in the postural muscles and/or potentialimbalances at the joints. Since movement begins from a position of static posture,the presence of poor posture is an indicator thatmovement may be dysfunctional.
Static Postural Assessment A static postural assessment may offer valuable insightinto:– Muscle imbalance at a joint and the working relationships ofmuscles around a joint– Altered neural action of the muscles moving and controlling thejoint– Potentially dysfunctional movement Tight or shortened muscles are often overactive anddominate movement at the joint, potentially disruptinghealthy joint mechanics.– Personal trainers should consider conducting a static posturalassessment on their clients as an initial assessment.
Muscle Imbalance andPostural Deviation Factors Muscle imbalance and postural deviations can be attributed to manyfactors that are both correctible and non-correctible. Correctible factors:– Repetitive movements– Awkward positions and movements– Side dominance– Lack of joint stability or mobility– Imbalanced strength-training programs Non-correctible factors:– Congenital conditions– Some pathologies– Structural deviations– Certain types of trauma
Neural Activity Proper postural alignment promotes optimal neural activity of themuscles controlling a joint.– When joints are correctly aligned, the length-tension relationships andforce-coupling relationships function efficiently.– Good posture facilitates proper joint mechanics.MuscleBalanceNormal Length-Tension RelationshipProper Joint Mechanics(Arthrokinematics)Normal Force-couplingRelationshipsEfficient ForceAcceptance andGenerationMovement EfficiencyPromotes Joint Stabilityand Joint Mobility
Right-angle Rule of the Body An initial training focus should be to restore stability andmobility and attempt to “straighten the body beforestrengthening it.”– The trainer should start by looking at a client’s static posturefollowing the right-angle rule of the body.– This model portrays the human body in vertical alignment acrossthe major joints. The right-angle rule allows the observer to look at theindividual in all three planes to note specific “static”asymmetries at the joints, as illustrated on the followingslide.
Right-angle Rule (Frontal and Sagittal Views)
Line of Gravity Good posture is observed when the body parts aresymmetrically balanced around the body’s line of gravity.– While the right-angle rule can identify potential muscleimbalances, there are limitations in using this model.Line of Gravity
Plumb Line Instructions The objective of this assessment is to observe theclient’s symmetry against the plumb line.– Using a length of string and an inexpensive weight, trainers cancreate a plumb line that suspends from the ceiling to a height 0.5to 1 inch (1.3 to 2.5 cm) above the floor.– A solid, plain backdrop or a grid pattern with vertical andhorizontal lines that offer contrast against the client isrecommended.– Clients should assume a normal, relaxed position.– Personal trainers should focus on the obvious, gross imbalancesand avoid getting caught up in minor postural asymmetries.
Plumb Line Positions: Anterior View For the anterior view, position the client between the plumb line anda wall. With good posture, the plumb line will pass equidistant between thefeet and ankles, and intersect the:– Pubis– Umbilicus– Sternum– Manubrium– Mandible (chin)– Maxilla (face)– Frontal bone (forehead)
Plumb Line Positions: Posterior View For the posterior view, position the individual betweenthe plumb line and a wall.– With good posture, the plumb lineshould ideally intersect the sacrumand overlap the spinous processesof the spine.
Plumb Line Positions:Sagittal/Transverse Views Position the individual between the plumb line and the wall, with theplumb line aligned immediately anterior to the lateral malleolus. With good posture, the plumb line should ideally pass through:– The anterior third of the knee– The greater trochanter of the femur– The acromioclavicular (A-C) joint– Slightly anterior to the mastoid process ofthe temporal bone of the skull All transverse views of the limbs and torsoare performed from frontal- andsagittal-plane positions.
Chronological Plan forConducting Assessments When conducting assessments of posture andmovement, the following components should beconsidered.Health History and LifestyleInformationStatic PosturalAssessmentIdentify CorrectiblePostural CompensationsDocumentation andDetermination of Need forReferral to MedicalProfessionalMuscle Length Testing – Active andPassive ROMAdminister AppropriateMovement ScreensRestorative ExerciseStability and MobilityProgrammingMovement TrainingProgressionLoad TrainingPerformance Training
Deviation 1: Ankle Pronation/Supination Both feet should face forward in parallelor with slight (8 to 10 degrees) externalrotation.– Toes pointing outward from the midline,as the ankle joint lies in an oblique planewith the medial malleolus slightly anteriorto the lateral malleolus The toes should be aligned in the samedirection as the feet.
Ankle Pronation and Tibialand Femoral Rotation The body is one continuous kinetic chain. Barring structural differences in the skeletal system, apronated ankle typically forces internal rotation of thetibia and faster, greater internal rotation of the femur.
Ankle Pronation/Supination: Lower Extremity Effects Ankle pronation forces rotation at the knee and places additionalstresses on the knee.– As pronation moves the calcaneus into eversion, this may actually liftthe outside of the heel slightly off the ground.– In turn, this may tighten the calf muscles and potentially limit ankledorsiflexion.– A tight gastrocnemius and soleus complex (triceps surae) may forcecalcaneal eversion in an otherwise neutral subtalar joint position.
Deviation 2: Hip Adduction Hip adduction is a lateral tilt of the pelvis that elevates one hiphigher than the other.– If a person raises the right hip, the line of gravity following the spine tiltstoward the left following the spine.– This position progressively lengthens and weakens the right hipabductors, which are unable to hold the hip level.– Sleeping on one’s side can produce a similar effect, as the hipabductors of the upper hip fail to hold the hip level.
Alignment of the PelvisRelative to the Plumb Line To evaluate the presence of hip adduction with a client, apersonal trainer must identify the alignment of the pelvisrelative to the plumb line.
Hip Adduction Screen The plumb line should pass through:– The pubis in the anterior view– The middle of the sacrum in the posterior view Positioning a dowel or lightly weighted bar across theiliac crests can help determine whether the iliac crestsare parallel with the floor.
Deviation 3: Hip Tilting (Anterior or Posterior) Anterior tilting of the pelvis frequently occurs in individuals with tighthip flexors.– With standing, a shortened hip flexor pulls the pelvis into an anterior tilt.– An anterior pelvic tilt rotates the superior, anterior portion of the pelvisforward and downward.– A posterior tilt rotates the superior, posterior portion of the pelvisbackward and downward.
Pelvic Rotation An anterior pelvic tilt will increase lordosis in the lumbar spine,whereas a posterior pelvic tilt will reduce the amount of lordosis inthe lumbar spine.– Tight hip flexors are generally coupled with tight erector spinae muscles,producing an anterior pelvic tilt.– Tight rectus abdominis muscles are generally coupled with tighthamstrings, producing a posterior pelvic tilt.– This coupling relationship between tight hip flexors and erector spinae isdefined as the lower-cross syndrome.– With ankle pronation and accompanying internal femoral rotation, thepelvis may tilt anteriorly to better accommodate the head of the femur.
Pelvic Tilt Screen: ASIS and PSIS To evaluate the presence of a pelvic tilt, a trainer canuse a consensus of four techniques:– The relationship of the anterior superior iliac spine (ASIS) andthe posterior superior iliac spine (PSIS) (two bony landmarks onthe pelvis)– The appearance of lordosis in the lumbar spine– The alignment of the pubicbone to the ASIS– The degree of flexion orhyperextension in the knees
Deviation 4: Shoulder Positionand Thoracic Spine Limitations and compensations to movement at the shoulder occurfrequently due to the complex nature of the shoulder girdle.– Observation of the scapulae in all three planes provides good insightinto the quality of movement a client has at the shoulders.– Locate the normal “resting” position of the scapulae
Shoulder Screen: Level Shoulders Determine whether the shoulders are level.– If the shoulders are not level, trainers need to identify potentialreasons.
Shoulders: Torso/ShouldersRelative to Line of Gravity Determine whether the torso and shoulders are symmetrical relativeto the line of gravity.– A torso lean would shift the alignment of the sternum and spine awayfrom the plumb line and create tightness on the flexed side of the trunk.– However, if the hips are level with the floor and the spine is aligned withthe plumb line, but the shoulders are not level with the floor, this mayrepresent muscle imbalance within the shoulder complex itself.– An elevated shoulder may present with an overdeveloped or tight uppertrapezius muscle.– A depressed shoulder may present with more forward rounding of thescapula.– The shoulder on a person’s dominant side may hang lower than thenon-dominant side.
Shoulders: Rotation of theScapulae and/or Arms Determine whether the scapulae and/or arms are internally rotated. Anterior view– If the knuckles or the backs of the client’s hands are visible when thehands are positioned at the sides, this generally indicates internal rotationof the humerus or scapular protraction. Posterior view– If the vertebral/inferior angles of the scapulae protrudeoutward, it indicates an inability of the scapulaestabilizers to hold the scapulae in place.
Shoulders: Normal Kyphosis Determine whether the spine exhibits normal kyphosis.– With the client’s consent, the trainer can run one hand gently up thethoracic spine between the scapulae.– The spine should exhibit a smooth, small, outward curve.
Deviation 5: Head Position With good posture, the earlobe should align approximately over theacromion process. A forward-head position is very common.– This altered position does not tilt the head downward, but simply shifts itforward.– The earlobe appears significantly forward of the acromioclavicular (AC)joint.
Forward-head Position Screen In the sagittal view, align the plumbline with the AC joint, and observe itsposition relative to the ear. A forward-head position representstightness in the cervical extensors andlengthening of the cervical flexors. With good posture, the cheek boneand the collarbone should almost be invertical alignment with each other.
Movement Screens Observing active movement is an effective method toidentify movement compensations. When compensations occur, it is indicative of alteredneural action. These compensations normally manifest due to muscletightness or an imbalance between muscles acting at thejoint.
Five Primary Movements Movement can essentially be broken down anddescribed by five primary movements that peopleperform during many daily activities:– Bending/raising and lifting/lowering movements (e.g., squatting)– Single-leg movements– Pushing movements– Pulling movements– Rotational movements ADL are essentially the integration of one or more ofthese primary movements.
Movement Screens and the Kinetic Chain Movement screens must be skill- and conditioning-levelappropriate, and be specific to the client’s needs.– Screens generally challenge clients with no recognizedpathologies to perform basic movements.– This can help the personal trainer evaluate a client’s stability andmobility throughout the entire kinetic chain.
Clearing Tests Prior to administering any movement screens, trainersshould screen for pain by using basic clearing tests.– These tests may uncover issues that the individual did not knowexisted.– Trainers should select clearing tests according to themovements that require evaluation.– The objective when conducting clearing tests is to ensure thatpain is not exacerbated by movement. Any client who exhibits pain during a clearing testshould:– Be referred to his or her physician– Not perform additional assessments for that part of the body
Clearing Test: Cervical Spine The client performs the following movements in a seatedposition while the personal trainer monitors for anyindication of pain:– Move the chin to touch the chest.– Tilt the head back until the face lies approximately parallel ornear parallel to the floor.– Drop the chin left and right to rest on, or within 1 inch (2.5 cm) of,the shoulder or collarbone.
Clearing Test: Shoulder Impingement The client performs the following movement in a seatedposition while the personal trainer monitors for anyindication of pain:– Reach one arm across the chest to rest upon the oppositeshoulder and slowly elevate the elbow as high as possible.
Clearing Test: Low Back The client performs the following movements from a prone positionwhile the personal trainer monitors for any indication of pain:– Slowly move into a trunk-extension position, producing lumbarextension and compression in the vertebrae and shoulder joint.– Move into a quadruped position and slowly sit back on the heels withoutstretched arms, producing lumbar and hip flexion.
Bend and Lift Screen: Objective To examine symmetrical lower-extremity mobility andstability, and upper-extremity stability during a bend-andlift movement
Bend and Lift Screen:Frontal View Observations First repetition– Observe the stability of the foot. Second repetition– Observe the alignment of the knees over the second toe. Third repetition– Observe the overall symmetryof the entire body over thebase of support.
Bend and Lift Screen:Sagittal View Observations First repetition– Observe whether the heels remain in contact with the floor. Second repetition– Determine whether the client exhibits “glute” or “knee” dominance. Third repetition– Observe whether the client achieves a parallel positionbetween the tibia and torso in the lowered position, whilecontrolling the descent phase. Fourth repetition– Observe the degree of lordosis in the lumbar/thoracicspine during lowering and in the lowered position. Fifth repetition– Observe any changes in head position.
Bend and Lift Screen:Potential Compensations
Hurdle Step Screen: Objective To examine simultaneous mobility of one limb andstability of the contralateral limb while maintaining bothhip and torso stabilization under a balance challenge ofstanding on one leg
Hurdle Step Screen: Frontal View Observations First repetition– Observe the stability of the foot. Second repetition– Observe the alignment of the stance-leg knee over the foot. Third repetition– Watch for excessive hip adduction greater than 2 inches (5.1 cm) asmeasured by excessive stance-leg adduction or downward hip-tiltingtoward the opposite side. Fourth repetition– Observe the stability of the torso. Fifth repetition– Observe the alignmentof the moving leg.
Hurdle Step Screen:Sagittal View Observations First repetition– Observe the stability of the torso and stance leg. Second repetition– Observe the mobility of the hip.
Hurdle Step Screen: Potential Compensations
Shoulder Push Stabilization Screen: Objective To examine stabilization of the scapulothoracic jointduring closed-kinetic-chain pushing movements
Shoulder Push Stabilization Screen:Observations Observe any notable changes in the position of thescapulae relative to the ribcage at both end-ranges ofmotion. Observe for lumbar hyperextension in the press position.
Should Push Screen: Potential Compensations
Shoulder Pull Stabilization Screen: Objective To examine the client’s ability to stabilize thescapulothoracic joint during closed-kinetic-chain pullingmovements
Shoulder Pull Stabilization Screen:Observations Observe any bilateral discrepancies between the pullson each arm. Observe the ability to stabilize the trunk during the pullmovement.– That is, the ability of the core to stiffen and lift the hips with theshoulders and resist trunk rotation during the lift.
Shoulder Pull Screen:Potential Compensations
Thoracic Spine Mobility Screen: Objective To examine bilateral mobility of the thoracic spine Lumbar spine rotation is considered insignificant, as itonly offers approximately 15 degrees of rotation.
T-Spine Mobility Screen: General Interpretations Observe any bilateral discrepancies between therotations in each direction.– Identify the origin(s) of movement limitation or compensation.– This screen evaluates trunk rotation in the transverse plane.– Evaluate the impact on the entire kinetic chain.– The lumbar spine generally exhibits limited rotation ofapproximately 15 degrees, with the balance of trunk rotationoccurring through the thoracic spine.– If thoracic spine mobility is limited, the body strives to gainmovement in alternative planes within the lumbar spine.
Thoracic Spine Screen:Potential Compensations
Flexibility and Muscle-length Testing A personal trainer may opt to assess the flexibility ofspecific muscle groups. Specific muscle groups that frequently demonstratetightness or limitations to movement are discussed inthis section. The table on the following slide provides normal rangesof motion for healthy adults at each joint.
Average Ranges of Motion
Thomas Test—Hip Flexion/Quad Length:Objective To assess the length of the muscles involved in hipflexion– This test should not be conducted on clients suffering from lowback pain, unless cleared by their physician.
Thomas Test—Hip Flexion/Quad Length:Observations Observe whether the back of the lowered thigh touchesthe table (hips positioned in 10 degrees of extension). Observe whether the knee of the lowered leg achieves80 degrees of flexion. Observe whether the knee remains aligned straight orfalls into internal or external rotation.
Thomas Test: General Interpretations
Passive Straight-leg (PSL) Raise: Objective To assess the length of the hamstrings
Passive Straight-leg (PSL) Raise: Observations Note the degree of movement attained from the table ormat that is achieved before the spine compresses thehand under the low back or the opposite leg begins toshow visible signs of lifting off the table or mat.– The mat or table represents 0 degrees.– The leg perpendicular to the mat or table represents 90 degrees.
Passive Straight-leg Raise:General Interpretations
Shoulder Mobility Assessment Apley’s scratch test involves multiple and simultaneousmovements of the scapulothoracic and glenohumeraljoints in all three planes.– To identify the source of the limitation, trainers can first performvarious isolated movements in single planes to locate potentiallyproblematic movements. Consequently, the scratch test is completed inconjunction with:– The shoulder flexion-extension test– An internal-external rotation test of the humerus
Apley’s Scratch Test—Shoulder Mobility:Objective To assess simultaneous movements of the shoulder girdle (primarilythe scapulothoracic and glenohumeral joints) Movements include:– Shoulder extension and flexion– Internal and external rotation of the humerus at the shoulder– Scapular abduction and adduction
Apley’s Scratch Test—Shoulder Mobility:Observations Note the client’s ability to touch the medial border of thecontralateral scapula or how far down the spine he orshe can reach with shoulder flexion and externalrotation. Note the client’s ability to touch the opposite inferiorangle of the scapula or how far up the spine he or shecan reach with shoulder extension and internal rotation. Observe any bilateral differences between the left andright arms in performing both movements.
Apley’s Scratch: General Interpretations
Shoulder Flexion Test: Objective To assess the degree of shoulder flexion– This test should be performed in conjunction with Apley’s scratchtest to determine if the limitation occurs with shoulder flexion orextension.
Shoulder Extension Test: Objective To assess the degree of shoulder extension– This test should be performed in conjunction with Apley’s scratchtest to determine if the limitation occurs with shoulder flexion orextension.
Shoulder Flexion/Extension Tests:Observations Measure the degree of movement in each direction. Note any bilateral differences between the left and rightarms in performing both movements.
Shoulder Flexion/Extension:General Interpretations
External Rotation—Humerus (Shoulder):Objective To assess external rotation of the humerus at theshoulder joint to evaluate medial rotators– This test should be performed in conjunction with Apley’s scratchtest to determine if the limitation occurs with internal or externalrotation of the humerus.
Internal Rotation—Humerus (Shoulder):Objective To assess internal rotation of the humerus at theshoulder joint to evaluate lateral rotators– This test should be performed in conjunction with Apley’s scratchtest to determine if the limitation occurs with internal or externalrotation of the humerus.
Internal/External Rotation—Humerus: Observations Measure the degree of movement in each direction. Note any bilateral differences between the left and rightarms in performing both movements.
Internal/External Rotation—Humerus: Interpretation
Balance and the Core Balance and core baseline assessments evaluate theneed for comprehensive balance training and coreconditioning. Dynamic balance tests are generally movement-specificand quite complex.– Trainers should aim to first evaluate the basic level of staticbalance that a client exhibits by using the sharpened Rombergtest or the stork-stand test.
Sharpened Romberg Test: Objective To assess static balance by standing with a reducedbase of support while removing visual sensoryinformation
Sharpened Romberg Test: Observations Continue to time the client’s performance until one of thefollowing occurs:– The client loses postural control and balance– The client’s feet move on the floor– The client’s eyes open– The client’s arms move from the folded position– The client exceeds 60 seconds with good postural control
Sharpened Romberg Test:General Interpretations The client needs to maintain his or her balance withgood postural control (without excessive swaying) andnot exhibit any of the test-termination criteria for 30 ormore seconds. The inability to reach 30 seconds is indicative ofinadequate static balance and postural control.
Stork-stand Balance Test: Objective To assess static balance by standing on one foot in amodified stork-stand position
Stork-stand Balance Test: Observations Timing stops when any of the following occurs:– The hand(s) come off the hips– The stance or supporting foot inverts, everts, or moves in anydirection– Any part of the elevated foot loses contact with the stance leg– The heel of the stance leg touches the floor– The client loses balance
Stork-stand Balance Test:General Interpretation
Core Function—BP Cuff Test: Objective To assess core function, as demonstrated by the ability to draw theabdominal wall inward via the coordinated action of the transverseabdominis (TVA) and related core muscles without activation of therectus abdominis
Core Function—BP Cuff Test: Observations While the client attempts the contraction, carefullymonitor for any movement of the hips, ribcage, orshoulders. Clients must avoid any movement at the ankles(dorsiflexion) or pushing from the elbows that would beused as leverage to raise the torso.
Core Function—BP Cuff Test:General Interpretation A good indicator of TVA function is the ability to reducethe pressure in the cuff by 10 mmHg during thecontraction.– If a client lacks effective core function, he or she usually recruitsthe rectus abdominis muscle instead to achieve the desiredmovement.– No change or a change 10 mmHg does not necessarilyrepresent a lack of core function.
Summary Trainers should adhere to the principle of “straighteningthe body before strengthening it.” Trainers should consider performing the assessments inChapter 7 of the ACE Personal Trainer Manual (4th ed.),in the sequence presented. This session covered:– Static postural assessment– Movement screens– Flexibility and muscle-length testing– Shoulder mobility assessment– Balance and the core
This session, which is based on Chapter 7 of the ACE Personal Trainer Manual (4th ed.), explains the importance of various functional assessments and outlines how to properly perform each. After completing this session, you will have a better understanding of: –How to set up a plumb line to conduct a basic postural assessment.