Transcription
S PS S T U T O R I A LSPSS TutorialTUTORIAL CONTENT1- GETTING STARTED2- IMPORTING DATA3- MANIPULATING DATABy Oussama BenKhadra1Master of Science in Information SystemsSchool of Computer Science, Telecommunications and Information SystemsDePaul UniversityChicago, IL, 60604, USA{obkhadra@hotmail.com}1Modified by Raffaella Settimi on 08/30/2007
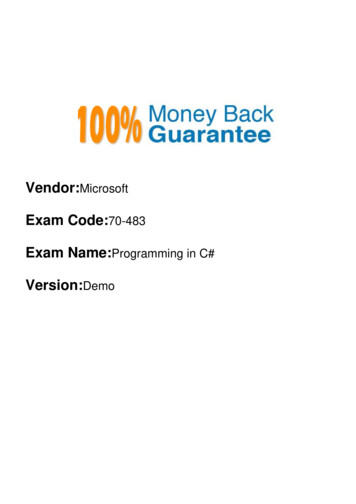
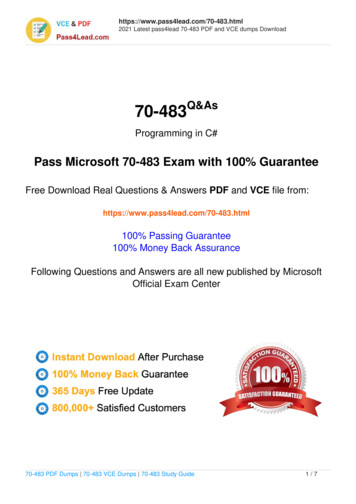
S PS S T U T O R I A L1GETTING STARTEDThis tutorial provides a quick review of the basic features of SPSS StatisticalSoftware. In addition to this brief introduction, we recommend using the SPSS tutorial thatis found under the Help menu in SPSS. The SPSS tutorial is extremely helpful and willprovide more detailed information about the various SPSS functionalities.SPSS is available in all DePaul and CTI labs, and is installed in the CTI terminals. Seethe end of this tutorial for information about CTI terminals. A trial version of SPSS 15 canbe downloaded from the SPSS website at http://www.spss.com/downloads/ (Select SPSSBase in the Product Name Selection list. Look under “Product Demos” in the results page,and click on the SPSS 15.0 for Windows link.) The trial version is for evaluation only andwill expire in 14 days. Students can also purchase a six-month license at e-academy:http://estore.e-academy.com/In this section, I will guide you on the first steps of using SPSS application. Here is the list oftasks discussed in the tutorial:1- Launch SPSS application2- Open an existing SPSS Data file3- Calculating Simple Statistics4- Viewing Result Output5- Connecting to CTI terminals to use SPSS remotely1- Launching SPSS ApplicationThe path to open the SPSS Application is as follows:Start Programs SPSS for Windows SPSS xx.x for WindowsWhere xx.x is the version number (e.g. 14.0)Once you launch the program the following window appears:
S PS S T U T O R I A LFigure 1.1 SPSS Starting WindowMany options are available after opening SPSS:1. Run the tutorial: A very useful for learning more SPSS functionalities in a veryattractive environment (recommended for first time users).2. Type in data: Open a new data file in SPSS3. Run an existing query: You import data from a previous selection syntax4. Create a new query using Database Wizard: very powerful tool for importing data fromany type of RDBMS using Microsoft ODBC (Open Database Connectivity)5. Open an existing data source: Open an existing SPSS data file (*.sav spss datafileextension)6. Open another type of file: Open other type of SPSS files (e.g. *.spo for SPSS outputdocument)2- Opening an existing SPSS data fileChoose “Open an existing data source”.
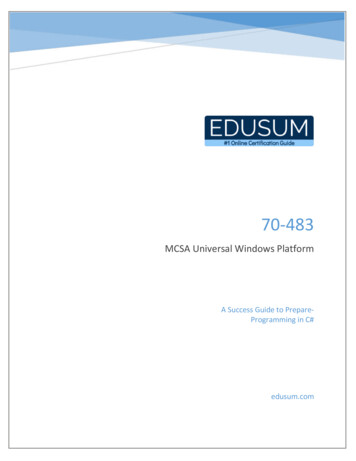
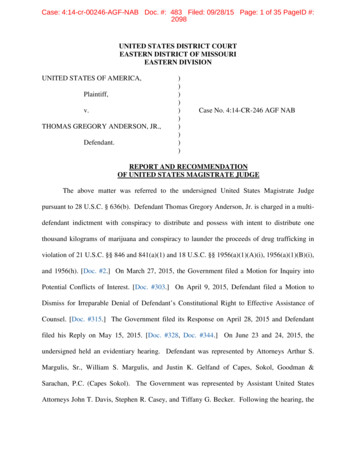
S PS S T U T O R I A LFigure 1.2 SPSS Open File WindowWhen you choose “open an existing data source” a window (figure 1.2) will appear and select“Employee data” data file name and click on openYou will notice a window having similar environment as MS Excel. In the SPSS Data Editorwindow there are 2 different views:- Data view : for visualizing the entire data set- Variable view: for visualizing details concerning the variables.The menu bar of SPSS Data Editor is organized in the same way as the data mining process:- File: It is used for opening/importing data from data files or databases- Data: It is used for selecting and cleaning process- Transform: It is used for calculating new values or transforming current valuesby applying logical statements.- Analyze: It is used for applying statistical and data mining techniques andvisualizing the outputs- Graph: graphical visualization of data mining techniques.For more information concerning the different tools available in each category,please use the help tutorial.
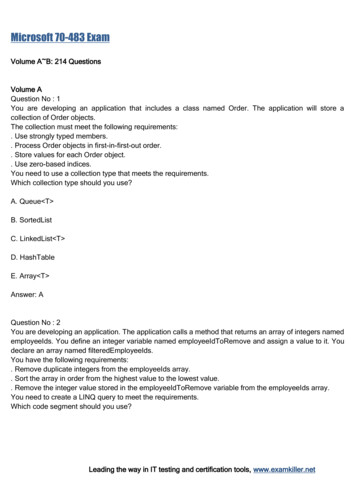
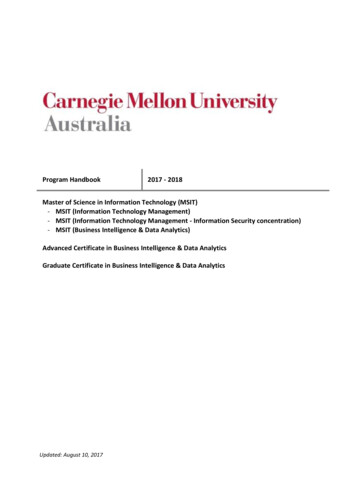
S PS S T U T O R I A LVariablesCasesVariable viewData viewFigure 1.3 SPSS Open Data Editor Window (Data View)In the data view (figure 1.3) window the variables name are in the first row and each rowrepresents one case. The missing values in a field is represented (by default) by “.” a dot.In the variable view (figure 1.4) you can edit the characteristics of each variable: the mostuseful ones are:- Name: this is should be unique and does not exceed 8 characters. (The firstcharacter of a variable name should be a letter)- Type: determine the data type of the variable (you can choose from numeric,date, currency and string)- Label: it is useful to specify the label of the variable for visualization- Values: Here you specify the label of a given field value (e.g in case of “m” forgender you specify that it represent “male”)- Missing: You specify which value to give for a missing value- Measure: It is important to specify what kind of variable it iso Ordinal: the values of the variables are sorted (e.g level of satisfaction)o Nominal: the values of the variable are categorical (e.g gender)o Scale: the values of the variable are continue (e.g. salary)
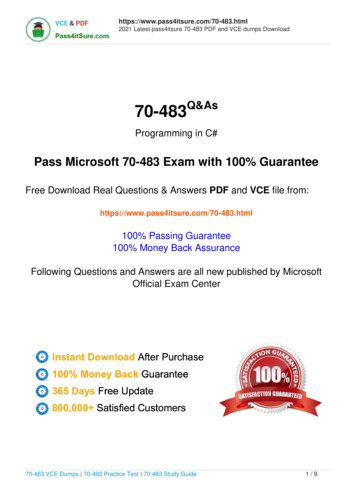
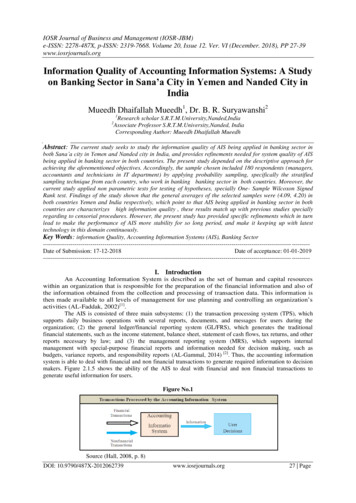
S PS S T U T O R I A LFigure 1.4 SPSS Open Data Editor Window (Variable View)After opening the SPSS data file, we will apply some statistical technique on the data andvisualize the output result in the SPSS Output window.3- Calculating Simple StatisticsThe next logical step in the analysis is to apply statistical or data mining tools on the data.The “Analyze” menu in the menu bar is the best place for this purpose.Click on “Analyze”Select “descriptive Statistics”Open “Frequencies ”The opening window of “Frequencies” appears as shown in figure 1.5a.
S PS S T U T O R I A LMove selectedvariableList of VariablesFigure 1.5a SPSS Frequencies windowTo select a variable from the variable list for analysis, click on the variable for selection thenclick on the “arrow” ( ) button in the middle of the window (figure 1.5b). Then click onOK for viewing Frequency result of the Employment Category.Figure 1.5b SPSS Frequencies window4- Viewing SPSS Result OutputThe SPSS Output window (figure 1.6) contains an outline and a content pane. You can clickon an item in the outline pane to visualize it in the content pane.
S PS S T U T O R I A LOutline PaneContent PaneFigure 1.6 SPSS Output windowIn the SPSS Output window, you can export the results into other format (e.g html) or printthem.
S PS S T U T O R I A L2IMPORTING DATAThe SPSS Data Editor is designed to handle a wide variety of data source, including:- Spreadsheets (e.g. Excel format)- Databases files using ODBC tool (such Access files)- Tab-delimited and other types of ASCII text filesIMPORT DATA FROM EXCELIn this section I will introduce you on how to import data from ExcelTo open a data file, from the menu in the data Editor window choose:1. Click on “File”2. Select “Open data” and locate the file in your hard disk. Remember to select the Excel(“.xls”) files in the “Files of type” box.3. Click on the data file to be imported4. A data import wizard will appear. NOTE: If the data first row contains the variablenames, check the box “read variable names from the first row of data”. Do not
S PS S T U T O R I A Lcheck this box if the first row of data contains data. If the box is checked, the first rowwill not be read. Click ok5. The Data View will appear showing the imported data. Always double check that thedata set was imported correctly and its entirety.6. Click on “Variable View” tab to modify the variables properties. For instance you canmodify the variable names here.
S PS S T U T O R I A LTo save the data in a SPSS format choose “Save as” from the File menu and save the data ina .sav file.IMPORT DATA FROM A TEXT FILE (ASCII)Data are often saved in text files, with values aligned in columns. SPSS has a easy to usewizard to import data from text files. To run it:1. Click on “File”2. Select “Open data” and locate the file in your hard disk. Remember to select theappropriate file extension in the “Files of type” box – e.g. .txt files.3. Follow the instructions of the wizard that will guide you through the entire process.
S PS S T U T O R I A L3 RUNNING SPSS REMOTELY - INTRODUCTION TO TERMINALSERVICES:SPSS is available in all DePaul labs. You can also access SPSS remotely by using our CDMterminals. This option is only for students who have a fast Internet connection.INTRODUCTION TO TERMINAL SERVICES:Terminal Services allow multiple users to access a remote computer as if they were using themachine locally. Terminal Servers within CDM allow students who cannot access lab resourcesor install applications on their home computers to have full access to the applications needed tocomplete course work.Connecting to the CDM Terminal Servers1. Login into the CDM User Account Activation Application nts.aspx using your CampusConnect username and password2. Activate your “myCDM” CSTCIS Account.3. Take note of your username and domain.4. Launch the Remote Desktop Client from your computer that can be found in thePrograms list under Accessories. If you cannot find it, do the following: Click on Start Programs Accessories Communications Remote Desktop Connection.If the application is not available on your PC, download and install the Remote DesktopClient x?FamilyID 80111f21-d48d426e-96c2-08aa2bd23a49&DisplayLang en .5. Type in the Server name into the Computer Name text box:ctiterminals.cstcis.cti.depaul.edu6. If the step is successful, you will see a Windows XP desktop and you can then launchSPSS15 from the terminal machine clicking on Start All Programs SPSS7. Notice that in this case SPSS runs remotely on the terminal computer, and not on yourlocal machine. This means that the data files must be saved on the remote terminal
S PS S T U T O R I A Lcomputer in order to be imported into SPSS, and the SPSS output files will be saved onthe remote computer (and not on your local machine).You can easily transfer files from/to your local machine to/from the remote terminalcomputer by using a web email account and attaching the files to email messages.8. THIS STEP IS OPTIONAL – I RECOMMEND IT ONLY IF YOU WANT TO USE/SAVE FILES ONYOUR LOCAL HARDDRIVE.Select the “Options ” button in the Remote Desktop Connection and select “LocalResources”.a. Select “Do not play” under “Remote Computer Sound”b. If you want to be able to use your local hard drives and printer select “Diskdrives” and “Printers” under the “Local Devices” section.9. Select the connect button to connect to the Terminal Server.10. Login to the Terminal Server using the username and domain you copied in Step (2). Thepassword should be same as your Campus Connect password.11. You are now ready to begin using the software on the remote Terminal Server.
Aug 30, 2007 · Master of Science in Information Systems School of Computer Science, Telecommunications and Information Systems DePaul University Chicago, IL, 60604, USA {obkhadra@h