Transcription
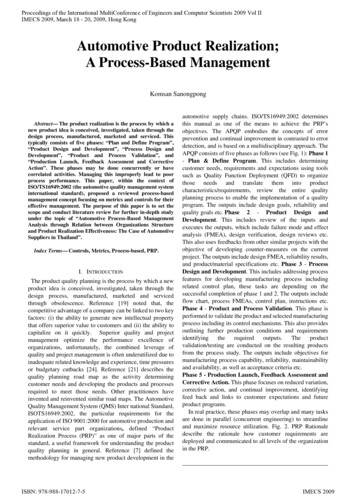
Idea Realization with Arduinoand Rapid PrototypingFangzhou XiaNov. 15th, 2020MIT Splash Workshop
Outline Overview of Mechatronic Systems Project Examples Rapid Prototyping Mechanical design Fabrication tools Electronics Control and programmingAdditional Resources2
About the Instructor Dr. Fangzhou XiaDegree at MIT Mechanical Engineering Postdoc at Mechatronics Research Lab Specialization in control, robotics andinstrumentationMinor in computer scienceResearch: Atomic Force MicroscopeDual B.S. in ECE and ME2 time TA of 2.12 intro to roboticsTeaching Interest Mechatronic systemPrecision instrumentationRobot design and control3
What is Mechatronics?Mechatronic system illustration [ref]4
Mechanical Systems Mechanism designMechanics for solids and fluidsThermal dynamics & heat transferMechatronic system illustration [ref]Fluid and thermal systems5
Jansen's Linkage6
Electronic Systems Embedded in a CarEmbedded systems in car [ref]7
Control Systems: Cubli Balance8
Computer: Vision System9
Background Requirement Math background: calculus, differential equation (18.01/02/03)Electronics: circuit analysis, signals and systems, programing (6.001/002/003)Mechanical: design and manufacturing (2.00/007), system control (2.003/004)Related classes: introduction to robotics (2.12), instrumentation (2.671)Don’t panic, we can start simple to familiarize ourselves with some toolsLet’s do a quick survey firstMIT Hacks fire hose of knowledge [ref]What we mean by drinking from a fire hose [ref]10
Project Examples
Robotics ApplicationsInstructable page for project ideas [ref]12
Mechatronics ApplicationsInstructable page for project ideas [ref]13
Case Study: Mechanized Pedestrian14
Case Study: Mechanized Pedestrian15
Mechanical Systems16
Electrical Systems17
Control Systems18
Computer User Interface19
Mechanical Design
Computer Aided Software Purpose of CAD/CAM/CAE Mechanical CAD Software Computer Aided Design software helps designers to manage complex designComputer Aided Manufacturing (CAM) automates manufacturing processComputer Aided Engineering includes simulation studiesSolidworks/OnShape, UG NX, Catia, Creo/ProE, AutoCAD Fusion 360,Google SketchUp, etc.Industrial Design CAD Software: Rhinoceros. Etc.Animation: 3ds Max, Maya, etc.21
Solidworks Capabilities Create parts, dimension drawings, motion studies, finite element analysis3D component2D drawingAssembly motion studiesFlow analysis22
Solidworks Rendered Assembly Animation Assembly of an Atomic Force Microscope Created using Solidworks23
OnShape Exercise: 3D Modeling Activity time: 20 minutesBreak time: 5 minutesReturn time: 5:00 pmRegister OnShape Account: https://www.onshape.com/en/products/freeFor CAD beginners: follow this video to start https://youtu.be/pMWnsHpDlQEFor experienced user: try model the simplified MIT green building (Fancy Demo) Model as a single part with 1:1000 scaling (1m becomes 1 mm)Data available on Wikipedia: https://en.wikipedia.org/wiki/Green Building (MIT)OnShape interfaceMIT Green Building24
Fabrication Tools
Prototyping Facilities at MIT MIT On-campus maker spaces Tools available at the Makerworks Mechanical Engineering MakerworksLaser cutting (acrylic, paper, wood)Water jet (aluminum, steel)CNC mill and lathe (aluminum, steel)Bandsaw, drill press and hand tools3D printingOff-campus outsource fabrication option Shapeway 3D printingProtoLabs CNC26
2D Geometry Creation Water jet cuttingLaser cuttingWater JetLaser cutting machine27
Machining Tools Milling operationTurning with latheBandsawMillLatheBandsaw28
Additive Versus Subtractive29
Types of 3D Printing31
3D Scanning & PrintingBIBO 3D printer3D scan with Skanect3D printed objects32
Electronics
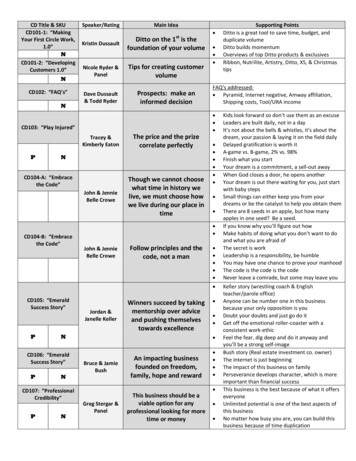
FIRST LEGO League34
Mindstorm EV3 LEGO League35
Arduino Microcontroller Open source general purpose electronic prototyping platformModular design with many extendable shieldsSuitable for data collection or controlling up to kHz rangeArduino Uno [ref]Arduino Mega [ref]Arduino Micro [ref]Arduino Nano [ref]Arduino sensor shield V5 [ref]Arduino motor shield [ref]Arduino Bluetooth shield [ref]25 more Arduino shields [ref]36
Arduino Microcontroller Arduino UNO widely used as starter board for small robotics hobby projectsArduino Micro board used in lab for IMU data interfaceResources: GPIO, 10 bit ADC, 8 bit DAC with PWM, serial UART, SPI, I2CArduino Uno board resources [ref]Arduino Micro board resources [ref]37
Raspberry Pi Cost-efficient mini-computer with SD card for memoryAllows easy installation and modification of operating systemSignificantly higher processing capability compared to ArduinoMore GPIOs but no ADC/DAC ports included in the original designUse with Linux operating system in various robotics projectsRaspberry Pi 4 diagram [ref]Raspberry Pi quick start guide [ref]38
Pokemon Robotics Challenge Mobile Robot Platform Line following, ultrasonic distance, obstacle avoidance, opticalencoder, grey scale sensorsGo to stop with same color as start to catch the PokemonRouteStartEnd39
Sensors for the Robot Ultrasonic Distance Sensor Infrared sensor 1 channel digital signal for obstacle avoidance4 channel digital line following sensorColor sensor Trig: send pulse, Echo: measure return signal delayUltrasonic distanceAnalog signal output measuring greyscale colorOptical encoder Used for counting rotation roughlyCount changes of digital signal (20 slots on the plate)Infrared sensor4 channel line followingGrey scale sensorOptical encoder set40
Motor Driver Wiring Servo motor: angle control 0-180 Red/Brown: positive/negativeOrange: angel control signalDirect current motor: Continuous rotation of wheelsL298N motor driver for current supplyServo motorGeared DC MotorL298N motor driver41
Assembled RobotRobot isometric viewRobot front viewRobot bottom view42
Control and Programming
Arduino Microcontroller Resources Summary General-Purpose Input/Output (GPIO) Analog to Digital Converter (ADC) Convert microcontroller digital values to analog voltage signalPulse Width Modulation: approximate with high frequency switching of GPIOInterrupt: handling of special events with higher priorityCommunication Protocols: (UART, SPI, I2C, GPIB, SCSI, etc.) Read analog sensor signal as digital values for microcontroller processingDigital to Analog Converter (DAC) Uncommitted digital signal pin configured for either input or outputUniversal Asynchronous Receiver/Transmitter (UART) communicationSerial Peripheral Interface (SPI) communicationInter-Integrated Circuit (I2C) communicationApplication Dependent Peripherals Analog signal conditioning and digital signal processing blocksCommunication protocol handling blocks: Bluetooth, Ethernet, Wifi, etc.Direct Memory Access blocks, sensor/actuator driving electronics45
Arduino Software Interface Download, install and open the Arduino Integrated Development EnvironmentSelect an example from the drop down for board testingSelect the serial port for the board and change the board time as neededClick on the arrow to upload the code (confirm success at the status bar)Arduino IDE exampleArduino serial port/board selectionArduino code upload46
Arduino Programming Reference Automate register level manipulation with built-in function for easy codingC/C based programing style with specific features for the microcontrollerGood documentation online and examples with the IDEVarious libraries available for operation with external shields and devicesCode general structure: setup() and loop() function Digital input and output functions (pin definition for UNO as pin: 0 13, A0 A5) Set pin mode: void pinMode(pin, mode); mode: INPUT OUTPUTOutput voltage level: void digitalWrite(pin, value); value: HIGH LOWInput voltage level: int digitalRead(pin); value: HIGH LOWAnalog input and output functions (UNO AI pins: A0 A5; AO pins: 3,5,6,9,10,11) void setup(): Initializing variables and modes of Pinsvoid loop(): Run program inside this function continuouslyAnalog input: int analogRead(pin); integer range 0 to 1023PWM analog output: void analogWrite(pin, value); integer range 0 to 255Serial functions: Serial.begin(baud rate); Serial.read(); Serial.println(text);Timing functions: void delay(ms); void delayMicroseconds(us):47
Exercise: Servo Motor Control We are going to control the servo motor angle with a potentiometerGo to TinkerCAD and register an account: https://www.tinkercad.com/Log into TinkerCAD and select circuitCreate a circuit with Arduino Uno R3, Potentiometer and Micro ServoFollow the demonstration to implement the code48
Final Servo Code#include Servo.h int pos 0;int angle 0;Servo servo 9;// library for the servo motor// initialize servo position variable// initialize angle record variable// create a servo variablevoid setup() {servo 9.attach(9);pinMode(A0, INPUT);Serial.begin(9600);}// setup function that runs once// create the servo motor on pin 9// set the A0 pin mode to input// start a serial port at 9600 baud ratevoid loop() {angle analogRead(A0);Serial.println(angle);servo 9.write(map(angle,1023,0,0,180));delay(10);}// loop function that runs forever// read potentiometer from A0// display the angle value through serial// set the servo angle with mapping// wait for 10 milliseconds
Project Ideas on InstructableInstructable page for project ideas [ref]50
Ventilator Project ExampleOpenVent-Bristol V2.0 bag valve mask ventilator [ref]51
Software Tools for Mechatronics Instructable, Hackster.io, edX, Udemy, PacktPub, Coursera, ROS Ignite Academy Design:Solidworks, OnShape, Fusion 360, AutoCAD, UG NX, CatiaAnalysis: Ansys, Abaqus, Altair Hyperworks, COMSOL, ADAMSEmbedded Systems:Arduino, Raspberry Pi, STM FPGA, LabVIEWElectronics: Altium Designer, Multisim/Ultiboard, EagleProgramming: Python, Matlab/Simulink, Origin, C/C , Java, JavaScript, RRobotics: ROS, TensorFlow, PyTorch, OpenAI Gym, Keras, OpenCVDocumentation: PPT, Adobe PS, Adobe AI, Visio, Word, LaTeXVideo: VideoStudio, Adobe Premiere/AfterEffect, Camtasia, Cinema 4D, 3DS Max52
Thank You!
Raspberry Pi Cost-efficient mini-computer with SD card for memory Allows easy installation and modification of operating system Significantly higher processing capability compared to Arduino More GPIOs but no ADC/DAC ports included in the original design Use wi