Transcription
QuickBooks Online Student GuideChapter 9QuickBooks OnlinePayroll
2 Chapter 9Table of ContentsObjectives 3Payroll Setup 3Time Tracking in QuickBooks 24Creating and Printing T4’s at Year End 37Create Records of Employment 40
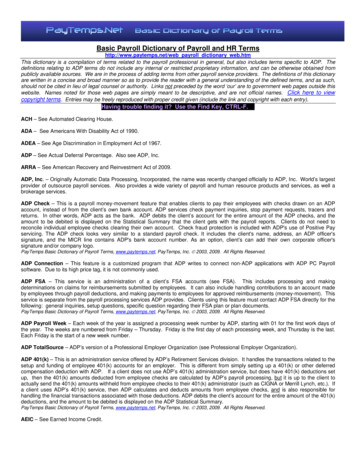
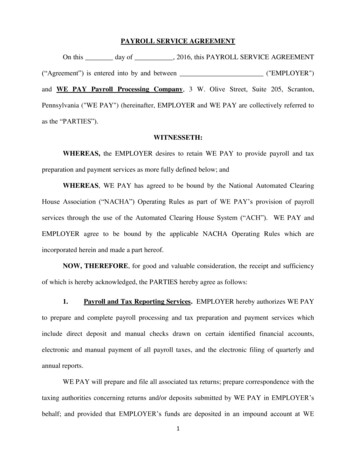
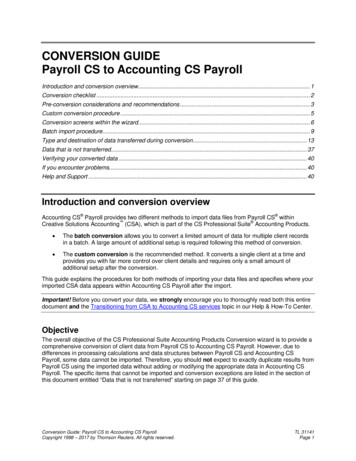
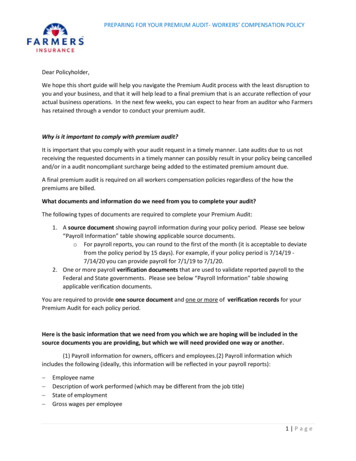
QuickBooks Online PayrollWhen you use QuickBooks Online you can track your small business accounting.You can track sales, expenses and manage all your day-to-day transactions.As you grow, QuickBooks Online lets you manage your company payroll.You can add employees, track time, and pay employees using cheques or via direct deposit. You cantrack and pay your payroll liabilities and create year-end forms like T4’s and Records of Employment.QuickBooks lets you manage all of your payroll needs directly within in QuickBooks Online.ObjectivesIn this chapter you’ll learn the following: Setting up pay items Setting up employees Creating Paycheques Track and pay liabilities Create T4’s Create Records of Employment Tracking and paying liabilitiesPayroll SetupTo get started in QuickBooks Payroll it’s a good idea to gather some basic information beforeentering information into QuickBooks. Please see a few sample items that will help you get up andrunning quickly in QuickBooks Online Payroll.To get started using QuickBooks Online Payroll, do the following:1. Click Employees.3
4 Chapter 92. Click Setup Payroll.3. Select the options that apply to your business. In this class we will only use the Standard Payrollproduct. This means that you are limited to choosing Direct deposit, Payroll reports andYear-End forms & reporting. After making your selections select how often you run payroll todetermine how often you run payroll.
QuickBooks Online Payroll4. Choose Standard Payroll and then click Turn on Payroll Now.5. Click Get started with payroll.6. Enter your business information including your company contact information.5
6 Chapter 97. Click Continue.QuickBooks needs to know if you’ve paid employees before using QuickBooks Online Payroll. If youhave, you’ll select the option Yes, I’ve already paid T4 employees this year.8. If you are starting QuickBooks Payroll from scratch, you’ll select No, I’m a brand new employerpaying T4 employees for the first time. Click Continue.
QuickBooks Online PayrollNOTE When you’re setting up payroll in QuickBooks, you need to enter summarizedpayroll amounts if you’re just beginning to use QuickBooks payroll but you’ve already writtenpay cheques earlier in the calendar year. The summarized amounts ensure correct year-to-datetotals on the pay cheques you write for the rest of this year.9. QuickBooks now asks if you have completed TD1 forms. Click Yes, I have completed TD1 formsfrom all (or most) of my employees.NOTE The Canada Revenue Agency (CRA) requires you to keep a current federal andprovincial TD1 form on file for each of your employees. For Québec employees, you mustkeep a federal TD1 form and a provincial TP-1015.3 form on file.7
8 Chapter 9Now you’re ready to setup your first employee. Click Add an employee.Next, you’ll complete each of the 7 steps for the employee you’re setting up. Enter the employee’spersonal info.
QuickBooks Online Payroll10. Click the Enter TD1 form.11. Complete the TD form for the employees. You must enter the Last Name, First Name, HomeAddress (including Postal Code), Date of Birth and Social Insurance Number.12. Enter the Federal TD1 amount in the appropriate field. This number comes from the employeefield. If necessary, you can use the default number that QuickBooks enters based on aregular TD1 form.13. Click the Provincial Taxes down arrow and enter the Provincial TD1 amount.9
10 Chapter 914. Click Done.NOTE You can deduct additional tax amounts from employees pay cheques. If anemployee requests this, enter the extra amount to be deducted in the box labeled, Additionaltax amounts that you want to deduct from each pay cheque.
QuickBooks Online PayrollNOTE In rare cases, you can make an employee exempt from paying CPP and EI. Todo this click the Tax exemptions down arrow and make the appropriate selections. This shouldonly be done when instructed by the Canada Revenue Agency or other government authority.QuickBooks returns you to the Edit Employee Details window.The second step is to answer the question: How often do you pay Jane? (or anotheremployee name)15. Click Enter a pay schedule.16. Next, answer the questions listed in the Pay Schedule window.11
12 Chapter 917. Choose how often you pay the employee. Click Create Pay Schedule.You can choose from the following selections: Every Week Every other week (Bi-weekly) Twice a month Every month18. Enter the next payday date in the When’s the next payday? field.19. Enter the last day of work for the payday in the When’s the last day of work (pay period) forthat payday?
QuickBooks Online Payroll20. Name the pay schedule in the What do you want to name this pay schedule? field.NOTE To attach this pay schedule to all future employees, select Use this schedule foremployees you add after Jane.21. Click Done to complete the payroll schedule setup.13
14 Chapter 9QuickBooks returns you to the Edit Employee Details window.22. Next, you’ll tell QuickBooks how much you pay the employee. Click the down arrow in step 3under How much do you pay Jane? You can choose from Hourly, Salary or Commission Only.If you pay the employee hourly you can enter their hourly account in the appropriate field.23. If you choose Salary, you can enter the Salary amount in the appropriate field and tellQuickBooks the time-period for the salary. This tells QuickBooks how much to pay in every payperiod. You can choose per year, per month or per week.
QuickBooks Online Payroll24. During the employee setup, you will add wage items to the employee’s record. In step 3 youcan also add Additional pay types. Click the Edit button to setup additional pay types.The additional pay types are the following: Overtime Pay—this pay type pays the overtime wage of 1.5 X regular wage. Double Overtime Pay—this pay type pays the overtime wage of 2 X regular wage. Sick Pay—used to pay out sick time accrued. Bonus—used to pay bonuses as needed throughout the year. Commission—used to pay out commissions. The commission item is an amount your enter onthe pay cheque. QuickBooks will not track or calculate the commission amounts. Reimbursement—used to reimburse employees for various items. Allowance—if your business pays out allowances you will setup an allowance. Other Earnings—use this item to record any other earnings item that does not fit in the abovecategories.15
16 Chapter 925. Select the items you need to appear on the employee pay cheque in the left-hand column.26. To add a Sick pay policy click select Sick Pay. Choose a policy that works for your company’ssituation. You can choose from the following:a. at beginning of yearb. each pay periodc.per hour workedd. on anniversary date27. Enter the number of hours per and the Maximum allowed (optional field).28. Click OK to setup the policy.
QuickBooks Online Payroll29. Click Bonus and Commission to add these pay types to the pay cheque. When these items areselected, it means that they’ll display on each pay cheque.30. Add any additional pay types. Enter the recurring amounts in the appropriate fields ifnecessary. This automates the pay outs of these items on the employee pay cheque.31. Click Done to return to the Edit Employee details window.32. In Step 5 click Enter a Vacation Policy.17
18 Chapter 933. Answer the question What is Jane’s Vacation policy? You can choose to accrue vacation (mostcommon) or to pay vacation pay each pay period.34. Choosing to accrue vacation lets you choose when the employee accrues vacation and enterhow many hours the employee accrues per period.NOTE You can choose one of the following options to accrue vacation: at beginning of year each pay period per hour worked on anniversary dateNOTE If you pay out every period you will be required to enter a vacation % amount inthe appropriate field.
QuickBooks Online Payroll35. If the employee has a balance you will enter it here. Click Make Adjustments.36. Proceed to Step 6.37. To add deductions and contributions to the employee record, click Add Deductions in theWhat deductions or contributions does Jane have?38. Click the drop down menu.39. These deductions/contributions are optional and will only be setup if your company offersthese types of benefits. Choose the first type of deduction: Health Insurance.19
20 Chapter 940. Complete the information to setup the Health Insurance deduction/contribution.I. Enter the Provider name. This is the provider of the benefit offered. QuickBooks will printthe supplier name on the cheque.II. In the left-hand column under Employee deduction, enter the Amount per pay period.You can also choose % of gross pay.III. In the right-hand column enter the Company-paid contribution portions.IV. Enter the Amount per pay period.V. Enter the Annual Maximum (optional). This means that you will cap the amount that thecompany pays to the benefit.
QuickBooks Online PayrollVI. Click OK.41. Next, choose Retirement Plans.42. Choose the Type. You can choose Registered Retirement Savings Plan or RegisteredPension Plan.21
22 Chapter 943. Complete the information as needed for the retirement savings benefit. The same informationis required in these fields as in the previous benefit.44. Click OK to complete the setup.45. Create any other deductions needed for your business. Click the drop-down menu under Whatdeductions or contributions does Jane have?46. Choose the deduction to create. For example, you can create Union Dues.47. Click OK. Enter the name of the deduction in the Description. Enter the name that will displayon the employee pay cheque.48. Enter the amount to be deducted per pay period. Enter the Annual maximum if necessary.49. Click OK to complete the setup.QuickBooks returns to the Edit employee details window. To complete the setup complete theinformation in Step 7—How do you want to pay Jane?50. Click the edit button to choose Paper cheques or Direct deposit.
QuickBooks Online Payroll51. Choose Paper cheque to write or print cheques to employees.52. Click Done to complete the employee setup.This completes the employee setup.To learn how to setup employees and add pay items watch this video:https://youtu.be/ruBfNbmGvLY23
24 Chapter 9Time Tracking in QuickBooksQuickBooks Online lets you track time for your employees and subcontractors. When you track timeyou can import the hours into QuickBooks payroll and add the hours to the employee’s pay cheque.You can track time using a weekly timesheet or by entering single time activities.NOTE Time tracking is a feature only available in the QuickBooks Online Plus version.To enable time tracking in QuickBooks:1. Click the Gear icon and then click Accounts & Settings.2. Click Advanced.3. Click Time Tracking.NOTE QuickBooks lets you make time activities billable to customers. You can alsoassign the first day of the work week to display on the timesheet.Enter Single Time ActivityYou can enter a single time activity. From this window you can enter the name of the employee, thedate and the start and end time of the time activity.NOTE You can also add the Customer name to track the time to a specific customer.
QuickBooks Online Payroll1. To enter a single time activity click the New menu and then click Single Time Activity.2. Enter the employee Name.3. Enter the Date. Ensure the date is correct as the date determines when the time will be importedinto the pay cheque.4. Enter the Time for the Start Time and End Time. QuickBooks calculates the total hours. To makeentries in these fields, select the Enter Start and End Times checkbox.5. Enter a Description if necessary.6. Click Save.25
26 Chapter 9Enter Weekly TimesheetThe weekly timesheet it helpful to enter an entire week of timesheet information. You can enter thesame field as a single time activity with one exception, the start and end time.To fill in a weekly timesheet:1. Click New Weekly Timesheet.2. Choose a Name from the list.3. Select the week for which you want to record activities.4. For each type of activity, enter an activity line:CUSTOMERChoose a customer if you want to bill the activity tothe customer or track expenses for the customer.(Optional) If you use services to enter time, chooseSERVICECLASSa service that represents this activity. If you don’t seeit, Add Service field to timesheets is turned off.(Optional) Choose a Class. If you don’t see Class,class tracking is turned off.(Optional) Choose a Location/Department. IfLOCATIONyou don’t see it, location/department tracking isturned off.Enter a description of the activity. If the activity isbilled to a customer, the Description appears onDESCRIPTIONtheir invoice, depending on your company settings.Text for the description appears automatically if youselect an item from the optional Service field.Select this checkbox if you want to bill the activityBILLABLEto the customer. Enter a rate per hour and selectTaxable if the activity is taxable.
QuickBooks Online Payroll5. For each day of the week this activity occurred, enter the number of hours spent on this activityfor that day.You can add more activity lines if needed or clear all lines and begin again.6. Click Save to enter the timesheet.NOTE If the last timesheet is like the current time period, click Copy last timesheet.27
28 Chapter 9Run Payroll in QuickBooksTo run payroll in QuickBooks you’ll start on the Employees page. On the employees window, clickRun payroll.1. Choose the Bank account where the money will be paid from.2. Choose the Pay Period and Pay Date (when running a regular Pay Schedule, these dates shouldauto-fill for you.3. If you’ve entered timesheets that coincide with the pay period, QuickBooks automaticallyimports the hours. They’ll display in the Regular Pay Hrs section.
QuickBooks Online Payroll4. Click the pencil (edit) icon to view each employee pay cheque.5. Click the arrow next to Pay to expand the pay information.6. Click OK to move to the next employee and review the same process if necessary.29
30 Chapter 97. Click Save for Later to complete the payroll at a later time or click Submit Payroll to completethe payroll run.8. From the Run Payroll window you can click to Print pay stubs, or enter a Cheque Number. Youcan also Print Payroll Reports from this window.To learn how to pay employees watch this video: https://youtu.be/WHG-AIo bfE
QuickBooks Online Payroll9. Click Print pay stubs.10. Click View Payroll Reports to view and export your payroll reports to Excel.11. Click OK.12. Select the reports to view and then click OK. QuickBooks exports your reports to Excel.31
32 Chapter 9Paying Payroll LiabilitiesQuickBooks automatically tracks your payroll liabilities for your company. After your first payrollrun, QuickBooks will prompt you to setup your payroll taxes so that you’re ready to pay whenthey come due.You’ll see the following window after your first payroll run.1. Click Set up taxes now.2. Click Continue to Tax Setup.3. QuickBooks checks to see if you’ve entered the correct hire and birth dates for employeesyou’ve paid this year.
QuickBooks Online Payroll4. Click Continue.5. Add or edit any Business Details. Enter the CRA payroll account number if you’ve received it orselect No, I haven’t received it yet, or I don’t have it handy.6. Choose How often the CRA requires you to remit payroll deductions and contributions.7. Click Continue.33
34 Chapter 98. Now you’re ready to remit your taxes. From the Payroll Tax Centre you can Pay taxes, edit yourtax setup or view Monthly, Annual or Employer Forms.9. Click Monthly Forms to view the current payroll liabilities. QuickBooks now lets you view thePD7A report.
QuickBooks Online Payroll10. Click the PD7A Report link.11. Select the period for the report.12. Click View. QuickBooks displays the PD7A report.35
36 Chapter 913. After viewing and printing the report you can close the browser tab.14. Click Back to go back to the Payroll Tax Centre.15. Click Pay Taxes.16. Click Record Payment.17. Choose the Bank Account from which you’ll pay the liabilities.18. Enter the Payment Date and review the amounts.
QuickBooks Online Payroll19. Click Record and Print.To learn how to pay taxes watch this video: https://youtu.be/iI6QqxOskFUCreating and Printing T4’s at Year EndAt the end of the calendar year you’re required to print T4 or Releve 1 forms for your employees. T4forms are the yearly forms, which report employee earnings and deductions. Manually preparingthese forms can be a daunting task. Luckily, QuickBooks assists you in preparing T4 forms.The following checklist provides six simple steps for small businesses to get their payrolldata in order:1. Verify employee data.2. Verify and review benefit information for your employees.3. Verify and review payroll deductions.4. Complete a T4 slip for each employee.5. Complete and remit a T4 Summary form.37
38 Chapter 96. Review employee wages and benefits for next year.Preparing T4sA T4 slip is the end-of-year form that you give to each employee and submit to Canada RevenueAgency (CRA)—usually no later than the last day in February. T4s report the employee’s wages andtaxes withheld for the calendar year. See the following checklist for the things to report on a T4 slip: salary, wages (including pay in lieu of termination notice), tips or gratuities, bonuses,vacation pay, employment commissions, and all other remuneration you paid to employeesduring the year; allowances; deductions you withheld during the yearT4 SummaryOnce all T4s are printed, you must prepare a T4 Summary. Your T4 Summary is a report thatRevenue Canada requires. This summary report totals all employees earnings as recorded on theT4s. It also totals the deductions and payroll taxes (CPP and EI) withheld from the employees duringthe calendar year. Lastly, this form is used to reconcile those amounts with the source deductionpayments that you remitted to CRA.Your T4 Summary Report is due to be filed with Revenue Canada by the last day of February of thefollowing year.To Print T4’s for your employees:1. On the left navigation bar, click Taxes.2. Click Payroll Tax.3. Click Annual Forms.4. Click T4 slip (employee).
QuickBooks Online Payroll5. Select the Period.6. Click View.7. Print the T4.To learn how to create a T4 watch this video: https://youtu.be/wHPQFHrPyWM39
40 Chapter 9Create Records of EmploymentIn Canada, you’re required to issue a Record of Employment (ROE) when an employee: quits your company is laid off or terminated goes on leaveNOTE Please visit the HRDC website for more information regarding who qualifies fora Record of Employment.The Record of Employment gives the employee all the information they need to submit to thegovernment to claim any benefits they qualify for.To create a Record of Employment:1. First you must tell QuickBooks that the person is leaving the company or going on leave. ClickEmployees.2. Click the employee name.3. Click the Employee name and then click Edit Employee.
QuickBooks Online Payroll4. Enter the new Status, Reason for Status change and the Termination date.5. Click Done.6. Click Yes.41
42 Chapter 97. Click View.8. QuickBooks displays a preview of the ROE.NOTE You cannot submit this information directly to the HRDC from QuickBooksOnline. However, this information can be used to complete the ROE web form for submission.
QuickBooks Online Payroll 9 10. Click the Enter TD1 form. 11. Complete the TD form for the employees. You must enter the Last Name, First Name, Home Address (including Postal Code), Date of Birth and Social Insurance Number. 1
