Transcription
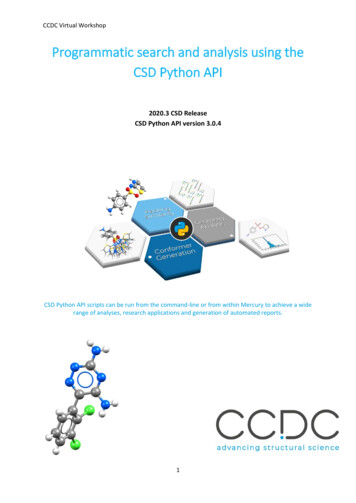
CCDC Virtual WorkshopProgrammatic search and analysis using theCSD Python API2020.3 CSD ReleaseCSD Python API version 3.0.4CSD Python API scripts can be run from the command-line or from within Mercury to achieve a widerange of analyses, research applications and generation of automated reports.1
CSD Python APITable of ContentsIntroduction . 3Objectives . 3Pre-required skills . 3Materials . 3Example 1: Demonstrating Input and Output. 4Aim . 4Instructions . 4Conclusions . 7Example 2: Introduction to searching with the CSD Python API . 9Aim . 9Instructions . 9Conclusions . 12Example 3: Searching the CSD for specific interactions. 14Aim . 14Instructions . 14Conclusions . 17Workshop Conclusions. 19Next Steps . 19Feedback . 19Glossary . 19Bonus Exercise: Customising a simple script for use in Mercury. 20Aim . 20Instructions . 20Conclusions . 242
CCDC Virtual WorkshopIntroductionThe CSD Python API provides access to the full breadth of functionality that is available within thevarious user interfaces (including Mercury, ConQuest, Mogul, IsoStar and WebCSD) as well as featuresthat have never been exposed within an interface. Through Python scripting it is possible to buildhighly tailored custom applications to help you answer detailed research questions, or to automatefrequently performed analysis steps.This workshop will cover a range of aspects of the CSD Python API, building from an initial introductionto the basic mechanics of input and output through a Python console, to searching for specificinteractions, and finally to advanced Python scripting. The applications illustrated through these casestudies are just as easily applied to your own experimental structures as they are to the examplesshown here using entries in the Cambridge Structural Database (CSD).Before beginning this workshop, ensure that you have a registered copy of CSD-Core or CSD-Enterpriseinstalled on your computer. Please contact your site administrator or workshop host for furtherinformation.ObjectivesIn this workshop, you will: Learn how to access CSD entries through the CSD Python API. Learn how to read different file formats. Learn how CSD entries are represented in the CSD Python API. Learn how to conduct a Text Numeric Search of the CSD. Learn how to search for specific interactions in the CSD.This workshop will take approximately 40 minutes to be completed.Pre-required skillsThe following exercises assume that you have a working knowledge of the program Mercury, as wellas a very basic understanding of Python.MaterialsFor this workshop you will need the file example.cif that you can download here. A text editor isrequired for scripting during this workshop. If you have a preferred text editor, we recommend stickingwith that. If you do not have a preferred editor, we would recommend Notepad for Windows(https://notepad-plus-plus.org/) and BBEdit for macOS (available in the App Store). The basic Notepadfunctionalities in Windows would also be enough. For more in-depth Python editing or for interactivework, try looking at PyCharm (https://www.jetbrains.com/pycharm/) or Jupyter(https://jupyter.org/). Visual Studio is available for all platforms and would be a suitable s/).3
CSD Python APIExample 1: Demonstrating Input and OutputAimThis example will focus on understanding the basic principles of using the CSD Python API. We willwrite a script that will print the results out to the console. We will cover the concepts of Entries,Molecules and Crystals.Instructions1. For this exercise we will be writing the script in a Python file that we can then run from a commandprompt later. Start by creating a folder where you will save your Python files in a place where youhave read and write access, for example C:\training\ for Windows, or something equivalent onmacOS or Linux. We will continue to use our C:\training\ folder (or equivalent), through thetutorial.2. Open the command prompt from this folder. In Windows you can type ‘cmd’ in the File Explorertab and press ‘Enter’. In Linux you can right click on the folder and select Open in Terminal. InmacOS, right click on the folder, select Services then click New Terminal at Folder.The command prompt window should now appear.3. To run your Python scripts from the command prompt, you will first need to activate yourenvironment. The activation method will vary depending on the platform: Windows: Open a command prompt window and type (including the " marks):"C:\Program Files\CCDC\Python API 2021\miniconda\Scripts\activate"MacOS/Linux: Open a terminal window and change directory to the CSD Python API bin folder:cd /Applications/CCDC/Python API 2021/miniconda/binThen activate the environment with:source activateIf the activation is successful, (base) will appear at the beginning of your command prompt:4
CCDC Virtual Workshop4. We can now start writing our script. In the folder you created, open your preferred text editor andcreate a new Python file called example one.py. The following steps show the code that youshould write in your Python file, along with explanations of what the code does.5. The CSD Python API makes use of different modules to do different things. The ccdc.io moduleis used to read and write entries, molecules, and crystals. To make use of modules, we first needto import them.from ccdc import io6. Entries, molecules, and crystals are different types of Python objects, and have differentcharacteristics, although they do have a number of things in common. They each have readersand writers that allow for input and output respectively. We will start by setting up an entry readerand using it to access the CSD. From the CSD, we want to open the first entry.entry reader io.EntryReader('CSD')first entry entry reader[0]print(f'First Refcode: {first entry.identifier}')The 0 means that we want to access the first entry in the database (when we have multiple itemsin a list or a file, Python starts numbering them from zero). We are outputting the information asan f string, which is a way of formatting strings available in Python 3.6 and above. The expressioninside the curly brackets {} will be replaced with the value of the expression when the printcommand is executed by Python. In this case first entry.identifier will return theidentifier (also known as a CSD Refcode) of the first entry in the CSD.7. Make sure the changes to your file have been saved. We can now run the script in the commandprompt – this can be done by typing the following in the command prompt and then pressing‘Enter’:python example one.py‘python’ tells the command prompt to run Python and ‘example one.py’ is the name of ourPython script that Python will execute.You should see in the command prompt that “First Refcode: AABHTZ” is returned, which is thestring included in our script and identifier of the first entry. Giving the 'CSD' argument to theEntryReader will open the installed CSD database. It is possible to open alternative or multipledatabases in this way. Similar methods can be used to read molecules or crystals with aMoleculeReader or CrystalReader instance.5
CSD Python API8. From an entry object, it is also possible to access the underlying molecular or crystal informationfor that CSD entry. We will explore this using paracetamol (CSD Refcode HXACAN). The code belowis accessing the entry HXACAN directly from our EntryReader, then accessing the underlyingmolecule from this entry. Add these lines to your script:CSD Entry HXACANhxacan entry entry reader.entry('HXACAN')hxacan molecule hxacan entry.molecule9. We can also access information from inside the molecule classfor this entry. The molecule class contains a list of atoms andbonds. This next line of code will return the number of atomsin the HXACAN molecule, by checking the length of the atomlist.print(f'Number of atoms in HXACAN: {len(hxacan molecule.atoms)}')10. Save the changes to your script and run the script in the command prompt again using the samecommand as in Step 7. You should see the string printed out to your screen; “Number of atoms inHXACAN: 20”.11. We can access information about the individual atoms within the atom list such as atom labels,coordinates and formal charges. Add these next lines to your script and save the file (Note: thefour spaces before print are very important!):for atom in hxacan molecule.atoms:print(f'Atom Label: {atom.label}')12. Save and run your Python script in the command prompt again, as done for Step 7. You shouldsee that the label for each atom in the paracetamol molecule is now returned. We have used a forloop to iterate through each atom in the molecule and print out its atom label. for loops are usedto iterate through each item in a list of items – the atoms in the molecule in this case. for loops areuseful and allow us to iterate through everything from the atoms in a molecule to entries in theCSD.13. We can also read entries, molecules, and crystals from a number of supported file types. We aregoing to use an example .cif file to illustrate this. For this demonstration, we will use the providedexample.cif (which you can access here) and place in the C:\training folder.We need to tell Python where to find this file, so add the following line to your script, making surethat the filepath is that which you have just used:filepath r"C:\training\example.cif"Python does not like spaces or backslashes in file paths! The r and double quotes (" ") help us toget around this.6
CCDC Virtual Workshop14. Now that Python knows where the .cif file is located we can access the crystal using aCrystalReader, by adding these next lines to our script:crystal reader io.CrystalReader(filepath)tutorial crystal crystal reader[0]print(f'{tutorial crystal.identifier} Space group :{tutorial crystal.spacegroup symbol}')Save the changes you have made to your file and run your Python script in the command promptagain. The output should now also display the space group of our example crystal, P21/n.15. It is good practice to close files when we are finished with them, but before we do that, we aregoing to take the underlying molecule from our tutorial crystal for use later. Add the followinglines to your script:tutorial molecule tutorial crystal.moleculecrystal reader.close()16. The CSD Python API can also write entries, molecules, and crystals to a number of supported filetypes. To do this, we need to tell Python where we want the file to be written. We will continueto use our C:\training\ folder (or equivalent), and we will use this to set up our new file as avariable. Add this line to your script:f r"C:\training\mymol.mol2"17. With this new variable we can use the CSD Python API to create a .mol2 file that contains themolecule from the example .cif file that we kept from earlier. To do this, add these lines to yourscript:with io.MoleculeWriter(f) as mol writer:mol writer.write(tutorial molecule)Here, the with statement ensures that we automatically close the mol writer and the file whenwe have written our molecule.18. Save the changes you have made to your file and then run the Python script in command promptonce more. What we have done in this last step is to create a file mymol.mol2 in our folder, thenwrite the molecule we kept from earlier into it. In this way, we can write out molecules, crystals,and entries that we have obtained or modified and use them for other tasks and with otherprograms.ConclusionsThe CSD Python API was used to explore input and output of various objects and file types using theccdc.io module.The concepts of entries, molecules and crystals were illustrated here along with some of the ways inwhich these are related.You should now know how to run Python scripts using the CSD Python API and have an appreciationof how objects and files are read into and written out of the CSD Python API.7
CSD Python APIFull Scriptfrom ccdc import ioentry reader io.EntryReader('CSD')first entry entry reader[0]print(f'First Refcode: {first entry.identifier}')hxacan entry entry reader.entry('HXACAN')hxacan molecule hxacan entry.moleculeprint(f'Number of atoms in HXACAN: {len(hxacan molecule.atoms)}')for atom in hxacan molecule.atoms:print(f'Atom Label: {atom.label}')filepath r"C:\training\example.cif"crystal reader io.CrystalReader(filepath)tutorial crystal crystal reader[0]print(f'{tutorial crystal.identifier} Space group :{tutorial crystal.spacegroup symbol}')tutorial molecule tutorial crystal.moleculecrystal reader.close()f r"C:\training\mymol.mol2"with io.MoleculeWriter(f) as mol writer:mol writer.write(tutorial molecule)8
CCDC Virtual WorkshopExample 2: Introduction to searching with the CSD Python APIAimThis example will focus on using the CSD Python API to carry out a search across the CSD. We willcreate a search query, add criteria to the search query and then save the resulting hits from the queryas a refcode list (or .gcd file).The CSD Python API allows searches to be performed. There are a number of different search modulesincluding text numeric searching, substructure searching (which you will try in Example 3), similaritysearching, and reduced cell searching. In this example, we will be using the text numeric searchmodule which searches text and numeric data associated with individual entries in the CSD.Unlike the similarity and substructure search modules, the text numeric search module can only beused to search the CSD because it searches fields that are specific to the database.Note: If you have not tried Example 1, you will need to do Steps 1-3 of that exercise before continuingwith this exercise to set up the command prompt.Instructions1. In the same folder as in Example 1, open your preferred text editor and create a new Python filecalled ‘text numeric search.py’. The following steps show the code that you should write in yourPython file, along with explanations of what the code does.2. First, we need to import the Text Numeric Search module in our script.from ccdc.search import TextNumericSearch3.We then need to create our search query. This line of code creates an empty query called ‘query’.query TextNumericSearch()4. We are going to use our query to look for entries that have ‘ferrocene’ in their chemical names inthe CSD. To do this we need to define the search parameters to find entries which contain theword ‘ferrocene’ anywhere in the chemical name and synonyms field.query.add compound name('ferrocene')5. To search the CSD we will use the .search() function which will produce a list of ‘hits’ that areentries which have met the defined criteria. This has been assigned to variable hit list to savethe output of the search.hit list query.search()6. To see how many entries have been found in our search, we will add a line to print the length ofthe hit list.print(f'Number of hits : {len(hit list)}')7. We are now ready to search the CSD. Save the changes you have made to your script and then runthe Python script in your command prompt. To run your Python script, type the following in yourcommand prompt and then press ‘Enter’:9
CSD Python APIpython text numeric search.pyThe script may take 10-20 seconds to run and should print out the resulting length of the hit list.You should obtain at least 7472 hits (As of version 2020.3 of the CSD including Update 1 Feb.2021).8. We can add more criteria to our query. In this case we will look only for structures published inthe last 5 years by adding a search criterion based on the citation. We can add a range of whenthe structure was published. We will then search the CSD again and print out the number of hitswe have obtained.query.add citation(year [2016,2021])hit list query.search()print(f'Number of hits published between 2016 - 2021 : {len(hit list)}')Save the changes you have made to the script and then run your script again in the commandprompt. You should obtain at least 1997 entries published in the last 5 years.9. We can check what search criteria has been used in the query. This line of code will print out thecomponents of the query in a human readable form. Add this line to your script and then save thechanges you have made.print('Query search criteria: ')print('\n'.join(q for q in query.queries))Run your script in the command prompt. The output you should see printed in the console is:This means that the word ‘ferrocene’ appears anywhere in the compound name and synonymfield and the entries have a journal year between 2016 and 2021.10. If we want to find out the number of hits for each year in our five-year range, then we need to runseparate queries. We can do this by using a for loop to iterate through a range from 2016 to 2021( 1 is added to 2021 in the range as the function is exclusive – meaning it does not contain thefinal number in the result). For each search we need to clear our query – otherwise we would getno results as the search criteria would be for an entry publi
CCDC Virtual Workshop . 1 . Programmatic search and analysis using the CSD Python API . 2020.3 CSD Release . CSD Python API version 3.0.4 . CSD Python API scripts can be run from the command-line or from within Mercury to achieve a wide range of analyses, r


