Transcription
SCIONxD2008 -INTERIOR LIGHTING UPGRADEPreparationNOTE: Part number of this accessory may not bethe same as the part number shown.Part Number: PTS21-52085Light Guide Kit ContentsItem #1Quantity Reqd.123412156781111DescriptionController Board, 4 colorprogrammed w/ BracketRGB, LED Engine wire harness14mm Light Rod, 8” LengthPush button switch, momentaryTypeRGB Cup holder wire harnessPower harness with fuseInstallation hardware kitInstallation instructionsHardware Kit ContentsItem #1Quantity Reqd.223456744412118910112DescriptionFoam pad with adhesive (38.1 x38.1 x 4.75mm)1/8” Rivets1/8” Rivet washersCatamountsWire ties (177.8mm)Cup Lens KitPush button switch mountinghardware“Illumination” switch bezelSwitch installation toolT-tapsAdditional Items Required For InstallationItem #Quantity Reqd.DescriptionConflictsNoneRecommended ToolsPersonal & VehicleProtectionSafety GlassesSafety GlovesVehicle ProtectionOptionalBlankets, Part Boxes,Masking TapeNotesSwitch installation tool0-50 in/lbs Torque WrenchPaper drill templatesDrill templatesIn hardware kitFor Battery TerminalsSee Appendix 1PPO ONLY.IADS (xD-08-034)Installation ToolsNotesNylon Panel Removal ToolRatchetSocket10 mm9/20/076 inchSpecial ChemicalsNotesAll Purpose CleanerVDC approved, mild waterbased, solvent free allpurpose cleaner.Uni-bit or step drill rec.General Applicability2008 SCION - xDRecommended Sequence of ApplicationItem #1234567AccessoryNavigation systemV5 Security – RS3200 V4 RESIlluminated Door SillsAudioSatellite RadioInterior Light KitLegendNotesSpecial ToolsIssue: CWire CuttersPhillips screwdriverDrill motor½” Drill bit5/16” Drill bit1/8” Drill bitDrill stopCenter punchDeburring toolNon-scratch wiping clothScissorsPliersRivet GunSocket extensionSTOP: Damage to the vehicle may occur. Do notproceed until process has been complied with.OPERATOR SAFETY: Use caution to avoid risk ofinjury.CAUTION: A process that must be carefully observedin order to reduce the risk of damage to theaccessory/vehicle and to ensure a quality installation.TOOLS & EQUIPMENT: Used in Figures calls out thespecific tools and equipment recommended for thisprocess.Page 1 of 22 pagesDIO
SCIONxD2008 -INTERIOR LIGHTING UPGRADEProcedureCare must be taken when installing this accessory to ensure damage does not occur to the vehicle. The installation of thisaccessory should follow approved guidelines to ensure a quality installation.These guidelines can be found in the "Accessory Installation Practices" document.This document covers such items as: Vehicle Protection (use of covers and blankets, cleaning chemicals, etc.). Safety (eye protection, rechecking torque procedure, etc.). Vehicle Disassembly/Reassembly (panel removal, part storage, etc.). Electrical Component Disassembly/Reassembly (battery disconnection, connector removal, etc.).Please see your Toyota dealer for a copy of this document.10mm Socket1. Vehicle Disassembly(a) Remove the negative battery cable. (Fig. 1-1)(1) Do not touch the positive terminal withany tool when removing cable.Fig. 1-110mm Socket(b) Use a 10mm socket to remove the bolt in therear console cup holder. (Fig. 1-2)(c) Remove shift knob.Fig. 1-2Nylon Panel Removal Tool(d) Use panel safe tool to remove switch panelassembly. (Fig. 1-3)Fig. 1-3Issue: C9/20/07Page 2 of 22 pagesDIO
SCIONxD2008 -INTERIOR LIGHTING UPGRADEProcedure(e) Disconnect any connectors connected to theswitch panel. (Fig. 1-4)Fig. 1-4Nylon Panel Removal Tool(f) Use panel safe tool and remove console trimpiece. (Fig. 1-5)Fig. 1-510mm Socket or Phillips Screw Driver(g) Use a 10mm socket or Phillips screw driverand remove the four mounting bolts.(Fig. 1-6)Fig. 1-6(h) Remove the console from interior of vehicle.(Fig. 1-7)Fig. 1-7Issue: C9/20/07Page 3 of 22 pagesDIO
SCIONxD2008 -INTERIOR LIGHTING UPGRADEProcedure(i) Remove the front console piece. (Fig 1-8)Fig. 1-8(j) Remove the passenger side lower undercover located below the glove box. (Fig. 1-9)Fig. 1-9Phillips Screw Driver(k) Use a Phillips screw driver to remove the twomounting screws that secure the driver sidelower under cover. (Fig. 1-10)Fig. 1-10(l) Remove the driver side lower under cover.(Fig. 1-11)Fig. 1-11Issue: C9/20/07Page 4 of 22 pagesDIO
SCIONxD2008 -INTERIOR LIGHTING UPGRADEProcedure(m) Lower the “Aux” and “Ipod” panel assembly.(Fig. 1-12)Fig. 1-12(n) Disconnect the power outlet connector at therear of power outlet socket. (Fig. 1-13)Fig. 1-13(o) Separate the Velcro strap holding the carpetpieces together. (Fig. 1-14)(p) Bring the power outlet harness in front of thelower center console. (Fig. 1-15)Fig. 1-14FOR DIO ONLY:(q) Cut out paper drill templates.(1) Check the two inch reference on thepaper templates located at the end of theinstallation instructions for the correctscale.(2) Using scissors, cut out the papertemplates.Fig. 1-15Issue: C9/20/07Page 5 of 22 pagesDIO
SCIONxD2008 -INTERIOR LIGHTING UPGRADEProcedureCenter Punch or Scribe2. Installation of the Driver’s Side Light Rod.(a) Align the Driver’s side template to thebottom side of the driver side under cover.(1) Punch or scribe a mark for the mountingholes to be drilled.(2) Do not use the template to drill the holes.(Fig. 2-1)Fig. 2-11/8” Drill(b) Drill the mounting holes using a 1/8” drillbit. Deburr holes. (Fig. 2-2)Fig. 2-2Bottom side of panel(c) Insert rivets into catamounts and place intothe holes drilled on the bottom side of theunder cover. (Fig. 2-3)CatamountFig. 2-3Rivet GunTop side of panelWasher(d) Install a rivet washer onto each of the rivetson the top side of the under cover and installthe rivets using a rivet gun. (Fig. 2-4)Fig. 2-4Issue: C9/20/07Page 6 of 22 pagesDIO
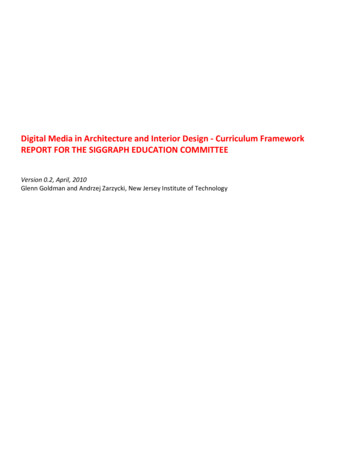
SCIONxD2008 -INTERIOR LIGHTING UPGRADEProcedureWire Cutters(e) Install the light guide onto the cover usingtwo 7” wire ties. (Fig. 2-5)(1) Reflector end of the light guide should betoward the outside of vehicle.(2) Light guide should be oriented with whitereflector at the top.(3) Trim excess wire tie.Fig. 2-5Center Punch or Scribe3. Installation of the Passenger Side Light Rod.(a) Remove the felt cover from the backside ofpassenger under cover.(b) Use template to mark the bottom side of theunder cover using a punch or scribe asshown. (Fig. 3-1) (Fig. 3-2)Fig. 3-1Center Punch or Scribe(c) Use a 1/8” drill bit and drill the holes for themounting of the rivets. (Fig. 3-3)(d) Insert rivets into catamount and place into theholes drilled on the bottom side of the cover.Fig. 3-21/8” Drill & Rivet Gun(e) Install rivet washers onto rivets on the topside of the cover and install using a rivet gun.Fig. 3-3Issue: C9/20/07Page 7 of 22 pagesDIO
SCIONxD2008 -INTERIOR LIGHTING UPGRADEProcedureWire Cutters(f) Install the light guide onto the cover usingtwo 7” wire ties. (Fig. 3-4)(1) Reflector end of the light guide should betoward the outside of vehicle.(2) Light guide should be oriented with whitereflector at the top.(3) Trim excess wire tie.Fig. 3-4(g) Reinstall Felt Cover.Center Punch or Scribe4. Installation of the Cup holder harness tocenter console.(a) Align cup holder template. Mark the hole foreach cup holder location using a punch orscribe. (Fig. 4-1)Fig. 4-11/8” Drill(b) Drill pilot holes with a 1/8” drill bit. Drillfinal holes with a 5/16” drill bit. DeburrHoles. (Fig. 4-2)(c) Remove tape liner from the threads of thecup holder lenses. From inside the cupholder, insert lenses into previously drilledholes. Press firmly to ensure the lenses arefully seated.Fig. 4-2(d) From the back of console install the lockwashers then the LED’s onto the lenses.(1) The LED housing with only 4 wiresattached to it (the short harness) isinstalled to the driver side cup holder.(2) Clean the bottom of the cup holdersurfaces and secure the wires with 2 foampads as shown. (Fig. 4-3)Fig. 4-3Issue: C9/20/07Page 8 of 22 pagesDIO
SCIONxD2008 -INTERIOR LIGHTING UPGRADEProcedureCenter Punch or Scribe5. Installation of Switch and Harness.(a) Use the switch template and mark the switchhole location in the switch cover using apunch or a scribe. (Fig. 5-1)Fig. 5-11/8” Drill(b) Drill a pilot hole with a 1/8” drill bit.(Fig. 5-2)Fig. 5-2Uni-bit or Step Drill(c) Using a ½” drill bit (Uni-bit or step bit ishighly recommended) drill the switch hole.(Deburr the hole.) (Fig. 5-3)NOTE: ½” hole can be drilled from the frontside to reduce the need for deburring.(d) Use VDC approved cleaner to clean switchcover surface.Fig. 5-3(e) Insert the switch bezel into the roundillumination plate. Using the Pull tab, removethe tape liner from the back of theillumination plate. Avoid contact with theadhesive surface. Install the bezel and theillumination plate onto the switch cover.(Fig. 5-4)Fig. 5-4Issue: C9/20/07Page 9 of 22 pagesDIO
SCIONxD2008 -INTERIOR LIGHTING UPGRADEProcedure(f) Be sure the illumination plate is in properalignment and not tilted either to the left orright (Fig. 5-5).(1) Once aligned, press down firmly toadhere tape.Fig. 5-5White end(g) Place switch spacer over switch bezel withthe white end of spacer against switch panel.(Fig. 5-6)Fig. 5-6Switch Installation Tool(h) Insert switch into bezel and use switch tool totighten bezel to switch. (Fig. 5-7)Fig. 5-7Wire Cutters(i) Align leads as shown. Secure leads with a 7”wire tie. Trim excess wire tie. (Fig. 5-8)Fig. 5-8Issue: C9/20/07Page 10 of 22 pagesDIO
SCIONxD2008 -INTERIOR LIGHTING UPGRADEProcedure(j) Install the button onto the switch by insertingit into the bezel and pressing to engage.(Fig. 5-9)6. Installation of Controller Board.Fig. 5-9(a) Review wire harness connections. (Fig. 6-1)(1) Some wire harnesses are identified with ayellow connector, band, or label.(2) Some connectors on the controller boardare identified with yellow marking oryellow connector.Light Engine HarnessController BoardCup Holder LED HarnessPower Harness4 Pin Connector(Identified byYellow Mark)Fig. 6-1Issue: C9/20/072 Pin Connector(Identified byYellow Mark)Switch HarnessPage 11 of 22 pagesDIO
SCIONxD2008 -INTERIOR LIGHTING UPGRADEProcedureScissors(b) Cut carpet as shown and fold strips to side.(Fig. 6-2)Fig. 6-210mm Socket(c) Remove the M6 nuts that secure the cover.(Fig. 6-3)Fig. 6-310mm Socket(d) Install the controller board and bracket overthe two mounting studs and secure bracketwith the two M6 nuts. Torque to 9.0 N-m (80lbf-in). (Fig. 6-4)Fig. 6-4Scissors7. Installation of Power Harness.(a) Use a pair of scissors and cut the coveringbehind the power outlet connector. (Fig. 7-1)Fig. 7-1Issue: C9/20/07Page 12 of 22 pagesDIO
SCIONxD2008 -INTERIOR LIGHTING UPGRADEProcedure(b) Separate the covering to expose the wire tothe power outlet connector. (Fig. 7-2)Fig. 7-2Pliers(c) Install a T-Tap to each wire on the poweroutlet harness. (Fig. 7-3)Fig. 7-3(d) Connect the power harness with fuse to theT-Taps. (Fig. 7-4)(1) Attach the white wire quick disconnect tothe T-Tap attached to the grey wire.(2) Attach the black wire quick disconnect tothe T-Tap on the white/black wire.Fig. 7-4(e) Reinstall power outlet connector to poweroutlet socket.(f) Run power harness along vehicle harness onright side on vehicle center.Issue: C9/20/07Page 13 of 22 pagesDIO
SCIONxD2008 -INTERIOR LIGHTING UPGRADEProcedureDrivers8.Installation of Light Engine Harness.(a) Pull back the carpeting covering the center ofvehicle in the passenger and driver sidefootwells. (Fig. 8-1) (Fig. 8-2)Fig. 8-1PassengerFig. 8-2(b) The light engine with the single wire isrouted under the center power outlet towardthe passenger side footwell. (Fig. 8-3)Fig. 8-3(c) Passenger light engine is routed up behindthe duct and toward blower motor locatedbehind the glove box. (Fig. 8-4)Fig. 8-4Issue: C9/20/07Page 14 of 22 pagesDIO
SCIONxD2008 -INTERIOR LIGHTING UPGRADEProcedure(d) Light engine with 2 wires attached is routedunder center power outlet, toward driver sidefootwell. (Fig. 8-5)Fig. 8-5Wire Cutters(e) Attach light engine to driver side light rodattached to lower cover. Reinstall cover.(f) Route wires as shown and attach wires tovehicle harness with a 7” wire tie. (Fig. 8-6)Fig. 8-6Wire Cutters(g) Route passenger light engine and attach wireto vehicle harness that runs to the blowermotor, as shown. (Fig. 8-7)(1) Do not fully tighten.Fig. 8-7(h) Attach the light engine to the light rodattached to passenger side lower cover.(Fig. 8-8)Fig. 8-8Issue: C9/20/07Page 15 of 22 pagesDIO
SCIONxD2008 -INTERIOR LIGHTING UPGRADEProcedure(i) Pull back excess light engine wire until lowerpanel can be installed. Tighten wire tie onblower motor harness and trim excess. Installlower passenger cover. (Fig. 8-9)Fig. 8-9Wire Cutters(j) Secure light engine harness to vehicleharness behind IPod connector using a 7”wire tie. Trim excess wire tie. (Fig. 8-10)Fig. 8-10Wire Cutters(k) Secure the excess light engine wire that runsbetween the 2 light engines. Bundle the wireand secure to vehicle harness as shown, Trimexcess wire tie. (Fig. 8-11)Fig. 8-11(l) Reinstall Ipod/Aux panel. (Fig. 8-12)Fig. 8-12Issue: C9/20/07Page 16 of 22 pagesDIO
SCIONxD2008 -INTERIOR LIGHTING UPGRADEProcedure9. Installation of Center Console.(a) Install two 7” wire ties to vehicle harness onthe right side of shifter. Leave a big loop.(Fig. 9-1)(1) DO NOT TIGHTEN.Fig. 9-1(b) Locate the rear wire tie just before thecontroller board and front wire tie towardfront of shifter. Run both the power harnessand light engine harness through wire tiesand toward the controller board. (Fig. 9-2)Fig. 9-2(c) Reinstall the front console. (Fig. 9-3)Fig. 9-3(d) Place center console into position to bereinstalled above shifter. Run cup holderharness toward rear of console.(1) Feed the harness through the previouslyinstalled 7” wire ties. (Fig. 9-4)Fig. 9-4Issue: C9/20/07Page 17 of 22 pagesDIO
SCIONxD2008 -INTERIOR LIGHTING UPGRADEProcedureLightEngineHarnessCup HolderHarness(Identifiedby YellowMark)PowerHarness(Identifiedby YellowMark)(e) Locate control board. Review connectors oncontroller board. (Fig. 9-5)CAUTION: Failure to connect wireharnesses in the correct locations may resultin permanent damage to light engineassemblies.SwitchHarnessFig. 9-5Yellow MarkPowerharness(f) Plug in the 2 pin Power harness identified bya yellow mark to the 2 pin connector on thecontroller board with the yellow mark.(Fig. 9-6)Fig. 9-6Yellow MarkCup holderLED harness(g) Plug in the 4 pin cup holder connectoridentified by a yellow mark to the 4 pinconnector on the control board with theyellow mark. (Fig. 9-7)Fig. 9-7Light Engineharness(h) Plug in the 4 pin Light engine harnessconnector to the plain black 4 pin connectoron the control board. (Fig. 9-8)Fig. 9-8Issue: C9/20/07Page 18 of 22 pagesDIO
SCIONxD2008 -INTERIOR LIGHTING UPGRADEProcedureWire Cutters(i) Bundle excess wire with a 7” wire tie. Trimexcess wire tie. (Fig. 9-9)Fig. 9-9Wire Cutters(j) Tighten the two 7” wire ties to the right ofshifter. Trim excess wire tie. (Fig. 9-10)(k) Install center console.Fig. 9-10(l) Plug in the 2 pin switch harness connector tothe plain black 2 pin connector on thecontroller board. (Fig. 9-11)SwitchharnessFig. 9-11(m) Install switch panel.(1) Reconnect all disconnected connectors tothe switch panel.(n) Attach trim pieces. Secure mounting screwsand bolts.(o) Attach Shift knob.Issue: C9/20/07Page 19 of 22 pagesDIO
SCIONxD2008 -INTERIOR LIGHTING UPGRADEProcedure10. Post installation.(a) Reconnect negative battery terminal andtorque to 4.1 N-m (36 lbf-in).(b) Clean light guide using approved cleaner andnon-scratch cloth.(c) Cycle test the system with key in ACC orON. The cycle may start from any step belowbut should cycle as follows:(1) System advances in color with each pushof the button.(2) Note: There are 4 colors (Orange, Blue,Green, Red) and an Off position.(d) Check interior trim panels for proper fit andalignment.Issue: C9/20/07Page 20 of 22 pagesDIO
SCIONxD2008 -INTERIOR LIGHTING UPGRADEChecklist - these points MUST be checked to ensure a quality installation.Check:Look For:Accessory Function ChecksLight Kit, Partial Operation Full engagement of affected wire harnessconnector at the controller board. Correct installation of harness locations atthe controller board.Note: positioning the light engine harnessconnector in the wrong location will resultin permanent damage to the light engines. Confirm light guide has been installed withthe reflector on the end opposite the lightengine. Vehicle key in the ACC or On Position. Vehicle battery connection. Full engagement of power harnessconnector at the controller board. Full engagement of power harness connectorat the Power Outlet. Blown Power Outlet fuse (see vehicleowner’s manual for Amperage and location). Blown light kit fuse (2A mini blade) Full engagement of switch harnessconnector at the controller board. Full engagement of any other switchesremoved on switch panel.Light Kit, No OperationVehicle Function ChecksPower Outlet Not OperationalPower outlet should function properly.Traction and Vehicle Stability ControlCheck for proper operation of the VSC switch.Security SystemCheck for proper operation of the securitysystem.Issue: C9/20/07Page 21 of 22 pagesDIO
APPENDIX 1
(d) Insert rivets into catamount and place into the holes drilled on the bottom side of the cover. (e) Install rivet washers onto rivets on the top side of the cover and install using a rivet gun. Fig. 2-5 Wire Cutters Fig. 3-2 Center Punch or Scribe Fig. 3-3 1/8” Drill & Rivet Gun Fig. 3-1 Center Punch or Scribe