Transcription
Automated Windows OS Image Creation(using some open source tools.and stuff)**I take no credit for the creation of these tools.only there somewhat novel use11Ialso take only partial credit for the novel use of said tools.and even that is very minimal. Seriously. I came across some tools on Github and started using them.just so we’re clear.
Shoutouts and AcknowledgementsWithout the work of these individuals, this presentation would not be possible.Matt Wrock - Creator of Boxstarter, also creator of some great Packer templatesMatthew Hodgkins - For his excellent Packer templates and Cake build scriptTaliesin Sisson - Packer templates and PowerShell scripts
What is this rubbish?
In a few words This presentation is not abouttools such as:MDT (Microsoft Deployment Toolkit)SCCM (System Center Configuration Manager)InTune
But first, let’s do a history review!
Some background c. 1998-ishThe really old classic way of creating a Microsoft Windows OS image.1. Prepare a bare-metal workstation (set BIOS settings, prepare boot media, etc)2. Install Microsoft Windows to a physical hard disk drive3. Install device drivers4. Install Windows Updates5. Install application software6. Install more Windows updates, possibly one or more “Service Packs”7. Customize Default Profile8. Clean up the operating system (i.e. delete administrator profile, downloads, etc)9. Run Sysprep utility10. Capture Disk Image
Some kinda old background c. 2008-ishThe -really old newer classic way of creating a Microsoft Windows OS image.1. -Prepare a bare-metal workstation. Create a Virtual Machine (mount ISO)2. Install Windows to a -physical virtual hard disk drive3. Install device drivers.maybe?4. Install Windows Updates5. Install application software6. Install more Windows updates, hopefully “Service Packs” are no longer a thing7. Customize Default Profile8. Clean up the operating system (i.e. delete administrator profile, downloads, etc)9. Run Sysprep utility10. Capture Disk Image OR convert to portable format such as .WIM
See the problem?
Is there a better way?
So then how?
Using these tools which you may have heard of.or not.
also some optional tools.
But why? Looks unnecessarily complex.
Let’s talk about Packer.
Packer is an open source toolfor creating identical machineimages for multiple platformsfrom a single sourceconfiguration.Packer is lightweight, runs onevery major operating system,and is highly performant,creating machine images formultiple platforms in parallel.Packer does not replaceconfiguration managementlike Chef or Puppet.In fact, when building images,Packer is able to use toolslike Chef or Puppet to installsoftware onto the image.
A little info about Vagrant. Vagrant (also made by Hashicorp), is atool for building and managing virtualmachine environments.Vagrant uses “boxes” which areessentially just fancy zip archivescontaining a virtual machine configurationfiles and virtual hard disks.Vagrant allows simple creation of newVMs with a few simple commands.Packer allows you to create vagrant boxesfor a variety of hypervisor environments.Source: https://www.vagrantup.com/intro/index.htmlAlthough the focus of this talk is not on Vagrantas a tool, it is part of the toolchain for buildingoperating system images (and not just WindowsOS images).To use Vagrant to create a new VM from a“.box” template:vagrant init hashicorp/windows10entvagrant upOr, if you don’t want to use the public feed:vagrant init box-namehttps://source.tld/box-name.boxvagrant up
So then how does this work?
With a build template.
What does a “build template” look like?
Assign Variables{"variables": {"vm name": "Example-VM","cpu": "4","ram size": "8192","disk size": "25000","iso url": ,"Iso checksum type": "sha1","iso checksum": me" : "Administrator","password" : "SomeReallyStrongPassword!@# % &*()"},
Specify Builder(s)"builders": [{"vm name":"{{user vm name }}","type": "hyperv","iso url": "{{user iso url }}","iso checksum type": "{{user iso checksum type }}","iso checksum": "{{user iso checksum }}","Communicator":"winrm","winrm username": "{{user username }}","winrm password": "{{user password }}","winrm timeout" : "4h""shutdown command": "C:/VCU-Deploy/Packer/PackerShutdown.bat",}],
Specify Provisioner(s)"provisioners": [{"type": "powershell","elevated user": "{{user username }}","elevated password": "{{user password }}","scripts": ["./scripts/script.ps1",]}],{"type": "windows-restart","restart timeout": "2h"},
Specify Post-Processor(s)"post-processors": [{"type": "vagrant","keep input artifact": true,"output": "/{{.Provider}} {{ user vm name }}.box"}]
So what does this look like in action?
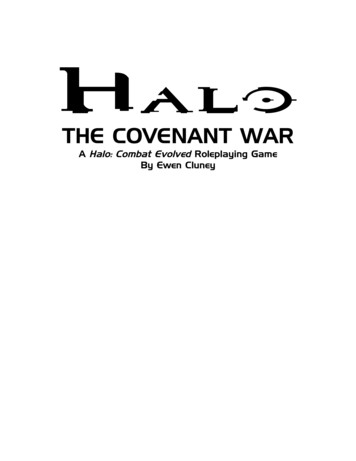
PrerequisitesAt a bare minimum you need these two items: Packer (choco install packer -y) A hypervisor. Although our focus is on Hyper-V today, you can use: Virtualbox (choco install virtualbox -y)VMware (vSphere/ESXi)QEMUParallelsAmazon EC2Azureetc, etc, etc.the list goes on and include cloud providers as well as community-built buildersSource: https://www.packer.io/docs/builders/
Very-Simple-Packer-Build-Image.ps1#ensure chocolatey is installedif(!( env:ChocolateyInstall) -or !(Test-Path " env:ChocolateyInstall")){iex ((new-object rg/install.ps1"))}#force reinstall Packerchoco install packer -y -f#check for Hyper-V, if enabled run the buildif( hyperv.State -eq "Enabled"){packer.exe build .\windows10.json --provider hyperv}Else {Write-Output “You need to enable Hyper-V first!”}
DEMO TIME
Do you have a flowchart?
So what about a bare-metal image?
Converting a VHD to a WIM using PowerShellOnce a VM has been exported to a Vagrant box from Packer, we use the remaining .VHD(x) to convert toa .WIM automatically using a PowerShell script something like this :#first we specify some variables about paths to things mount "F:\Mount" wimPath "F:\WIM" wimFile "F:\WIM\baseimage.wim" vhd CC-win10L-Ops)-base\Virtual Hard Disks\LCC-win10L-Opsbase.vhdx" imageName "Base-Windows-10-Image"#ensure our mount path and wim path both existif (!(Test-Path mount)){New-Item -Type Directory -Path mount -Force}if (test-path wimPath){Remove-Item "F:\WIM" -ForceNew-Item -Type Directory -Path wimPath -Force}else {New-Item -Type Directory -Path wimPath -Force}#next we mount the VHD file as a Windows Image to our temporary mount folder and capture to a WIM fileMount-WindowsImage -ImagePath vhd -Path mount -Index 1New-WindowsImage -CapturePath mount -Name imageName -ImagePath wimFile -Description imageName -VerifyDismount-WindowsImage -Path mount -Discard#delete temp mount pathRemove-Item mount -force
Putting it all together (building the cake)
Q&A
THANK YOU.
MDT (Microsoft Deployment Toolkit) SCCM (System Center Configuration Manager) InTune. But first, let’s do a history review! Some background c. 1998. The really oldclassic way of creating a Microsoft Windows OS image. 1. Prepare a bare-metal workstation (set BIOS settings, prepare boot media, etc) 2. Install Microsoft Windows to a physical .