Transcription
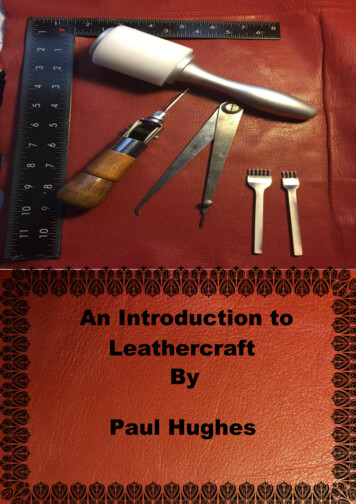
An Introduction toLeathercraftByPaul Hughes
An introduction to LeathercraftCopyright 2016 Paul Hughes - All Rights Reserved
DedicationTo Will Kalif of stormthecastle.com .To be his “new tool” for the box. For his help andencouragement.To my wife Valerie for putting up withburning our midnight oil on my many projects.A note from Will: Paul put a lot of time intothis ebook. And he offered it to me, and you,totally free.Why don't you send him an email and let himknow what you think of it? His email is here:paulh3915@gmail.com.
Please note that before starting any cutting of leather use a surface whichwill take the pounding of a stamp or a stitching tool. Be careful of using anysharp implement especially cutting toward yourself and make sure allblades are sharp as blunt ones can cause more accidents.Above.Rubber mat for putting underneath thequartz block to absorb the blows tostitching chisels or stamping tools.Blue polypropylene - for cutting without damagingblades.Quartz block - solid surface for marking out ,cuttingmaterial and using stamping tools and riveting.
Choosing leatherLeather is a natural material and of course it comes from an animal.Naturally we think of the cow as a source but there is Buffalo, Goat, Pig,Kangaroo, Alligator and Python to name but a few.Anything that can provide a skin that can be worked into almost anything bythe crafter. You do not have to get the exotic skins for projects as there arecowhides which can be treated to simulate the other animals and so avoidany unnecessary killing of endangered species.For the purposes of this book we shall be dealing with cowhide.Suppliers of leather offer it in different sizes and weight and it is either purchased as a full hide or parts of the hide. Single shoulder, double shoulder,Sides. There is different weight and thickness too.Examples - 4 to 5 ounce which is 1.6 to 2.0 mm thick, 6 to 7 ounce which is2.4 to 2.8 mm thick and 7 to 9 ounce which is 2.8 to 3.6 mm thick.It can be treated in different ways too, although I suggest working with avegetable tanned leather as it is the most suitable.It can be dyed, painted in acrylic paints or have finishes applied to enhancethe look of it. A good starting point would be of a shoulder size, which ismore than enough for small projects.Once you become familiar with the material you will see that there are otherleathers suitable for clothing, handbags, holsters and may be classed assplits or with hair on.Here, I have a single shoulder and from left to right you can see thatit measures a little over 3 ft x 2 ft. It is also 6 to 7 ounces in weight.If you do not wish to purchase this size then I believe some suppliersmay sell you offcuts for purchase to practise on. The smooth side upis called the face side and the rear or flesh side is rough, fibrous andlike suede in texture.
Some of the tools we will be usingBasic beginners kit to build anduse.There are roughly four main types of tools you will encounter.The cutting tools - consisting of craft knife,scalpel, swivel knife andsafety beveller.Piercing tools - stitching chisels usually found in sets of 4 having 1, 2,4 and 6 teeth, beveller/gouge and punches of which there are twotypes, rotary fixed tubes and single punch with replaceable tubes.Bradawl, stitching awl with thread reel and of course the needle andwaxed thread.Measuring tools - metal rulers 1 or 2 ft length, try square, set squareand compass.Moulding tools - grooved plastic wheel called a slicker, bone or plasticfolder.
Cutting toolsSwivel KnifeCraft knivesRotary cutter - and in use on thin leather.
Piercing toolsStitching chisels - notice that in this set of four, theteeth are arranged as 1, 2, 4 and 6. For long rowsthe 6 tooth chisel can be used and for squareshaped grooves you can change to a lower toothspacing to negotiate corners more accurately.
Piercing tools - continuedThe Bradawl is a pointedtool with either a rounded ora square shaft as picturedhere.They are used to enlargeneedle holes to ease offsewing where a needle maybe binding.BradawlStitch awlStitch awl, a device that has a handle to hold a needleand which feeds it with waxed thread from an attachedreel.Often used in conjunction with a stitching pony whichhas a clamp of wood to hold the workpiece steady forsewing. Usually it has pieces of leather attached to theinside of the jaws to hold leather cleanly and securely.Vises of metal are definitely NOT suitable for holdingleather as it would seriously mark the workpiece.
AdditionalThe stitching pony as mentionedpreviously. This device is a mostdesirable piece of equipment in anyleatherworker's kit.It holds the leather firmly, will notmark it, often has leather pads inbetween the jaws for a much morecontrolled grip.Stitching ponyYou sit on the extended portionwhile the jaws and clamp can berotated to any position for workingat a comfortable height.A set of hole punches arranged in acircle so that each size is selectedby a rotation of the wheel. Placeleather between the punch and anvil(jaws) and squeeze handles and thehole is produced. Select the smallestfor sewing and anything between forriveting or fitting eyelets. Downsideis that it is only suitable for edging.Rotary or daisy wheel punchFor piercing holes for decoration orfurther into the body of leather it ismuch more adaptable to use thesingle punch. Its replaceable tipsare tightened with a small spanner.However, you must use a polyboard to absorb the blows from themaul and to avoid making the tipsblunt.Single punch
Lastly, there is the one we are all familiar with - the needle. Using waxedthread it is the most simplest of all for piercing and sewing. Without usingstitching chisels and bradawls to make our stitching holes it would be adifficult job to push a needle through a tough piece of leather. Therefore itwould be useful to have a sailmaker's palm which comes either right or lefthanded.(Examples courtesy of Internet)
Measuring toolsMetal rulers, one preferably with a fingergroove and an anti slip back.A metal try square, a set square and acompass for drawing circles.
Moulding & finishingPulley wheel - no, this device isactually for finishing the edge ofleather, by burnishing it. It iscalled a “slicker.”Before you can use this, youhave to prepare the face andrear side of your leather piece.This means using a beveller toclean up the rough shaped edgeready for the slicker to do itswork.The leather edge is slightlydampened with plain water andthen set into the groove and thewheel is slid back and forth alongthe edge of the workpiece. Aftera short time you will notice amore shiny and rounded edge.Bone folderThis is an item quite often associatedwith and used by bookbinders. Thebone or plastic folder. Essentially it isused to shape the leather to work itwhile it its wet .
Measuring and cutting outExercise 1 : measuring and making square - the first cut.Take your leather selection and using themetal try square mark and cut a pieceinto a nice true square.Practise measuring and cutting untilyou feel comfortable and confident.Exercise 2: cutting straight linesTake a ruler and craft knifeand measure off and cut astraight line leaving a stripof leather about 1\4 of aninch wide.Go ahead and practisemaking strips of varyingwidths. Get a feel for bothblade and material.* Be safe, use a ruler with afinger groove and whichhas a non slip back. Makesure your blade is new andsharp. If the leather does not cut straight through onthe first cut just keep on slicing but if it is caught by asmall point do not be tempted to pull it - IT WILL TEAR!Persevere and just keep cutting.
Cutting curves: the swivel knife.finger cradleBodyAdjustablecollarBladeIntroducing the swivel knife.This versatile tool can be used forboth cutting curves and for carvingleather.For now, we will concentrate oncutting curves.Place your forefinger on top of thecradle and using your thumb andsecond finger to hold the body itshould feel comfortable and notstretched. It can be adjusted via the locking collar to adapt tothe user. The forefinger just supports the tool. .Exercise 3 : cutting curves.To start the cut, tilt the blade backward so that you are using acorner. “Drive” the blade by creating a wavy line swivelling thetool body from side to side as you move it.Go and do a series of cuts and get a feel for the tool and itsaffinity with the material. At this stage change to a craft knife tocut right through to separate the pieces.
Gouging & PiercingSo far you should have mastered the cutting of straight linesand curves. The next process is preparing the leather forstitching.Here we employ a tool known as the gouge and this one beinga dual use device we can utilise it later for bevelling.This particular tool as I mentioned earlier is shaped witha “V” profile.This gives it a dual purpose,However, there are toolswhich are totally dedicatedto being bevellers and notfor the purpose we wish touse this one.Exercise 4: creating a groove prior tostitching.Dampen the leather with plain waterusing a sponge.It will darken slightly.Do not wet it. Let it dry for a few minutes or until you notice it almost backto its normal colour. Push the gougein a straight line. It should create athin “string” and a groove. Go andcreate some more grooves and getthe feel for getting them straight.
Piercing holes prior to stitchingNow that you have practised cutting a groove with the gougeand the reason we need to do that is to allow stitching to sitsnugly within it and ultimately avoiding the wear on the threadthat so often happens if the stitching happened to be sittingexposed upon the surface of the project. Plus, it gives it anaesthetically pleasing look.Stitching chisels a set of fourStitching chisel in use.Moving up tonext placement.Starting the holeChisels and laterstamping toolsare struck with apoly maul.Having already started the first entry by using a rawhide mallet orpolymer maul to strike the chisel, it is then moved up by placingtwo teeth into the last two holes to consistently create a line ofevenly spaced holes for stitching.Exercise 5: creating the stitching holes.To start the process scrape or stick the chisel into a block ofbeeswax or a piece of candle prior to piercing the leather. Thewax should make it easier to extract ready for the next stage.Practise gouging in a square, using the chisels to work your wayaround the square ( tip when you get to a corner use a singletooth chisel then continue with a two tooth then back to a six foran even spacing.)
SkivingIf we were to try and fit a bucklenow, the leather being doubled, thetongue of the buckle cannot beseen and its clearance will not allowthe opposite portion to passthrough.One of the skills that will prove usefulis that of “skiving.” This procedure isused where we need to reduce thethickness of leather to accommodatean accessory. For example the fittingof a buckle.Here we have the strap that is notquite ready. It is too thick. The toolwe will use is a safety beveller.This tool has a shielded bladewhich can be aligned in such a way,as to “shave” the flesh side, to pareit down to an acceptable level. Atleast 50% is required.
Skiving - continuedThe skiving process produces some quite powdery shavings in consistencybut do not worry this is more or less a normal occurrence. Your target is foran overall reduction in thickness to be achieved .Now you can see the overall improvement that skiving can maketo a project. The leather is reduced, the tongue is seen and thegap will now allow the end of the strap to locate.Exercise 6Take your leather straps produced from exercise 1 andskive the ends. Get a feel for the beveller and the angle ofcut and ultimately try and get down to at least 50% of youroriginal material. Remember to skive each side then themiddle. Do not try to do it in one cut.
Making & using TemplatesFirst of all what are templates? By definition, accordingto the Cambridge Dictionaries, they are a pattern madeof metal, plastic or paper, used for making many copiesof a shape or to help cut material accurately.If you intend making more than one item it will be usefulto make and use a template.I have found one of the easiest template materials is theplastic pouch as those used in a laminator. It has theright consistency for having a stylus or ballpoint pen oreven a blunt pencil for tracing onto a piece of leather.Here I have taken my plasticsheet and placed it over apicture of the rotary cutter. Ihave drawn around it, withballpoint pen.Taking the image and dampeningthe leather I can now transfer theoutline with a stylus.As you trace your outline make sure youlift the plastic sheet periodically to checkthat you have traced the entire designfully onto the leather.
Templates - continuedCard stock acquired from cereal packets, or from stationer’ssupplies are also good to use for templates.The circle template I made for a crown piece of leather.The outer circle was for cutting out the disc and the innermarked circle was for scribing the gouge line and ultimatefold in the edging.Exercise 7 - moulding leatherMake a template like the one I have shown previously and usethe following dimensions : outer circle radius 40 cm and theinner circle 30 cm. Cut this out - this is your template. On theface side, dampen your leather and wait for a while until itchanges to a lighter colour after a few minutes. Draw aroundthe template and check for an indentation in the material.(Scribe the inner circles only.) Cut the leather disc to shape.Use the gouge to make a groove around the inner circle faceside. You may have to do this a few times to work the material.Wet both sides and scribe the inner circle on the flesh side.Skive the outer edge until it is at least half of original thickness.Now we use the bone folder to work the wet leather up into a liparound the disc. Keep working it, and as it is wet, it will allow forbending. Squeeze out any excess water with your fingers.Keep workin
Choosing leather Leather is a natural material and of course it comes from an animal. Naturally we think of the cow as a source but there is Buffalo, Goat, Pig,