Transcription
SIDDURCOVERWORKSHOPTemple B’nai Shalom
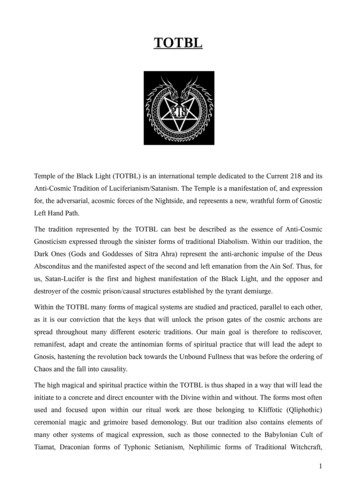
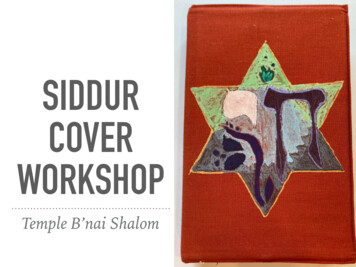
YOUR EMBROIDERED SIDDUR COVER When you receive your siddur cover yourHebrew name will be embroidered on spine When you lay yourcover flat, the leftside is the frontcover, and the rightside is the backyour name reads topto bottomLevi repeated the same large Jewish star on thefront and back of her siddur cover. The bird is onthe front, with the text on the back.
BEFORE YOU START ON YOUR COVER Think about what image(s) might be important to you inregards to your connection to Judaism Look through the stencils for images that you like and wouldlike to use or just for inspiration
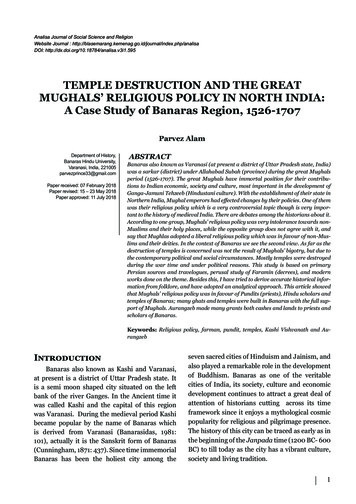
IMAGES Think about the siddur cover as one piece, even though there will beimages on the front and back Drawings and stencils can be enlarged and reduced As you think aboutimages for your sidduryou might want to thinkstart thinking about whatimages you’d want onyour tallit, and connectthe two items with similarimageryHarry used arectangular patternto tie the front andback covers togetheras one piece.
MATERIALS Siddur Cover Images- enlarged/reduced drawings or stencils Tape Pencil Chalk Transfer Paper Fabric Markers
PROCESS TO TRANSFER IMAGES TO COVER Step 1: Successfully place image and transfer paperDecide where the image will go onthe cover and tape it to the fabric(make sure you consider the spacefor the spine of the book)Locate which side of thetransfer paper has chalk onit (by touching it with yourfinger tip)Carefully place the transfer paperunderneath the image (withoutmoving the image) with the chalkside face down, touching thefabric, then tape all corners toensure that nothing moves
PROCESS TO TRANSFER IMAGES TO COVER Step 2: Transfer image to the fabricUse a pencil and trace thelines, pressing a bit, but nottoo muchWhile you are drawing takea moment to lift up a corner,carefully not moving theother corners, to see how thechalk is transferring ontothe fabricOnce you are finished tracing allof the lines remove the drawingand transfer paper, to reveal thetransferred imageIf you are not happy with the image youcan use a wet sponge and wash off thechalk before beginning again
PAINT PEN MARKERS New paint pen markers need to be primed before usePriming a paint marker: Shake well (recommended with cap on)After shaking, press the tip gently on a scrap piece of paperNeed to be patient, as you don’t want the paint to overflow from the tipIf needed, pump the tip gently a few more times, until paint starts flowingTip becomes full of paint (like a paint brush)When finished, snap the cap on fullyWhen you stop using the paint markers for a while you might need to ‘recharge’ the tip, byshaking the marker (with the cover on) and pressing the tip down again
TESTING AND USING THE PAINT MARKERS Before using the paint marker on the cover,test it to see how the color looks on thefabric (either on a swatch or inside the flap) Apply paint- it might be easier to outline theshape and then color in the spaces
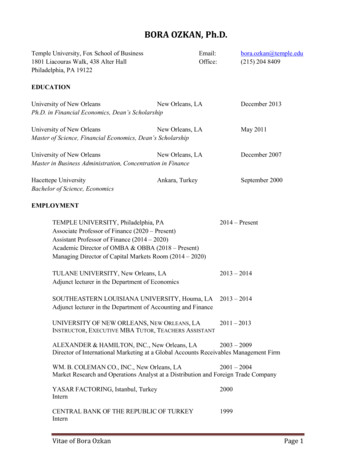
CONSIDER YOUR COLORS As the cover is one piece of work, consider using the samecolors on the front and back Consider using the matching metallic color, silver or gold, ofyour embroidered name, as one of your colorsLauren
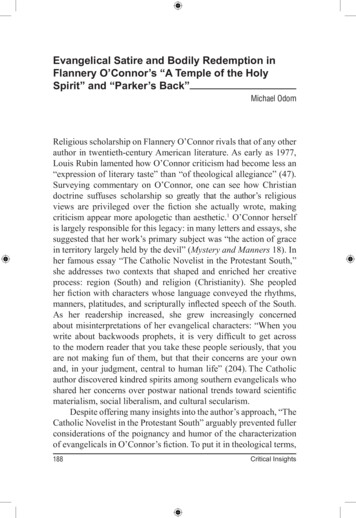
EXAMPLES OF WORKShaynaAriElsaLane
SarahRubyRebeccaLauren
PAINT PEN MARKERS New paint pen markers need to be primed before use Priming a paint marker: Shake well (recommended with cap on) After shaking, press the tip gently on a scrap piece of paper Need to be patient, as you don't want the paint to overflow from the tip If needed, pump the tip gently a few more times, until paint starts flowing