Transcription
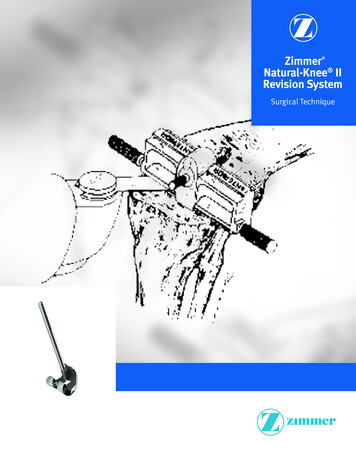
ZimmerNatural-Knee IIRevision System Surgical TechniqueIMAGE TOCOME
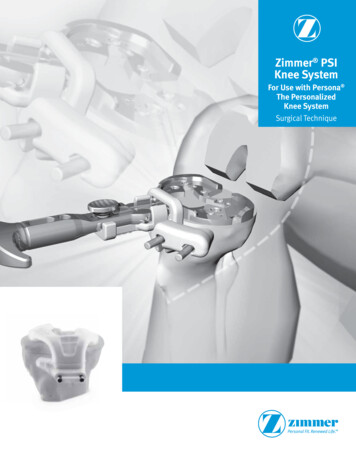
1Zimmer Natural-Knee II Revision System Surgical TechniqueZimmer Natural-Knee IIRevision SystemSurgical TechniqueTable of ContentsIntroduction2Versatility and System Overview2Preoperative Planning5Tibial Alignment and Proximal Tibial Cuts7Intramedullary Tibial Options8Tibial Stem Preparation10Femoral Medullary Canal Preparation11Femoral Alignment and Distal Femoral Cut11Anterior/Posterior and Chamfer Cuts12Patellar Preparation14Implantation of Components15Closure and Postoperative Care16Primary Femoral Component/Anterior Referencing Guide16Posterior Stabilization17Tibial Spacer Preparation18Femoral Augmentation Spacers19Intramedullary/Extramedullary Tibial Adapter20Tibial Bulk Bone Grafting21Distal Femoral Bone Grafting21Soft Tissue Balancing21
2Zimmer Natural-Knee II Revision System Surgical TechniqueIntroductionThe Natural-Knee II Revision systemhas been used successfully in patientsto meet the need for a more anatomicknee replacement. The system wasdesigned to provide maximum rangeof motion, restore the limb to normalalignment and provide improved fixationof the components. Early clinical resultshave confirmed that the Natural-KneeII System’s design considerationshave resulted in improved motion andstability, normal alignment and stablefixation of the implant.1,2The surgeon has the choice of eightoptional femoral component implants.Primary femoral and revision femoralcomponents with increased distal andposterior buildup are available, eachin posterior cruciate ligament (PCL)-retaining and PCL sacrificing versions(Figure 1).as the Natural-Knee II Primary femoralcomponent and may be used withprimary or revision tibial components.A modular posterior stabilizer bar may beinserted intraoperatively for conversionof the Natural-Knee II Revision femoralcomponent to a posterior stabilizedimplant.Anatomical unicompartmentalaugmentation spacers are availablein 4mm, 8mm and 12mm thicknesses(Note: size 00 is not available in 12mmthickness) (Figure 2).Material TechnologyThe design innovations of the NaturalKnee II Revision System are matched withporous coating technological advancespioneered by Zimmer’s proprietaryCancellous-Structured Titanium (CSTi )Porous Coating.An exclusize Zimmer sintering process“locks” CSTi porous coating to thecobalt-chrome (CoCr) substrate of thefemoral component. The SinterLock CSTi process successfully combinesthe wear properties of CoCr withthe biocompatibility of titanium.Compared to other conventional porouscoatings, the SinterLock CSTi processdemonstrates the excellent shear/tensilestatic strength and cyclicfatigue properties.Versatility and SystemOverviewThe Natural-Knee II Revision System iscomposed of modular components thatcan be customized intraoperatively toaccommodate the individual patient’sclinical needs and surgeon’s preference.Component thickness, stem lengthand diameter, insert thickness anddegree of constraint may be determinedintraoperatively.Fig. 1Each implant is available in porouscoated and nonporous-coated versions,both of which are manufactured fromcast cobalt-chrome for a preferredarticular surface.Primary femoral components can beused only if minimal distal femoral boneloss is present, otherwise proximaltransposition of the joint line will occur.The primary femoral components areanatomic, asymmetrically shaped witha deep patellar groove for increasedrange of motion and patellar stability.The Natural-Knee II Primary and Primaryposterior stabilized femoral componentsare available in seven anatomic sizes.The Natural-Knee II Revision femoralcomponents are available in six anatomicsizes. The articular geometry is the sameFig. 2The spacers are attached via mechanicalfixation with or without supplementalcement. The spacers are manufacturedfrom cast cobalt chrome with inferior andsuperior surfaces containing gritblastedcement pockets for enhanced cementbonding. The outer box geometryof spacers matches the inner boxgeometry of the Natural-Knee II Revisionfemoral component. This allows fordistal transposition of the joint lineintraoperatively without the need foradditional bone cuts, simply by addingspacers. Three modular stem lengths(125mm, 200mm and 250mm) areavailable in four diameters (10.5mm,
3Zimmer Natural-Knee II Revision System Surgical Technique12.5mm, 14.5mm and 16.5mm) foroptimal femoral diaphyseal endostealcortex contact thereby eliminating theneed to cement the stem. The modularstems are mechanically attached tothe Natural-Knee II Revision femoralcomponents via a Morse taper with anadditional retaining screw (Figure 3).Fig. 3The stems are manufactured fromwrought cobalt-chrome. The straight200mm and curved 250mm stems havea coronal slot proximally to provideflexibility at the tip to avoid thigh pain.Ten optional tibial components areavailable to accommodate bone loss,status of the posterior cruciate ligamentand surgeon preference. All tibialcomponents are asymmetrically shapedfor optimal tibial plateau coverage.Primary tibial components can be usedwith revision femoral componentsbecause of identical surface geometries(Figure 4a).Fig. 4aThe most conservative implant typeis the Natural-Knee II resurfacingtibial baseplate which is availablein seven anatomic sizes, right andleft configurations. This baseplate ismanufactured from wrought titanium andis porous coated with CSTi coating. It isrecommended for use with the congruentinsert and in minimal bone resectionswhere excellent bone quality is present.The Natural-Knee II stemmed tibialbaseplate may also be used in minimalbone loss situations. The stemmedtibial baseplate is manufactured fromcast titanium, is available in sevenasymmetric sizes, and is offered in bothporous-coated and nonporous-coatedversions. The central stem is cruciateshaped for maximal bone conservation.The porous version has a nonporouscoated stem and four nonporous pegs atthe periphery to prevent stress shielding.The Natural-Knee II stemmed tibialbaseplate will accommodate congruent,ultracongruent and posterior stabilizedpolyethylene inserts.In revision total knee replacementswhere a longer stemmed implant isused, the Natural-Knee II 4mm revisionbaseplate (Figure 4b) (4mm thicker thanthe primary baseplate) is available in sixasymmetric sizes.Fig. 4bThe Natural-Knee II 14mm revisionbaseplate (14mm thicker than theprimary baseplate) replaces even greatertibial bone loss. Its conical-shaped stemhas a one size decrease, proximal todistal, to replicate the natural flare of thetibia. The 14mm baseplate is availablein five asymmetric sizes. Both the 4mmbaseplate and 14mm baseplate aremanufactured from wrought titanium,are offered in both porous- andnonporous- coated versions, and willaccept congruent, ultracongruent andposterior stabilized polyethylene inserts.Both the 4mm and 14mm NaturalKnee II tibial baseplates employ modularconical-shaped titanium stems availablein six lengths (60mm, 90mm, 120mm,155mm, 180mm and 215mm) (Figure 5).Fig.5
4Zimmer Natural-Knee II Revision System Surgical TechniqueThe stem is secured via a Morse taperin a position offset slightly anteriorand medial to the midline, allowingutilization of longer stems without lateraltibial endosteal cortical impingement.Titanium unicompartmental spacers forasymmetrical tibial bone defects areavailable in seven sizes, medial andlateral configurations and 4mm and8mm thicknesses (Figure 6).Fig. 8Fig. 7Fig. 6They are designed to allow formechanical and/or cement fixation toall Natural-Knee II tibial baseplates.The inferior and sagittal surfaces of thespacers are porous coated with CSTicoating. The superior surface of thespacers contains grit-blasted cementpockets for enhanced cement/implantbonding.All Natural-Knee II tibial inserts aremanufactured from ultrahigh molecularweight polyethylene (UHMWPE)and feature an enhanced snap/lockmechanism which eliminates tibialinsert/baseplate motion and increasespull out strength. The congruent,ultracongruent and posterior stabilizedinserts (Figure 7) are available in threeasymmetric sizes (size 00, 0 insert forsizes 00 and 0 baseplates, size 1, 2insert for sizes 1 and 2 baseplates,and size 3, 4, 5 insert for sizes 3, 4 and5 baseplates) and seven thicknesses(9mm to 22mm).The Natural-Knee II congruent tibialinsert is designed for PCL retention.It is asymmetric in shape with a 4mmanterior lip height which aids in resistinganteroposterior forces. The NaturalKnee II ultracongruent tibial insert isdesigned for PCL deficiencies. It has a12mm anterior lip height which servesto resist posterior subluxation of thetibial without the need for a posteriorstabilized femoral component. TheNatural-Knee II posterior stabilized tibialinsert is a cruciate-substituting tibialinsert with a central eminence designedto engage the posterior stabilizer bar onthe Natural-Knee II Primary and Revisionposterior stabilized femoral components.It has an 8mm anterior lip height to resistanteroposterior forces.All-polyethylene tibial componentsare available in the congruent andultracongruent articulating surfacegeometries in seven asymmetric sizesand five thicknesses (9mm to 19mm)(Figure 8).They have an asymmetric inferior surfacewith dovetail grooves for macro cementinterdigitation between the implantand the bone.5,6 Each component has acentral cruciate-shaped stem.The Natural-Knee patella implants(Figure 9) are sombrero shapedcomponents designed to conform withall Natural-Knee II femoral componentsthroughout the total range of motion.Fig. 9
5Zimmer Natural-Knee II Revision System Surgical TechniqueThe all-polyethylene patellar componentsare available in four diameters and twothicknesses (7mm and 10mm). TheNatural-Knee metal-backed (CSTi coating)patella is 10mm thick and is also availablein four diameters.AdaptabilityA few additional instruments that adaptto the primary instruments are requiredfor revision knee surgery utilizing NaturalKnee II Primary or Revision components orcombinations of both. Once a surgeon isfamiliar with the Natural-Knee II Primarysurgical technique, use of the NaturalKnee II Revision instruments is an easyextension.AlignmentRevision implants and instruments aredesigned to provide precise anatomicalignment by referencing the anatomic axisvia the intramedullary canal of both thefemur and tibia. Alignment is achieved byplacing the tibial component 90 degreesto the anatomic axis of the tibia and thefemoral component in 6 degrees of valgusbased on the anatomic axis of the femur(Figure 10).Using these landmarks, it is possibleto restore the mechanical axis of theextremity with the center of the kneelying on a line from the center of thefemoral head to the center of the ankle.Preoperative PlanningIn revision total knee replacementsurgery, preoperative planning isimportant to assist in determining properplacement of the joint line for the kneeto be balanced in flexion and extension.1Instrumentation cannot be relied upon,as in a primary knee replacement, forproper joint line positioning since bonylandmarks used as reference points areabsent. If possible, the pre-total kneereplacement radiograph of the involvedknee should be obtained. Frequently it isnot available, so the contralateral kneeradiograph is used. If the contralateralknee has also been replaced, it can stillbe used as long as it is functioning well.Assuming one is using a normal kneeradiograph for comparison, the first stepis to verify that the radiographs are ofthe same magnification, otherwise anymeasurements will need to be factoredby the magnification difference. Thesecond step is to determine the correctfemoral component size from the primaryor revision femoral templates using thenormal lateral radiograph. The third stepis to measure the distance from the jointline to the adductor tubercle (usually40mm to 50mm) (Figure 11a) and lateralepicondylar ridge on the anteroposteriorradiograph and to the junction of theposterior femoral condyle and femoralshaft on the lateral view (Figure 11b).BAFig. 11The fourth step is to transfer thesemeasurements to the abnormal kneeanteroposterior and lateral radiographsto determine where the joint line shouldbe (Figures 12a and 12b).ABFig. 12The fifth step is to place the correct sizeprimary or revision femoral template onthe abnormal knee anteroposterior andlateral radiographs at the correct jointline position (Figures 13a and 13b).ABFig. 13Fig. 101 Gustke, K.A., MD, “Planning and Techniques for Unconstrained Revision Total Knee Replacements,” Fu, F.H., Harner, C.D. and Vince, K.G., editors, Knee Surgery, Baltimore, MD, Williams andWilkins, 1994, pp. 1553-1562.
6Zimmer Natural-Knee II Revision System Surgical TechniqueThis will then demonstrate whether aprimary or revision femoral componentshould be used. Using the distal endof the femoral component that is beingrevised as a reference, templating willillustrate how much additional distalfemoral resection will be necessaryduring surgery. The templating step mayalso show if additional distal femoralbuildup with spacers will be necessary.6) Femoral chamfer cutsPreoperative templating is also helpfulin determining the maximum size andlength of the femoral stem. On the tibialside, preoperative measurements usingthe fibular head as a reference point willshow if tibial bone loss is present andwhich type of tibial component, stem,augmentations or bone grafts will benecessary. Noting the relationship ofthe inferior pole of the patella can alsobe helpful in placing the joint line at thecorrect level.The IncisionTen Basic StepsTen basic steps are required to align andseat the femoral and tibial componentsin revision total knee replacementsurgery. Precise cuts can be achievedusing instruments that reference off ofand are stabilized via the intramedullarycanals of the femur and tibia. Thepreferred method is to prepare thetibia prior to the femur. The followingrepresent the 10 basic steps:1) Tibial alignment and proximal tibialcuts2) Tibial medullary canal preparation3) Femoral medullary canal preparation4) Femoral alignment and distal femoralcut5) Femoral rotation and anterior andposterior femoral cut7) Trial reduction8) Femoral routing if posterior stabilizerdevice is used9) Patellar preparation10) Component implantationBecause of decreased skin vascularityover the knee, the incision mustbe carefully chosen taking intoconsideration all previous incisions.If multiple anterior skin incisions arepresent, the most anteromedial oranterolateral is chosen followed bya parapatellar capsular incision. Amid-quadriceps splitting incision isused rather than a subvastus medialisapproach.The most difficult part of exposure inrevision knee surgery is getting theknee flexed and everting the patellawithout avulsing the tibial tubercle.Initially, the quadriceps should be splitas far proximally as possible. A lateralpatellar retinacular release is performedif there is thick scar tissue lateral to thepatella. If the patella cannot be everted,a decision is made at this point whetherto direct further releases proximal ordistal to the patella. An extended tibialtubercle osteotomy is indicated if thereis relative inferior positioning of thepatella (“patella baja”). Proximally, theincision can be carried laterally acrossthe quadriceps tendon (“quadricepssnip”) or an inverted “V” can be made inthe vastus lateralis tendon. For very stiffknees, the lateral quadriceps mechanismincision is carried distally to the tibiaallowing inversion of the patella.Component RemovalBone preservation and ligamentpreservation are the major goals withcomponent removal. The femoralcomponent is removed first. Based onpreoperative radiographic measurements,the desired level of the new distal femoralcut is marked off with a ruler using theexisting femoral component distal flangeas a reference. If grossly loose, it can beremoved with alternating taps on themedial and lateral flanges or with theNatural-Knee II femoral impactor/extractorwith the slaphammer (1/4-inch threadedor Natural-Hip) attached. If partiallyloose or rigidly fixed, the implant-boneor implant cement interfaces must bereleased completely or unnecessary boneloss or fracture may occur. Thin flexibleosteotome blades of various widths areideal for this purpose (Figure 14a). Theyare angled around pegs and also throughthe notch (Figure 14b).Fig. 14aFig. 14b
7Zimmer Natural-Knee II Revision System Surgical TechniqueAlternate instruments to release theinterfaces are thin oscillating saw bladesor a gigli saw. The Natural-Knee II femoralimpactor/extractor with the slaphammeris attached and used to axially removethe femoral component (Figure 14c).The implant-bone or implant-cementinterface is then released with thinflexible osteotomes (Figure 14e) or anoscillating saw.patellar components with porous-coatedpegs present a major challenge toremove without excessive bone loss. Agigli saw or metal cutting tool is used totransect the pegs. The pegs and cementare then removed separately.Tibial Alignment andProximal Tibial CutsFig. 14cAny fixed cement is left on the femurat this point to help maintain boneintegrity. The femur should be retractedposteriorly while working on the tibia.Tibial component exposure is facilitatedby releasing soft tissue from around themedial and lateral tibial plateaus.A cemented all-polyethylene tibialcomponent is removed by loosening theimplant-bone interface with thin flexibleosteotomes or an oscillating saw. Cuttingacross the top of the stem may assistremoval if the stem is not loose. Thestem is then removed separately.If a stemmed metal tray tibial componentwith screws is present, the insert is firstremoved with standard osteotomes(Figure 14d).Fig. 14dFig. 14eA standard ½-inch osteotome is thenplaced under the lateral plateau and theimplant is impacted proximally. If thestem is porous coated, a large amount ofbone may remain attached to the stem.In this situation, two vertical slots aremade in the anterior tibial metaphysiscorresponding to each side of the stem.Thin flexible osteotomes are then angledthrough these slots along the sides ofthe stem to release some of the stemcement or stem-bone interface prior tocomponent removal.Direct vertical exposure of the tibialplateau is necessary. This is facilitatedby soft tissue releases around the tibialmetaphysis, medial and lateral softtissue retraction with the small angledknee retractors and subluxation of thefemur posteriorly with the large angledknee retractor (Figure 15).Any cement present on the tibia isthen removed. Fixed femoral cement isleft in place until femoral componentpreparation has begun.If the patella component requiresrevision, removal of the component is leftuntil after femoral and tibial preparationsare complete to lessen the chanceof patellar fracture during retraction.All polyethylene patellar componentremoval is accomplished with releaseof the implant-cement interface andtransection of polyethylene fixationpegs with thin flexible osteotomes or anoscillating saw. Metal-backed patellarcomponents with smooth pegs areimpacted vertically after release of theinterface. Uncemented metal-backedFig. 15If a viable PCL is present, it is left intact.If there is any question of its integrity orstrength, it is sacrificed now rather thanrisk postoperative rupture. The tibia cutis performed using the proximal tibialalignment guide with the intramedullaryadapter attached or the intramedullarytibial cutting guide.
8Zimmer Natural-Knee II Revision System Surgical TechniqueIntramedullary TibialOptionReference HolePlacement of the intramedullary guide isaccomplished by first drilling a 5/16-inchhole in the proximal tibia. This referencehole should be centered from medial tolateral. Anterior/posterior positioningshould fall between the middle andanterior one-third of the tibial plateau(Figure 16).Rotational AlignmentRotation is selected based on anyremaining landmarks, i.e., posterior tibialcondyle, tibial tubercle and the malleoliof the ankle (if using extramedullaryguide with intramedullary adapter) as inthe primary technique. The most reliablelandmark will be the tibial tubercle. Thedistal pin of the cutting block shouldbe positioned just medial to the tibialtubercle (Figure 18).Fig. 20Fig. 16Preoperative templating of thelateral tibial radiograph may assist inaccurate location. The ¼-inch, flutedintramedullary rod is slowly inserted tolocate the medullary canal.The rod is removed and reinsertedthrough the preassembledintramedullary guide consisting of thealignment guide with the saw guide andtibial stylus affixed (Figure 17).Ideally, both references should beused. Rotation is then locked in placeby impacting the set pin with a mallet(Figure 20). Additional stability canbe obtained, if necessary, by drillingand pinning through the auxiliary holelocated anteriorly.Posterior SlopeFig. 18As a second reference, the posteriorsurface of the cutting block should beparallel to the posterior edge of the tibialplateau if the bone is not deformed ordeficient (Figure 19).No anatomical landmarks are usuallyremaining to select the posterior slopeangle. The posterior slope is preset at5 degrees by lining up the black line inthe center of the tibial intramedullaryguide with the back of the anterior swivelportion of the same instrument (Figure21).Fig. 19Fig. 21Fig. 17
9Zimmer Natural-Knee II Revision System Surgical TechniqueLevel of ResectionThe “REVISION” end of the stylus isused to determine the tibial saw guideposition for minimal resection of theproximal tibia (Figure 22).Fig. 23Fig. 22This end of the stylus will positionthe tibial saw guide 1.5mm below thepoint of reference. If there is minimaldifference in bone loss on the medialand lateral side, the tip of the stylus isplaced on the lower side at a point whichwill allow at least one-half of the cortexon that side to contact the implant. Aconservative bone-sparing cut is desiredrather than trying to obtain a perfectlyflat bone surface. If there is greater than4mm difference in bone loss medial tolateral, the stylus tip is placed on thehigher side and use of a tibial spacer isplanned (See Tibial Spacer Preparationsection).The cutting guide is then stabilized bydrilling and pinning through the 9mmmedial and lateral holes of the cuttingguide (Figure 23).This allows for 2mm adjustmentproximally and 7mm distally. The lateraldrill point is first placed after retractingthe patellar tendon, followed by themedial drill point. If the medial drill pointappears to “walk,” this can be easilyavoided by marking the entry pointthrough the block, then drilling outsidethe block to pierce the cortex. Redrill thehole through the block. Disassemblyof the jig is then achieved by removingthe stylus and intramedullary rod. Aslaphammer hole is located posteriorlyon the guide to aid in removal of theintramedullary rod and jig, leaving thesaw guide fixed to the anterior face ofthe tibia.The tibial alignment checker and rod isplaced on the tibial saw guide. The rodshould pass through the center to nomore than a few millimeters lateral to thecenter of the ankle (Figure 24a). The 2,-2 degree varus/valgus saw guide can beused if correction of the angle of the cutis necessary (Figure 24b).ABFig. 24Cutting the Proximal TibiaA “free” saw blade or cutting gauge isplaced on the tibial saw guide alongthe medial and lateral edge of the tibiato confirm the level of desired tibialresection. The saw capture is placed onthe tibial saw guide. If it appears that aninadequate resection will occur, the levelcan be lowered by adjusting the tibialsaw guide in 2mm increments. Angledretractors are used to protect soft tissueand ligaments.The proximal tibia is cut with anoscillating saw with the appropriate sawblade for the saw capture (Figure 25).Fig. 25
10Zimmer Natural-Knee II Revision System Surgical TechniqueNote: Saw blades especially designedfor this system are recommended. Theblades are 1-inch wide with a shankthickness of 35-thousandth (.035 inch)and 38-thousandth tooth offset (.038inch), and will best match the saw guideand capture.Proximal Tibial Baseplate DrillGuideis mostly intact, a primary stemmedtibial baseplate or all-polyethylenetibial component may be used. Theappropriate size and style tibial broach(size 00, 0, size 1, 2, or size 3, 4, 5) isapplied to the proximal tibial baseplatedrill guide and impacted into the bone(Figure 27).To avoid soft tissue impingement, theappropriate-size tibial baseplate drillguide is selected that completely fillsbut does not overhang the proximaltibia. The medial/central hole is drilledand filled. Final rotational alignment isreferenced off the tibial tubercle withthe handle of the guide just medial tothe tubercle. It is then stabilized with sixpins as the holes are drilled using the1/8-inch by 5-inch drill bit (Figure 26).Fig. 29The broach is removed with aid ofthe slaphammer. If there is centraltibial bone loss and/or a weakenedor deficient proximal cortical rim, arevision tibial baseplate is preferred.The appropriate reamer guide (size 00and 0, size 1 and 2, or size 3, 4 and 5)is selected to match the baseplate drillguide. The reamer guide (#1) alone withthe reamer (#2) and handle (#3) (Figure28a) is applied to the baseplate drillguide with the pin in the anteromedialhole (Figure 28b).Fig. 26The alignment of the tibial cut is againchecked with the rod through the handleof the baseplate drill guide.Tibial Stem PreparationAt this point a decision is required asto which type tibial component will beused. If minimal central tibial bone lossis present and the proximal tibial cortexProgressively larger reamers are useduntil the reamer’s cutting edge can befelt engaging the tibial endosteal cortex(Figure 29).AFig. 28BThe reaming is done with a powerreamer or with the tibial reamer handleattached via a Zimmer-type fitting.In cases of excessive varus or valgusbowing of the tibia, a shorter stem isrequired to prevent malalignment ofthe tibial component as a result of stemimpingement.Tibial Trial InsertionIf a resurfacing tibial baseplate,primary stemmed tibial baseplate orall-polyethylene tibial component isto be used, the appropriate-size tibialbaseplate trial is inserted. The trial maybe left in place during preparation of thefemur to protect the cut tibial surface. If arevision tibial baseplate is utilized, initialplacement of a 4mm over a 14mmtibial baseplate is preferred since it willallow more exposure of the femur. Theappropriate-length modular tibial stemis secured to the 4mm tibial baseplatewith the screw. The pin on the trial tibialstem is placed in the right or left holein the baseplate (Figure 30). The tibialtrial baseplate and stem is driven ontothe proximal tibial, lining up the pins in
11Zimmer Natural-Knee II Revision System Surgical Techniquethe previously drilled holes (Figure 31).Attention at this point is directed to thefemoral preparation.Fig. 32Femoral Alignment andDistal Femoral CutFig. 30The appropriate size femoral sleeve isattached to the distal femoral alignmentguide with the 5/16-inch intramedullaryfluted rod. The revision distal femoralsaw guide is also attached to the distalfemoral alignment guide (Figure 33).Fig. 34Femoral Varus/ValgusAlignment CheckThe extramedullary axial alignmentguide can be used to double checkthe femoral varus/valgus alignment.The axial alignment rod should pointtoward the femoral head (Figure 35).Fine adjustments of the distal femoralalignment guide can be made by dialingthe medial/lateral adjustment screw in orout if a large medullary canal is present.Fig. 31Fig. 33Femoral Medullary CanalPreparationThe roof of the intercondylar notch isidentified. A starting hole is made witha 5/16-inch drill point and intercondylardrill guide just above the center of theintercondylar notch. The 5/16-inchintramedullary fluted rod is insertedinto the canal. If use of a revisionfemoral component is anticipated frompreoperative planning, the canal is thenreamed with progressively larger femoralstem reamers starting with the 10.5mmreamer until cortical bone is contacted inthe diaphysis (Figure 32).The distal femoral alignment guide withsleeve is advanced until at least oneside of the face of the guide is in contactwith the distal femur. The adjustmentscrew is advanced to contact bone onthe side opposite the more prominentdistal femoral condyle. The distalfemoral alignment guide is rotatedto approximately the correct femoralrotation and then fixed with two free1/8-inch x 5-inch pins passed throughthe cannulated adjustment screws. If theprevious femoral component rotationwas correct, the posterior condyle canbe used as a reference, otherwise it isinternally rotated 10 degrees from thefemoral epicondylar line (Figure 34).Fig. 35
12Zimmer Natural-Knee II Revision System Surgical TechniqueDistal Femoral ResectionThe cutting gauge is placed on thecutting surface of the distal femoralsaw guide. If there is minimal distalfemoral bone loss and use of a primaryfemoral component is indicated, the sawguide is dialed down to the least distalfemoral cut. If there is more than 10mmof original distal femoral bone loss,use of a revision femoral component isindicated. The saw guide is dialed downto the previously marked level for thenew distal femoral resection level basedon preoperative planning. The saw guideis stabilized by using 1/8-inch by 3-inchpins on the medial and lateral side andone proximally (Figure 36).blade thickness through the saw capture(Figure 38). After the saw capture isremoved, the cut is checked for flatnesswith an auxiliary cutting block. The distalfemoral saw guide is removed along withthe 1/8-inch pins.Fig. 37revision anterior/posterior chamfer sawguide. The saw guide should match thesize femoral component determined frompreoperative templating. Alternately,femoral trials can be held up againstthe distal femur to see which size bestfits in the medial/lateral dimension. Theknee is flexed to 90 degrees and thepreviously balanced collateral
2 Zimmer Natural-Knee II Revision System Surgical Technique Introduction The Natural-Knee II Revision system has been used successfully in patients to meet the need for a more anatomic knee replacement. The system was designed to provide maximum range of motion, restore the limb to normal alignment and provide improved fixation of the .