Transcription
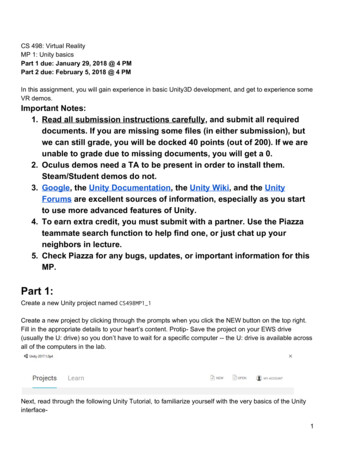
CS 498: Virtual RealityMP 1: Unity basicsPart 1 due: January 29, 2018 @ 4 PMPart 2 due: February 5, 2018 @ 4 PMIn this assignment, you will gain experience in basic Unity3D development, and get to experience someVR demos.Important Notes:1. Read all submission instructions carefully , and submit all requireddocuments. If you are missing some files (in either submission), butwe can still grade, you will be docked 40 points (out of 200). If we areunable to grade due to missing documents, you will get a 0.2. Oculus demos need a TA to be present in order to install them.Steam/Student demos do not.3. Google , the Unity Documentation , the Unity Wiki , and the UnityForums are excellent sources of information, especially as you startto use more advanced features of Unity.4. To earn extra credit, you must submit with a partner. Use the Piazzateammate search function to help find one, or just chat up yourneighbors in lecture.5. Check Piazza for any bugs, updates, or important information for thisMP.Part 1:Create a new Unity project named CS498MP1 1Create a new project by clicking through the prompts when you click the NEW button on the top right.Fill in the appropriate details to your heart’s content. Protip- Save the project on your EWS drive(usually the U: drive) so you don’t have to wait for a specific computer -- the U: drive is available acrossall of the computers in the lab.Next, read through the following Unity Tutorial, to familiarize yourself with the very basics of the Unityinterface1
Basic Interface TutorialMore In Depth Interface TutorialFeel free to look through some more tutorials, to familiarize yourself with the basics of Unity.Part 1.1The Room: Oh hai Mark!You will build a cubic room, whose sides are made out of six planes. Make sure to orient theseplanes so the visible sides face inwards, and ensure that the player cannot walk through any of them.The room should be 15x15x15 Unity units (aka meters).First, create a plane. It can be found in the top bar menus, under GameObject 3D Object- Plane, as shown below.Now, by default the plane is 10x10 (X x Z) units. In order to make your room 15 units wide, youhave to scale the plane. On the right side (in the default editor layout) you will find the Inspectorwindow. This window provides details about the currently selected object. Select the plane in the Sceneview, and the Inspector will fill with information and settings for said plane. Find the “Scale” option, andset it to 1.5 on the X and Z to make your plane 15 units wide and long.2
Note: The plane has no thickness, so the value in Y can be any positive integer.By default, your scene has a directional light in it. This is basically the sun- a light source thatilluminates your entire scene from a specified angle, from very far away. You’ll notice that your planesdo not block this light. That’s because planes only block light (and render) from one side. Bear this inmind when creating objects in Unity in the future! Please delete the directional light (don’t worry, youlladd new lights in later)In the hierarchy view, you can select your plane, and duplicate it.From there, simply change the new plane’s rotation and position to make it one of the walls or ceilings.Unity measures position from the center of the object, so if you want your walls to match up with thefloor (at height 0), your walls will need to be at 7.53
Note: In the image above, rotating the plane also rotated its axes (the blue z axis now points down). Make sureto account for that when rotating and moving objects!Player:Place an OVR Player Controller prefab in the room. This prefab handles basic movement,collision, and camera control.The lab computers come with the Oculus OVR plugin installed. You can import it by going toAssets Import Package OculusUtilites, and then click import.If, for whatever reason, you can’t find it, goto the Oculus Website and download theirUnity package. Unzip the unity package file,and then go to Assets ImportPackage Custom Package. Find theunzipped OculusUntilites.unitypackage, andimport all of the items within. You should nowhave an “OVR” folder in your “Assets” folder.In this class, you will be primarily using twoprefab objects from this package (both foundin OVR Prefabs). The first prefab, theOVRCameraRig, is a camera for the Oculus,that handles all of the movement and positiontracking for the oculus, as well as therendering on the Oculus display. The secondprefab, the OVRPlayerController, is a morecomplicated version of the OVRCameraRig. It4
includes the camera from the OVRCameraRig, but also includes basic joystick movement controls, anda capsule-shaped collider (so that the player doesn’t walk through solid objects). Place anOVRPlayerController into your scene, at (0,1,0), and delete the “main camera” object.There’s just one more thing you need to do to finish enabling VR. Go to Edit ProjectSettings Player, which will open up the player settings in the inspector window. In “Other Settings” (orXR settings, depending on your version of Unity), check the “virtual reality supported” option. Now,when you play your scene, it should render inside the Oculus.If you have issues importing, please check piazza to see if others have had your issue, andmake a post if you need more information.Lighting:At the center of the roof of the room, place a point source of light. This light will change color bypressing the Tab key, which is detailed in the scripting section.First, read up on the types of light in Unity . Then, go to GameObject Light Point Light, andbring a point light into your scene. Place it at (0,15,0)Select your light, and your inspector view should have a “Light” component like this-Of primary importance are the “range” (the radius of your light), color, and intensity values. Setthe shadow type to “soft shadows”, and read up on Unity Shadows . Set the “Mode” to “Realtime”, andread up on Lighting Modes In Unity Set your range and intensity so that your room is brightly lit.5
Planet and Moon:Create a large sphere, and have it float in the middle of the room. Create another, smallersphere, set it as a child object of the bigger sphere, and move it next to the bigger sphere, 4 units awayon the X-axis. You will make it orbit the larger sphere in the Scripting section.Create two spheres (GameObject 3D Sphere). Scale the first sphere to 2 in all directions,and place it in the center of your room. In the Hierarchy view, drag the second sphere onto the first.They should now look like this-What this means is that the second sphere is a child of the first sphere. So now, whenever youchange the position, rotation, or size of the parent sphere, its child will make the same movement,rotation, or scaling. Furthermore, the 0,0,0 position of the child is now its parent’s position, NOT theglobal 0,0,0. That is, the child’s position is an offset from the parent’s position. Finally, if the parentrotates, then the child will rotate about its parent’s axes, not its own axes (this will make more senselater). For more information on parent-child relationships, see the Hierarchy page of the Unity Manual.Set the position of the child sphere to be (2,0,0), which is four units from the parent sphere on theX-axis (why?).Text:Put large text on a wall, detailing the controls and listing your netIDs. Feel free to experimentwith what you can put on a canvas, but keep it grandmother appropriate!Check out the Unity tutorial on Creating Worldspace UIs . Create a text canvas by going toGameObject UI Text. This will create a Unity Canvas, and some text on that canvas as a child of thecanvas. It may also happen to be massive. Not what we want.6
To remedy this, select the canvas(not the text) from the hierarchy view. It’sinspector should look like this - (right)The first thing to do is change theRender mode from “Screen Space Overlay”, to “World Space”. This changesour canvas from a UI element that isglued to the camera, to an object that isstationary in the world. Traditional UIs donot work well in VR, and we highly, highlyadvise against sticking any UI elements tothe camera in your future MPs andProjects. Always attach UI elements tosomething in the world (See this ).Now that the canvas is a worldspace object, we can make it a morereasonable size. However, since the RectTransform’s width and height determinethe resolution of our text canvas, wecannot set them to be, say, 5x5, because then our text resolution would be 5 pixels by 5 pixels. Set thewidth and height to 1000 (that is 1000x1000 pixels). Shrink the canvas by setting the scale. We wantour canvas to be 10 units by 10 units, and be 1000x1000 pixels, so our scaling is 10/1000 0.01. Makesure your text’s Rect Transform has the same width and height as its parent canvas, but leave thescale as 1. Place your canvas against one of the walls. You want to place your text ever so slightly(like, 0.001) in front of the wall it is against to avoid Z-fighting (which is where two objects have thesame depth, and Unity can’t figure out which one to render). Below is an example of Z-fighting-7
Now, you can set your text color, size, font, width, whether it wraps or overflows, etc. Make yourtext have you and your partner’s NetIDs, as well as the controls for your game. Make sure it is bigenough for us to read. If the text appears blurry or jagged, then increase the width and height of thecanvas and text (to increase the resolution), and scale them down further.Scripting:You will need to write a couple of scripts for this part of the MP. Read up on Scripts in Unity, andfamiliarize yourself with C# syntax. It should be very familiar to any of you who have worked with Java.If you are unfamiliar with programming, you can check out this C# tutorial . You’ll only need the basics ofobjects, classes, and variables for now. Throughout this course, you will find the Script API Reference auseful source of information.1. Light switch: Pressing the Tab key should change the color of the point light in the room.Pressing it repeatedly should change the color each time, i.e. have it be a toggle or a switchbetween a series of colors. Make sure that the color change is large enough so it is immediatelyapparent!Create a new script, called “Lightswitch”, and attach it to your point light. When a Unity Script isattached to a GameObject, that script will run when the game is started. Furthermore, the “ this”reference in the script will refer to the object that the script is attached to.Our first step is to get the light component of our point light GameObject. Read the ControllingGameObjects using GetComponent tutorial, then add these lines to your script-This will get the light component of the object this script is attached to (calling“ GetComponent () ” is the same as calling “ this.GetComponent () ”), and set it to the “ light ” variablewhen we boot up the game. To register input, we use the Input library of Unity, specifically, theInput.GetKeyDown method. This will return true when the specified key is first pressed down. Since wewant to listen for the “tab” key, then in our “ Update ” function, we write-Setting the light color is easy, you can either create a new color using the “ newColor(red,green,blue) ” constructor, or one of the predefined colors. How you change the light is up toyou, but the light should visibly change every time we press tab. Maybe you use a boolean variable totrack the current color, or an integer (for more than two colors). That is up to you.2. Orbit: The moon should orbit the planet sphere. The easiest way to do this is to have the planetconstantly rotate. Since the moon is a child of the planet, it will also rotate around the planet.8
GameObjects’ rotation and position is controlled by their transform parameter, accessed with“ GameObjectName .transform ”. This class is well worth looking through, though the most importantparts for this class are the “ transform.position ”, which is the 3 vector of the object’s x,y, and zcoordinates in the global frame (as opposed to the local frame, which is relative to this object’s parent’sposition), and the “ Rotate ” method.Most of Unity rotations are done using something called quaternions, which are better than thestandard way of measuring rotation (the rotation about the x,y,and z axis). You will learn aboutquaternions, and why they are awesome, in class later. For now, simply know that thetransform.Rotate(Vector3(a,b,c)) will rotate you “a” degrees about the object’s x axis, “b” degreesabout the y, and “c” degrees about the z.Create a script, called “orbit”, and attach it to the parent sphere. In its update method, add thisline-This will rotate the parent sphere by 2 degrees about the y axis every frame.3. Room switch: Pressing the ‘2’ key should switch to Part 2!Create the “room switch” script, and attach it to the player. Simply use Input.GetKeyDown(“2”) ,and set the player’s transform.position to the Vector3 corresponding to the center of your room forpart 2 (wherever you end up putting it). Don’t forget, the player controller needs to be 1 unit above theground.4. Quit key: Pressing ‘Esc’ should exit the game.This can be simply added on to the “room switch” script. You will want to add the following linesto the update method-Application.Quit() quits a Unity application, but it will not stop a game running in editor. So,we check if we are in editor, and stop the editor if we are.9
Part 1.2In part 1.2, you will be working in the same scene as room 1, but with fewerinstructions.You are expected to Google the specifics -- Unity has a great tutorial on practically everything you willneed to do for this MP, and the Unity forums also provide high-quality answers for debugging advice.The Room 2: Hi doggy!Create a new room, at least 50 units away from the first room. Inside the MP1.2 zip file, we’ve providedyou with a package of a wall that contains a door. Your new room will use this object as one of thewalls. The floor plan of the room will be a hexagon (meaning there will be six walls), and the ceiling willbe slanted (not parallel to the floor). It is ok if the walls pass through each other, provided the final roomis fully enclosed, and looks good from the inside. Use Unity cubes this time, so that the directional lightis blocked. You can make the cubes very thin, so that they are like the planes you used before (except,of course, being solid on all sides). Add a point light in your room, as we will need to clearly see all ofthe features of the room.To import the package, unzip the MP1.2 zip folder,then go to “Assets Import package Custompackage”, navigate to your unzipped MP1.2 folder, and import the MP1 2.unitypackage file.Material:Read up on Materials, Shaders and Textures , focusing mainly on the Materials, for now. Wehave provided you with an image (tile.png), and a normal map (it’s the weird purplish imagetile-normal.png). Create a material with these images, and put it on one wall. Change the tiling, and putit on 2 different walls. Finally, change the metallicity, and put it on the remaining 2 walls. Make a simplecolored material for the ceiling and floor, and apply it. Make sure each face is distinct enough that it isclearly visible to the grader. If that means you have to make the room look a little bit ridiculous, then gofor it.To create a material, go to Assets Create Material.10
This will generate a default material. Name it“Wall 1”. Select it, and you should see the following menu- (right)Drag the “ tile.png ” image to the box labelled“Albedo”. Now, drag this material from the assets folderonto one of your walls (except the wall with the door) inthe “scene” view. It probably doesn’t look too good. Don’tworry, it’ll get better.Drag the “ tile-normal.png ” image to the boxlabelled “normal map”. Notice how it changes theperceived material of of the material. A normal map is atrick used to give the illusion of depth on a flat surface, bytelling the engine to reflect light as if there were theselittle bumps and pits in the material.Create a new material, called “Wall 2”, and applythe albedo and normal maps the same as wall 1. Apply itto another two walls (again, except the wall with thedoor). Right above the “secondary maps” subheading isthe “tiling” option, which has an option for x and for y.Tiling causes a material to repeat itself on the sameobject, rather than covering the whole thing. So, changingtiling X to 2, means that the material will repeat once (thatis, show up twice) in the x direction on the wall. Play withthe tiling until you like the look of it. Below is an exampleof non tiled and tiled walls side by side11
Create a new material, called “Wall 3” with the same albedo and normal map. Change its tilingto be different from walls 1 and 2. Right below the albedo option is a slider for metallic, and a slider forsmoothness. Play around with these, and see how they affect the material. Both deal with how lightreflects off the material, metallic giving a more metallic look, and smoothness helping to enhance orsubdue the normal map. Paste this material on the remaining two walls.Finally, create a material, called “floor”, that has no albedo or normal map. Next to the albedooption is a small color box. This shows what color the material will reflect. When the material has noalbedo, the material will be this flat reflection color. Try and see what happens when you change thecolor of a material with an albedo. Apply this flat color onto the floor and ceiling of your room.Scripting:You will be creating some scripts for this room as well.1. Room Switch: Extend your room switch script so that pressing 1 moves you back to part 1.This is essentially the same as the movement script from part 1. Extend the same “room switch”script again, and make it return you to the center of your first room.2. Trigger Zone: Create a box collider, and make it a trigger. Place a sphere above the triggerzone. Make a script so that when the player enters the trigger zone, the ball falls.To create the Trigger Zone script, first, watch the Unity Tutorials on Colliders and Triggers . Next,create a new empty GameObject. Next, hit Add Component Physics Box Collider. A Box Collider is(as the name would suggest) a box-shaped area that registers and reacts with collisions with otherGameObjects. Make the box collider 2 x 0.5 x 2 (x,y,z) units. Select the “is trigger” option. Your objectshould look like this-And should show up in the scene view as a green wireframe box. Place this game object in the back ofyour hexagonal room, across from the door, and create a sphere about 3-4 units directly above thecenter of the trigger GameObject.Add a script to your trigger object by clicking Add Component New Script, and name it“BallDropScript”. Open the script, and create the following lines-12
The OnTriggerEnter function will be called when the collider attached to our empty GameObjectis entered. The “other” parameter is the collider that intersected this collider.The “public GameObject” tag shows a neat feature of unity. Save your script, then navigate toyour empty trigger GameObject. The script component should look like this-So our public GameObject is now a field for the script component in Unity. Drag the sphere intothis field. Now, whenever you reference the “ball” variable in your script, it will be referencing the sphereyou dragged in. Pretty neat! You can read more about this in the Variables and the Inspector tutorial .Now, all that’s left is to make that sphere fall. You’ll need to get the rigid body of the sphere(rigid bodies deal with physics, read more here ), using the ball.GetComponent RigidBody () method.After that, simply set rigidBody.useGravity to true .Store assets:Import at least one free asset from the Unity Store . Place it in the room. You will need a free Unityaccount for this.Create a Unity account , then head over to the “Asset Store” tab, right next to the “Scene” and “Game”tabs-Sign into your Unity account using the “log in” button at the upper right. Now, you can search for anyfree asset you desire, and put it in your room. Make sure it doesn’t intersect with your collider, or it willtrigger the collider. It can be whatever you want (provided it’s school-appropriate, of course).Submit:Submit your unity project according to the submission guidelines at the bottom of thisassignment.13
Part 2:Create a new Unity project, called CS498MP1 2 . Do not work in your part 1 project.In this part, you will create a simple game with minimal hand-holding, as compared to part 1.Part 2.1The Room 3: You’re tearing me apart, Lisa!Create a more interesting room, with a window! The shape and size is all up to you, it should be largeenough to comfortably accommodate all of the following requirements within it. The walls should becolored or textured, as well. The choice of wall color and texture is up to you (but keep it grandmotherappropriate).For 20 points of extra credit, use a 3D modelling tool to create more complicated room geometry, like acurved roof, slanted windows, multiple levels, et cetera. Note in a README what you created. Somesoftware options areBlender ( https://www.blender.org/ ): Extremely powerful, but complicatedGoogle Sketchup ( https://www.sketchup.com/ )- Simple, but somewhat limitedProbuilder Basic ( 1919 )- Most limited of the three,but is integrated into Unity.The default Unity modelling tools are extremely limited, so we highly recommend you familiarizeyourself with one of the above tools. It will assist greatly in your final project. To get the extra credit, youmust do a nontrivial amount of extra work with your modelling tool. That is, it should look like it took youmore than 15 minutes to do.Skybox:We have provided you with six images in skybox.zip that together, form a skybox. You are going tocreate a skybox with these images, and apply it to your scene. Here is the Unity manual page forskyboxes. Skybox asset credit: mgsvevo14
Directional Light:Create a directional light for the scene, set it to have hard shadows. Set its angle to match the sun inthe skybox.Scripting: Trigger game:You are going to make a game similar to a cat chasing a laser pointer (where you’re the cat). Inthis room, you are going to place several box colliders (at least 4), and mark them as triggers. Place apoint light at the center of each box collider. Every 3 seconds, one of these point lights should light up.The player should then move to the lit up point light, and press “A” on the controller (the OnTriggerStaymethod should be helpful here). When the player does so, they will get one point, and another lightshould light up at random (bypassing the normal 3 second timer). The player’s score should bedisplayed on the wall, in sharp (NOT blurry) text. We should be able to quit at any time upon pressingthe Start button on the controller.Using a controller in Unity is not quite as simple as using the keyboard. Unfortunately, becauseyou can’t see the keyboard in VR, and all of the keys largely feel the same, keyboards do not work wellin VR. Controllers, with their contours and designated button shapes, are much easier to use blind.Unity Manual page on InputUnity wiki page on Xbox controllersAdditionally, a Microsoft Blog page on Xbox controller input in Unity (note: the controller drivers arealready installed)Unity Manual page on Time and Frame ManagementA very useful method here is Unity’s Time.DeltaTime() method. This method, when called fromthe update method, will tell you how many real-time seconds have elapsed since the last frame. This ishugely important, as you do not want to tie game logic to your framerate.Part 2.2VR experiences: Your final task is to choose and try out four (4) of the VR demos available through theOculus or Steam store, or from the VR shared “V” drive. You will have to create a Steam and/or Oculusaccount for this step. Oculus titles will need a TA to help install, while steam will not. For each demo,write at least 3 sentences with a short description of the demo, something you liked, and something youdid not like. One experience must be a student experience, and one must be an Oculus/Steamexperience. You can find oculus games at https://share.oculus.com/ or on Steam athttp://store.steampowered.com/search/?vrsupport 102 . Please put your names, netIDs, and reviews ina PDF named HW1DemoWriteUp.pdf.Some TAs have access to some paid experiences. See piazza for a list of these TAs, and theexperiences they have access to (hint hint, Nate has SUPERHOT VR ). Attend that TA’s office hours totry the experience.15
Submit:Submit your unity project according to the submission guidelines at the bottom of thisassignment.16
RubricPart 1NamePoints DescriptionPart 1.1Room515x15 room made from 6 planes, with OVRPlayerControllerLight5Bright point light in center of room ceilingPlanet and moon10Planet and rotating moon in center of roomText5Text displays NetIDs and controlsLight Switch5Light changes color every time tab key is pressedRoom Switch5Pressing “2” moves on to part 1.2Quit5Pressing “Esc” quits the gameTotal40Part 1.2Room Switch5Pressing “1” moves back to part 1.1Room10Room is Hexagonal, with slanted roof and prefab door. Roof andceiling have flat, colored texture.Material 15Created material with albedo and normal map, placed on wallMaterial 2- tiling52 walls have altered tilingMaterial 3smoothness/metallicity52 walls have altered smoothness and/or mentallicityTrigger zone10When walking beneath floating ball, it falls to the floorTotal40Grand Total8017
Part 2NamePointsDescriptionRoom10Built a room, with a window, and colored/textured walls.Skybox10Custom Skybox in skyDirectional Light5Has directional light, which matches skyboxTrigger Zone Lights5Has at least 4 trigger zones with lightsRandom Trigger Zone5Active trigger zone is randomXbox Controls25Can press “A” on controller to get points when in lit trigger zone,“start” to quitScore Display15Score is tracked and displayed clearly on wallTrigger Zone Timer25Every 3 seconds, active trigger zone changesExtra Credit20Built nontrivial room geometry with blender, sketchup, orprobuilderTotal100 20Part 2.1Part 2.2Experience 15Likes and dislikes for an Oculus/Steam experienceExperience 25Likes and dislikes for a student experienceExperience 35Likes and dislikes for any experienceExperience 45Likes and dislikes for any experienceTotal20Grand Total120 2018
Submission InstructionsStep 1: Create a .unitypackage file1. Save your Unity scene in the Assets folder with the title “ CS498MP1 1 ” (for part 1) or “ CS498MP1 2 ”(for part 2)2. Using the editor, find the created scene in the Project menu3. Right click on the scene and select “Export Package ”4. Export the file using default settings (“Include dependencies” should be checked by default)Step 2: Create a standalone game build1. Go to Edit Project Settings Player. Make sure the “Virtual Reality Supported” box underOther Settings or XR Settings is checked.2. Go to File Build Settings3. Click “Add Open Scenes”. This will add the currently open scene to the build. You must havesaved the scene to the Assets folder for this to work (you should do that anyways).4. Save the project to C:\Users\ student’s netid \ project name t emporarily, rather than yourU drive (local storage is faster when building).5. Hit “Build”.6. This should create an executable ( .exe ) for running the build, a folder containing your scenedata, and a UnityPlayer.dll. Make sure this executable runs correctly on the Rift beforesubmitting.Step 3: Copy the Input Manager1. Shut down your project, and navigate to Your Project Folder ProjectSettings2. Copy the “InputManager.asset” file, and copy it to your submission folder. This will allow us toreplicate any new gamepad buttons or joysticks you mapped.Step 4: Zip the files and submit them through Compass1. Create a zip file containing the following items:a. The .unitypackage created in Step 1b. The .exe, dll, AND DATA FOLDER created in Step 2c. The InputManager.asset object found in Step 3d. A README.txt file containing any special instructions or notes you think are relevant forevaluating your assignment.e. For part 2, your writeup PDF.2. Name the file by separating NetIDs with underscores- cs498vr HW1 part#.zip. EXAMPLE: Ifsteve1 and anna2 worked together, the file for part 1 should be calledsteve1 anna2 cs498vr HW1 1.zip , and steve1 anna2 cs498vr HW1 2.zip f or part 2a. Only one partner should submit the zip.19
DO NOT SUBMIT YOUR ENTIRE PROJECT FOLDER20
Basic Interface Tutorial More In Depth Interface Tutorial Feel free to look through some more tutorials, to familiarize yourself with the basics of Unity. P a r t 1 . 1 T h e Ro o m: Oh hai Mark! You will build a cubic room, whose sides are made out of six planes. Make sure to orient these
