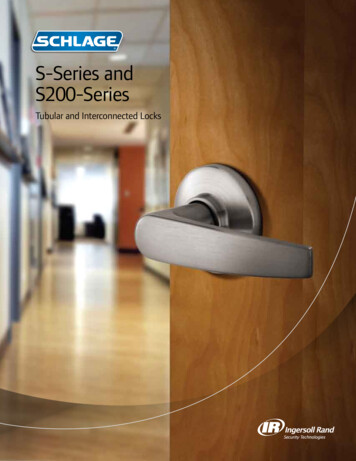
Transcription
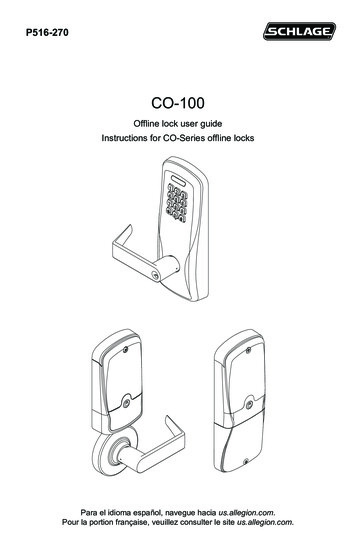
P516-270CO-100Offline lock user guideInstructions for CO-Series offline locksPara el idioma español, navegue hacia us.allegion.com.Pour la portion française, veuillez consulter le site us.allegion.com.
ContentsOverview.3Lock functions.4Getting started.4Construction access mode.4Credential types and functions.5Manual programming instructions.5Important notes.5PROGRAMMING credential.5NORMAL USE credentials.6TOGGLE credentials.6FREEZE credentials.6PASS THROUGH credentials.7OTHER programming.7Error codes.8Test lock operation.8Mechanical test.8Electronic test.8Normal lock operation.8Wired remote release feature.9System requirements.9Switch specifications, wire specifications and routing.9Wired remote release operation.9Wired remote release button action.9Lock status reports.10Reset to factory defaults. 11Batteries .12To install or replace alkaline batteries.12Low battery indications.12Battery failure mode.12LED reference.13Schlage button.13Optional Inside Push Button (IPB).13Troubleshooting.14FCC Statements.15This product is compliant of UL 294 and ULC S319 standard. This product’s compliance would beinvalidated through the use of any add-on, expansion, memory or other module that has not yet beenevaluated for compatibility for use with this UL Listed product, in accordance with the requirements ofthe Standards UL 294 and ULC S319. This product has been evaluated for ULCS319 Class I.2 Schlage CO-100 user guide
OverviewThe Schlage CO-100 is a keypad-only off-line electronic lock in the CO-Series product line. This product is listed for UL 294 and ULC S319. Three factory-configured functions are available: 1) Classroom/Storeroom, 2) Office and3) Privacy. The lock is powered by four (4) AA batteries. See Batteries on page 12 for moreinformation. Outside lever is normally locked. Inside lever always allows egress.OutsideSchlage ButtonKeypadOutside LeverKeywayInsideBatteryCompartmentOptionalInside PushButtonInside LeverCO-100-CYCO-100-MSCO-100-9933 Schlage CO-100 user guide
Lock functionsThe CO-100 lock is available in one of three functions:Privacy (40): Privacy function is available on locks with firmware version 2.6.2 or higher.Lockset is normally secure. Inside Push Button is pressed to disable normal electronicaccess from outside (activates privacy). Another press of Inside Push Button restores normalelectronic access (deactivates privacy).Office (50): Lockset is normally secure. Inside Push Button may be used to select passageor secured status.Classroom/Storeroom (70): Lockset is normally secure. Valid toggle credentials may beused to change to a passage or secure status.Getting startedFollow these steps when setting up a new lock.1. Install the lock. See the installation guide that came with the lock or visitus.allegion.com (Support Document Library Schlage Electronic Locks, search on“CO‑Series” and select Installation Instructions) for more information.2. Test the lock for proper mechanical and electronic operation. See Test lock operation onpage 8 for more information.3. When ready to set up for normal use, enter a new programming code, then program theuser credentials. See Manual programming instructions on page 5.4. Familiarize yourself with the information in this guide.Save this user guide for future reference.Construction access modeConstruction access mode is used to allow accessbefore the lock has been programmed, and for testingpurposes. Construction access mode is enabled bydefault.Offline locks with keypads have a default PIN of 13579and “ # ”, which can be used for installation, testing andconstruction access. To test, enter the default PIN (13579 and “ # ”). The Schlage button will blink and the lock willunlock. The default PIN is automatically deleted when anew programming credential is created.4 Schlage CO-100 user guideTIPIf you press the default PIN codeon a new lock and the code is notaccepted, the lock has alreadybeen programmed.If the new PIN is not known, or toput the lock back into constructionaccess mode, reset the lock tofactory settings. See Reset tofactory defaults on page 11 formore information.
Credential types and functionsProgramming credential: A 5 digit code used only for lock programming.PIN credential: A 3-6 digit code entered on the keypad.Note: A unique credential must be used for each credential type described below (forexample, a single credential may not be used for both normal use and toggle functions).Credential typeFunctionProgramming PINUsed only to program the lock. Does not unlock the lock.Normal use PINUnlocks the lock momentarily after a credential is entered.Toggle PINFreeze PINChanges the state of the lock from locked (secured) to unlocked(unsecured), or vice versa, unless in a Freeze state.Freezes the lock in the current state. The lock remains frozen untilany Freeze credential is entered again. (A pass-through credential willoverride a lock in frozen state as described below).Unlocks a lock momentarily, regardless of state.Pass-through PINA valid Pass-through credential can unlock a door set to any securedlockout mode (e.g., Freeze, Privacy, Time Zones, Door Auto-Locks andHolidays). The door will relock after the specified relock time.Manual programming instructionsImportant notes:LL Wait for the Schlage button LEDs to stop flashing before continuing to the next step.LL Programming mode will time out if no entry is made in 20-25 seconds. Time out isindicated by three left and nine right red blinks of the Schlage button.LL An incorrect entry is indicated by a solid red left and blinking green right LED on theSchlage button. Refer to Error codes on page 8 to interpret error code patterns.LL A unique PIN must be used for each credential type (for example, a single PINmay not be used for both normal use and toggle functions).PROGRAMMING credentialTo complete thisaction:Create newProgrammingCode (PIN)Perform the following steps:Wait for1Enter(This is the defaultprogramming PIN)to stop flashing between each step!2Enter34Enter new 5 digit Reenter the new 5Programmingdigit Programmingcode andcode andWait for rightWait for confirmation:green light.2 right green blinks.Note: Programming codes such as 1-1-1-1-1 or 1-2-3-4-5 can be easily selected by non-authorized users andshould not be used.5 Schlage CO-100 user guide
NORMAL USE credentialsNote: Until a new Normal Use PIN is created, the default PIN isPerform the following steps:To completethis action:Wait for1EnterCreate aNormal Use ProgrammingPINPIN and2Enterto stop flashing between each step!345Enter new For anotherPress3-6 digitPIN, goagainPIN andback toto finishstep 36Wait forconfirmation:2 right greenblinks.TOGGLE credentialsPerform the following steps:To completethis action:Create aTogglePINWait for1EnterProgrammingPIN and2Enterto stop flashing between each step!3Enter45Enter new For another3-6 digitPIN, goPIN andback tostep 3ORWait forpressright greenagain tolight.finish6Wait forconfirmation:2 right greenblinks.FREEZE credentialsTo completethis action:Create aFreezePINPerform the following steps:Wait for1EnterProgrammingPIN and6 Schlage CO-100 user guide2Enterto stop flashing between each step!3Enter4Enter new3-6 digitPIN and56For anotherWait forPIN, go back confirmation:to step 32 right greenORblinks.pressWait foragain toright greenfinishlight.
PASS THROUGH credentialsPerform the following steps:To completethis action:Create aPassThroughPINWait for1EnterProgrammingPIN andto stop flashing between each step!23EnterEnter45Enter new3-6 digitPIN and6For anotherWait forPIN, go back confirmation:to step 32 right greenORblinks.pressWait foragain toright greenfinishlight.OTHER programmingTo completethis action:Perform the following steps:Wait for1EnterDelete a PINProgrammingPIN andto stop flashing between each step!234EnterEnter thePIN to bedeletedandEnterChange PINProgramminglength(AvailablePIN andEnterEnterEnterChangerelock delay ProgrammingperiodPIN andEnterEnterEach buttonpress adds tothe total delaytimeExample: adds a10 second delayEnterEnterEnterto disablebeeperOR, , ,ORfordesired PINlengthwith firmwareversion 2.5.0or higher.)Disable/enablebeeperEnterProgrammingPIN andTo deleteanother PIN, goback to step 3ORpressagainto finishEnterto enable ammingPIN andEnterEnterEnterto disableremote releaseORto enableremote release5Wait forconfirmation:2 right greenblinks.Pressagain tofinishWait forconfirmation:2 right greenblinks.Pressagain tofinishWait forconfirmation:2 right greenblinks.Pressagain tofinishWait forconfirmation:2 right greenblinks.Pressagain tofinishWait forconfirmation:2 right greenblinks.7 Schlage CO-100 user guide
Error codesLL All error codes are indicated on the Schlage button by a solid red left LED, and ablinking green right LED. The number of green blinks indicates the error code.RedGreenLeft LED Right LEDNumber ofgreen blinks2345Error code functionshave not been verified byUnderwriters LaboratoriesInc.6789Error code descriptionToo long programming/user code entered.Programming code must be five (5) digits. User codelength cannot exceed six (6) digits.Memory full, too many codes. Delete some codes.Programming code cannot be deleted, only changed.Programming code entries do not match.Programming code not changed.Invalid command. Invalid function code entered.Code not found.Code too short. Programming code length must be five(5) digits. User code minimum length is three (3) digits.Not a unique code.Test lock operationIf you encounter problems while performing any of the following tests, review the installationguide and correct any problems.Mechanical test1. Rotate the inside lever or depress the push bar to open the door. Operation should besmooth, and the latch should retract.2. Insert the key into the keyway and rotate the key and the outside lever to open the door.Operation should be smooth, and the latch should retract.Electronic test1. Press any number key. The lock will beep. Use the default PIN (13579 and “#”) to verifyaccess.Normal lock operationAfter PIN credentials have been programmed, enter a PIN to operate the lock:Press a valid PIN. The green LED will blink and access is granted.The “#” key is used as ENTER key for PINs with fewer than six digits. Default minimum digitsis six (6). PIN length may be manually configured so users do not have to push the “#” key(see Change PIN length on page 7).If the PIN credential is entered incorrectly, press “ * ” to start over.8 Schlage CO-100 user guide
Wired remote release featureSystem requirements Available on CO-100 Office function only. The CO-100 must be programmed with CO-100 version 2.6.2 firmware or higher.Switch specifications, wire specifications and routing Recommended switch: basic SPST (single-pole single-throw) momentary action switchwith normally open contact configuration. Wire gauge AWG 24, stranded, twisted pair, shielded. (Shielded cable is optional. Ifshield is present, only one end of the cable shield should be terminated to chassisground). Belden 9841 or equivalent. Maximum cable length is 1000 feet (305 meters). Route wires from the switch, through the door frame and door to the door position switchterminals as shown below.Attach switchwires to DPSterminalsWired remote release operation When the remote release button is pressed the lock will unlock for the programmedrelock delay period. The green Schlage LEDs and the green inside push button LED willturn on to indicate the lock is unlocked. If the beeper function is turned on, the beeperwill sound one time to indicate the lock is unlocked. After the relock delay period has expired, the green Schlage LEDs and the green insidepush button LED will turn off. If the beeper function is turned on, the beeper will soundtwo times to indicate the lock is relocked.Wired remote release button action If the remote release button is pressed and held, the release will function only one time,even in the event the button is held longer than the relock delay period. If the remote release button is quickly pressed repeatedly, the release will function onlyone time. Any additional button presses during the relock delay period are ignored. Once the lock relocks, the next press of the remote release button will activate a newrelease cycle.9 Schlage CO-100 user guide
Lock status reportsFollow the steps below to obtain lock status reports:LL Lock status reporting is available with firmware version 2.5.0 or higher.LL The left and right Schlage button LEDs will blink red once with each button press,followed by the status indicator as described below.Function /ReportInitiatereport modePressIndicator/Report resultPress and holdWait until only the right Schlage button LED is onto indicate the lock is in report mode and awaitingan entry. If no entry is made, then timeout willoccur in 20 seconds.while pressingLeft LED:BatterystatusSolid green normalBlinking red lowNo indicator critical batteryOnce a status is reported, both left and right LEDs will light green, followed bysolid green on the right LED only. The right green LED indicates the lock is awaitinganother entry.Obtain an additional status report as described below, or pressmode.Function /ReportFirmwarestatusHardwarestatusPressPCB serialnumberto exit reportIndicator/Report resultLeft LED blinks green for the version numberDecimal point is indicated by one red blink“Zero” is indicated by two red blinksLeft LED blinks green for each numberEach number is separated by one red blinkPressnumberafter two red blinks to display the nextIf no entry is made within 20 seconds of the solid green right LED, then timeoutwill occur.To exit report mode at any time, press10 Schlage CO-100 user guide.
Reset to factory defaultsAll information in the main controller in the lock will be deleted and reset to factory defaults!Main controller configurations that will reset to factory default include: programming anduser codes.The door must be locked (not toggled open or in the middle of normal access) beforeresetting to factory defaults.Follow these steps to reset to factory defaults.1. Remove the top inside cover.2. Remove one battery from the battery pack to disrupt power. Wait 5 to 10 seconds forpower to run out in the lock.3. Press and hold the Schlage button while reconnecting the battery into the battery packto resupply power.4. Continue holding the Schlage button, and wait for two beeps to sound and two greenblinks of the Schlage button.5. Release the Schlage button.6. Press and release the Schlage button three (3) times within 10 seconds of the beepsand blinks at step 4. One beep will sound and one red blink will occur with each press.7. The Schlage button will light green for one second and a one-second beep will sound,indicating that the lock has been reset.LL If the Schlage button is not pressed 3 times within 10 seconds, two beeps and twored blinks indicate timeout.8. Replace the top inside cover.To test, enter 13579 and “#”. The Schlage button will blink and the lock will unlockmomentarily.11 Schlage CO-100 user guide
BatteriesTo install or replace alkaline batteriesLL1.2.3.Changing batteries does not affect any programmed data.Remove the battery cover.Remove the battery bracket. Do not allow the battery pack to hang from the wires.Install the new batteries (install only new AA Alkaline batteries). Make sure the batteriesare installed in the correct orientation.4. Reinstall the battery pack and battery bracket.5. Reinstall the battery cover, making sure the plug is to the right of the battery pack (CY,MS and MD locks). Be careful not to pinch the battery wires when installing thebattery cover.CAUTION! Danger of explosion if batteries are incorrectly replaced! Replace only withnew AA alkaline batteries. Dispose of used batteries according to the manufacturer’sinstructions.This product has been evaluated for ULCS319 compliance with AA and coin cell batterieslisted below. For installations requiring ULCS319, these battery models should be used.AA batteries: Duracell PC1500, MN1500; Energizer E91, EN91, AX91, XR91;RayoVac 815, 815-HECoin cell batteries: Energizer CR2025, CR2032; Maxell CR2025, CR2032,Panasonic CR2025, CR2032; RayoVac KECR2025, KECR2032.!Plug MUST Be on RightCY, MS993Low battery indicationsConditionIndicatorBatteries low After credential PIN is pressed,9 red blinks of Schlage button,then normal indicator.BatteryNo LED or beepsfailureValid credentials do not grantaccessSolutionReplace batteries immediately to avoidbattery failure. Lock is intended to operatefor 500 cycles in low battery condition.Replace batteries immediately.Mechanical override key must be used tounlock the lock.Battery failure modeIn the event of battery failure, the lock will fail As-Is (lock remains in current state, locked orunlocked, until batteries are replaced).12 Schlage CO-100 user guide
LED referenceSchlage buttonConditionAccess deniedValid PIN entered while lock in Freeze modeFactory default resetLow battery indicator, AA batteriesMomentary unsecured accessLights2 red blinks12 red blinks indicating lockoutOne-second solid green with one-second beep9 left red blinks1 green blink, then one red blink on relockOptional Inside Push Button (IPB)ActionOffice ModePress IPB to lockPress IPB to unlock1Privacy ModeWith door closed, press IPB to engage privacyWith door closed, press IPB to release privacyLights1 red blink1 green blink4 green blinks4 red blinks1 Unlocking the lock with the IPB will cause the lock to remain unlocked until the IPB is depressed again.13 Schlage CO-100 user guide
TroubleshootingProblemThe lock doesnot functionwhen a validPIN credential isentered, or thelock beeper doesnot sound.Possible causeThe beeper may beturned off.SolutionUse manual programming to enable the beeper(see Disable/enable beeper on page 7).The battery or wiredCheck that the battery or wired power ispower may beconnected correctly.improperly connected. Check that batteries are inserted in the correctThe batteries may be polarity.inserted with incorrect Replace batteries.polarity.Check that the optional IPB through-door ribbonThe batteries may be cable is plugged in correctly (if applicable). Thedepleted.red wire should be on the left and not pinched inIf applicable, the IPBthe door.through-door ribbonCheck that there are no bent pins on the optionalcable may not beIPB through-door cable.properly plugged in, orRefer to the installation instructions that camemay have bent pins.with the CO-100 lock, or this user guide fordetails on the above mentioned procedures.Wired remoteThe lock may notWired remote release is available only on therelease feature is be compatible withCO-100 Office function.not working.remote release.Wired remote release is compatible with locksThe firmwareversion may notbe compatible withremote release.The remote releaseswitch may not befunctioning correctly.14 Schlage CO-100 user guideprogrammed with CO-100 version 2.6.2 firmwareor higher.Check that the switch closes and delivers lessthan 5 ohms resistance when activated.
FCC StatementsThis device complies with Part 15 of the FCC Rules. Operation is subject to the following twoconditions:1. this device may not cause harmful interference, and2. this device must accept any interference received, including interference that may causeundesired operation.15 Schlage CO-100 user guide
Customer Service1-877-671-7011 www.allegion.com/us Allegion 2017P516-270 Rev. 12/17-h
Follow these steps when setting up a new lock. 1. Install the lock. See the installation guide that came with the lock or visit us.allegion.com (Support Document Library Schlage Electronic Locks, search on "CO-Series" and select Installation Instructions) for more information. 2. Test the lock for proper mechanical and electronic operation.