Transcription
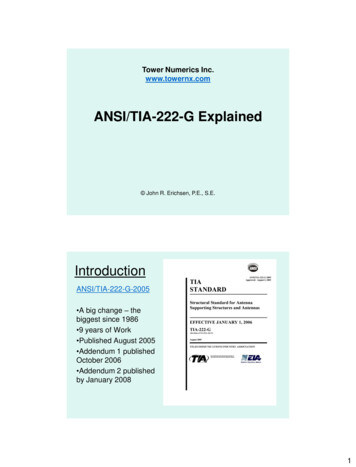
How to create an ANSI 5010 test file for Gateway EDIRecently Gateway EDI has been suggesting that all of their clients contact them andsubmit an ANSI 5010 format claim file for testing purposes to ensure that they are readyfor the transition. Clients who are running AMS Version 22 already have the abilitybuilt-in to create claims with the ANSI 5010 specification. We at AMS are providing thisguide to help clients create a test file to submit to Gateway EDI.Preparation:IMPORTANT: Before beginning this test, please generate and send all of yourcurrent claims to Gateway EDI. This includes any secondary claims that aremissing COB information. If you do not know how to resolve secondary COBclaims refer to page 6 – 2 of your manual and/or download the white paper bytyping the following web address in the Address Bar (not Search Bar) of your webbrowser http://tech.americanmedical.com/WhitePapers/COB ELECTRONIC.pdf.(You will be required to log into the technical support web site using the username and passwordprovided to you by AMS.)We suggest that clients start out by taking a current backup. You do not need to backupthe scanned images for this test since none of the scans will be affected. As long as youfollow the instructions below, you should not have any problems that would require therestoration of you data from the backup. The suggestion is merely a precaution.The first step is to determine which insurance carriers you will be using to perform thetest steps. The more carriers that you use, the more accurate the test will be withGateway EDI. We suggest that you test your most common insurance carriers and thatyou include Medicare, Medicaid and Blue Cross claims in the test. The test file will becreated by regenerating a few batches of claims that you have already sent to GatewayEDI. By opening the Claim Generation History Report and viewing the details of a batchyou can determine which insurance carriers to use for the test.NOTE: These claims will be submitted for testing purposes ONLY. They will NOT beprocessed for payment Gateway EDI.For your convenience, a form has been provided at the end of the document for you todocument the ECI Carrier Type for the insurance carriers you are testing with and theAMS Data Path.
Step 1: Document your AMS Data Path, sometimes known as the “StartIn Location”.1. Open Medical Office Management System.2. Click on “Help” on the top menu bar.3. Click on “About”4. Write down the Data Path exactly as it is displayed.Step 2: Queue a batch of claims (or multiple batches of claims if needed)to regenerate and record the insurance carriers in the batch.1.2.3.4.Open Medical Office Management System.Click on “Insurance Processing”.Click on “Claim Generation History Report”.Enter a date range in the “Claim Gen Dates” for a period of time during whichyou generated a total number of electronic claims greater than 25.5. Highlight the batch of claims that you plan to regenerate for the test and click onthe “Regenerate in Next Batch” button.
6. Double click on the batch of claims that you just regenerated to open the BatchDetails screen.7. On the Batch Details screen, click on the column heading of “Ins Cd” to sort thebatch by insurance carrier. You will need to scroll down the list and documenteach insurance carrier in the list on the provided form that you plan to use fortesting the ANSI 5010 format. (It is not necessary to use every single insurancecarrier but the more carriers you use now to test, the more accurate the test willbe.)8. You may repeat the steps above to include multiple batches of claims in the testfile so that you have the required claims to test with.9. When finished, click on “Exit”.Step 3: Setting the ECI Carrier Type in the Insurance Master to ANSI5010.1.2.3.4.Open Medical Office Management System.Click on “File Maintenance”.Click on “Insurance Master Update”.Enter the Carrier Code of the first Insurance Carrier that you are planning to usefor testing and press the Enter key on your keyboard.5. Document the current ECI Carrier Type on the attached documentation form.6. Change the ECI Carrier Type to “A5 – Ansi 5010x222 837” by selecting it fromthe drop down list.7. Click “Save” and repeat the steps above until you are finished changing the ECICarrier Type for ALL the insurance carriers that you plan to test.Step 4: Setting up the Electronic Submitter Information.1.2.3.4.Open Medical Office Management System.Click on “Insurance Processing”.Click on “Electronic Claims Interface”.Answer “Yes” to the prompt asking “Do you wish to generate all new electronicclaims which have not been previously filed.”5. You should get a confirmation of how many claims were generated. These arethe claims that you are generating for the test file. Click OK to continue.6. Click on “Edit Claim File”.7. Click on the column heading “State” to sort the claims by ECI Carrier Type.8. Checkmark any claims that do not have a state of A5. (If all claims have a stateof A5, skip step 9.)9. Click “Remove Selected Claims”. Click “OK” to confirm that you want to deletethe claims.10. Click “Exit”.11. Click on “Ansi Transmissions”.
If you currently send your claims in NSF format then you will need to fill out the Ansisubmitter information using steps 12 through 15 below. To determine if you currentlysend in NSF format you can refer to the ECI Carrier Type. If it is set to GW – GatewayEDI NSF, then you send your claims in NSF format. If the ECI Carrier Type is set to AN– Ansi 4010a1 837, you do not need to fill out this information and may skip to step 16.12. Click on “Submitter Information Ansi”.13. Click on the “Default Gateway Setup” button.14. Enter your Gateway EDI Site ID in the the fields ISA-06 Sender Id and SubmitterId.15. Fill out the rest of the blank fields. (If you are not sure what to use you can click“Exit”, “Exit” again, then click on “Gateway EDI Transmission” and open the“Submitter Information NSF” screen to use as a reference.)If you have more than one Insurance Personalization record, you will need to click on the “Next” buttonand repeat steps 12 – 15 for each record.16. Click on “Compress Claims”.17. It will warn you that “Compressing claims will transfer the file into a format thatwill be transmitted ”, Click “Yes” to continue.18. If you receive a warning that you are Skipping Claims which are missing COBinformation you can ignore it and click on “Yes” to continue.19. The Status will count up the bytes compressed. When it says “CompressionComplete – File Ready to Transmit”, click on “Exit”.20. Click on “Gateway EDI Transmission”.21. “Gateway Edi Webclaims”. This will open the Gateway EDI website.Step 5: Sending the Claim to Gateway EDI.Note: These steps below are controlled by Gateway EDI and are subject to change. If you need assistancewith the steps below or if they have changed and you need assistance uploading the test file, please contactGateway EDI technical support by calling 1-800-969-3666.1. Log into the Gateway EDI website.2. Under “Manage Claims”, click on “Send/Receive Files”.3. Click on the link “Send 5010 Test Files” which is located below the box whereyou select the files that you wish to send and receive.4. This will take you to a page where you need to select a claim file to upload, click“Browse”.5. Browse the network to the AMS Data Folder (WINDIR or WINDIR\FILESx).This is what you wrote down in Step 1 for the AMS Data Path. Once you haveopened the AMS Data folder, browse to the SendFiles folder and highlight the filenamed ANSI5010.TXT or ANSI5010-xxx.TXT.6. Click on “Open”, this will return you to the Select a claim file to upload screen.7. Click on the “Upload” button. You should get a message that states “Your file[FILENAME] was uploaded successfully.
Step 6: Cleanup1.2.3.4.Open Medical Office Management System.Click on “Insurance Processing”.Click on “Electronic Claims Interface”.Answer “No” to the prompt asking “Do you wish to generate all new electronicclaims which have not been previously filed.”5. Click on “Edit Claim File”6. If there are claims in the list, Click “Select All”. If there are no claims listed,continue to step 9.7. Click “Remove Selected Claims”. Click “OK” to confirm that you want to deletethe claims. This will remove any secondary claims that were not compressed dueto missing COB information.8. Click “Exit”.9. Click “Exit”.10. Click on “File Maintenance”.11. Click on “Insurance Master Update”.12. Enter the Carrier Code of the first Insurance Carrier that you are planning to usefor testing and press the Enter key on your keyboard.13. Change the ECI Carrier Type back to the original type by selecting it from thedrop down list.14. Click “Save” and repeat steps 12 – 14 until you are finished changing the ECICarrier Type for ALL the insurance carriers that you tested back to the originalECI Carrier Type settings.15. When finished click “Exit”.
ANSI 5010 Test File DetailsInsurance Carriers Included in the ANSI 5010 Test FileFill in the Insurance Carrier Code and ECI Carrier Type in the table belowINSURANCE CODE(S)INS CDTYPEExample:INS CDTYPEINS CDTYPE0MAGWINS CDECI Carrier TypeNO – Not an Electronic CarrierGW – Gateway EDI NSFGU – Gateway EDI UB04 (UB claims currently are not ready for testing)AN – Ansi 4010a1 837PF – Print to FileAMS Data Path (a.k.a. Start In folder)(Example: \\Server\Windir\ or M:\)TYPE
for the transition. Clients who are running AMS Version 22 already have the ability built-in to create claims with the ANSI 5010 specification. We at AMS are providing this guide to help clients create a test file to submit to Gateway EDI. Preparation: IMPORTANT: Before beginning this test, please generate and send all of your
