Transcription
Bag Construction updates(2009)Please readThis file was originally created several years ago. Please refer to the link below forupdated ideas regarding sandbag wtopic.php?f 9&t 157Additional ideas can be found within a more recent DVD/e-book available from thelink below:http://rosstraining.com/sandbagtraining.html As for filling materials other than sand, a few examples are listed below: Pea gravelSmooth river rockWood pelletsRubber mulchYou should be able to find 40 to 50 pound bags of gravel or wood pellets at mosthardware stores (ex. Lowe’s, Home Depot, etc.). Rubber is lighter, and typically is soldin 30 pound bags. A sandbag created with rubber mulch will be larger than one createdwith more dense material such as gravel. Rubber mulch is the cleanest of choiceshowever, as it dust-free and will not degrade.For those interested, the remaining contents from this file show options for baggingsand (created several years ago).A more recent approach to bagging sand would be to use tire inner tubes. A relatedtutorial can be found here:http://www.youtube.com/watch?v ca0IAA K7fg
The SandbagConstruction kitBy Ross EnamaitRossTraining.com and RossBoxing.comSandbag training offers numerous benefits. You will be hard pressed to find atraining modality, which is as intense and effective. To top it off, you canpurchase 200-pounds of sand for less than 15 at your local hardware store.In previous writings, I have discussed sandbag construction. One commontechnique is to use small zip-lock bags filled with sand. Each bag will be stuffedapproximately ¾ full. The bags should then be doubled (two bags) andthoroughly sealed with duct tape. These mini-sandbags will be placed into a1
large outer bag. The outer bag should be constructed from a rugged materialsuch as canvas.This sandbag construction method is very convenient for mess-free weightadjustments. You can quickly increase or decrease the weight of the total bag byadding or removing a few mini-bags. I have had great success with this style ofsandbag construction.Unfortunately, I’ve received several emails from individuals who were havingtroubles with torn zip-lock bags. The mini-bags were splitting, which caused amess inside the outer bag (commonly a canvas sporting bag or military duffelbag).Common reasons for zip-lock bag tears include:1. Too much sand is stuffed into the bags. I recommend stuffing the bags ¾full. The bags will feel “soft”, as opposed to feeling like sedentary rocks.2. Not all zip-lock bags were created the same. Many store brand bags arepoorly constructed with thin plastic. These bags do not hold up to theabuse of a serious sandbag training program.3. Failure to double the bags and properly seal the ends with duct tape. Thisprocess is tedious, so is often bypassed to save time.Despite these common problems, many readers ensured that they had followedeach step precisely, and were still experiencing bag tears and spills. To combatthis problem, I have tested several bags to determine the most effectivemethod(s) of sandbag construction. These techniques will ensure a lifetime ofsandbag abuse, minus the spilled sand.Quality Zip-lock BagsConsider purchasing a case of top quality zip-lock bags. Forget about usinggeneric bags. You can use purchase much more durable bags, ranging from 2mil up to 6-mil (or more). Mil or mil thickness is the common measurement of abag’s thickness. One mil equals 1/1000 of an inch. 1/4" equals 250 mils.You can purchase a case of quality bags through many online providers. Casestypically consist of 100 or 1000 individual bags. For example, the link thatfollows (page 3) is to a 6-mil recloseable bag. The cost for 100 bags is 13.75.This is a reasonable price for a very durable bag. A 6-mil bag will hold up tosome extreme sandbag training.2
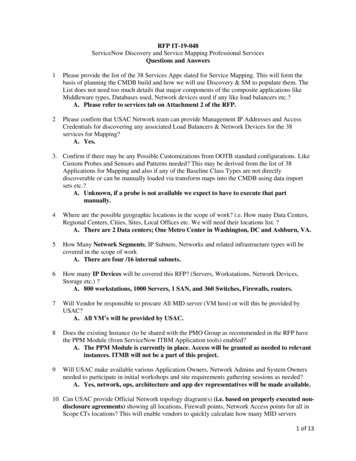
Based on the 6-mil thickness, you can get away without doubling these bags.Consider that common carpenter clean-up bags advertise the durability of their3-mil thickness. A 6-mil bag is obviously extremely durable. I would howeverrecommend sealing the ends of the bag with duct tape.6 X 9”, 6-Mil Clear Recloseable Bags (100 for 13.75)http://www.royalbag.com/6 x 9 6 mil clear recloseable bags 1361.aspA quick search of the web will bring you to several bag suppliers. I haveprovided a second link below. This company offers cases of 1000 bags. Thislarge quantity may be useful if you plan to create several sandbags for a team ofathletes or trainees.4-Mil White Block Zip Lock ck-zip-lock-bags.htmlPurchasing The Sand50-pound bags of sand are available at most hardware stores for less than 3 perbag. I recently purchased four 50-pound bags of sand at Home Depot for 2.87each. Where else can you purchase a 200-pound weight set for a total of 11.48?Finding A Home For Your SandYou will need a durable outer bag to hold the individual sandbags. A ruggedcanvas bag is ideal for the outer bag. Two common bags that I have used withsuccess include canvas sporting bags and sea bag style canvas duffel bags.Another common outer bag is a military style duffel bag.Next, I have provided illustrations to two of my bags:Sea Bag Style Canvas Duffel Bag – This bag is approximately 35 inches long. Ipurchased this bag at a local boating supply store for 15. The material is verydurable. This bag has endured plenty of abuse, with no signs of wear.3
I did a quick search of the web and found a link to the following bag. I have notused this particular product, but wanted to provide a link to a sample bag:Canvas Military Duffle Bag - Sea Baghttp://www.schoolunif.com/3339.htmlCanvas Sports Bag– This bag illustrated below is approximately 30 inches long.I purchased this bag at a local department store for around 10 on clearance. Ihave used this bag regularly for the past 4 years. I have tied the handles downon the bag to avoid distractions. I prefer to grab folds in the bag. By grabbing afold in the bag, you will experience much greater grip strength benefits. Thisstyle of lifting takes some getting used to, as it is common to experience pain inthe fingers. You will need to keep the fingernails cut short.A Faster OptionOkay, so you do not want to spend the time to individually package small ziplock bags. There must be a faster way to construct a sandbag.Have no fear, I have the perfect solution. Although this method of sandbagconstruction does not allow for small changes in weight, you can still make 25pound adjustments.Rather than using small zip-lock bags, you can use larger carpenter/contractorclean-up bags. These bags are much thicker than conventional garbage bags.4
Two rugged (and inexpensive) clean-up bags include the following:1. Husky Contractor Clean-up Bags – I purchased a box of 32 bags at HomeDepot for 13.72. These bags have 3-mil thickness. The measurements ofthe bags are 2 ft 9 in x 4 ft (42 gallons).2. Ruffies Contractors Bags – I purchased a box of 18 bags at Walmart for 8.68. These bags also have 3-mil thickness. The measurements for eachbag are 3 ft 2 in x 3 ft 9 in (45 gallon).In addition to these bags, there are several online providers. Two examplesinclude the following:3-mil dproduct 22936017184-mil bagshttps://www.ibnys.org/product detail.asp?pID 6513Any 3 or 4-mil bag should suffice. Consider that common household garbagebags often measure up at 1-mil or less. I tested the two products below: Hefty Ultra Flex (1.3-mil)Hefty Twist Tie Tall Kitchen Bags (.69-mil)Neither bag was able to endure the intensity of a sandbag workout. Afterbagging 150-pounds (25-pounds per bag), these bags tore minutes into myworkout. If you plan to use a larger bag, stick with higher quality carpenterclean-up bags.The Step-By-Step ProcessDue to the size of these bags, you will need to make some modifications. Let’slook at the individual steps. You will need a pair of scissors, some twine, sand,and the clean-up bags.5
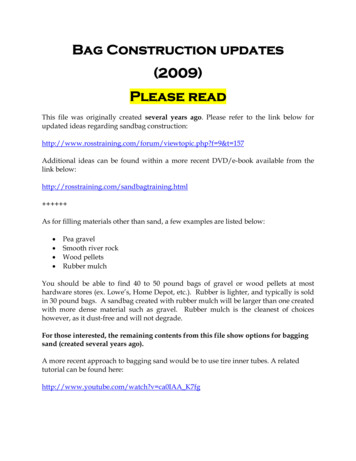
1. First, you will fill each bag with approximately 25-pounds of sand. Youshould also remove any excess air from the bag. If the bags are full of air,they will be more likely to break, and will take up more space. This willmake it difficult to fit each mini-bag into the larger canvas bag.2. Next, you will need to trim down the size of the bag. Below, you can seehow I have cut the end of the bag. After cutting the bag, I have tied theend tightly with twine. It is important that the twine is tied securely toavoid any leaks from the end of the bag.3. I recommend that you then double the bags for an added layer ofprotection. Although this step may not be necessary, it is better to be safethan sorry. You will then tie twine around the other bag as well.4. Lastly, you will place the 25-pound bags into the large, canvas bag. Youare ready for some sandbag fun.6
Sandbag Construction SummaryWhether you choose zip-lock bags or large contractor clean-up bags, you mustuse a durable product. Personally, I prefer the convenience of the smaller ziplock bags, but either option is acceptable.Once the sandbag is constructed, you will have one of the most intense,functional, and inexpensive training tools available. You can perform an infinitenumber of lifts with the bag.Train hard, and have fun with it!------------------------------------This file is FREE. Please share it with others.For more low-tech/high-effect trainingmethods, check out www.rosstraining.com7
The Sandbag Construction kit By Ross Enamait RossTraining.com and RossBoxing.com Sandbag training offers numerous benefits. You will be hard pressed to find a training modality, which is as intense and effective. To top it off, you can purchase 200-pounds of sand for less than 15 at your local hardware store. In previous writings, I have discussed sandbag construction. One common technique is .